Attached is the drawing for a gear like thing. I will be used as part of a coin drop mechanism. the drawing was made in inkscape starting with a 12 sided polygon and adding or subtracting circles to make the lobes. Unfortunately whatever I do the lobes end up asymetrical and distorted. Any ideas suggestions
Thanx, Craig
There are gear generators out there.
The forum has some threads about it, let’s see…
Yeah there are a bunch of threads, not sure which ones to pick, so here’s the search result for “gear generator”.
https://community.glowforge.com/search?q=gear%20generator
Should get you where you need to be. If the name Matthias Wandel isn’t on your radar, you should look for him on youtube. He’s into all sorts of mechanical wood creations.
3 Likes
Hmm I just realized that you may not be actually trying to make gears. If you want circular voids, the key is definitely going to be to use rotation to get the result you want. It’s hard to give you concrete advice here because I don’t know exactly what you’re up to, but if you haven’t played around with snapping the rotation point and center points of objects, that’s kind of the gist of it. Then you use the translation dialog to rotate by a set amount, for a 6-sided thing, it would be 60 degrees.
Quick caveat, I am assuming you have a pretty good handle on inkscape path/node/snapping/translate. If you don’t, I 'd suggest reading the various tutorials on the matter I like Tavmjong Bah’s tutorials, which you can find on google (or here, since I just had to remind myself of how to spell his name and I might as well direct link it ![]() )
)
So there are several ways you can attack something like this, but here’s a very basic gist:
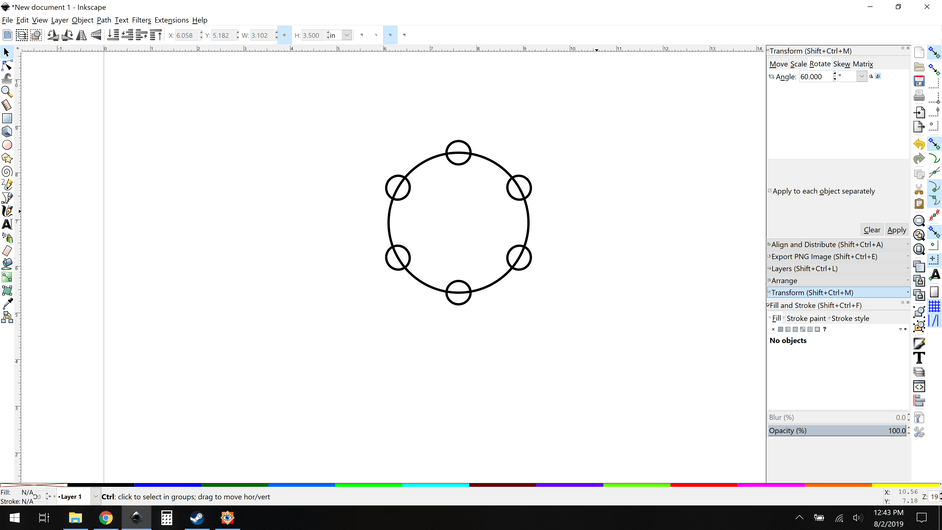
Make two circles and convert them to paths. (optional but I like paths.) Turn on center snapping and smooth node snapping.
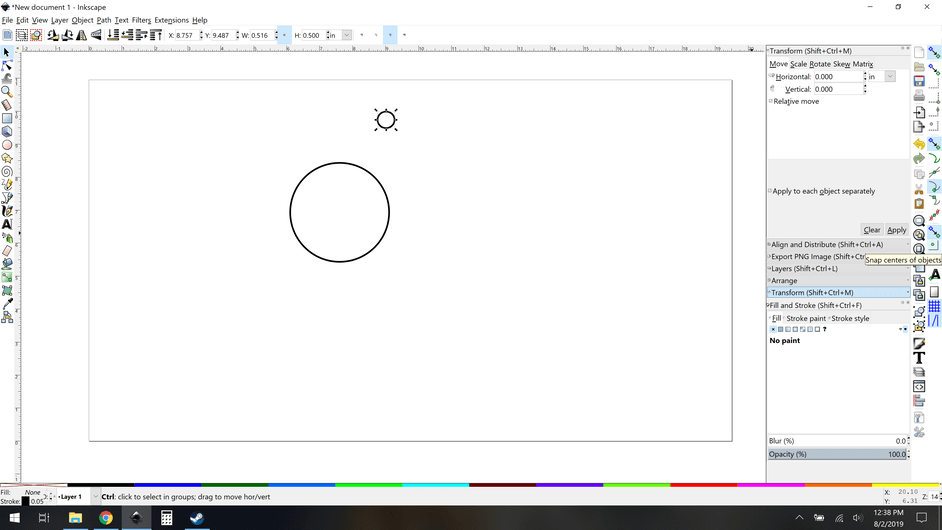
Snap them together for alignment.
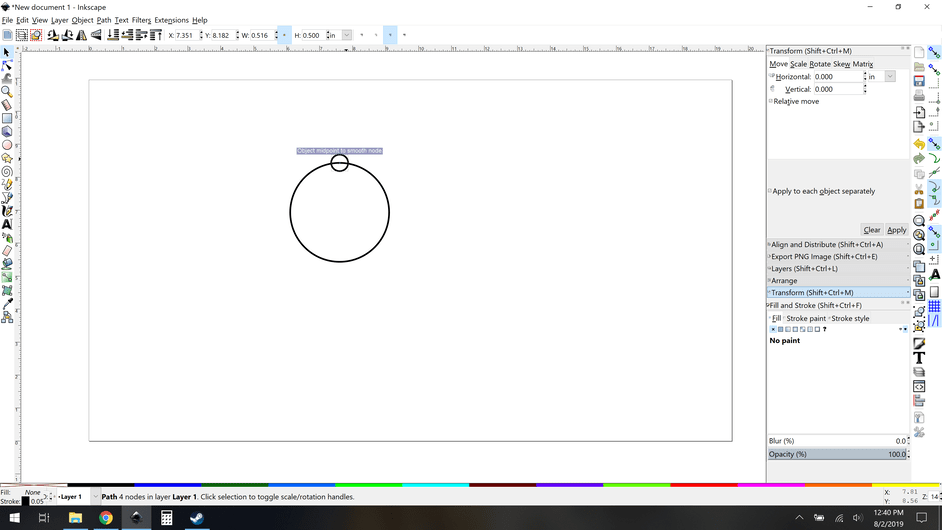
Turn off center snapping and turn on rotation snapping. (you could have gone with rotational all along, but whatever)

Snap the small circle’s rotation point (the tiny “plus” when you’re in rotation mode) to the larger circle’s rotation point.
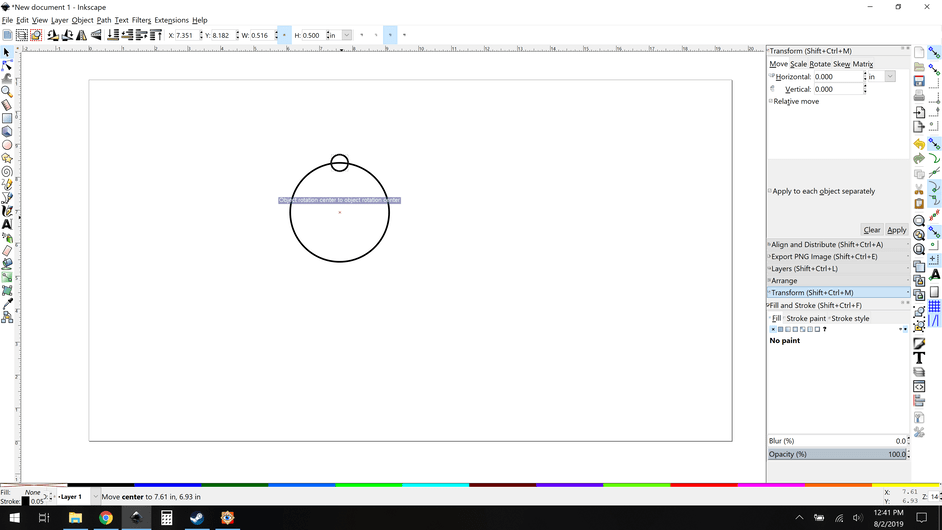
Copy and paste in place the small circle, now you have two on top of each other. Use the transform dialog (upper right here) to set a rotation amount of 60 degrees.
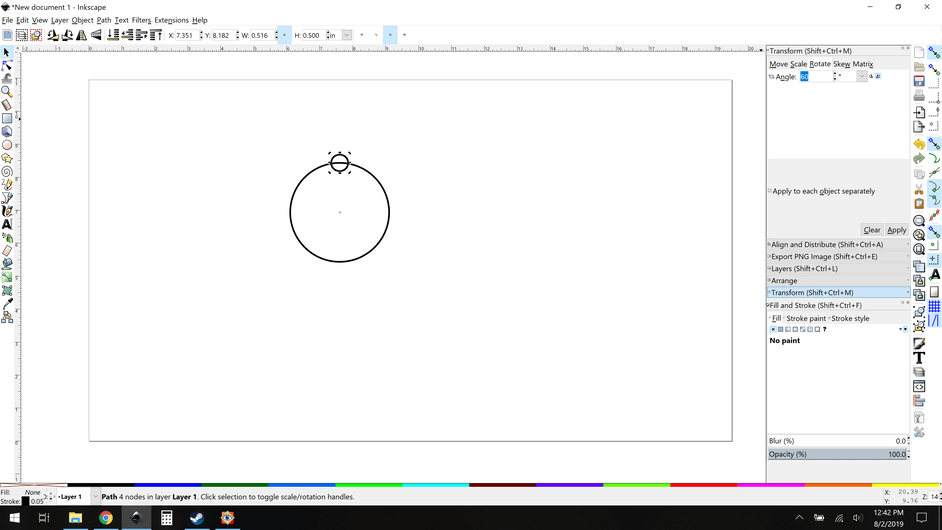
Rotate your copy 60 degrees. Repeat the process 5 more times, rotating by 60 degree steps to get a nice even array of 6 small circles on top of your larger circle. (yes you could have used the control key to lock your rotation increments, and 60 would have been easy to do that way but I like transform here since you’ll be doing a lot)
Now we get into path management. Select all your small circles, and combine them into one path (control K). Note at the bottom: 2 paths selected.
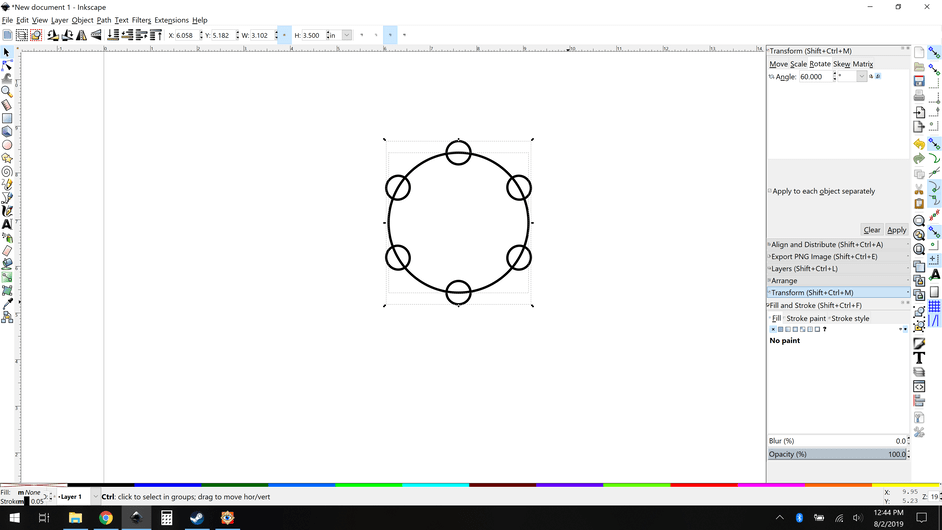
Simple boolean “difference” and you have a “gearish” shape.
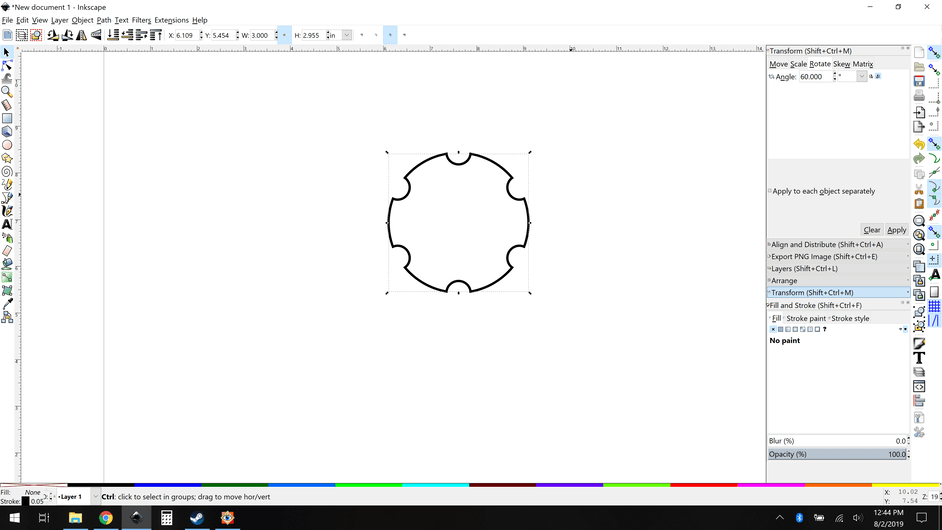
Now this isn’t exactly what you’re trying to do, and yes you’ll have to sculpt things a bit, but the key lesson here is to use the rotation point to do arbitrary rotation points, so you can pretty easily sculpt a “lobe” and then rotate copies of your lobe into place to make the desired shape with radial symmetry. It all depends on your needs and desired precision how much time and effort you put into it.
6 Likes
Sweet. Thankyou for improving my skill set I only had some of those techniques
2 Likes
This topic was automatically closed 32 days after the last reply. New replies are no longer allowed.