Glowforge Pro: I was in the middle of the job when the laser beam stopped cutting. The arm was still moving and based on the interface the job was still in process. So I stopped the machine.
I’ve cleaned the all the lenses and checked the mirror which looks like the day I first got the machine.
I’ve run the “gift of good measure keychain” job and the machine went through all the motions, but nothing happened. There was no light in the tube therefore no beam.
I ran the job on 7/1 at 12:18pm eastern time.
The same thing happened to me last August and ended up having to send it back and getting a refurbished one. This refurb machine is 10 months old. Please don’t tell me, I need to go thru this again.
Hi there. I’m sorry to hear that you’re running into some trouble with your Glowforge not cutting, scoring or engraving. I extracted the logs from your Glowforge to investigate, and it looks like the Glowforge is having trouble communicating with the printer head as it tries to print. There are two key connections I’d like you to check for me.
Could you please do the following?
Turn off your Glowforge.
Holding only the finished black surfaces, grasp the printer head as shown. Pull gently up and back to disengage the magnets and remove the head.
There is a small tab in the center of the wire ribbon. Push down fully on the tab to release it, and gently pull the wire ribbon plug from the printer head.
Pick up the printer head and wire ribbon. Make sure the tab on the wire ribbon is facing up. Slide the ribbon back into the head until it clicks.
As shown, lower the printer head over the metal plate so that it rests next to the two round posts. Then push it gently away from you – you’ll feel a “click” as magnets pull the printer head until it sits snugly atop the metal plate.
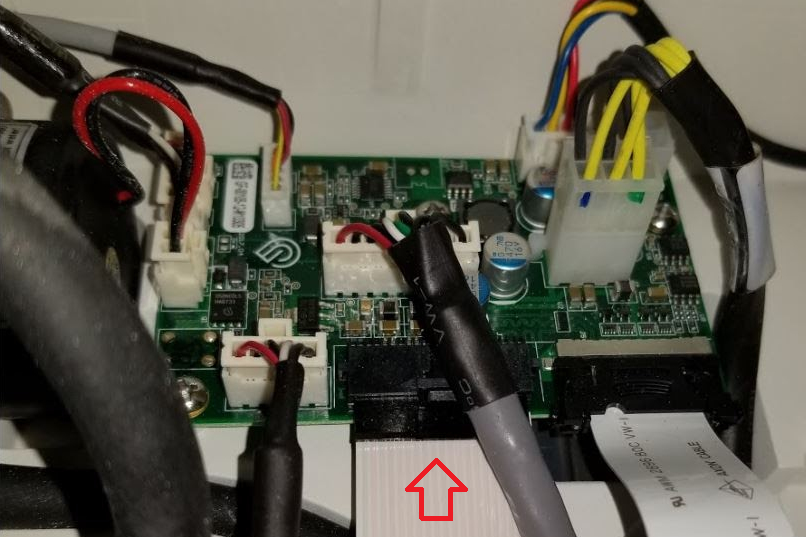
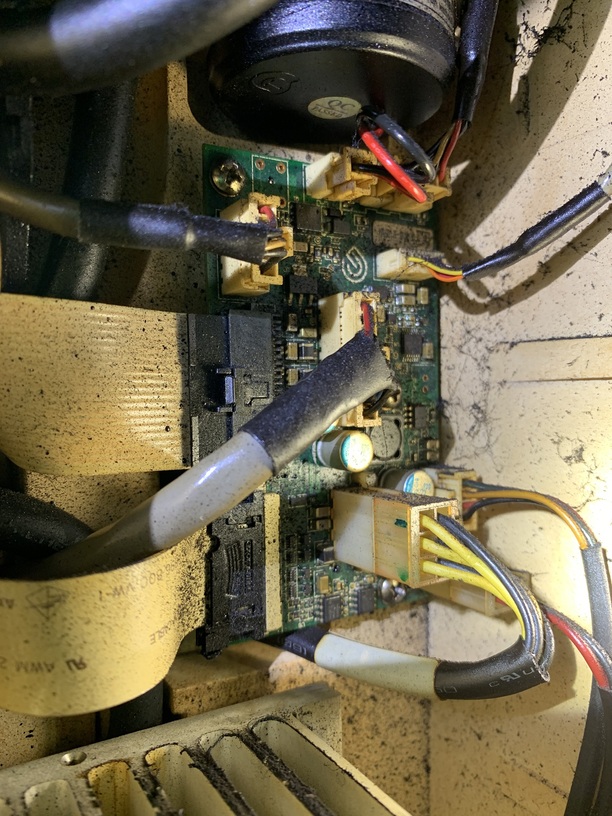
Try re-seating the flat white cable marked with the arrow above, and then take a photo of the circuit board with above image as reference.
Turn your Glowforge back on, and run our Gift of Good Measure test print. Please allow the print to run through (even if you do not see the laser firing) until it has cooled down and refreshed the print bed photo in the Glowforge app.
Send us the photos you took in step 4 and step 9, and the results of the test print.
I can review everything received for any next steps to get this resolved, and will look forward to hearing back. Thank you!
Hi @lea. Thanks for getting me those photos. I wasn’t able to notice anything with the pins or the connection to the circuit board, but I wanted to follow up with you on next steps through email since this may require some requests for your shipping information if we need to get any replacement parts sent out. Can you reply directly to my email, or confirm in this thread that you received it?