Glowforge Interface - Vector Files Made Easy šŸ¤”

You know thatā€™s a good question. Any object can be rasterized in Inkscape by selecting it, choosing Edit > Make Bitmap copy, but I have no idea how to create a gradient in the first place in Inkscape. Maybe someone else who uses it knows.

(If it canā€™t do it, you might have to create them in a raster program like GIMP or Photoshop and then import them into Inkscape.)

1 Like

Thinking aloud - is the object an engrave, ie already a bitmap ?
Or are you trying to vary the depth of a vector line ?
If the former, then Gimp is your friend, but if the latter, Iā€™ve no idea as yet.
John

This may help, go down to 6.
https://design.tutsplus.com/tutorials/quick-tip-how-to-create-gradient-fills-and-on-stroke-in-inkscapeā€“vector-14240
Not tried it, as Iā€™m still an inkscape newbie, but I have got a future use for it, if it works !
So please give us a heads up on the results.

:upside_down_face:

3 Likes

Thanks, Jules and John. The Edit -> Make Bitmap copy did the trick. I created a gradient filled box, did the ā€œMake bitmap copyā€ on it and GF treated it like an engrave. I could then do the different types of engrave (3d, hd, sd, ā€¦). Thank you - this is the piece I was missing. :grinning:

2 Likes

Inkscape has the gradient option alongside the buttons to turn the vectors on or off (you can even gradient the vector! However, for a gradient that follows the shape, I would go to Gimp as I cannot get the Inkscape gradient to do so, You could use ā€œGlowā€ in a vector behind the work that would be such a raster but it would be on both sides of the line.

2 Likes

Great list, thanks!

Iā€™m doing everything I can do avoid the monthly cost of AI and so one of the things that has taken me the longest to learn is the cut out function. In Illustrator it looks pretty straightforward and though I found some tutorials that described the function in Inkscape, I thought Iā€™d share here to add to the @Jules original.

So in this simple tutorial Iā€™ll explain how I cut out the shape above in to the shape below using a black circle and a simple top graphic.

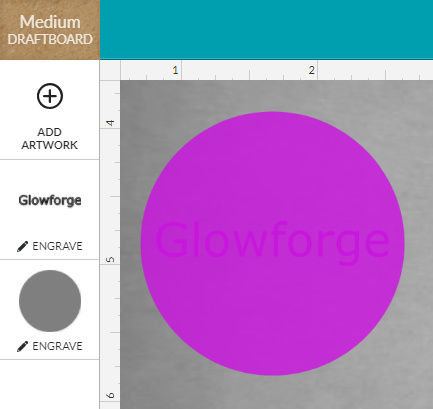
If you just draw a circle and lay something on top, the gfui presents the following:

image

So @Jules describes the process in AI and it is indeed simple there but it took me some time to figure it out on Inkscape.
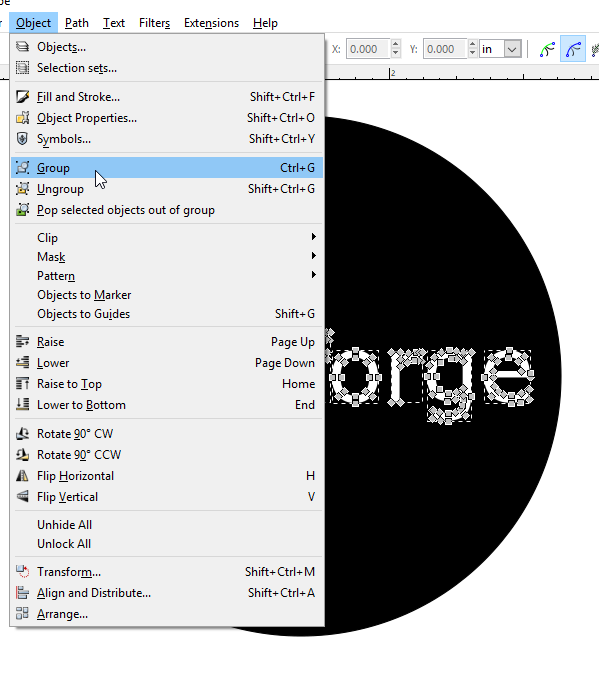
First, click ā€œedit pathsā€ button image and select each path in the top image - in this case, weā€™re clicking each letter in the text (already used object to path since gfui doesnā€™t read text) - image

I then choose to group these together.

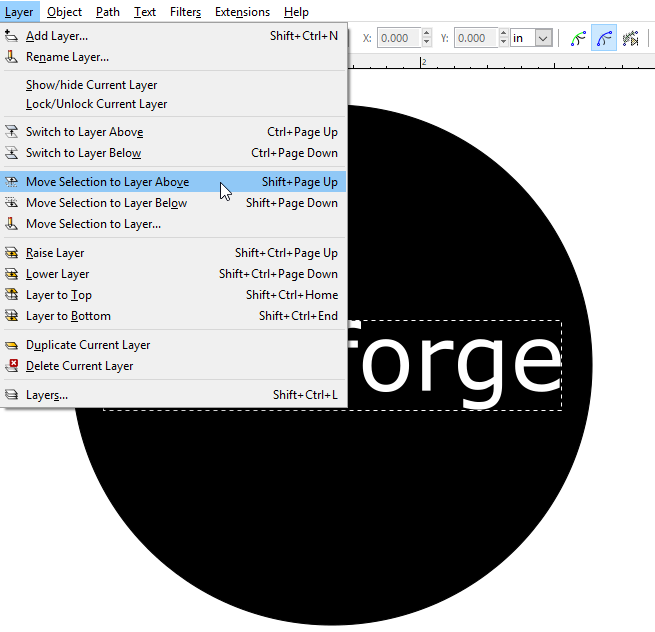
Then I create a new layer above and move my grouped image to it. image

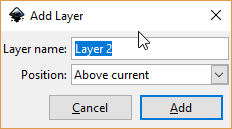
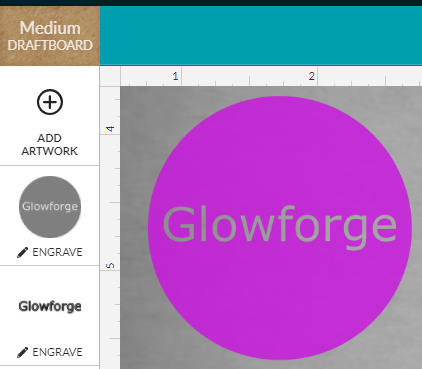
Then switch to layer above: image

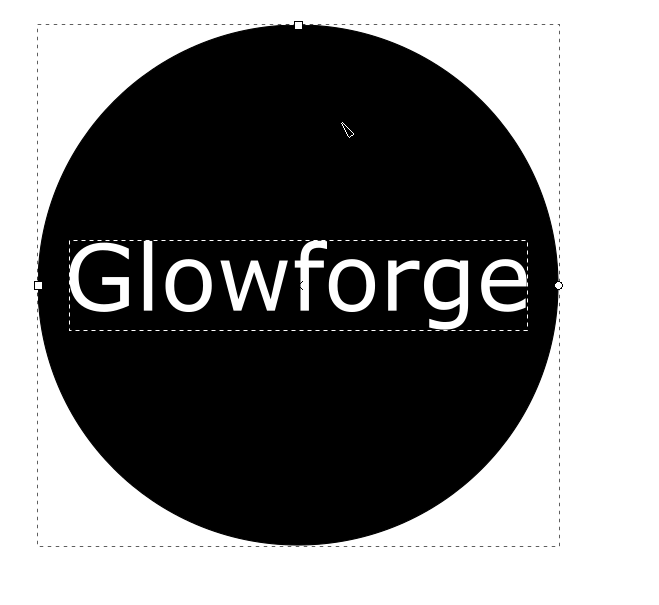
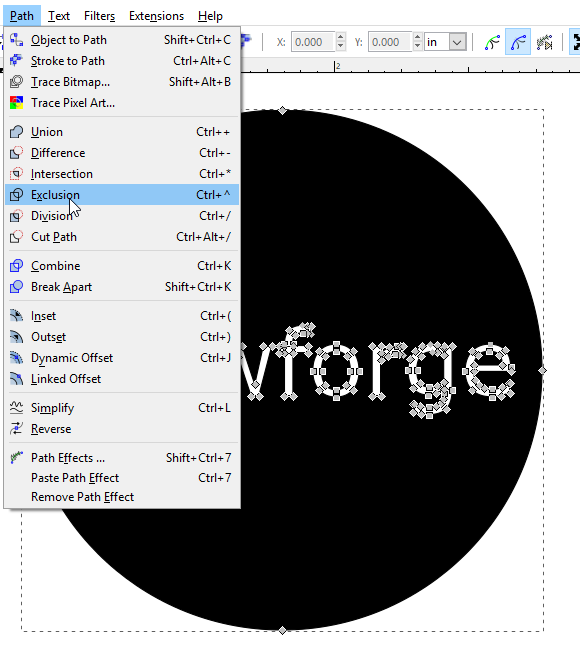
With the text group selected, shift click the background image:

and choose exclusion.

Your finished product will cut the above layer out of the bottom layer and effectively combine the two in the way that I need it for the GFUI.

image

I hope this helps those that are attempting to learn all of this from the ground up without prior design software knowledge.

Also, I see this as an extension of @Jules post but let me know if this should be in a separate thread.

The other thing Iā€™ve had to learn is how to make cut line out of anything. This exclusion feature and the offset feature have been the most useful so far.

19 Likes

Itā€™s great to have the Inkscape method outlined as well! Thanks for adding it. :slightly_smiling_face:

1 Like

Perhaps Iā€™m not seeing something here, but while it has the same number of steps, I donā€™t understand the need to complicate things by creating a new layer.
See if you find the following method both more logical, and universal.

Start with your filled circle, and then type out your text on it.
Select the text.
Click on ā€˜Object to Pathā€™ in the Path menu, which converts the text to a ā€˜groupā€™ of paths.
Click on ā€˜Ungroupā€™ in the Object menu, then click on ā€˜Combineā€™ in the path menu, which turns them into a single path.
Select both the new path and the filled circle,.
Click on ā€˜Differenceā€™, in the Path menu, and you have the object you require.

:upside_down_face:

11 Likes

Thanks for this. Any enhancement to this method I stumbled on is a plus. Iā€™ve yet to try it, but Iā€™m looking forward to trying it. I will update my amateur version accordingly.

It took me so long to get to this method that optimization was an afterthought. I donā€™t have time for classes, so Iā€™ve been finding youtube videos when I can.

Do yo happen to have any tips on generating a cut line around any object? For instance, in Inkscape now, I do a dynamic or linked offset of a duplicate on another layer.

Thereā€™s also this technique:

2 Likes

Nice! Thanks, @AhnoldZ. What else are you using regularly in Inkscape?

Funny how we all have different workflows. Assuming he circle and text are the only objects in the docā€¦ this is how Iā€™d do it:

Control a. (Select all)

Object to path. (Converts text and circle to path. If circle is already a path no harm.)

Control a (in case anything isnā€™t selected after path conversion)

Control shift g. (Ungroup everything)

Shift click on circle. (deselecting it, now the letter objects are still selected) .

Control k. (Combine letters into a single path)

Control a. (Reselects the circle, now both paths are selected)

Path->exclude. (Cuts it out)

Done.

5 Likes

By your exclusive use of keyboard short cuts, am I right in guessing you might be a mac user, rather than pc ?
I suppose because I came through the pc/win route, then graduated to ubuntu, but still with a pc, my instinct has always been to using the mouse, then latterly a pen.
Perhaps I have a need to keep hold of the mouse in my dominant left hand, and never got the instinctive typing skill to find the right keys when I need them !

:upside_down_face:

Control gives me away as pc, more or less!

Iā€™m pretty handy in an Linux terminal too, I use Cygwin in my day job.

Instead of doing a ā€˜path combineā€™ I do a ā€˜path unionā€™. That avoids problems due to winding rules and their interpretation if you have overlapping letters.

2 Likes

thatā€™s the opposite of my instinctual guess. especially for people who are long-time PC users (think pre-windows). windows has always been a heavy kbd shortcut system, since its roots are DOS, which had no mouse. mac OS was always more mouse-based.

Just what Iā€™ve learned from tutorials and so it all seems obvious. Iā€™m one of those weird people who like manuals and written tutorials. Itā€™s easier to develop ā€˜muscle memoryā€™ and work out my understanding by playing with the software while reading. With videos itā€™s harder to start and stop and ā€˜rewindā€™ (to use a cute archaic term Iā€™ve learned from my elders).

3 Likes

Hey thatā€™s a good tip. Itā€™s never bitten me yet, but I donā€™t use cursive scripts, and so havenā€™t had to tangle with overlapping letters.

This is the best post. Thank you for all your work and explanations!

2 Likes

I have a lot of trouble with GFUI combining colors. For example, if I have an SVG from Illustrator with vectors that are black, yellow, blue and green, the GFUI will sometimes treat them as four operations, or three, two, or even one. Weirdly, they can all be from the same file with different vectors of the same color visible - for example, a sign with a standard cut and score in two layers and colors, and a third color used for the vector writing or drawing on that particular sign. So I can generate a dozen signs, all with the same color palette, and get wildly different treatment in GFUI. So then I have to tweak colors and re-save the SVG until I can luck into a combination that GFUI handles properly.

Are there specific colors that the GFUI consistently differentiates? Or some other trick?

1 Like