Here is what i have done so far
First I did a search on this forum for ideas on what to try.
Reset my router
Went into my setting on my PC and in my network settings “forgot” every wifi that has ever been connected to my PC
Reconnect the wifi to the glowforge
Went into my windows accessories and maintenance and did a disk clean up
Also did a defragment and optimize files.
I also had everyone in the house off the wifi except for me.
I also moved the glowforge and my PC to be directly next to the wifi router(a foot away)
I have restarted my PC several times along with the routers.
We have the newest internet provider in our area and is considerably better than what we have had in the past.
After the glowforge does its print and starts to take a picture of the board. The % never leaves 0%. The head will move a couple of times as its measuring the draft board then disconnects.
I’m so sorry to hear that you’re running into trouble!
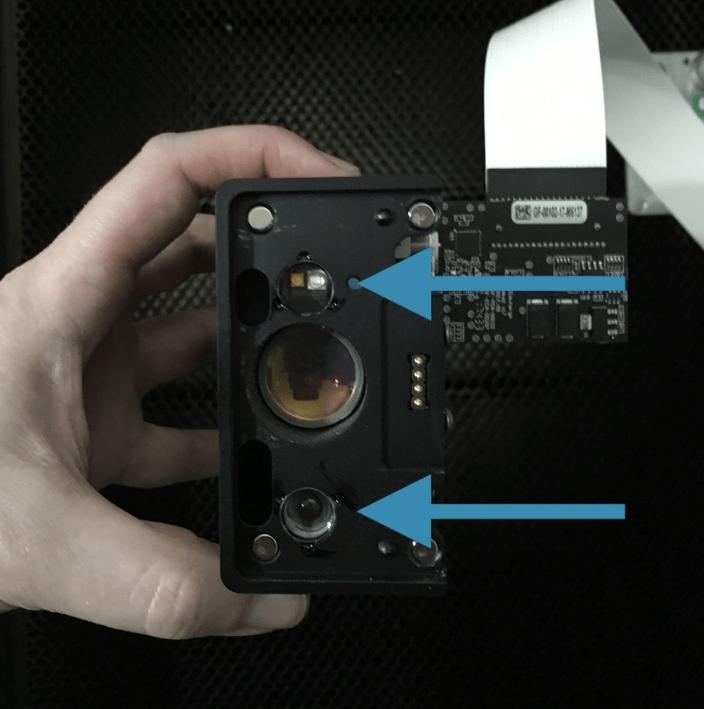
I’ve extracted the log files from your Glowforge to review your most recent Camera Recalibrations. Based on the logs, the trouble is not likely related to your network connection, or the channel your Wi-Fi is on. It appears your Glowforge is experiencing trouble properly measuring the height of the material during the Camera Recalibration, which is why it is failing. I’d like to take a look at two specific connection.
Could you please do the following?
Turn off your Glowforge.
Holding only the finished black surfaces, grasp the printer head as shown. Pull gently up and back to disengage the magnets and remove the head.
There is a small tab in the center of the wire ribbon. Push down fully on the tab to release it, and gently pull the wire ribbon plug from the printer head.
Pick up the printer head and wire ribbon. Make sure the tab on the wire ribbon is facing up. Slide the ribbon back into the head until it clicks.
As shown, lower the printer head over the metal plate so that it rests next to the two round posts. Then push it gently away from you – you’ll feel a “click” as magnets pull the printer head until it sits snugly atop the metal plate.
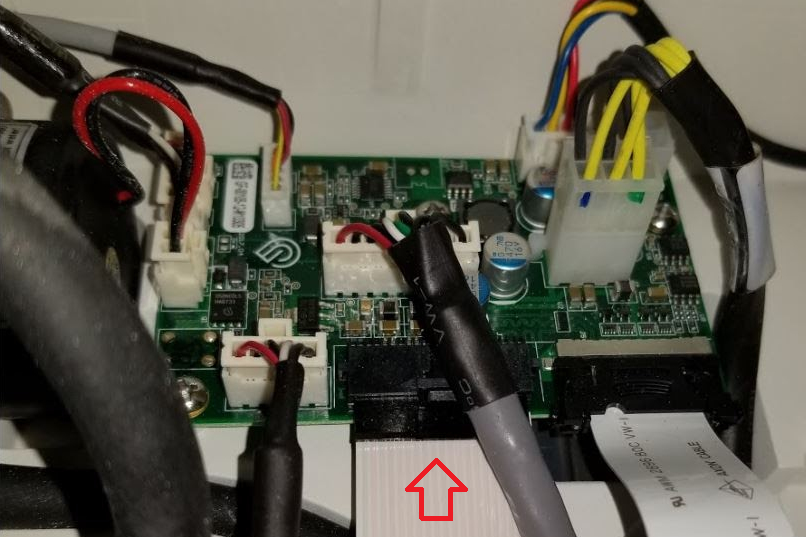
Take a photo of the circuit board. If the cable I’ve indicated above with the red arrow appears to be loose, please reconnect it and try printing again. This cable should ‘click’ back into place.
Turn your Glowforge back on.
Send us the photos you took in step 4 and step 9.
Once we can review these images, we’ll send over the next best steps.
Sorry to be so needy but I posted pictures as requested and no one has responded
If you need me to email them let me know
I really need machine fixed for a job
Thanks
Bernie
I sincerely apologize for the delay getting back to you. Thank you for providing those photos. The pins on your printer head look good.
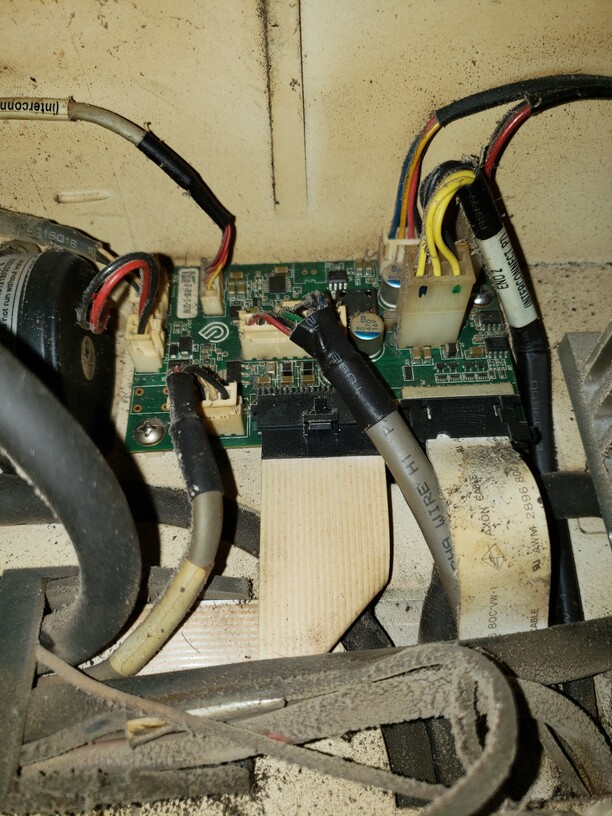
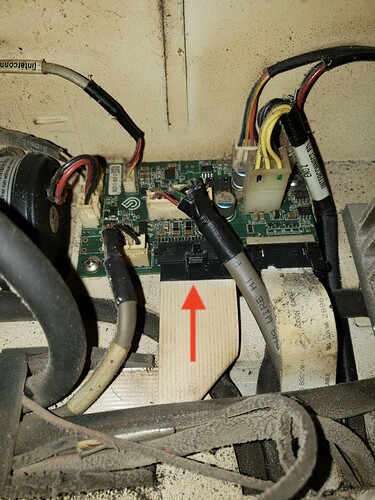
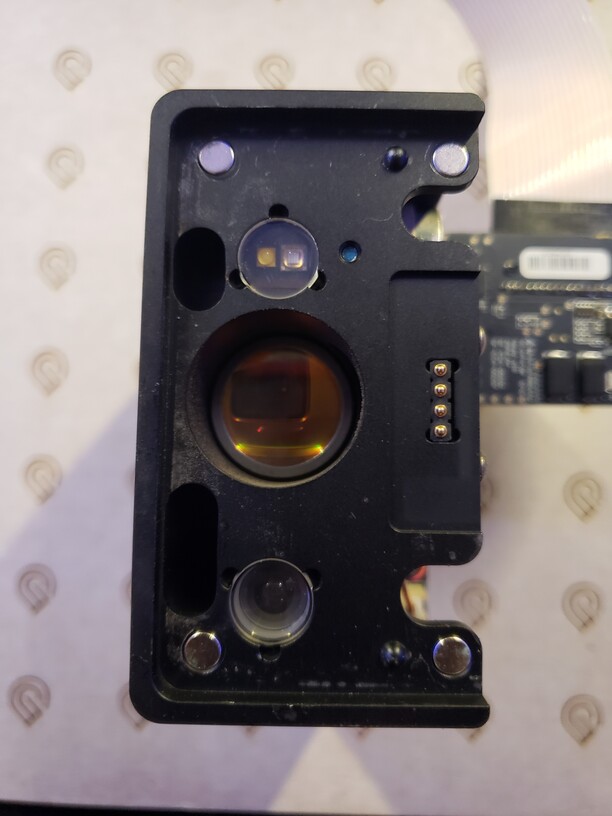
It does look as though the ribbon cable highlighted by the arrow in the photo below might not be making proper connection. I’d like to have you do the following:
Turn off your Glowforge
Pull the laser arm all the way forward.
Reach over the laser arm, and to the left of the inside of the unit, try reconnecting the cable. You should feel it click into place.
Once the cable is reconnected, please try a small test print. Let me know when the print is complete and I’ll review the print logs.
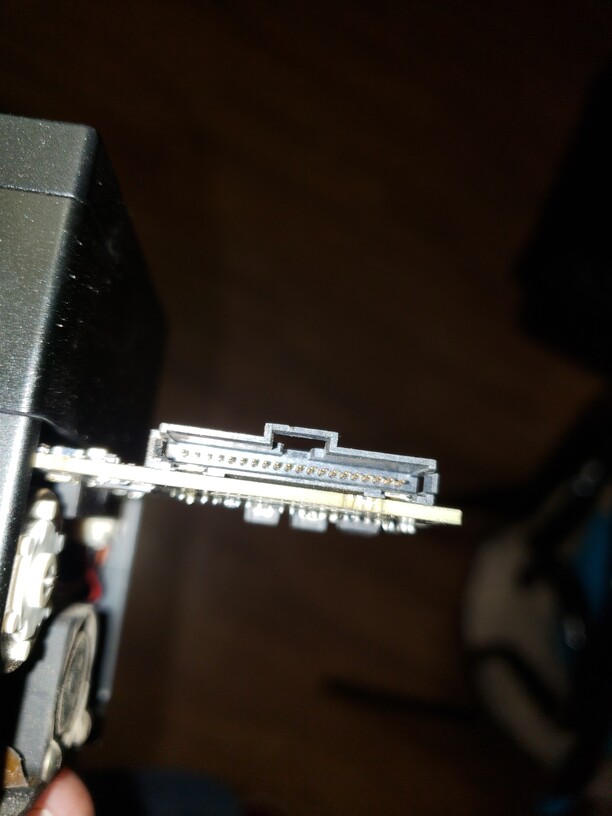
I would also like to get a photo of the bottom of your printer head like the example below.
I just finished the small print, did a cut, engrave and score took about 3:37min
I used proofgrade medium walnut plywood, engrave looks good, score looks good but didn’t cut all the way through
Thanks
Bernie
Hey @RawCustomsDesigns, Thank you for the additional photo and for running the test print. When I look at the logs from the test print, I’m still seeing that your unit is having trouble with the autofocuser. Sadly, this is not an issue we’ll be able to resolve remotely. We’ll need to see about getting a replacement unit out to you.
As a part of our process, we will need to confirm some personal information, so I’m going to send you a separate email. You should receive my email in a few minutes, but if you don’t receive it in the next 30 minutes please check your spam / junk mail folder. Once I know you’ve received my email, I’ll close this thread.
Hey Bernie, oh no, I’m sorry you didn’t receive my email yesterday. I’ve just resent it to you. Please let me know if you still don’t receive it. Thank you!
Hey there Bernie, I wanted to check back in, did you receive the email yet? If should have gone through, but might be in your spam or junkmail folder. Please let me know if you still haven’t received it. Thank you!
Hey @RawCustomsDesigns, I see that you received the email I sent. I’m going to go ahead and close this forum thread now and we will continue to work with you over email.