Other people have reported seeing the GF slip in alignment while cutting. I just had the same thing happen.
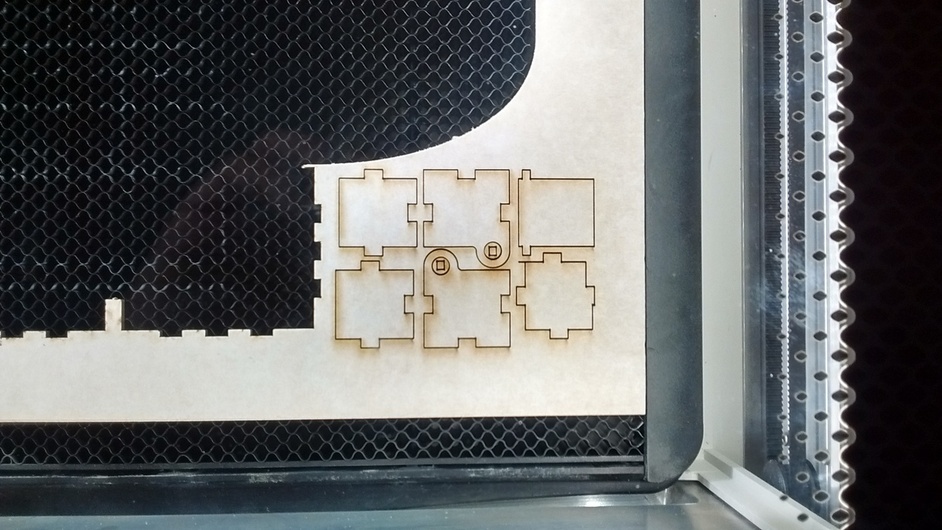
PG Draftboard. I took the photo through the glass (haven’t lifted it up yet). The last square was cut wrong. (6 pieces. This was literally the last item being cut.)
Other people have reported hearing it slip. I was standing over it, watching it work. No odd sounds.
I recut the bad piece a second time, and it cut fine on the 2nd attempt.
I had the same thing happen once (different unit than the one I have today) and it was also in the lower-right corner. Like you, I re-ran it and it was fine. Just odd that it happened to both of us in about the same place.
Huh. Funny how individual these machines are. I always start at that corner - my right side margin is less than my left side unprintable margin so I use the right side up first. Then I can slice it off and move the sheet over and I can use what would have been wasted left side margin.
I’m good with “stay out of that corner”. Does anyone know the dimensions of the do-not-enter zone? I kind of think it is 2" wide by 3" deep from the front-right corner.
Please don’t misunderstand. I want a fix so I can use the entire area. But I’m willing to accept the temporary workaround of “don’t use the corner.” This problem definitely does need to be addressed.
Not sure how it can be fixed because it physically can’t get to the corner unless you shave some of the plastic casing away. They would have to reduce the working area even more unless they can shift it all towards the back. I have no idea why it is so far forward when the camera can definitely see all the way to the back.
Wow – Thanks for the hint! I just confirmed it easily enough.
My test:
Power off the machine.
Manually move the head to the front-right until it touches the front wall/door.
Without pushing it back, move the head to the far left. On the far left, there’s a 2mm gap between the head and the door.
The path of the head is not parallel to the door; the front door is skewed inward by about 2mm, with slightly less room on the front-right corner. This is what the head is hitting.
Really hard to measure since I don’t have a right-angle T that large. But I believe the insides are square, while the outside case appears to be slightly parallelogram.
More testing… I think I know an easy solution.
You know the gray “do not use” border in the UI? (Areas that the camera can see but where the head cannot travel.) They need to pull the bottom border (bottom UI = front of GF) up about 3mm.
I don’t think anyone will complain if they lose 3mm of cutting depth.
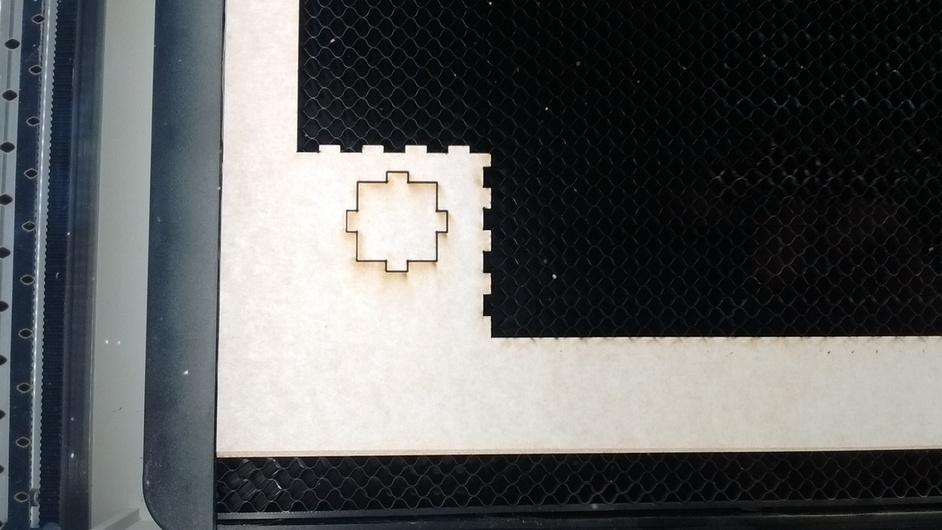
“But didn’t you say it was a 2"x3” area?" I was wrong. The bump happened at the bottom left. That screwed up the final element – which was in the 2"x3" area.
The workaround is to just skip a little bit more room at the bottom(UI) / front (GF). If the head doesn’t bump the door, then you’re fine.
Meanwhile, GF could be modified through software to detect this issue. During calibration, move the head all the way to each corner:
Move from back-left to back-right to back-left and measure the length.
Move from back-left to front-left to back-left and measure the length.
Move from back-right to front-right to back-right and measure the length.
This will identify the actual cutting region. With the bump against the door, you should notice step 2 being a fraction different from step 3. If they have a way of saving calibration settings, then this measurement only needs to be done once (or once in a while) – and not every time.
Not to be rude but that made me LMAO! The angst surrounding the increase in usable length vs the advertised capability and the accompanying change to the 11.5" height (current target) went on for weeks (and continues to be dredged up as another indication of GF’s supposed intent to deceive buyers and to play bait-and-switch games while failing to deliver).
Any further reduction will undoubtedly bring those same folks out to replay the same vitriol.