God Bless America! - UPDATED with Wood Base

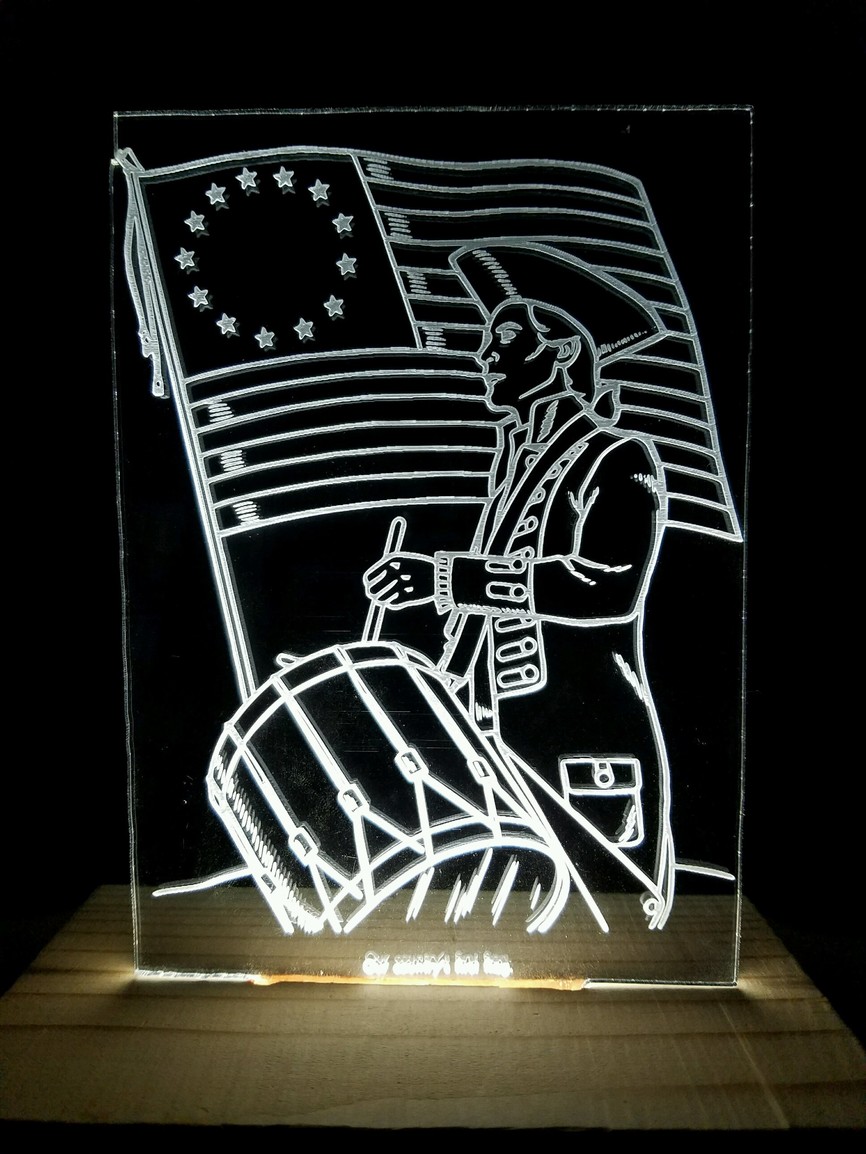
My two young boys have been obsessed lately with the American Revolution, and so I decided to go with that theme for my next draft project; an engraved acrylic sign.

A HUGE thank you those of you who have posted this kind of project in the past; @smcgathyfay @marmak3261 armak3261 (apologies if I have missed anyone) like this: ProofGrade Projects and Pre-Release Glowforge :glowforge: mini acrylic LED sign - #18 by jamesdhatch

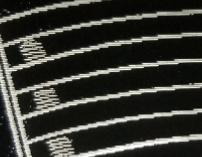
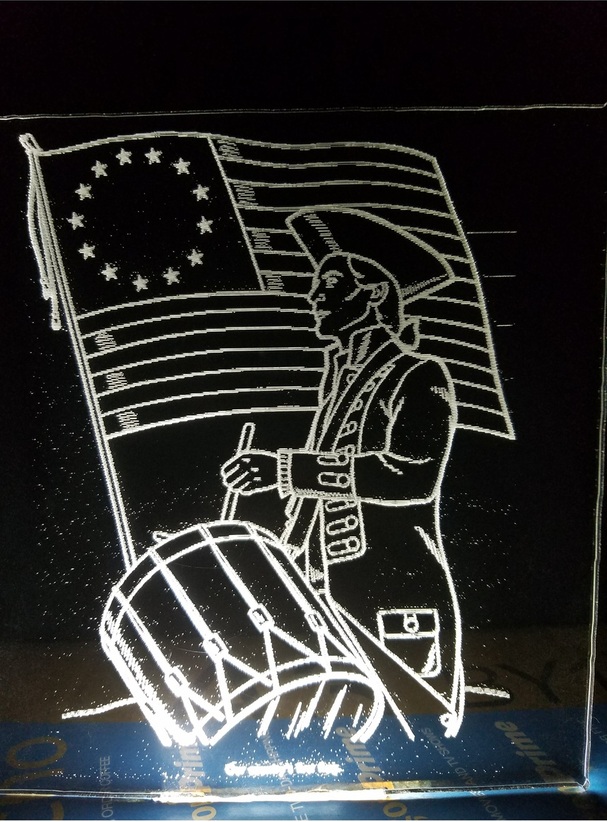
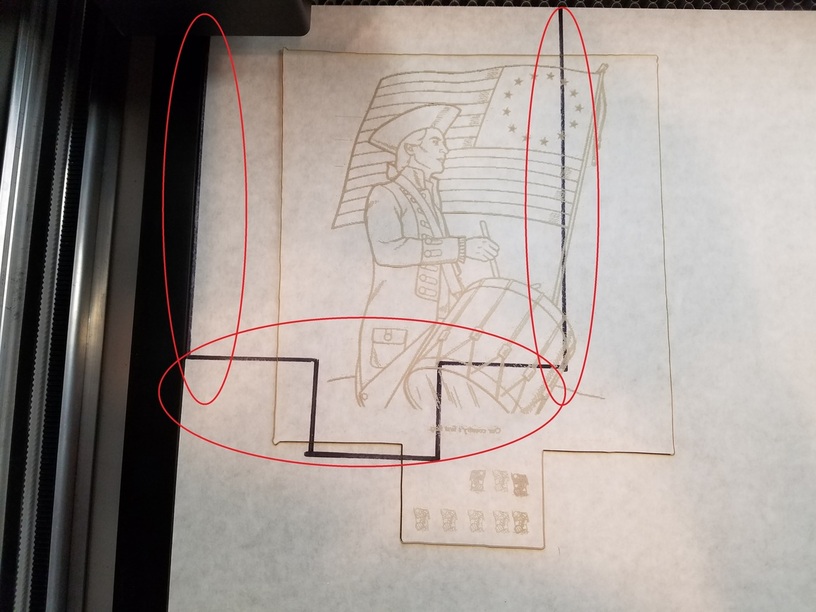
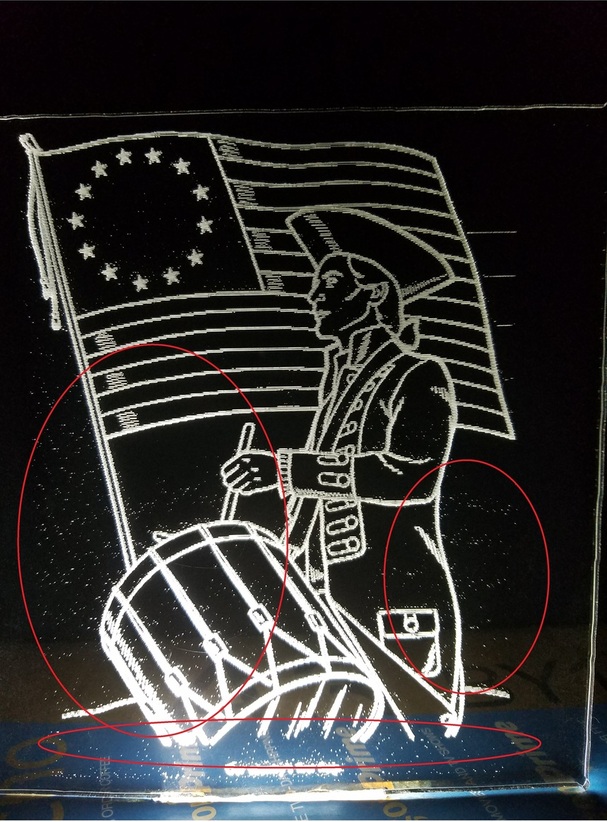
Please keep in mind that this was just a ROUGH test run, so it’s only 75lpi, the border was hand drawn & so it’s all wavy, I used an uploaded pic so it is a raster instead of smooth lines, and the pic I used has tons of noise…but I think it still came out pretty nice?

I think I might also have discovered a possible bug, which I will let Rita know about: The app had 2 choices for the engraving shade, and both choices seemed “blank”. I just clicked on one of them and figured I’d just see what happens…wanna guess, before reading the answer?

If you said “It went through the motions of printing, but did not produce a laser beam”, you’d be correct. I’m guessing that the auto settings must be blank for this p.g…

Has anyone else encountered this problem?

So I tried several tests using manual settings, and was getting weird results; sometimes it seemed to just remove the protective paper, and one setting was so high that it cut dots all the way through. You can see the tests here:


I finally wised up and looked online for good settings, and found 100 power and 90ipm, and that seemed to work well.

I also then realized that I needed to set the focus properly; I chose 1/16th, figuring that the center of the sheet would make for a nice, deep engrave…was that a good choice?

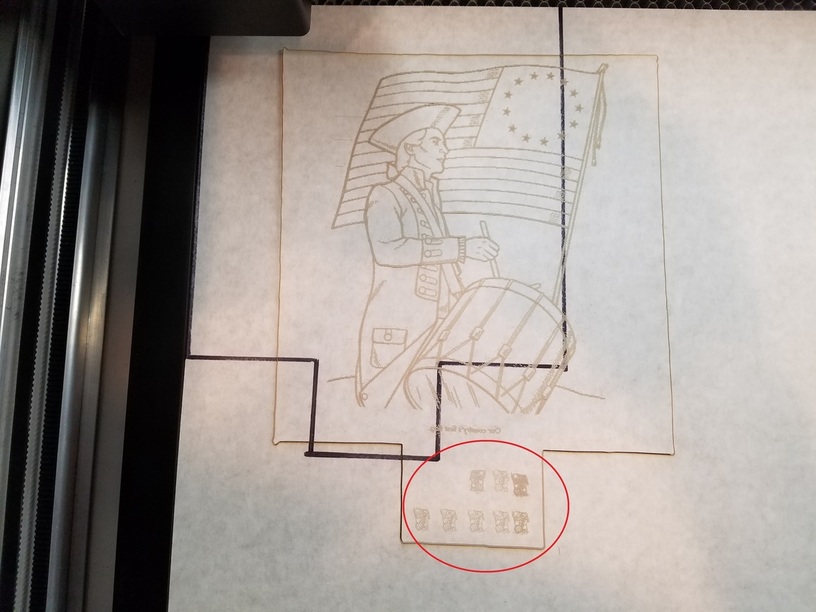
Another thing to keep in mind: I originally had drawn the border on the p.g. paper, with the very left edge included in the lines I drew, but the trace function was not picking it up because it was either too far to the edge of the bed for thee pre-release models, or because it blended in with the black of the bed (not sure, and it was soooo late at night that I forget now*). So I re-drew it on a piece of regular paper, centered it in the bed, and traced that instead. That is why the print is off from where it looks like it should have been…

Original maker that I could not use:

And this is the noise I was referring to:

By the way, the protective paper sticks pretty hard to the acrylic, and can be a little tough to get off everywhere, especially in the small, scratchy engraved sections.

And it can leave a film of sticky residue, even if it looks clean. I went to wash off my fingerprints with soap and water, and that is when the residue made its presence known, with a vengeance…

After I dried it, everything went frosty and I could see that the whole surface was slightly sticky and smudges everywhere…more soap did not help.

Soooo, I grabbed some lighter fluid and some paper towels, and after a short while and some rubbing, it fully cleared up.

I think next time, I will just soak it with lighter fluid (OUTDOORS & AWAY FROM FLAMES & LASERS; SAFETY FIRST!) for a few minutes while the paper is still on; that should permeate through and dissolve the adhesive, making the peeling a piece of cake, and then also much easier to wipe away any remaining adhesive.

Then a quick wash with soap and warm water, and she’ll be shiny & bright!

*A word of caution to all who haven’t received a unit yet: You WILL stay up very late at night, tenderly loving your forge, and not giving a single hoot about the inevitable coming sunrise…you will then viciously curse the morning for a fleeting moment, until you recall that you have a forge, and a new day means…MORE FORGING!! WOO-HOO!!!

UPDATE 4/7/17: Huge thank you to all who have taught me so much…

Thanks to the svg file that @takitus sent me, I was able to upgrade it to this!

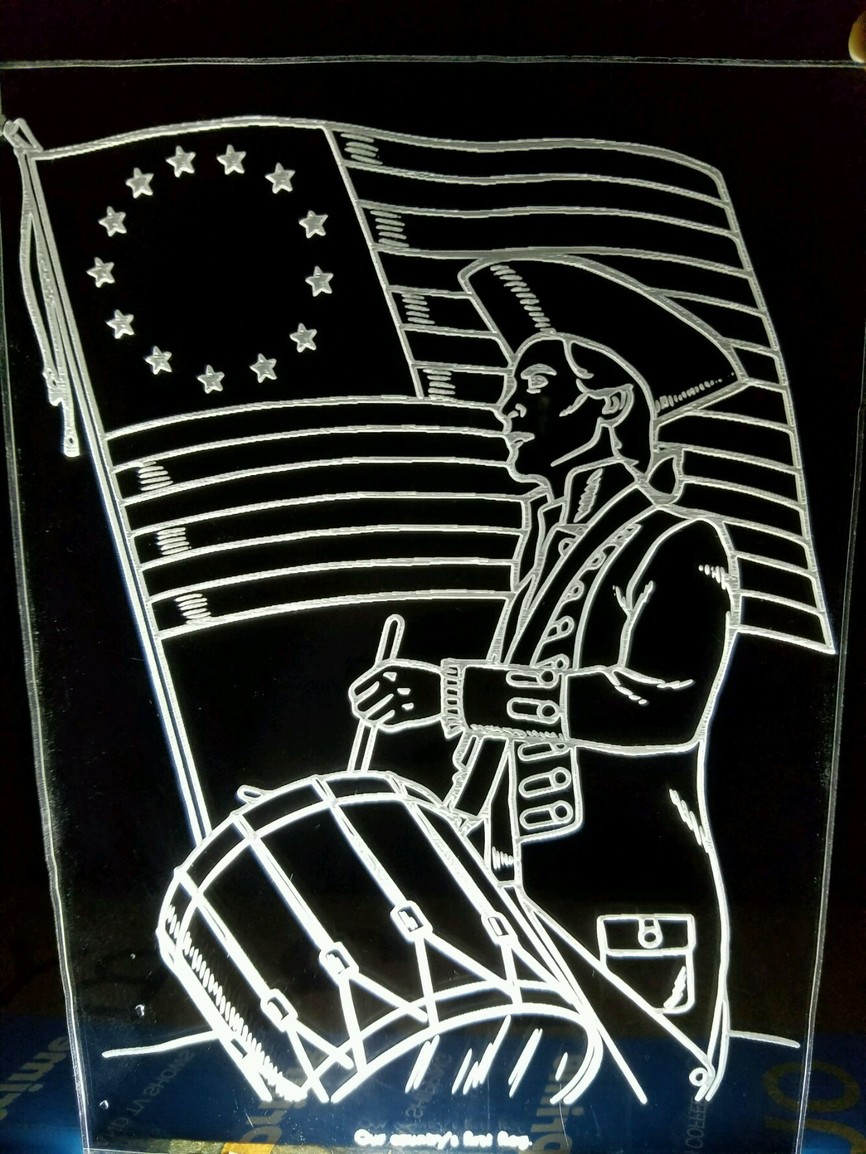
Yeap, svg is definitely the way to go for beautiful, clean lines…I’m getting Adobe Illustrator for sure…

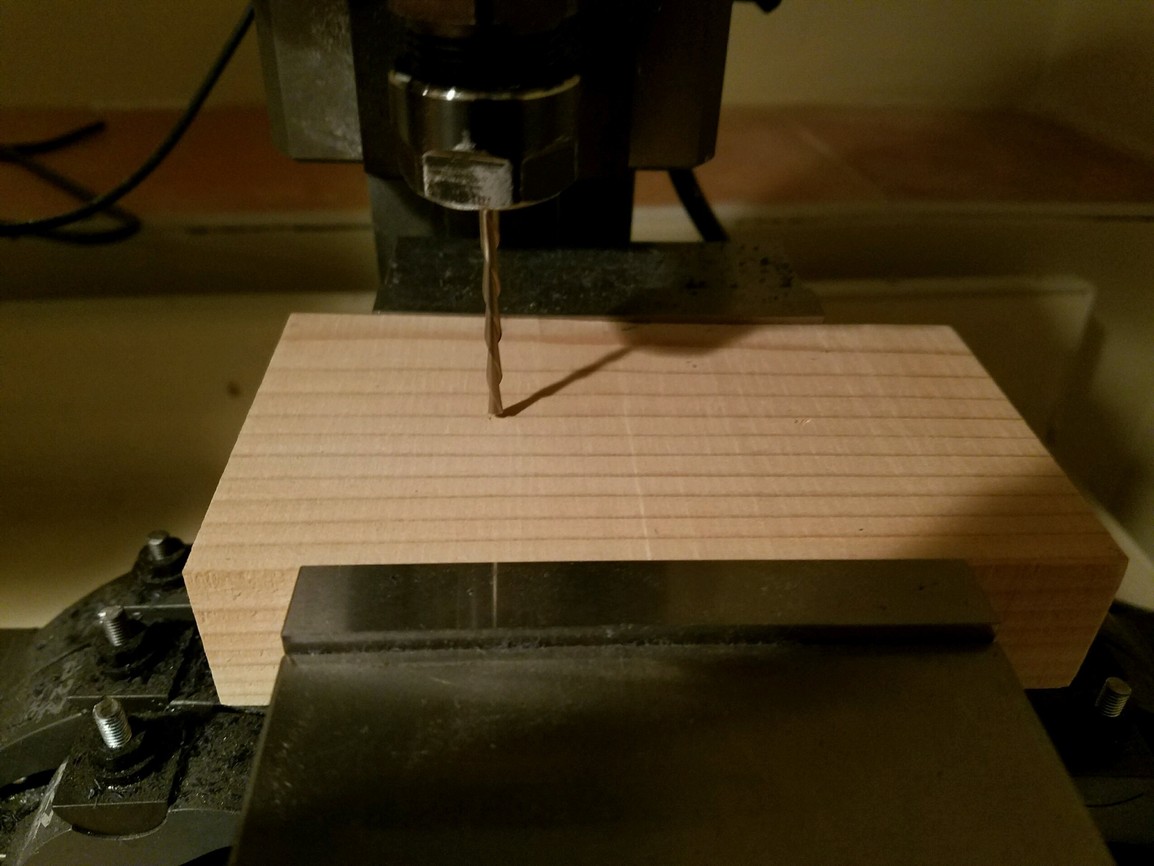
UPDATE on 4/10/17 - Added a wooden base…

Just a quick & easy (slightly sloppy) wooden base addition:

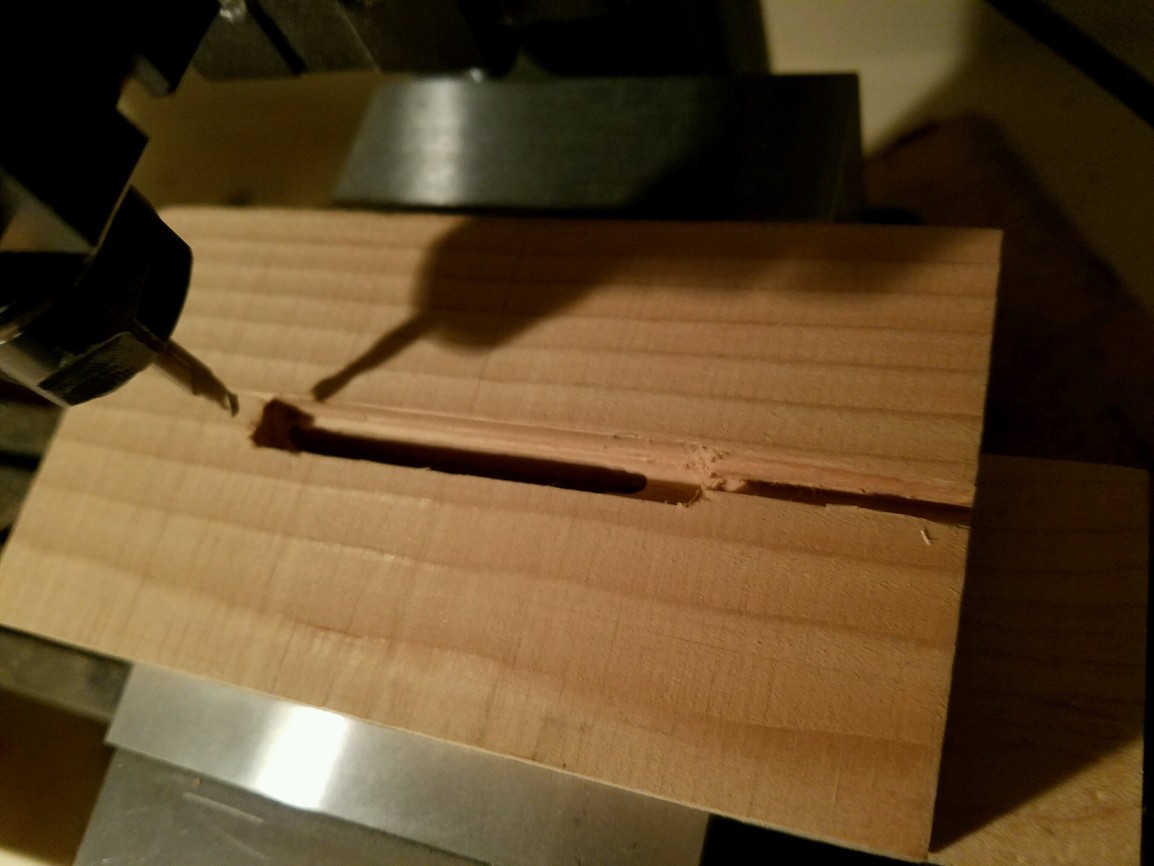
Could not find my real 1/8th end mill, so I used a dremel one instead. Note to everyone: Don’t use a dremel one instead, cause it bends, lol:

Sloppy cause it bent, but it fits nicely:

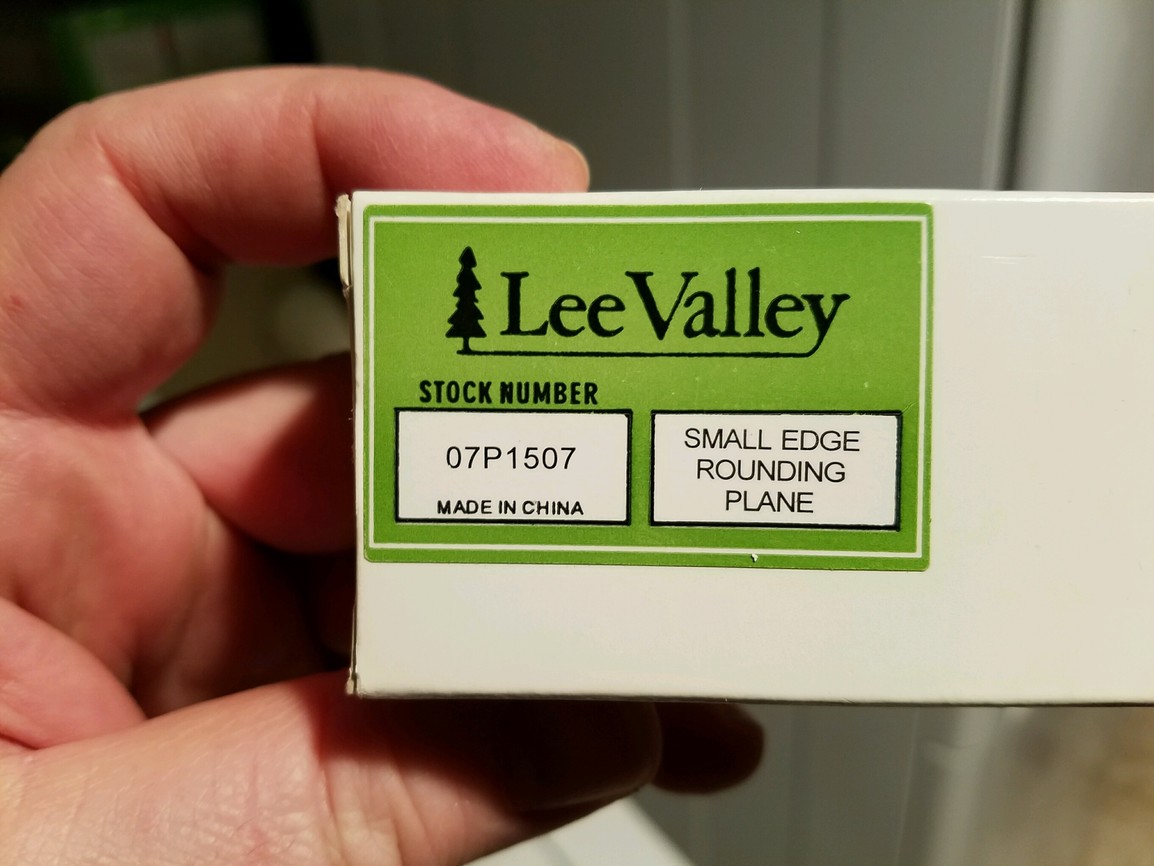
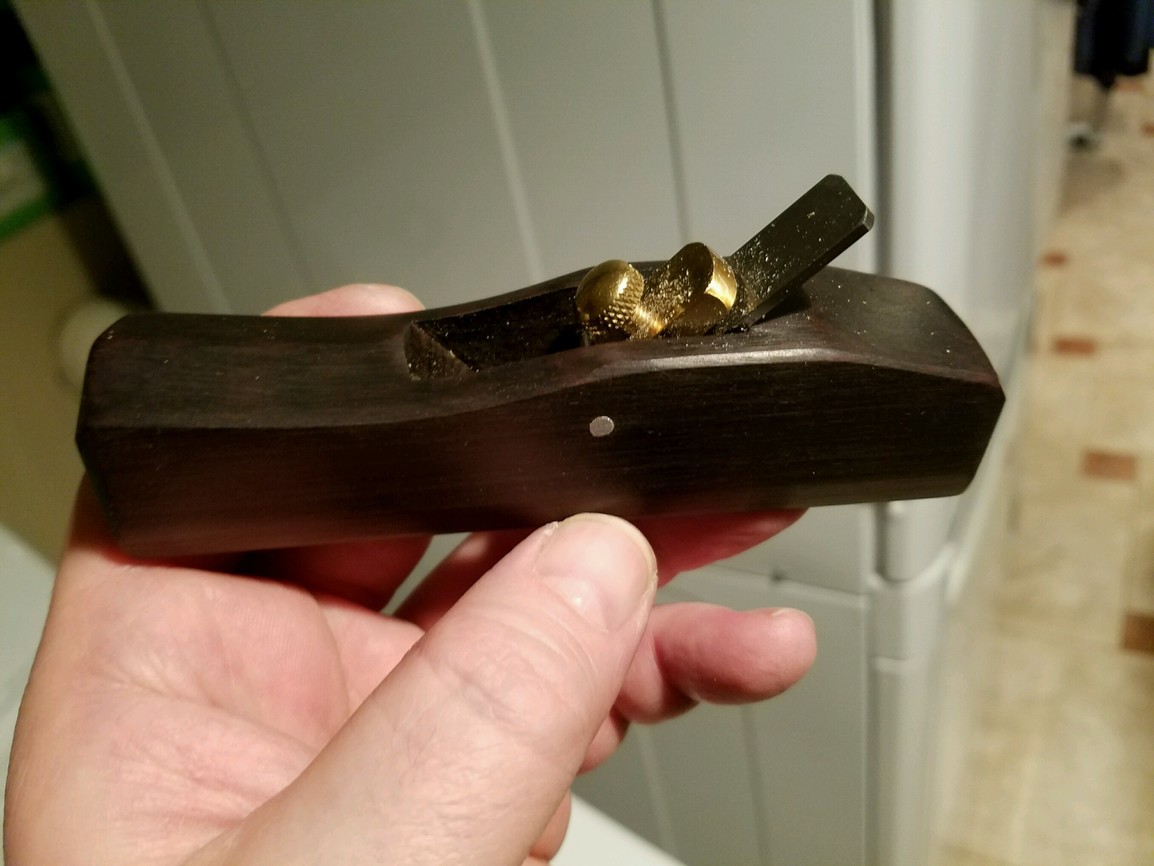
BTW, notice the rounded edge? Compliments of this little awesome guy; I HIGHLY recommend it:

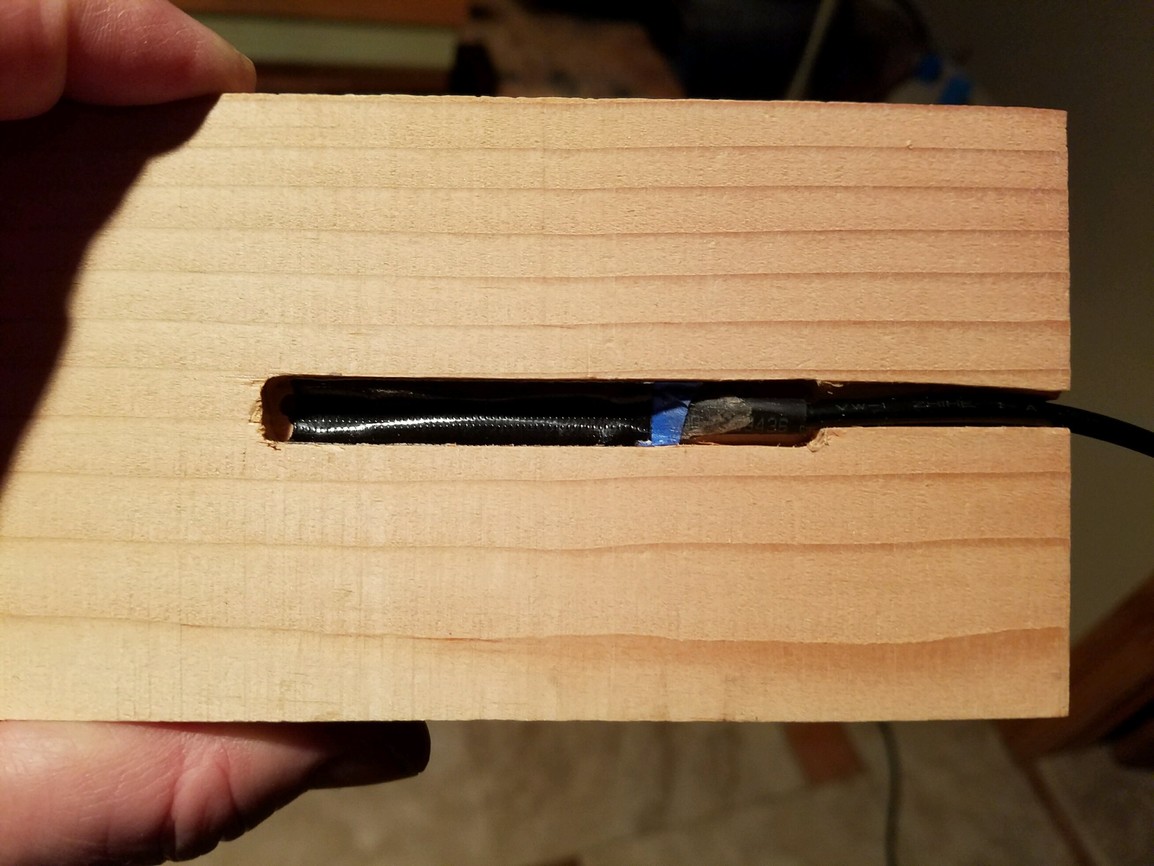
Switched to a real end mill and milled the bottom for the wire & L.E.D.s, held firmly in place with Gorilla Tape:

Sitting on top of the wood base. I’ll take a pic from a bit further out later to show the full view. Maybe I will even paint it black. And this makes me think that it would be good & easy to use the paper / plastic composite that someone had posted about a few weeks ago; I received a sample of that; good stuff!

Btw, 3 LEDs were too bright for a night light, so the next day I covered 2.5 of them with tape; much better.

58 Likes

I really enjoy how thorough you were in describing your process and how it worked out for you.

I wonder if printing the image out and then using the trace feature would have eliminated a lot of the noise. Just thinking of a quick work around.

Oh and you get a like for the title alone.

4 Likes

I don’t think the machine should have been able to pick up your line on the left side - even to human eyes & blown up it’s hard to tell if it’s a marker line or a material edge and much of it disappears into the bed background.

4 Likes

Thanks!

I’m nowhere near as artistically talented as a lot of people here, nor have as much experience with graphics and lasers, so I figure I can contribute best (for now) by stating what I’m experiencing as I make things, so that Average Joes like me can maybe know what to expect & what pitfalls to avoid…the little nuances and details can sometimes make all the difference in the world…

I’m going to try the print & then trace function with this pic tonight, and see if it makes a difference, thanks!

4 Likes

Ahh, and I see that @marmak3261 had trouble with the code reading, too:

1 Like

That’s a good thing considering the targeted marketing of the GF.

I’m spending a fair amount of time trying to figure out how to do things with the GF handling things differently than my other laser (so experience can slow you down). And then I have to figure out if what I think isn’t working “right” is just not working “as I expect” and then how much of what I expect is simply because that’s they way I’ve been doing it so it’s really not doing it the way other laser vendors have implemented their solutions. That’s a lot different than not being right.

3 Likes

The noise you are seeing is jpg artifacting. You’ll have to clean that up in photoshop or do a trace in illustrator. I would recommend doing both.

5 Likes

Yeah, I usually go to MS Paint and then manually erase those dots, and it is so tedious & takes forever…

Are you saying that photoshop can do that in an automatic function?! And trace in Illustrator can trace clean lines?!

If so, omg, I’ve been living under a rock for a looooooong time!

3 Likes

Trace is one of my favorite features in the world. Even more so when seeing the difference between a raster and a vector engrave on the forge.

29 Likes

HOLY CRAP!! I really need to get my act together…

Illustrator is my next focus, thank you!!

8 Likes

Thanks for sharing your experience and your result! You definitely encountered an interesting problem with the blank setting selections. I’m sure they’ll correct that soon. As for your left line, I can’t blame the software… it’s likely to detect that as the edge of the material rather than something put there on purpose. Just a bad position.

Keep up the fun work!

3 Likes

So wait… the raster is left and the vector is right? (or vice versa?)

Raster left, Vector right. Theres a good chance this outcome is just because of the faulty tube, but if I want good engraves that dont vary in height, I go with vector if possible.

You can see that I lost some detail in the trace from the raster image, but the engrave is so much better I just went with it.

It makes me really curious to figure out what causes that banding seen in the raster engrave. I see so many posts about it on so many forums, and no one has given a reasonable explanation for it. I know it has to do with bad tubes, and potentially their ability to generate power properly, but nothing definitive has ever been said that I have seen.

I want to say its something to do with thermals, as it happens over time every time. As the tube gets used more and more, the problem seems to worsen. This could mean its being insufficiently cooled causing the tube to expand which causes improper amplification of the wave/self cancellation/interference. This might be why the newer tubes have longer cooling spirals in them than the tube I have.

If you look closely, you can see that any time the amount of pixels to be engraved darkly per line changes, it tends to band. Like above and below the word ‘EMPIRE’, right under the AT-AT heads, and at the very top there is supposed to be a border, but its just an extra line where it gave up all together for a few lines.

This is the closest explanation Ive found to date:

As a conclusion to the “banding” problem, it was determined to be the laser itself after both the laser and RF unit were tested on the bench at Epilog.
What I experienced did not appear to be a typical problem or symptom. Although tech support varied greatly between techs at Epilog, I thank Brian for finally seeing this through. The 2006 inspected Coherent 120W laser tested at 79W so was replaced because of this (Cost $4200). The first replacement came with a blemished mirror and scratched lens but the second replacement was refurbished as expected.
Without knowing the exact reason the output power seemed to be intermittently low and high, replacing the laser resolved the problem and I have not had the problem again since.
There was a disagreement as to whether a weak or intermittent power supply (two on this Legend 32EX) could have caused this issue but I did not have to continue down that path.
Although I’ve heard several times “The laser always stays sharp” unlike other machine tool bits, I take this as a reminder it is not free. You can buy a lot of bits for $4,200.

12 Likes

Don’t forget ctrl/command + arrow up and arrow down changes contrast in the scan. You can eliminate some of that noise. That’s also the two curly arrow at the top of the trace screen. Do that before you click on black.

Nice doucmenration and good subject.

3 Likes

a good trace and an LPI of 340 or higher will help reduce this aliasing as well:

4 Likes

I’m really glad that there are much more knowledgeable people than me working on this stuff…

I get most of what you’re saying, but there are parts in there that make me feel like Penny when she talks physics with Sheldon

13 Likes

If you need further explanation, let me know. Ill be glad to go into detail. I think I wrote up a whole tutorial on tracing images for the GF already. lemme see if I can find it.

5 Likes

Awesome, yes, would love to read that, thank you! One of the main things I wasn’t to make is engravings…

1 Like

Oh, and this is where I got the pic from, if it helps anyone in any way:

5 Likes

Here ya go. This should explain the trace function, as well as some other potentially useful things:

11 Likes