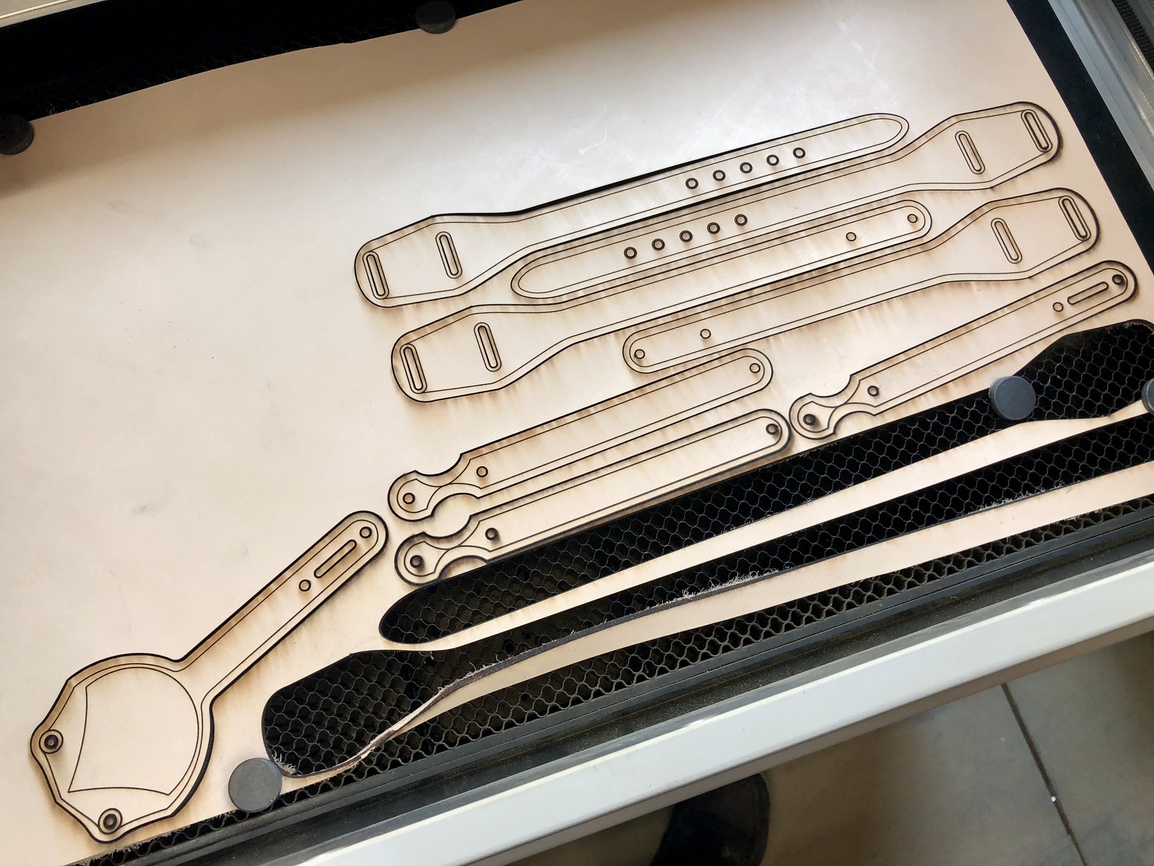
Starting off with .11” veg tanned leather. This is slightly thicker than proofgrade Thick Natural Leather so some adjustment to the cutting settings is required.
21 Likes
ahh, to be able to draw… even a little… 
2 Likes
I never could get a drafting job until the advent of AutoCAD as my freehand ability particularly in lettering was not good enough. Now there is little such excuse. With inkscape even delicate spirals are pretty easy.
1 Like
I’m learning. made a proper curved line yesterday! Working with other peoples SVG’s is good learning for me!
2 Likes
Always good to figure stuff out. When I first got AutoCAD any lisp routine over 3k would not load ( it was a clone bug, they were very proud that all the joints were soldered too). I taught myself lisp by going through other folks stuff to make it small enough to work. In the end my own stuff was very efficient for all that I had learned.
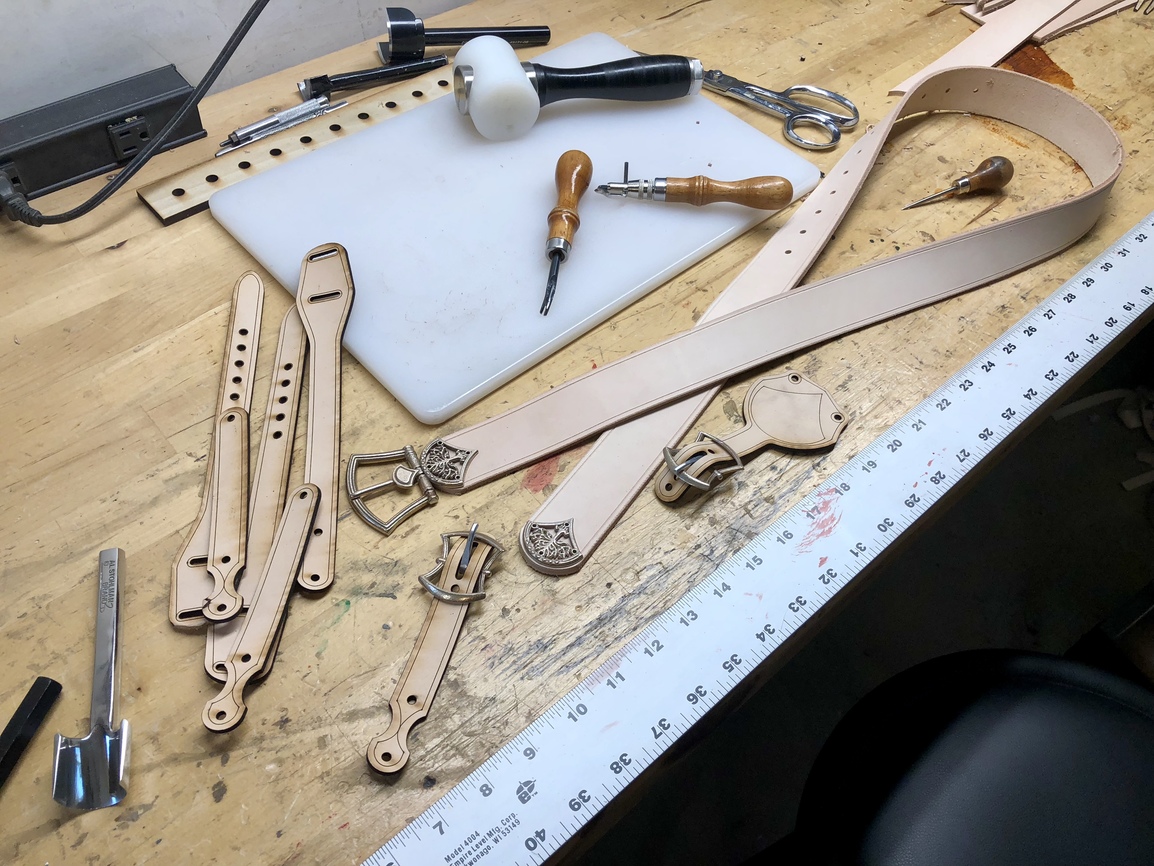
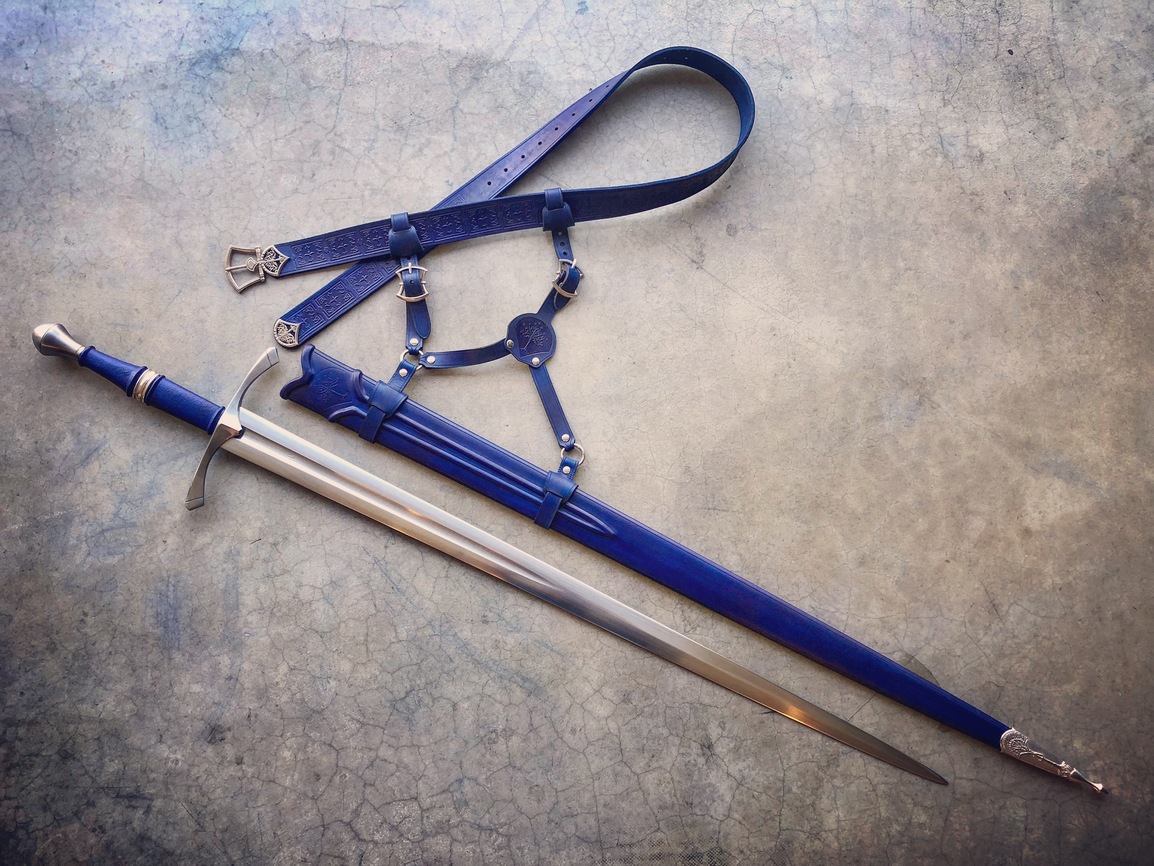
More progress. The main belt strap is done with traditional leather working tools. I’ve considered the suitability of the pass through slot for this but the manual tiling technique seems it would just take too long.
The belt hardware was sculpted in ZBrush and 3D printed in bronze infused stainless steel.
15 Likes
Wow! I’m really impressed by the leather work, and blown away by the 3D printed hardware! I’d love to see more of that.
3 Likes
Are you doing that yourself? or sending the designs out to be printed? I would love to have that ability, it would really make the 3D printing .
1 Like
You don’t need to be able to draw to make something like this–you just need to figure out how to build it up from primitive shapes using the tools in your graphics program.
A whole lot of what is done in Illustrator/Inkscape is overlapping simple shapes, and then merging them, or using one shape to take a bite out of another shape.
Here’s a simple example… Say you wanted to recreate the circled shape.
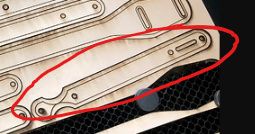
Well, it’s kind of a rectangle with circles stuck to the ends, isn’t it? Build that out of primitive shapes, and then merge the shapes into one with the Unite tool.
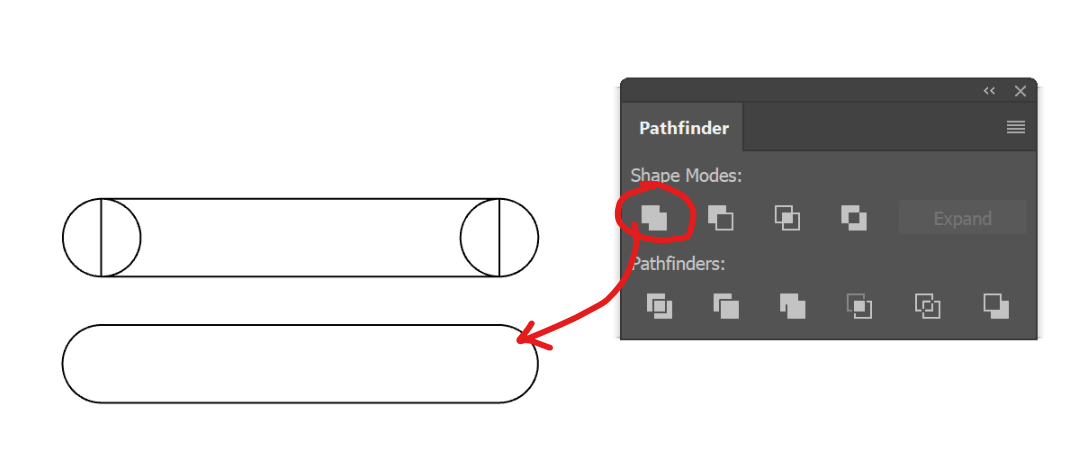
But it has dimples on one end, right? So draw another circle or ellipse as a throwaway tool, and use the Minus Front command to subtract it from the first shape.
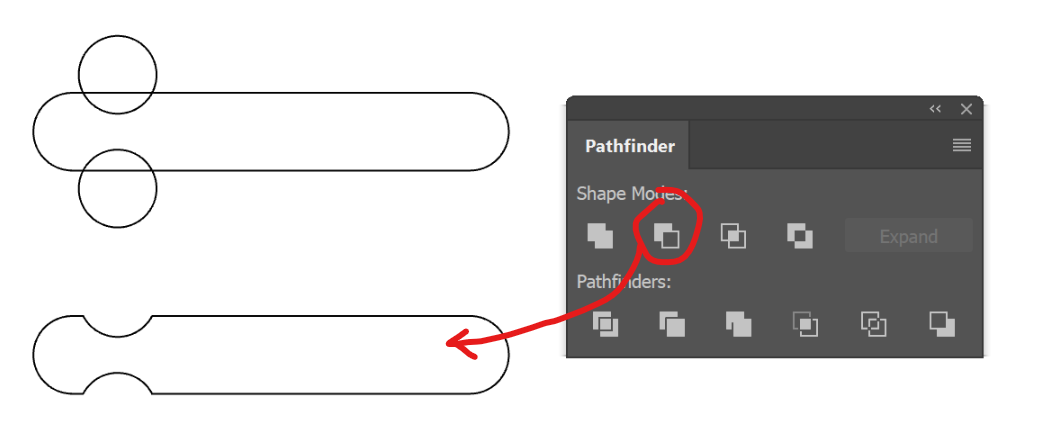
You get the idea. This sort of thing is absolutely fundamental to vector design!
Another really great trick to easily make useful shapes is to draw them with straight lines, and then use Round Corners. That is how I would make something like the python-head shaped head of the belt. The Pen tool even snaps my line to other nodes, so I don’t need to have any fine dexterity skills at all.
My proportions do not match the original piece, moving fast to make an example, but you see where I am going with this:
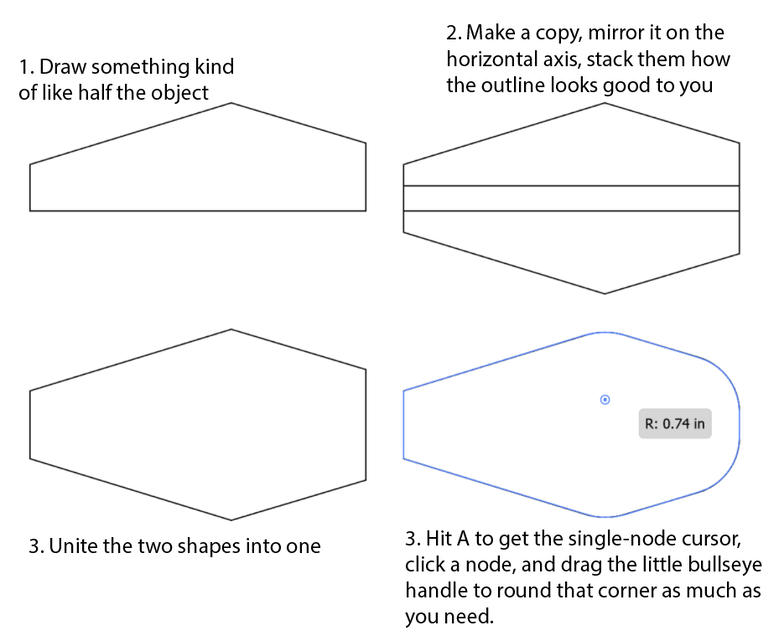
If I had to draw all those shapes freehand or with the bezier curve tool, I’d kill myself. But once you learn how to build up shapes from intersecting primitives, you can do some very useful stuff. I would also study the Offset Path tool, and then learn all about how to round corners, for both a whole object and single nodes.
Put those three skills together, and you can make OP’s pattern from scratch, and much faster than you may expect. No drawing required. ![]()
9 Likes
Out of the box the offset in the offset path is huge in Inkscape anyway but if you dig around in the program settings you can change the default to something smaller and even multiple times is better than not being able to use it at all.
Before discovering that I used dynamic offset that you can experiment with a lot to get to what you want. Bezier points and points on top of each other can really mess up an offset so I usually go about cleaning up potential problems first. If you select what looks like one point and you get arrows around it than it is many points but there is a command on the tool bar to make one point of it. If you miss one and it sends a huge spike headed for the sunset, do not despair, just pick it and hit that straight line on the tool bar and it will make it the shortest possible line on the two points on top of each other, when it is reasonable to do so I make everything lines like that and then the offset is much more restrained and does not go flying off to extremes.
Looks great! Looking forward to the finished project.
1 Like
This is incredibly, stunningly beautiful. period.
3 Likes
What she said! 
2 Likes
That is gorgeous, good job!
2 Likes
and its BLUE
It’s fantastic. It’s clearly bespoke custom work, and very high-end.
Gorgeous, detailed, and NOT from the prop store.
I love it.
3 Likes
Alex Steele’s working on a new sword. I think you are the person to do the scabbard and belt.
2 Likes