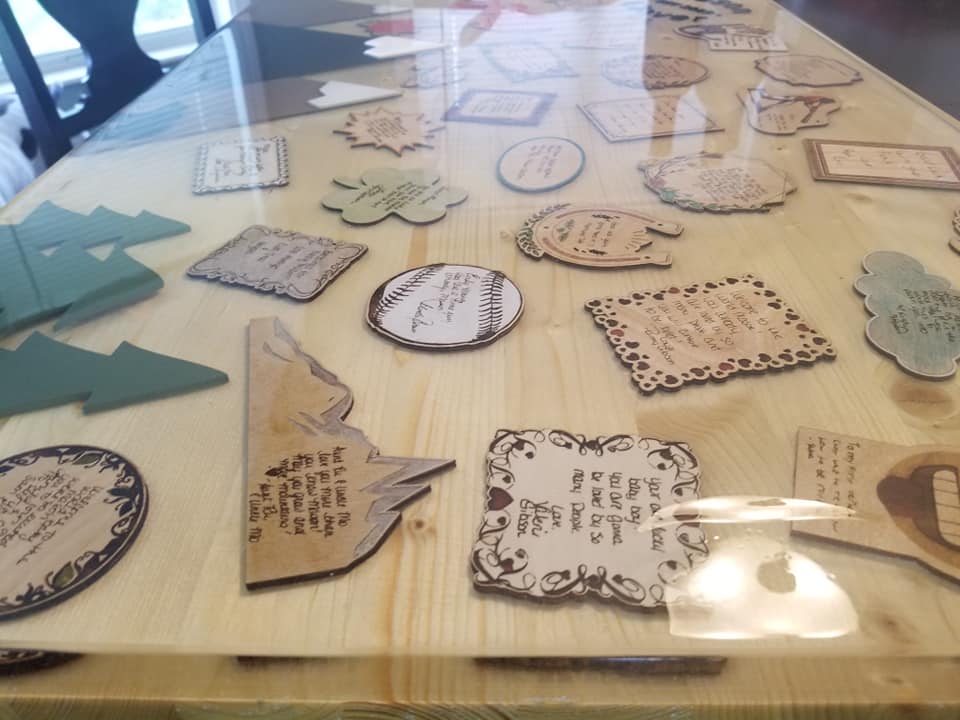
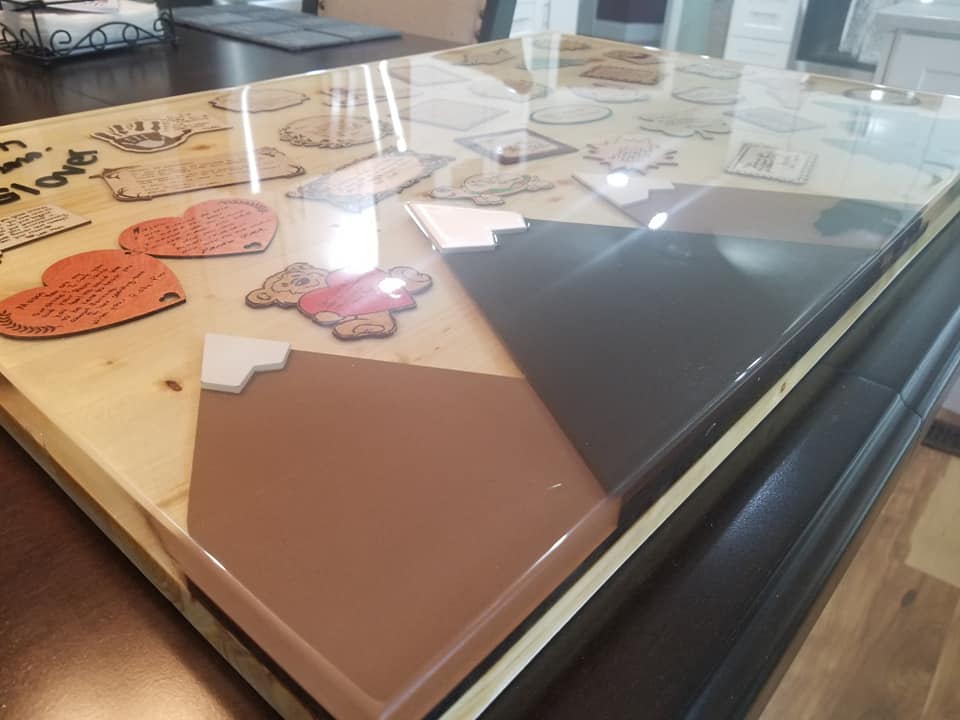
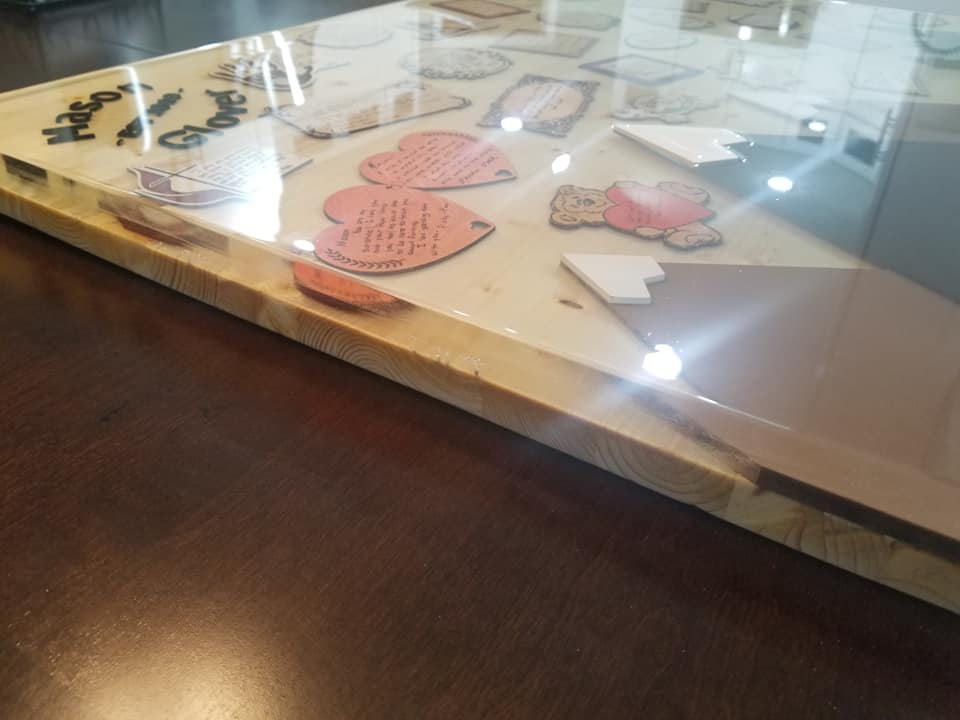
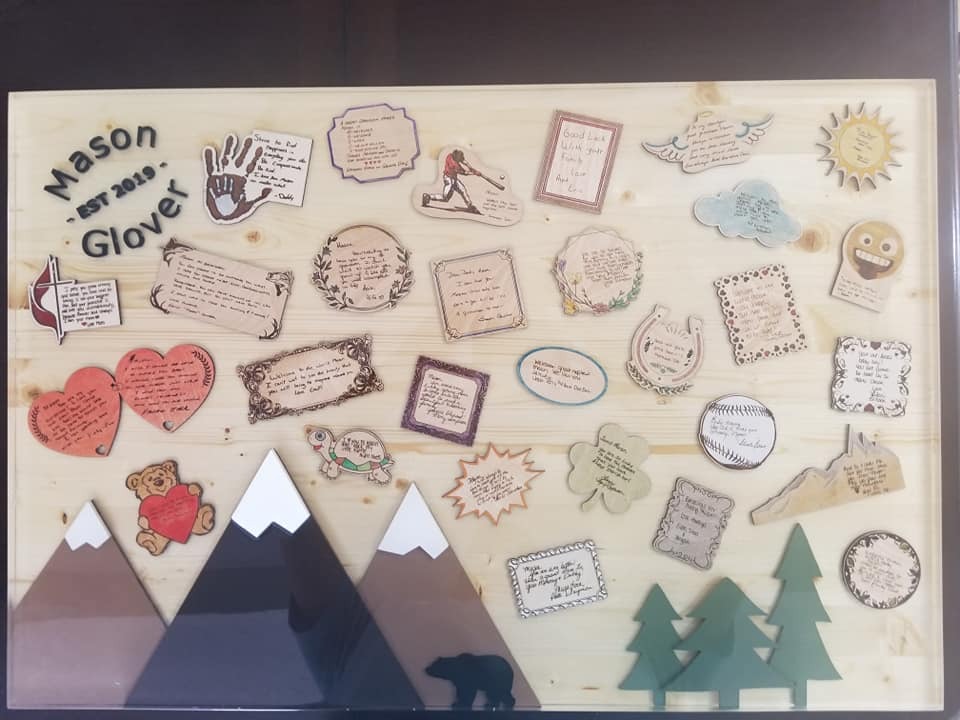
Finally completed the Well Wish Board for my soon-to-be Grandson due any day now!
The first time I’ve worked with epoxy and love it. 2 gallons of epoxy, sanding and buff. I still have a little touch-up work to do but it could go on the wall right now.
Long project but very enjoyable. Love my GF!
A side note to this project is that the joined red hearts are my Daughter-in-law’s parents. Her dad died 3 years ago but her mom had an old birthday card with his handwriting in it. I scanned the card and created a font in his handwriting and then wrote the saying that her mother asked me to write. It’ll be a tear jerker for sure when they it.
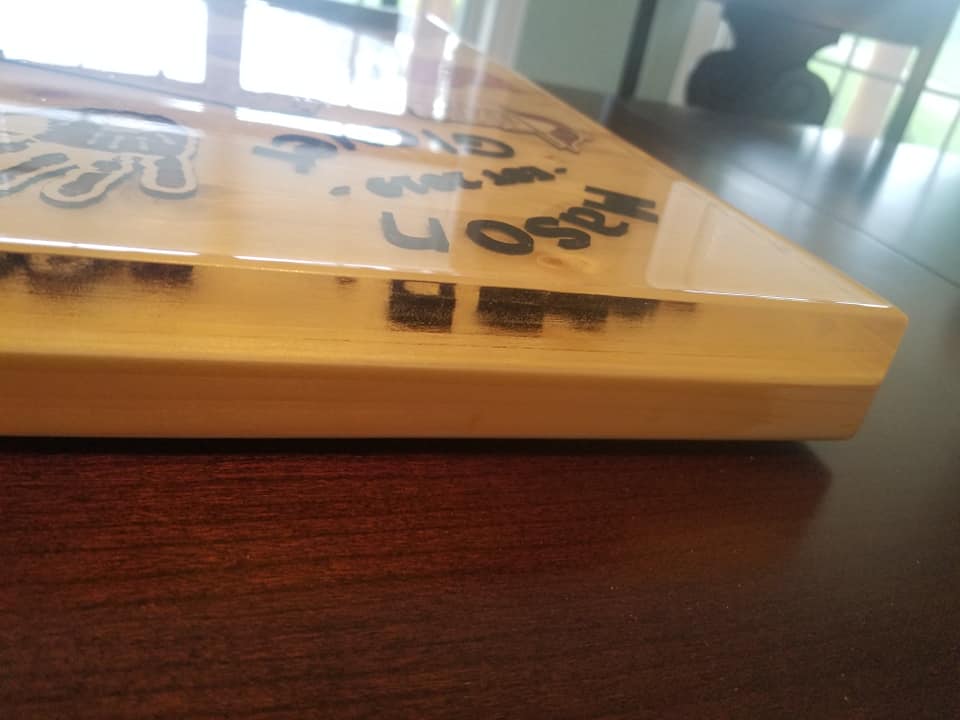
The resin is 3/4" total. I poured it in 8 stages and wish I would have done 2 more but didn’t want to buy more resin.
This was my first attempt and learned quite a bit. The heat gun works wonders for popping bubbles and I learned too late that deeper bubbles can be popped bu pocking with a toothpick as long as the resit is still liquid. I tried on a test piece to heat it up with the heat gun thinking that the heat would transfer through and force the bubble up but it ended up creating more tiny bubbles instead.
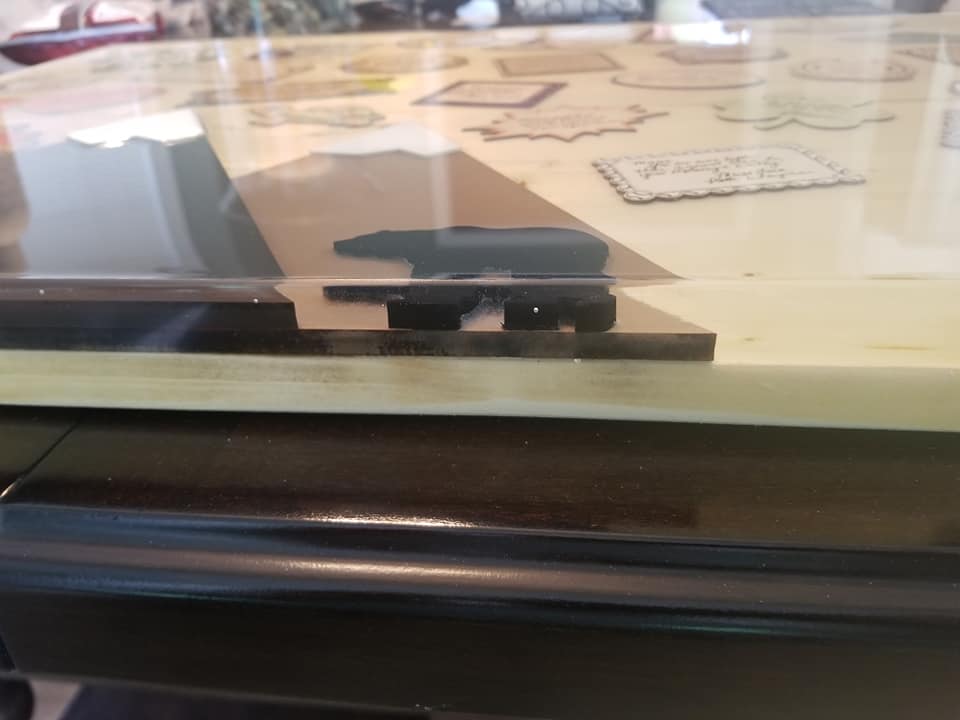
The edge still needs cleaned up a bit. I just wet sanded sanded it with 320, 400, 800, 100 then 1500 and then cut it with Meguiar’s #10 Clear Plastic Polish and buffed with #17 Clear Plastic Cleaner. I could have spent more time on the sides but was happy enough with the results
I used the foamboard from Hobby Lobby as the dam or form around the piece. I used aluminum foil tape to hold it together and attach it to the underside of the wood. Hindsight, I should have done more research as the foam board stuck to the epoxy and I had to scrape it off then sand it the rest of the way. I watched a video where someone just used the aluminum foil tape as the dam but I wanted smooth, straight edges so I didn’t have to run it through the table saw afterwards. I still don’t know the correct solution but will try something different next time.
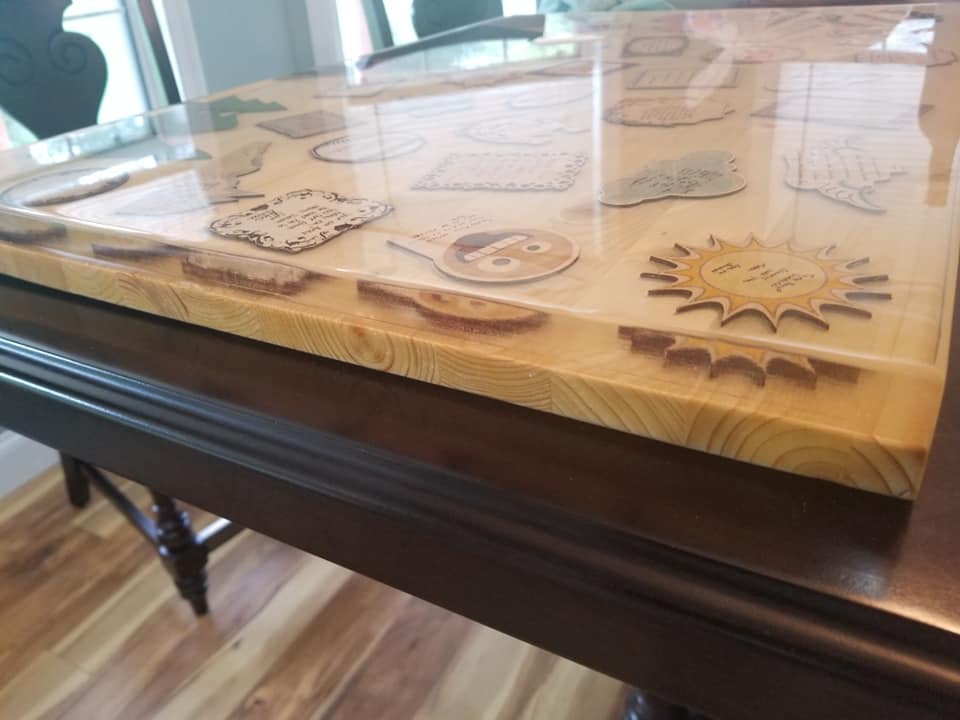
The best advise I can give is to make sure that the epoxy is well mixed prior to pouring. I have one layer that is different than the others, which can be seen in a couple of the images, I think. I think I rushed that mixture because there are some swirls in the finished product if you look really close but they’re deep and pretty transparent.
Other than that, it was really easy to do. Just take your time. I used an epoxy calculator for the first pour and then upped it a little from there mixing 12 oz of resin and 12 oz of hardener for each pour. The entire picture is 30x20.
Use a heat gun to pop the bubbles and the squeegee that comes with the MAS to drag the epoxy over every nook and cranny. I poured and immediately hit it with a heat gun then set a timer for 15 minutes to use the heat gun again, doing it 3 times total. The very first step was to mix up some epoxy and coat all edged to create a seal because the bubbles come from the woods open pores so the first thing I did was use a foam brush and paint the floor and all edges of the medallions, let it dry for a few hours and then poured the first “flood” coat, they call it.
It was nerve racking at first because I already had close to 40 hours into the project scanning everyone’s handwriting and then putting them on the medallions but after the first flood coat, my nerves calmed a bit.
I would suggest doing a small test piece first so you get a feel for how the process works.
Thank you! It weighs about 20lbs, so I’m going to use a heavy duty wall hanger and make sure that it’s set in studs.
My first Grandson, so of course he’s going to be spoiled
Thank you. I just sanded then with a palm sander making one continuous pass, changing the angle a bit and making another pass until I made almost a 90° turn. I left it a little shy of 90° so I didn’t scuff the top. I contemplated sanding and buffing the top perfectly smooth but after cutting and buffing, I thought that it looked good enough. The main reason I didn’t was because the center mountain peak is about 1/16" higher than the rest of the project and didn’t want to take a chance in slipping with the sander and gouging it.
I was happy to find the MAS product on Amazon. It was about 1/2 of most other products but it does not have UV protection in it, which is probably why the cost is so much different
My first/last/only resin project I was way too lazy to wait so I poured the entire amount (pint?) on it and let it sit forever (a couple weeks?) until it was dry. It looked great but I know I was crazy lucky! That was only ~1/4" thick.