I kept seeing this game pop up online (The Grid Game), and thought it looked like fun…but I don’t really like their color combinations, so I decided to try making my own.
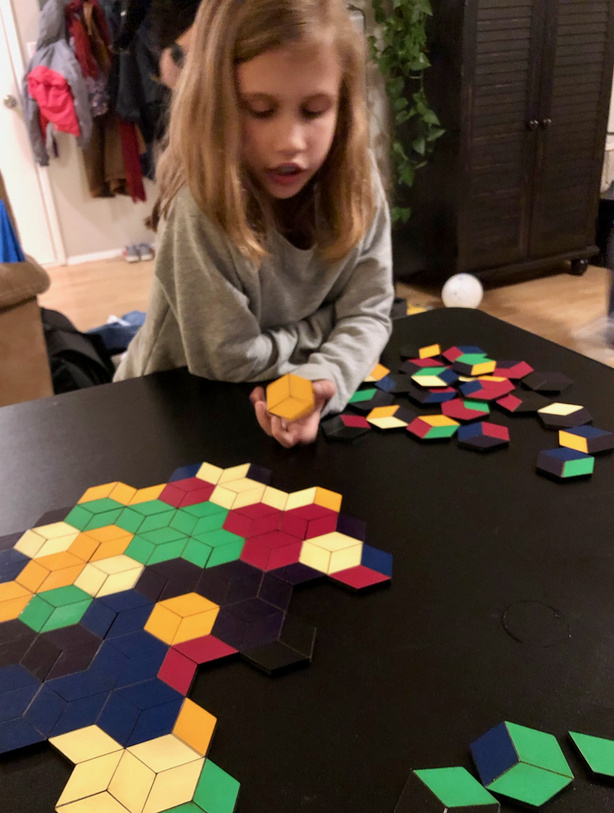
First iteration was cut from 1/4" (really more like 0.19") chalkboard from Home Depot, with the colors painted on the non-chalkboard side in acrylic with a couple of coats of polyurethane over that. Here’s my granddaughter looking for a spot to play in our inaugural game:
Problems with this build:
- Painting all those little diamonds took forever and it was really hard to keep the paint out of the score lines.
- I didn’t have great acrylic colors on hand, and didn’t really like the end result. Also, the purple came out so dark it was hard to tell from black.
- The pieces are flat, unlike the original game, in which the heights of the sides help to show in which orientation to play the pieces. It can be played with flat pieces, but it’s easy to get confused and put down a piece the wrong way.
- The blackboard isn’t thick enough for players to stand their pieces on edge if they want to keep them hidden from the other players.
So I started over. This time I decided to pre-paint Baltic birch and cut diamonds out of it, then glue them onto the chalkboard, since I like the heft and feel of it, and it saves me having to paint and finish the backs, and it makes the pieces thick enough to stand on edge. I bought some fun acrylic colors and used them, watered down, to “dye” some 1/8" BB:
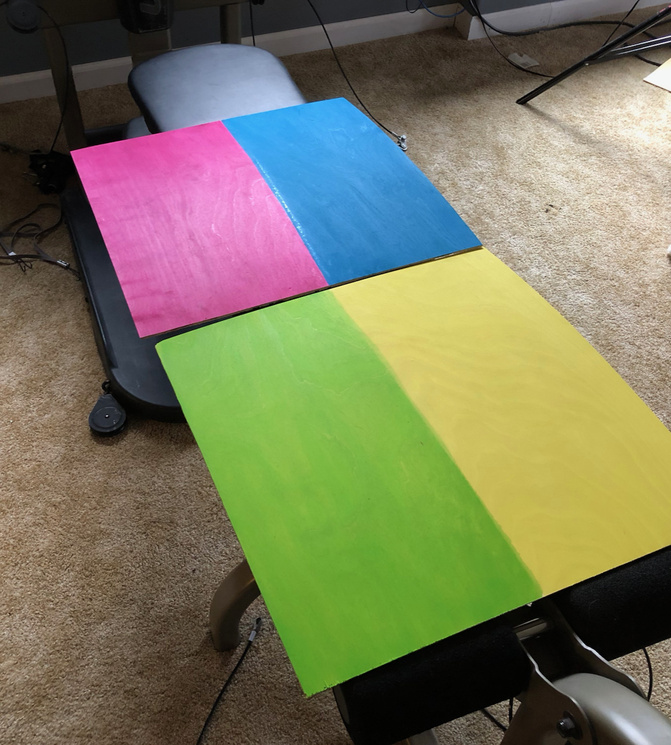
Why yes, I am using my Bowflex as a drying rack. Shush.
To make it easier to orient the flat pieces when playing, I put small diamonds in the outside corner of each larger diamond.
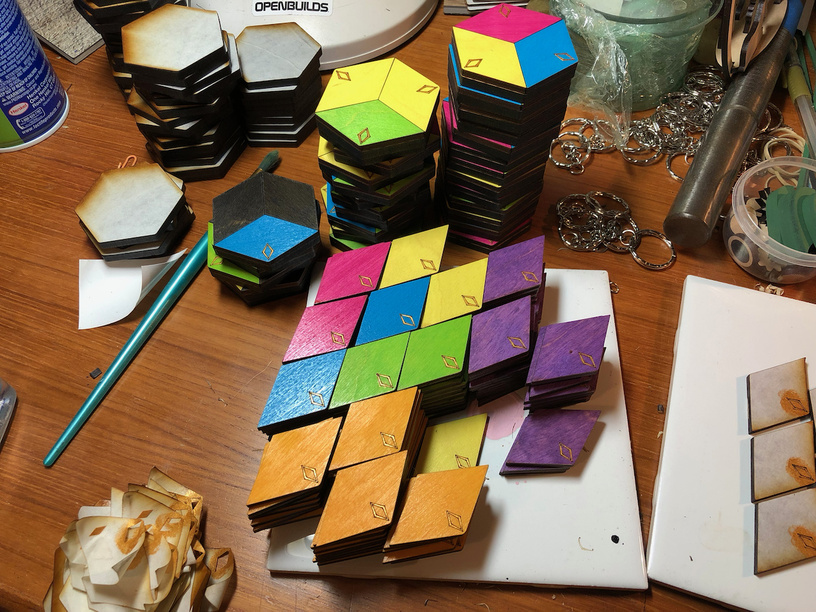
Players will be able to match up colors and diamonds to place their pieces, making the correct orientation more visually obvious.
It’s not done yet; I still have a lot of gluing and sanding and finishing to do. But I’m really happy with how it’s turning out, and thought I’d go ahead and share my files in case anyone else wants to try it.
First, the SVGs:


Directions:
You’ll need six colors of 1/8" material, plus black. Cut 40 diamonds of each of the six colors, and 24 of black. For the black ones, “ignore” the scored diamond markings, because you can’t play pieces on the black sides.
Cut 88 hex shapes from 1/4" material. Each of these will have 3 diamond shapes glued onto it.
I came up with sort of a “code” to determine what color combinations to put on the 88 pieces. To use it, assign each of your colors a number, with black being zero, like this:
0: Black
1: Pink
2: Blue
3: Green
4: Yellow
5: Orange
6: Purple
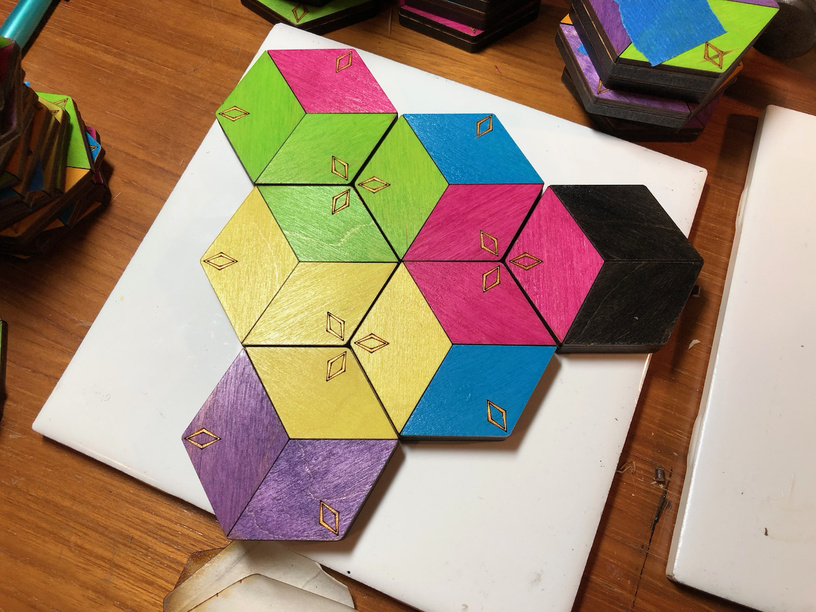
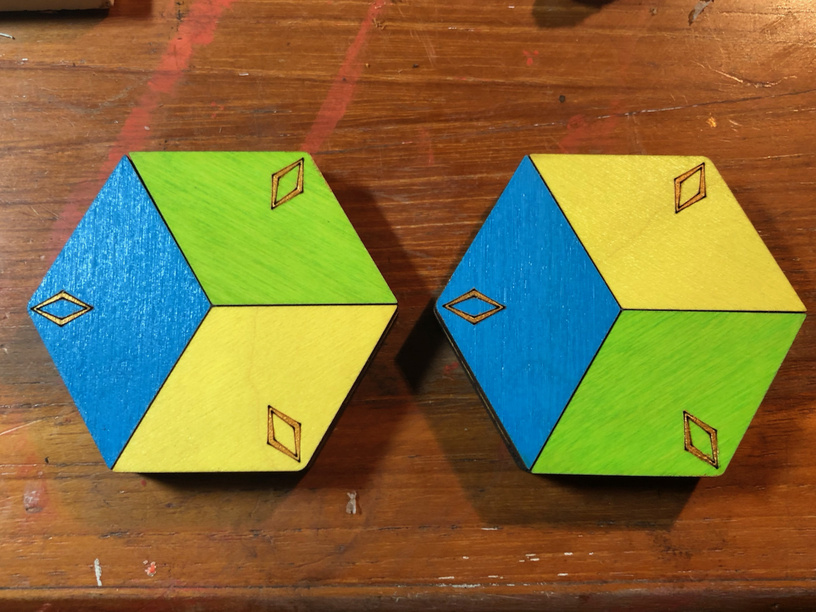
At the end of this post is the list of pieces you’ll make, using the numbers to represent colors, glued in clockwise order onto the hexes. Here’s a photo showing 234 and 243, by my color scheme - note they contain the same 3 colors, but in different orders:
And finally, here are the “codes” for the 88 individual playing pieces:
Make two each of these:
001, 002, 003, 004, 005, 006
And one each of the rest:
111, 112, 113, 114, 115, 116
122, 123, 124, 125, 126
132, 133, 134, 135, 136
142, 143, 144, 145, 146
152, 153, 154, 155, 156
162, 163, 164, 165, 166
222, 223, 224, 225, 226
233, 234, 235, 236
243, 244, 245, 246
253, 254, 255, 256
263, 264, 265, 266
333, 334, 335, 336
344, 345, 346
354, 355, 356
364, 365, 366
444, 445, 446
455, 456
465, 466
555, 556
566
666


 Thanks for the inspiration!