@areader154 here is how I made the dashed lines. It seems like a lot of steps but once you do it a few times it is no big deal. On really sharp curves it might not be great, but for geometric stuff it works pretty well. Bear in mind that I have an ancient version of Illustrator, so the menus and palettes may be different for you.
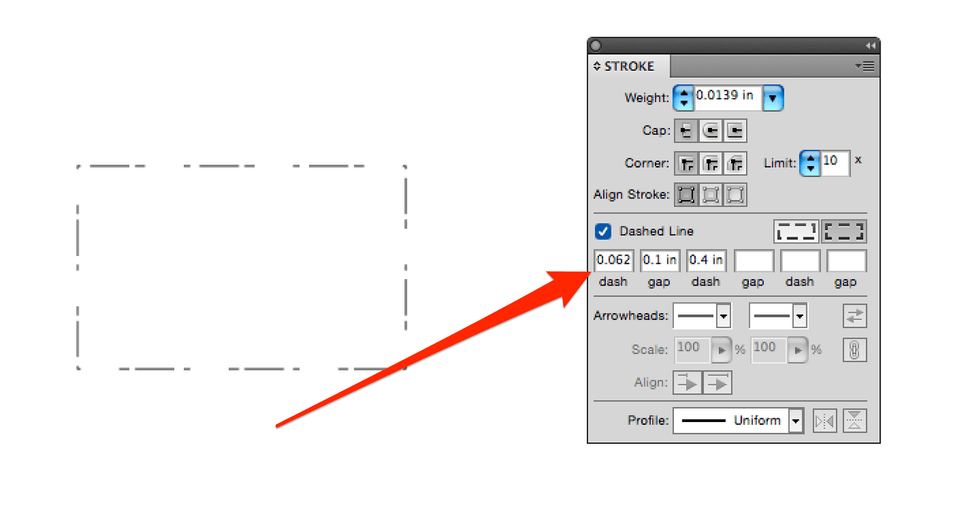
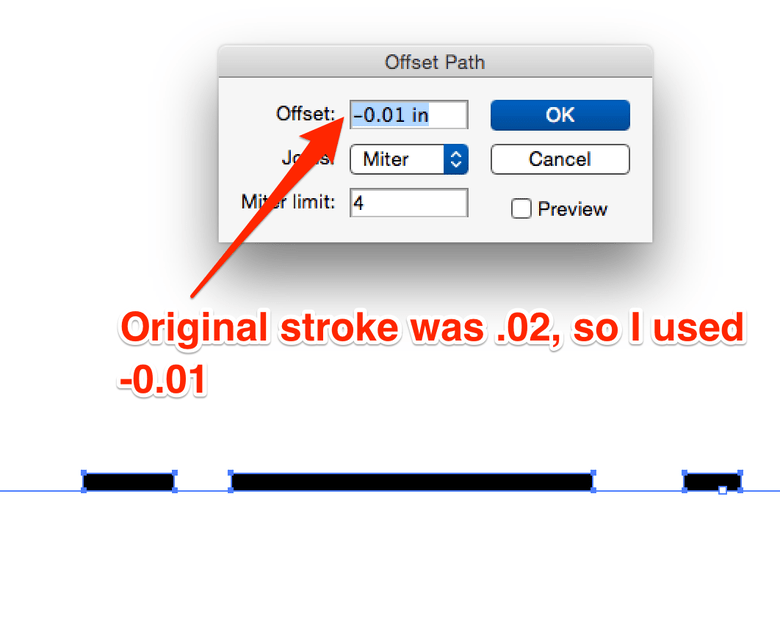
Step 1. Make your dashed lines the normal Illustrator way.
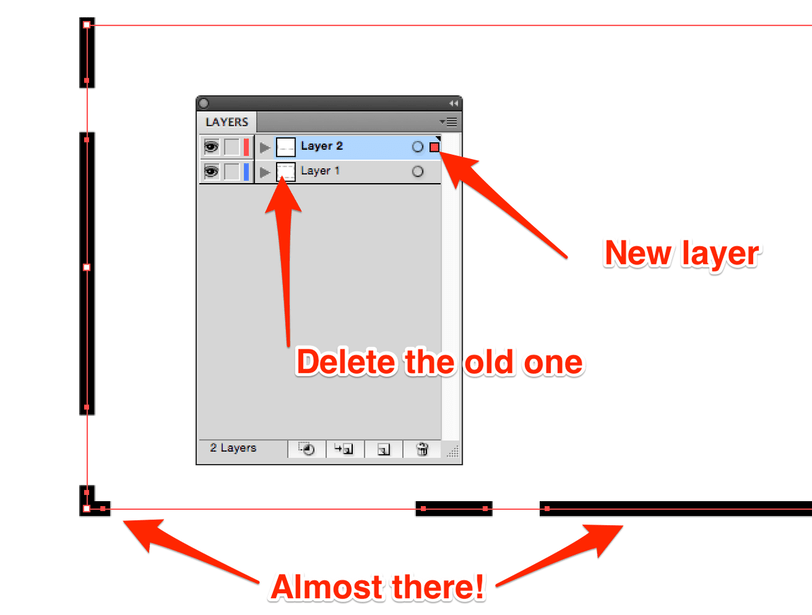
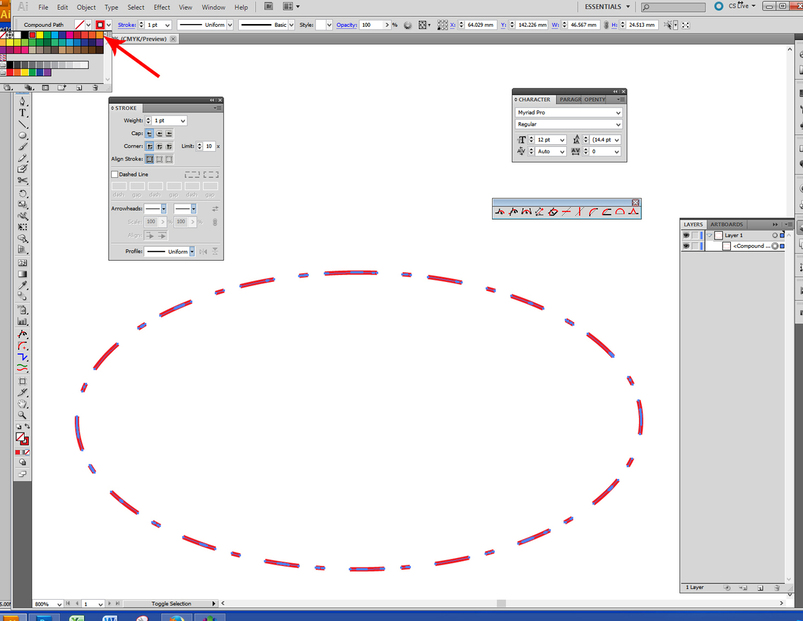
Step 4. Without deselecting anything make a new layer, move the new path to it, and delete the original layer (or keep it and do something else with it).
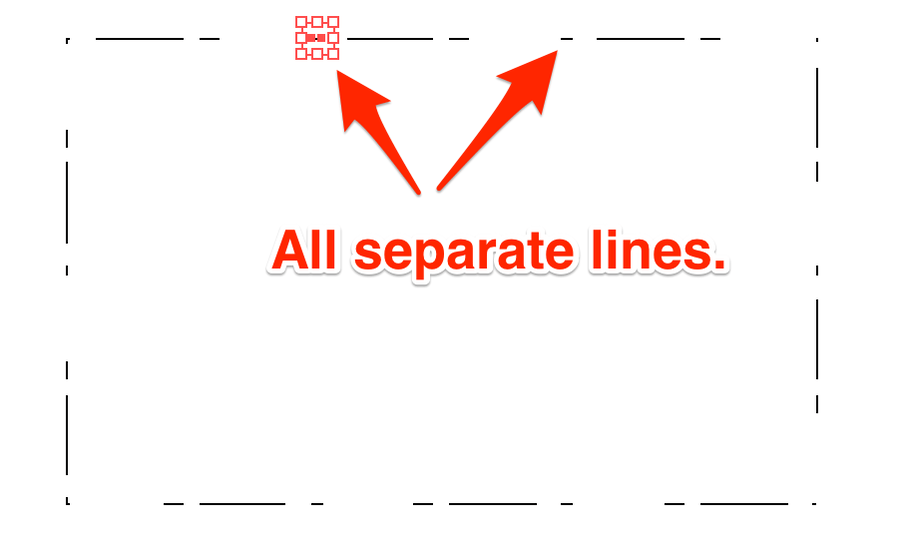
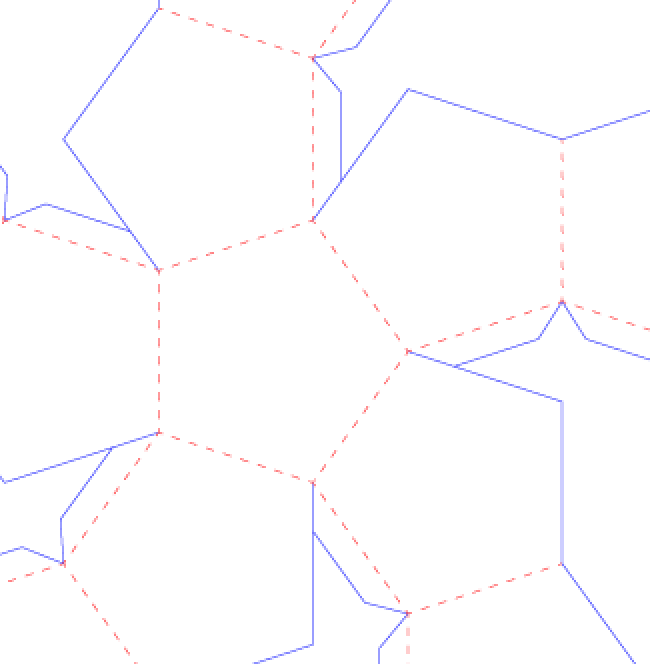
Step 5. Use the pathfinder and do outline (this will clean up a lot of duplicate lines). Now if you ungroup everything you should have a ton of individual lines!
I had to read this twice before I got what you are doing. Now I’ve got it. Brilliant! Only thing I didn’t understand is why the lines need to be ungrouped at the end.
Great write up!
You can do a lot of crazy cool things with a dashed line if you have AI CS5 or greater:
For instance:
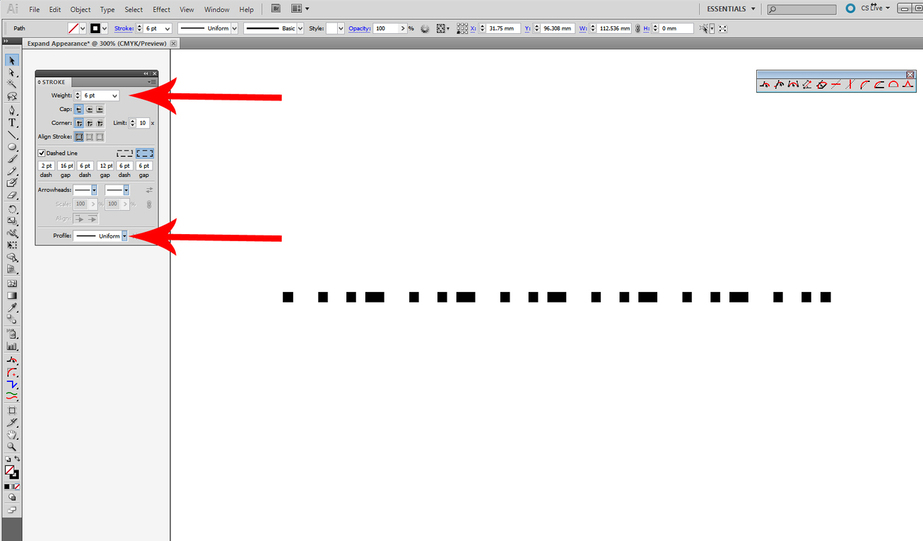
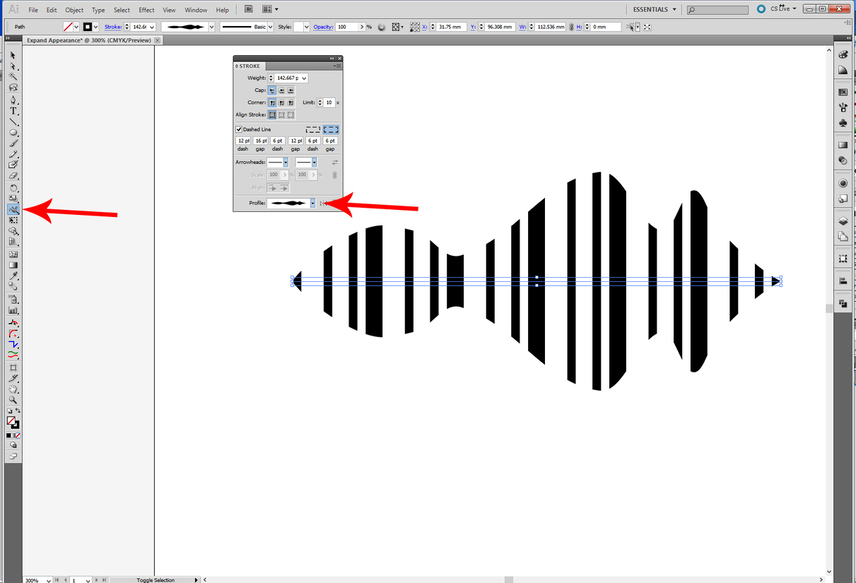
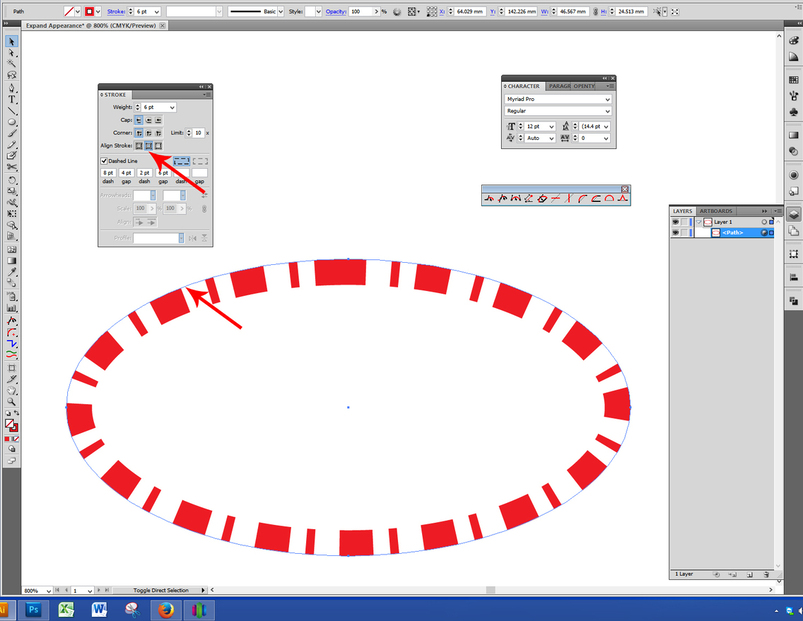
Here’s a dashed line - you can make it as thick as you want it to be just by varying the uniform line thickness at the top of the palette: (This one starts out 6 points wide.)
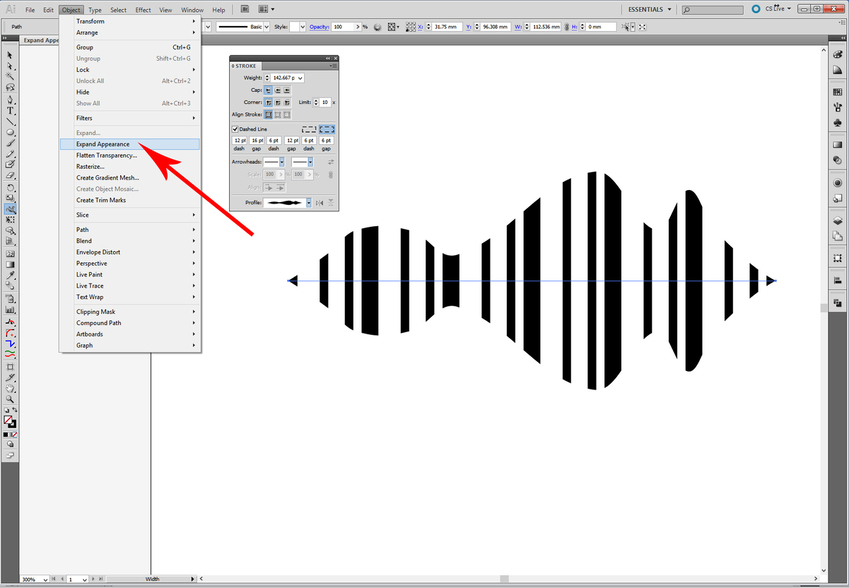
As long as you have not expanded the appearance, that shape can be adjusted, modified and tweaked. When you have it the way you want it, click on Object > Expand Appearance.
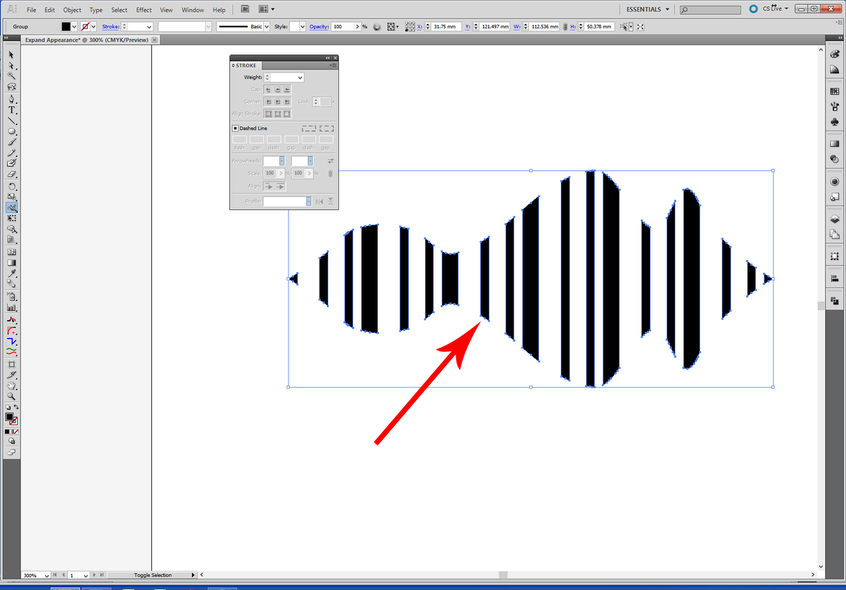
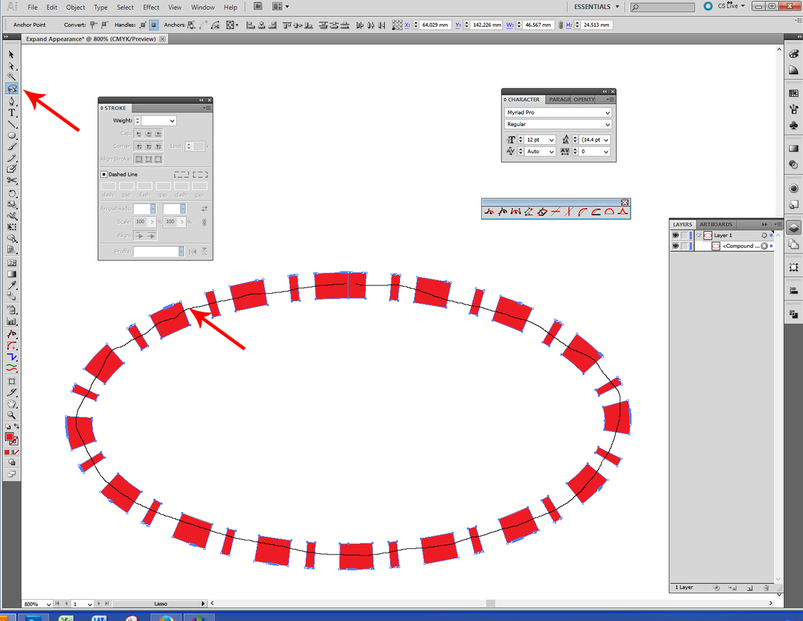
See the difference in the cut path after expanding appearance…formerly it was a straight line down the center of the shape. That is the vector portion of the line that you originally created. The Dots and Dashes were basically just a decorative shape that you would see in the viewer, but that would not necessarily be cut that way. When you Expand, or Expand Appearance in Illustrator, what you see is converted into the equivalent vectors.
There’s usually some ungrouping involved if you want to move one of the parts, but it’s an easy way to do some fun things. And you can scale it up or down with no loss of shape or quality.
My first vote is that Dan and crew get you an Adobe CC Subscription for your awesome service to the cause. These features change constantly and if you are to be helping “the people” you for sure want to be current on the software people will be using.
There is a MUCH easier way to do this in the current version of Illustrator. Make your dashed line box, Go to Object>Expand (fills and strokes or just stroke in this case is needed) and that is it. If you need them in pieces just ungroup and then release compound path.
I see that other people gave you this advice now, but I still say they should get you a subscription for the year as a thank you!
@Jules, @rubbersoul79 Thanks for the info on newer versions, but I am not sure we are saying the same thing.
So the key thing I was trying to do was to have the end result to be a single centerline stroke!
The version of Illustrator I have does just fine turning dashed lines into filled solids, but that means the laser wants to cut all the way around the outline.
I tried it on the newer (but still old) version my wife has, but it is just expanding or outlining the path as a fill, and that does not help.
Can the newer versions turn a dashed line into a set of single strokes without all the extra steps?
That alone would be worth the price of the creative cloud thing.
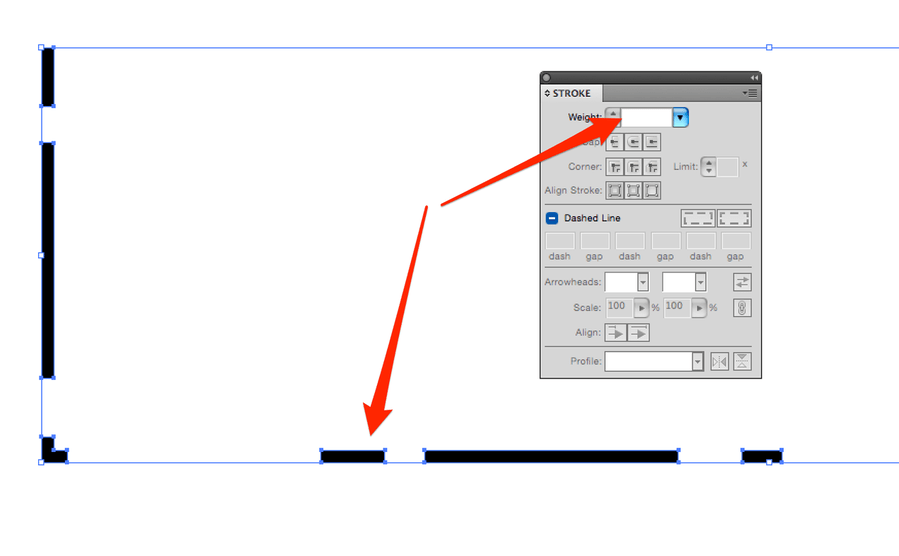
No, it doesn’t, you’re correct - the Expand function doesn’t create single line strokes. It creates teeny tiny little stroke sized rectangles.
Sometimes the cutting/lasering software treats a dashed line as dashed when it is cutting though, so it might not be necessary to do anything further beyond telling the line to cut dashed. (And sometimes it doesn’t…I’ve seen cutting software treat how it cuts dashes based on line color, not what the software sees. I’ve also seen some that had to be specified individually inside the cutting software.) It’s going to depend on how the software is written.
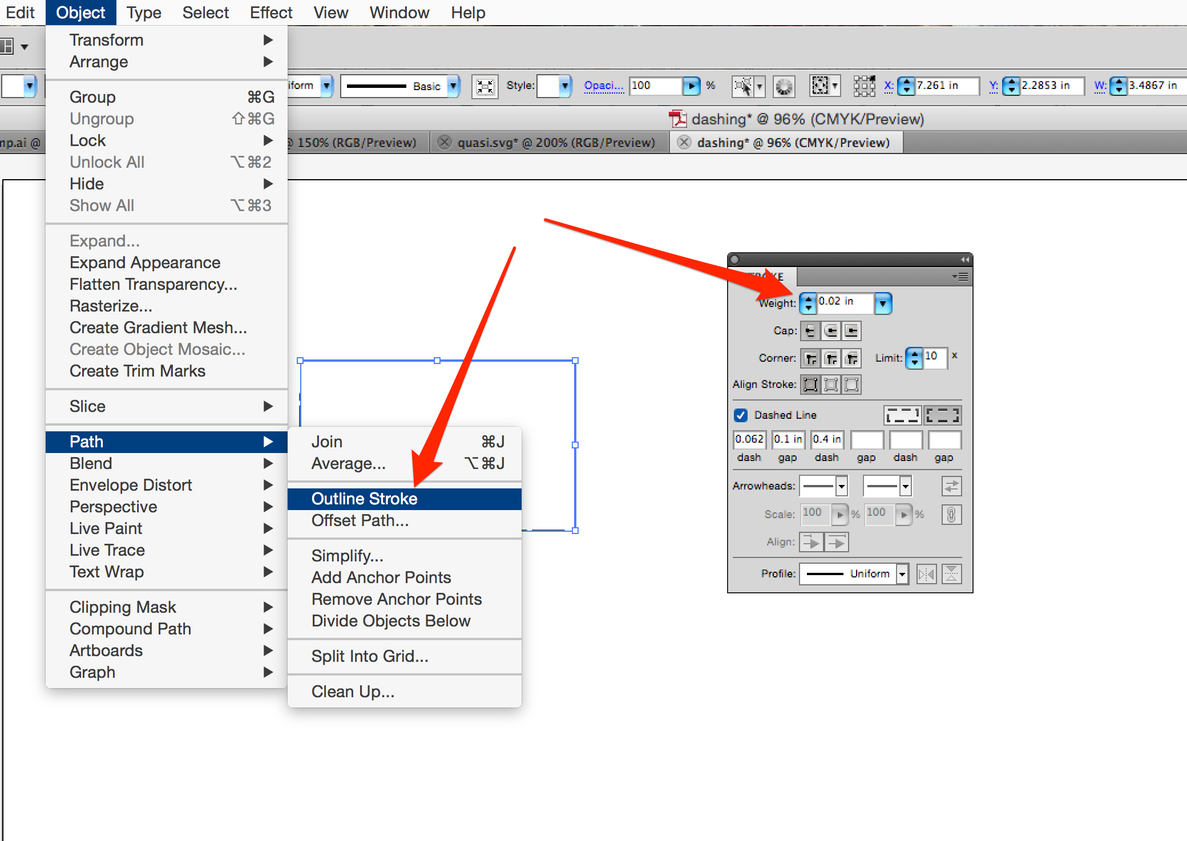
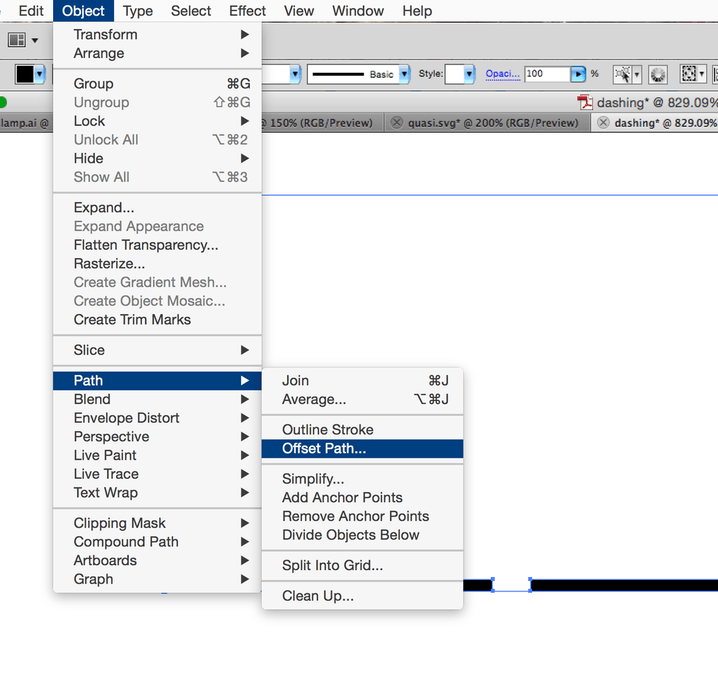
Personally I’d expand the dashed lines (to rectangles), direct-select (shortcut: A) the lower half of the rectangles, and delete them, which would leave you with the strokes comprising the top half. You’d then move them down by 1/2 the stroke width. This only works for straight lines, though.
I believe you can do something with pattern brush & symbols, then expand the symbols, too.
(Update: If you have a closed shape it works even better - you can specify that the stroke fall on the inside of the shape, make the rectangles as thick as you like to make them easier to grab, and you don’t have to move the dashed lines when you’re done.)
Played with it some more and discovered something interesting, but it only works on straight horizontal or vertical lines.
After you have created the dashes and expanded them into the little rectangles, (using either Expand or Outline Stroke) you can select them and just set the height (or width) to zero in the Transform Palette, and it turns them into pure strokes, centered exactly where you need it centered.
So that eliminates a few of the steps.
But zeroing the height/width is not going to work for your dodecahedron…
For that…your method works great, and it’s now been officially incorporated into my “Toolbox of Tricks”. (All other methods are more work.) …
I went there too. I even tried rotating the entire drawing over and over so each line was horizontal or vertical. That was a big pain.
I went through many iterations of “what if I do this and then that” before I hit upon a fairly easy and reliable one. I am sure there are other better ways, but having found one I stopped looking.