My head is now grinding in the upper left corner every few seconds when I turn on the machine. It has not been touched since a successful print when I printed some test files to try and calibrate earlier today, but they were way off. The video I took is too big to upload.
I got it to wake up again by gently moving the head under the camera. Now it’s not showing me any bed image and my art work is disappearing. This is an utter and complete circus.
Had the idea to restart the machine in advance of support telling me to restart the machine.
Now it’s back in the upper left corner grinding again. Come on, this isn’t the product you are selling.
If it’s doing that, it basically doesn’t know where the head is. Have you tried cleaning the lid camera? Do you have material in the bed with a bunch of holes?
It’s a perfect new proofgrade sheet, inserted with the label in the way that my camera can recognize. The grinding is happening when I turn it on. I’ll clean the camera in a bit, I had to walk away. Too frustrated.
I went ahead and put stick-on tabs so I know where the gantry and head need to be under the camera. It’s my habit to just position it there before I power it up, just to save the initial hide-and-seek of that dance.
OK, after the laser room cools down a bit I’ll try again. I have a checklist to run through from support too. Today I’ve hit issues in both the hardware and the software. Better luck tonight maybe. I would still appreciate an answer from Support.
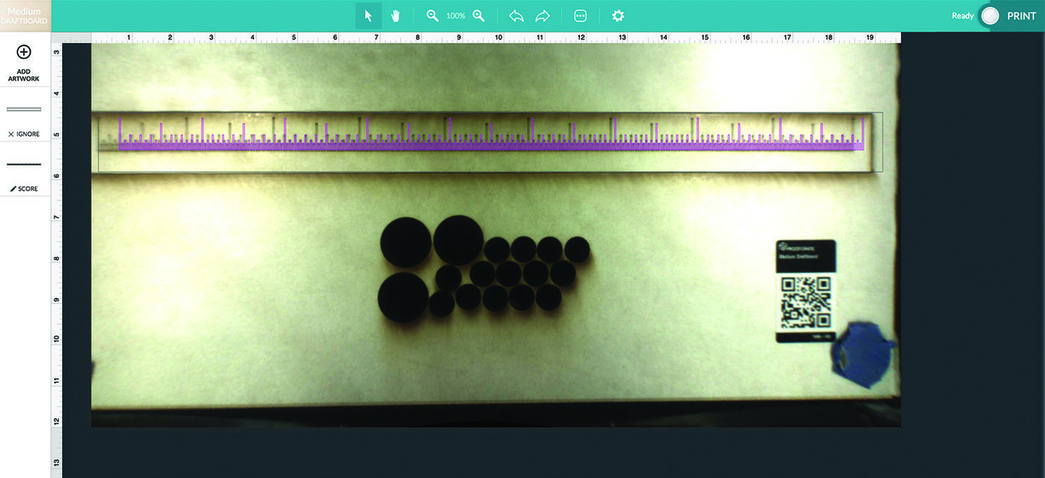
Laser is cooled down, great. I printed a few things, they’re pretty far off. Interestingly the bed image is far better aligned before it autodetects Proofgrade Draftboard. I have a couple photos to upload, but for now I’m going to just leave you with this, because this day is indeed ridiculous.
And here you see the whole thing and how it far it is off on the right side and the left. This is a scrap draftboard piece, but it has issue with a brand new one. I am happy to test on a different new draftboard piece, in another browser (this is Mac, Chrome), on another operating system, whatever, let me know.
(and before you ask, I restarted the app. I still only get Avengers instead of Gift of Good Measure). I am pretty certain I didn’t accidentally save over the GoGM, but if someone can restore it I’d appreciate it.
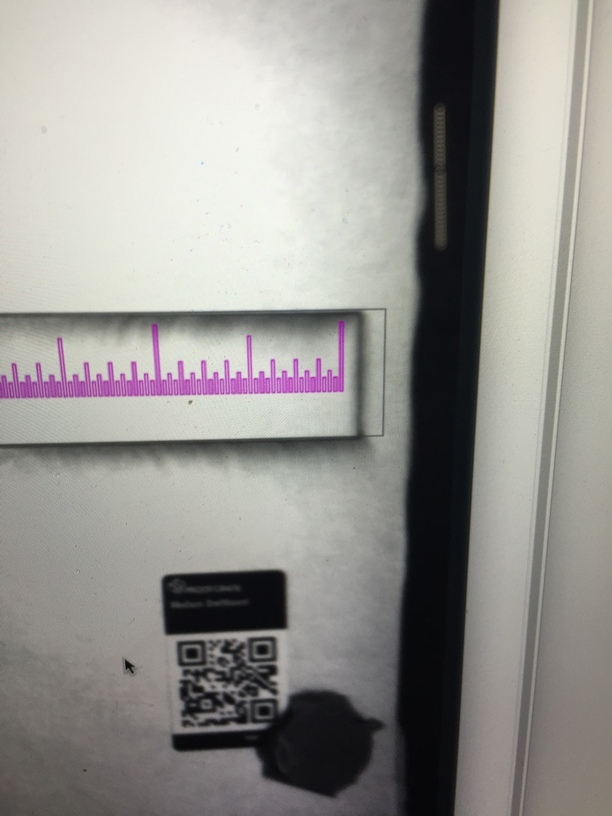
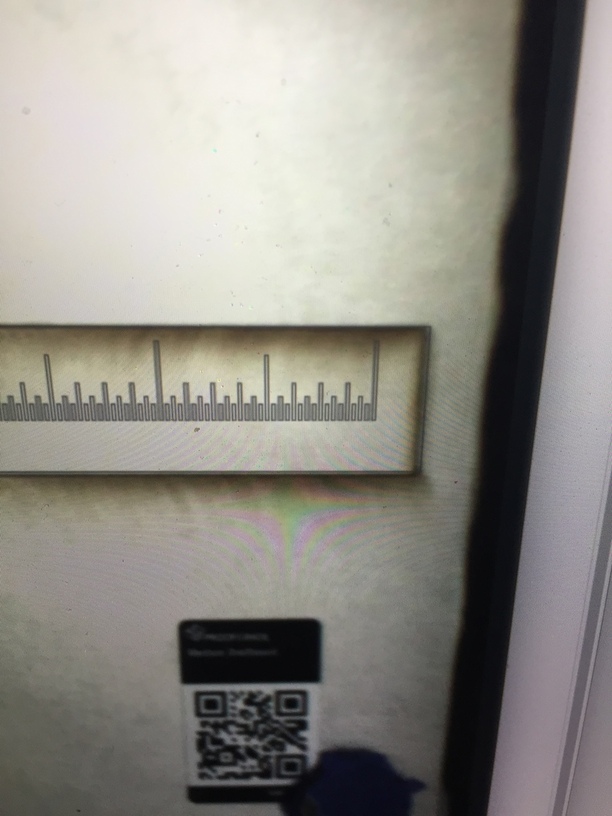
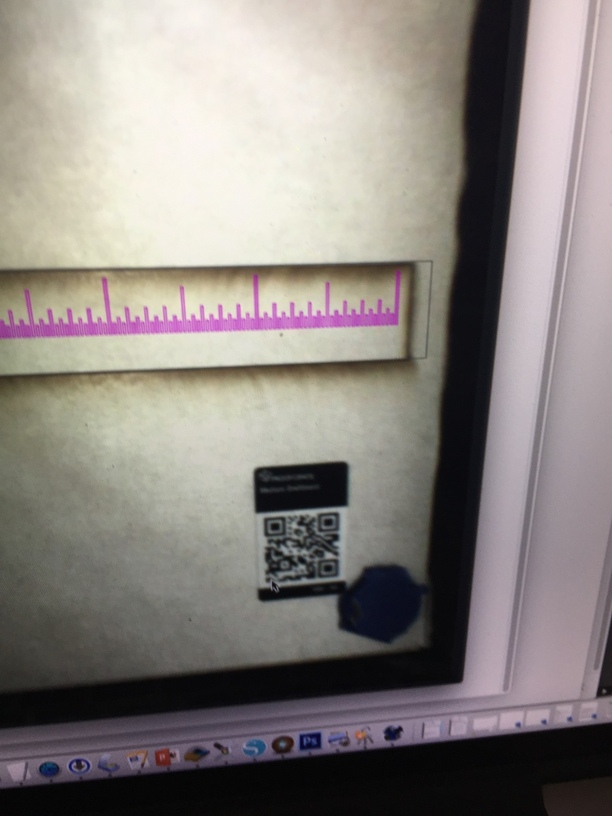
Thanks - it has the shape of the ruler but is just a dark black fill. Looks different than it did the last time I printed, but today is Nothing Is Easy day. I’ll try printing it tomorrow.
Thanks for letting us know about this, and I’m so sorry for the trouble.
I’ve extracted the logs from your Glowforge to investigate this issues you’ve reported, and I noticed that the head grinding occurred twice on 7/26, but has not happened since. Is this correct?
There are some troubleshooting steps I’d like you to try regarding alignment. First, though, could you please let me know if you’re still seeing the Gift of Good Measure load in as all black? This is something we’re seeing too, and we’re looking into it now. In the meantime, could you please refresh the page in your browser and let me know if the Gift of Good Measure appears correctly after doing so? Thank you.
Once you can successfully prepare the Gift of Good Measure to print, could you please do the following?
Turn off your Glowforge.
Check for small pieces of debris or dust.
Check the lower door to make sure it closes all the way. It may require some force to open, but open it, wipe any dust off the edges, and close it all the way.
Remove the tray and clean any dust or debris from the surface underneath. Pay careful attention to remove all debris from the four dimples where the tray rests.
Check the lid to make sure it closes all the way. Small particles of material, such as dust or debris, can prevent it from closing completely.
Check the surface your Glowforge is on to make sure it’s flat. Ensure it is not twisted slightly and that there is no debris propping up one side of the machine.
Turn your Glowforge back on.
We included an extra piece of Proofgrade Draftboard with your materials shipment for troubleshooting. Place the Proofgrade Draftboard in the center of the bed and print the Gift of Good Measure using the default settings.
When the print finishes, leave the lid closed and wait until the fans stop and the picture updates. Without moving your artwork or your material, take a screenshot of the Workspace to show us the difference between the artwork placement and the actual print placement. Make sure to include the rulers in your screenshot and show as much of the bed as possible.
Mac: Press Shift-Command-4 and click and drag a box around your image. You’ll find the screenshot file saved on your desktop.
Windows: Click on the Start Menu and type “snipping tool”. Open the Snipping Tool > New then click and drag a box around your image. Click the Save icon and name and save your file.
Send us the screenshot along with the date and time of the print, and we’ll investigate.