I use 1/2" and 3/4" cast acrylic often, but just for engraving. All of the cutting I do on a saw. I no longer have a band saw, but with the right blade you can get a fairly clean cut.
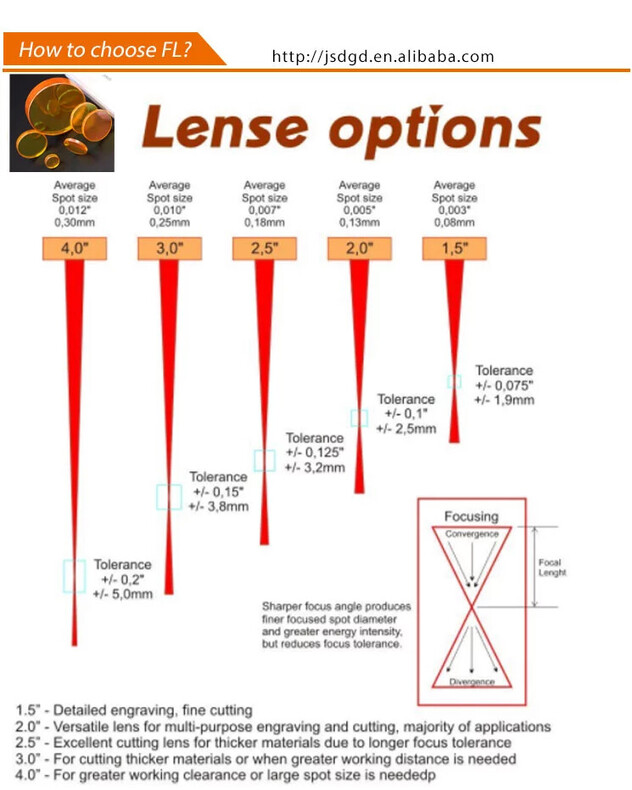
As to the slope being an issue. That’s not going to change based on the power of the laser. That’s down to the optics. You want a longer focal length to get less of a slope.
For engraving, the glowforge is great. It’s focal length is (if I remember what someone told me) 2". The longer the focal length, the less the angle is going to be, but there WILL be a bit of an angle no matter what you do.
7 Likes
and, if it’s not obvious, the longer the focal length, the more depth you need in the bed to accommodate.
1 Like
I’m not the acrylic expert, but it seems like the Glowforge may not be the best tool for this particular job. Maybe it’s time to go old-school.
2 Likes
Maybe but this does not work for our requirement. We cut several of complex shapes like heart, knight, etc.
1 Like
Yes you are right, we cut several of them every week already with pretty decent success. I will summarize what we do, so it might help others who are in the same page.
The thing is we need to set the laser power between 110 to 105 (or even lower) based on how long we have been cutting since the last time we followed the Glowforge lens cleaning procedure. After the procedure, we start with 110 x 2 pass and gradually decrease the power (109, 108 … to 105 or lower) every few weeks. I think this is needed because of the dust accumulating in the laser head. You need to find the magic number that works for your material. We cut a few 1 inch circles to find this number, and stick with it for several weeks.
Another thing we did to reduce the burn marks is replacing the masking sheet with the one from JPPlus (link here). This masking sheet is great and has significantly reduced the burn marks at the bottom surface. It has changed from roughly 30% of burn marks at the bottom surface to <1mm at the edges. The 1/2 inch acrylic sheets that we purchase (multiple sources) pretty much all come with a brown paper mask that causes a lot of fire and leaves burn marks at the bottom surface causing lot of material wastage.
Question on the “pin beds”… I doubt whether this approach will work for 0.5 inch materials? The max material height supported by Glowforge on honeycomb tray is 0.5 inch. So there is no room to increase the height further with any kind of pin beds right? Please correct me if I’m wrong.
1 Like
You are correct that you can’t put anything on the honeycomb if you are cutting .5" acrylic. However, you can remove the honeycomb and elevate the acrylic on something else.
1 Like
I am not meaning this in a rude way at all, but I could need a screwdriver and only have a hammer. It doesn’t mean I can make the hammer work as a screwdriver.
You would take the honeycomb tray out and use alternate supports. Blocks, painters triangles, pin bed blocks, anything really since your aiming not to have the laser hit them.
Thanks for your helpful process details!!
2 Likes
Thanks for the suggestion, but that’s actually a lot of work for volume cuts. Also additional investment for a saw cut / CNC machine for Glowforge owners.
1 Like
i have a super cheapo poor man’s pin bed that i use for painting. it’s just a 3/4" board, about 18x24 (some scrap i had leftover) with a bunch of 2.125" finish nails through it. i just drew a 1" square grid on it and popped a nail through all the intersections.
sadly, it wouldn’t work for this because it’s not perfectly even (those finish nails in a nail gun are notoriously not perfectly straight). i’ve done some straightening with pliers, but not perfect for this.
that said, you could probably do the same and predrill holes and put screws through for a quick and dirty bed that was a lot straighter.
1 Like
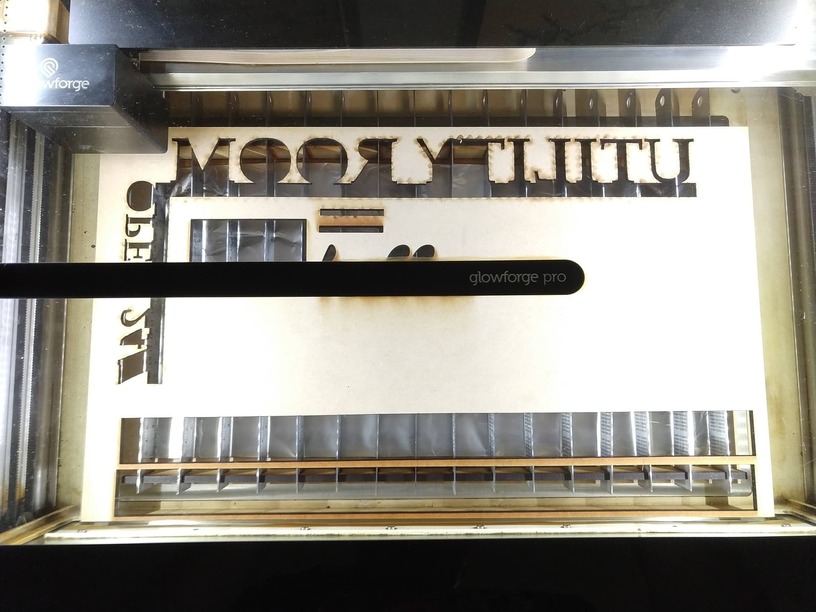
I also made an alternative crumb tray, a DIY knife table or blade table, using two 8-packs of metal rulers from Amazon. $26 total cost. Same idea, hoping to reduce flashback. The rulers are sitting in grooves laser-cut an inch apart in some scrap MDF.
This is the only picture I could quickly find going through my Google Photos.
5 Likes
What a great build!
This is great! Question… what should be the ideal material all the way at the bottom? A wood/MDF board will catch fire right? What is the ideal type of metal that can tolerate the laser power at (105 speed). Also I think it should not be too reflective either so the laser head is not damaged.
On mine, it’s MDF, but with a sheet of aluminum foil between the MDF and the rulers. The laser beam won’t penetrate the foil.
1 Like