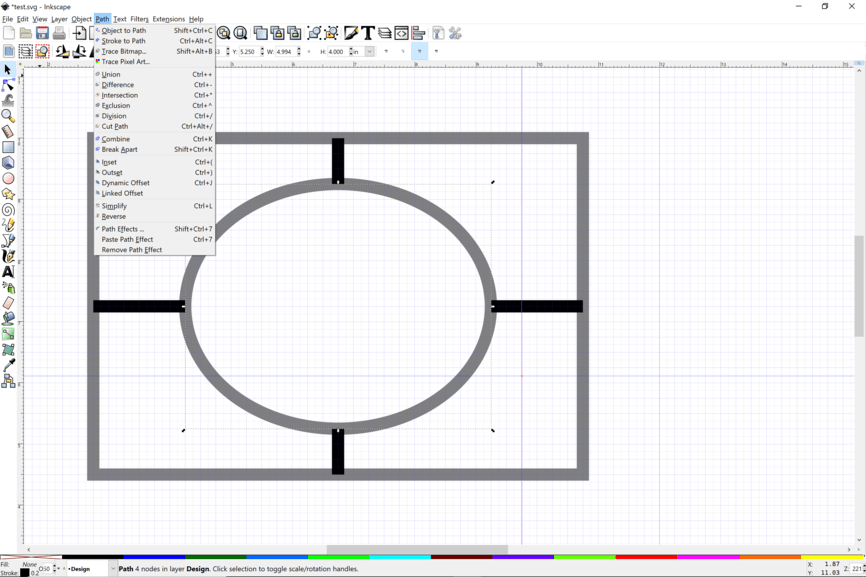
I’m getting adventurous so I want to try some acrylic stained glass. But, I’m having an issue with trying to figure out how to separate the pieces I want. So I have a grid, which I want to cut out of wood. And I want the inset pieces to be broken out so that I can cut them out of various colors of acrylic. I cannot for the life of me figure out how to accomplish this. Attached is a simple example of what I’m talking about. I’m using Inkscape, and I have tried combining, breaking apart, union and difference. Something worked along the way but the nodes got wonky and the lines were not straight after that. Can anyone tell me how to do this? Thanks so much in advance!!!
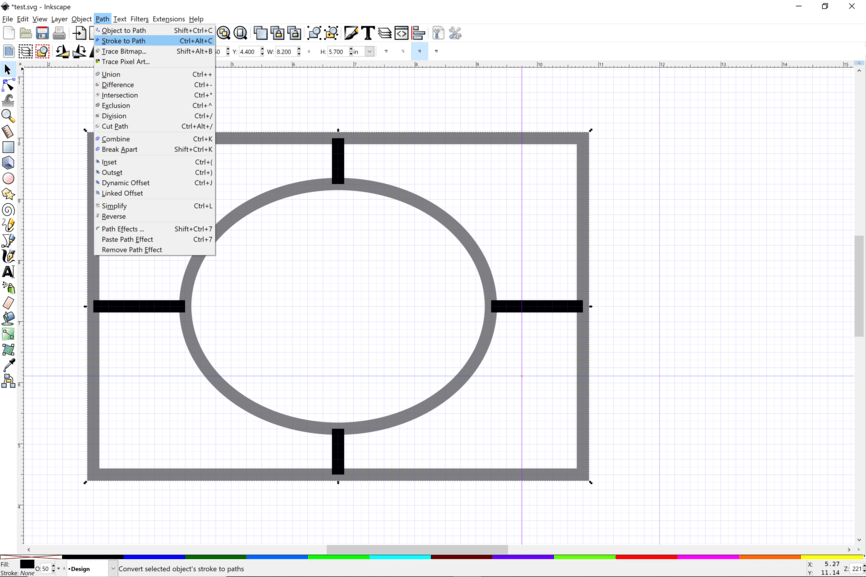
You need to create an inner piece for each part of the grid. I don’t know the term in Inkscape but in the program I use it would be a shadow layer. Also, when I imported it, there was a 12" x 20" box which would cut. Is that what you want?
That’s a lot more advanced than it seems, since there would probably be a need to do some kerf-adjusting on your design if you intend to inset the acrylic.
I can tell you how to create the separate sections, but I find it pretty clunky to do in Inkscape, and there are a couple of other folks around here who actually prefer using the program, so they might be a better source for the best way to do it.
If they don’t chime in with a better method I’ll check back. (It can be done.)
Thanks Jules! I’m not worried about kerf just yet, my plan was to follow your document on that after I get everything separated out and tested. I just can’t seem to break out the different shapes to do that, even though I somehow did it by accident yesterday. Like said the lines for the outline shape got bent somehow in the process so I think I skipped a step I didn’t know about.
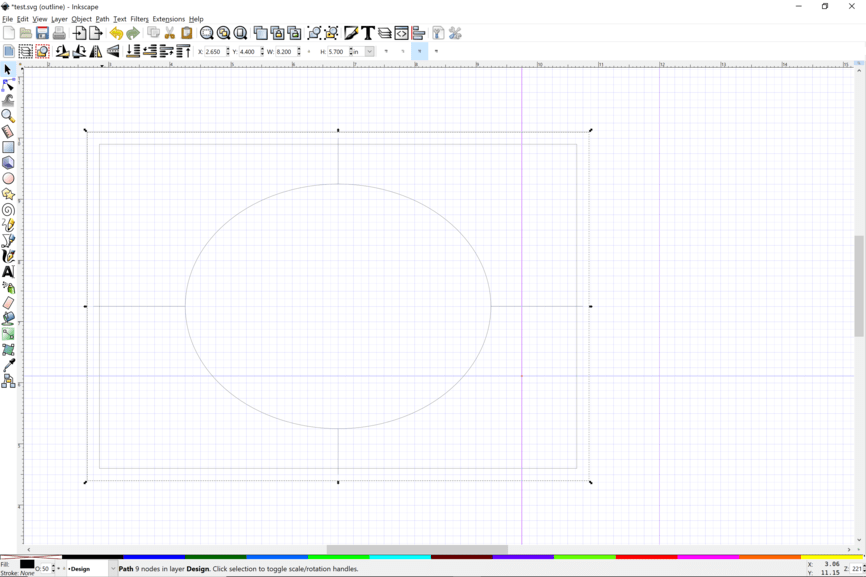
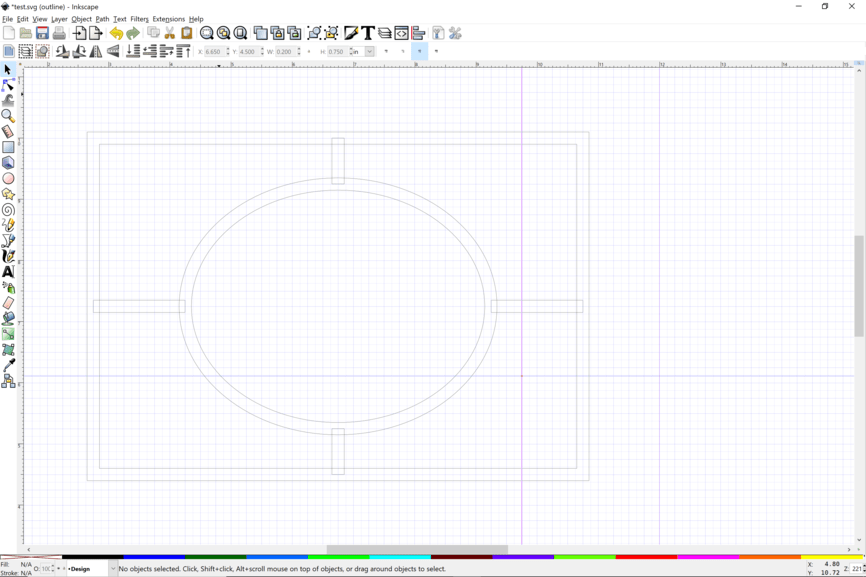
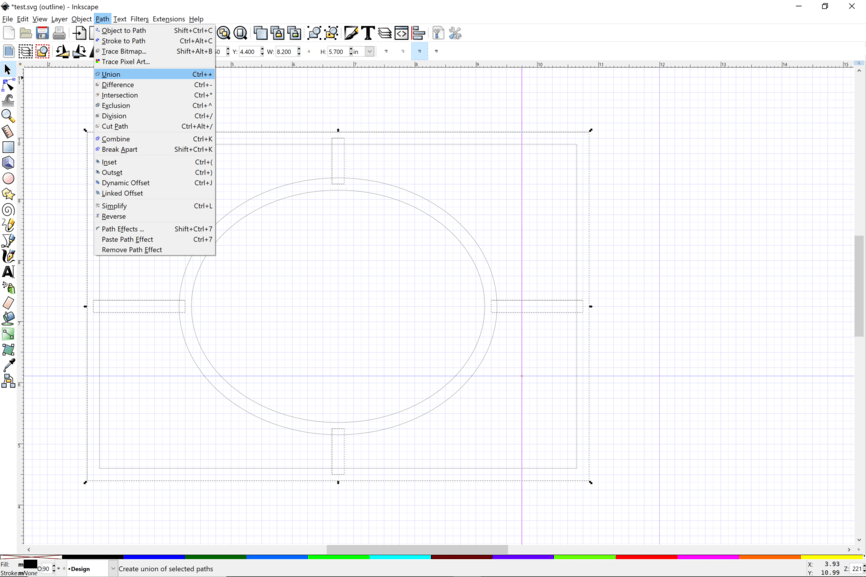
You can then break it apart as you wish. You could color different lines after breaking apart so you could print each separately.
There may be easier ways or this might not be what you would like, but it’s one way.
Right click on this SVG to download.
This would be the way to adjust for kerf too, although I am not going to go into that since everyone does it different. Just remember that your original stroke width will define how wide those parallel lines are.
Thank you, that is exactly what I needed, and I was so close to getting it. Tell me, what is the difference between “combine” and “union”? I was also getting thrown off by weird fill it put in every time I did one of those, and I didn’t even know about outline mode, so that is very helpful!
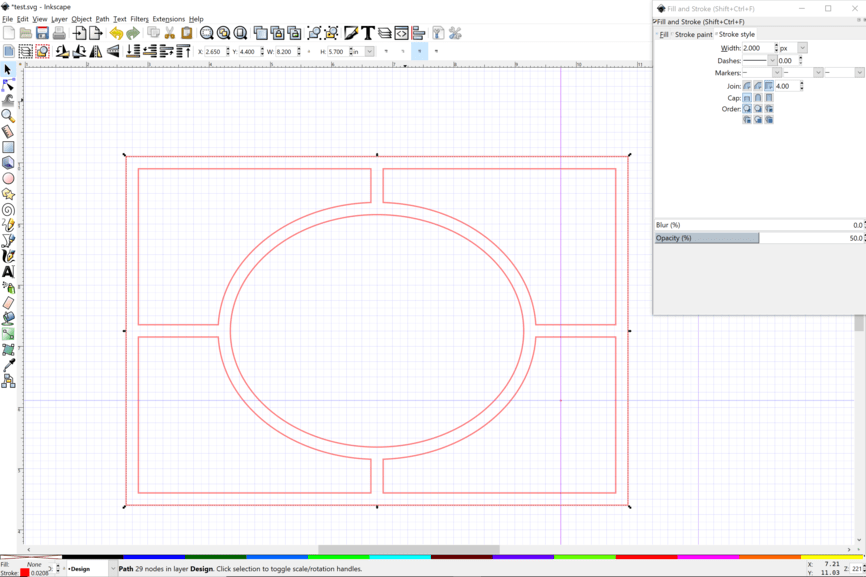
Yes, thank you! That is what I was trying to do. On to kerf adjusting now! Thanks to the tutorial documents, I’m hoping that will be pretty straightforward.
Union is a boolean operation and combine is not. If it takes a few years to wrap your mind around geometric boolean operations you are not alone. Be warned simplifications abound in the following, but based on the question I think it is a good place to start.
Union takes two shapes and combines them into one shape. Combine takes two shapes and treats them as a single shape while retaining the two shapes. Group, under the object menu, takes two shapes and makes sure they are all moved around at once. So, when do you use them?
You use Union when you want to make a single shape. If you take two squares you can make a complex shape by unioning them. If you combine them, the glowforge will cut the insides and outsides of the shape. Union just gives you the outside.
So why use Combine? When you use the Edit Paths by Node tool in Inkscape it will only work on one shape at a time. If you combine two shapes you use that tool to manually edit nodes, and combine them, with that tool.
So what about Group? Group is very useful for organizing. The more stuff in your file, the more it needs organizing. It is very easy to grab twenty objects and move them, but ooops, you didn’t grab the twenty-first object and now everything is RUINED!!! Edit-Undo, Edit-Undo, Edit-Undo…
To me the biggest difference between Group and Combine is with Group you can have a black square, a blue circle and a green star. Combine also combines colors into one. As colors are important for ordering cut operations in the GFUI, Group is important.
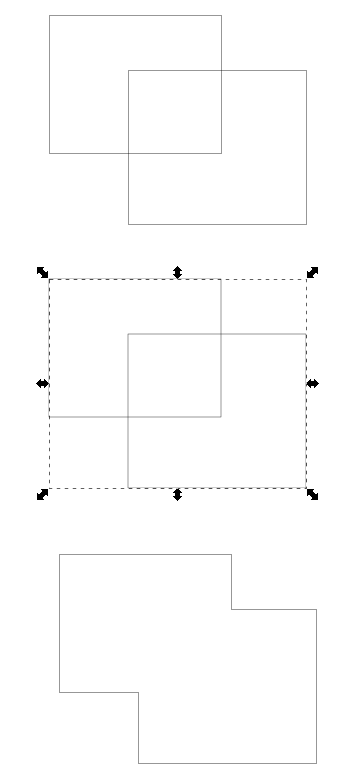
In the illustration below, the top two squares are independent. You can grab each one separately. The middle two squares are Combined and are treated as one (as seen by the dotted lines). The bottom two squares were unioned and are now one object.
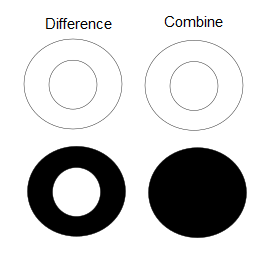
Since I’m here, I’ll mention Difference, another Boolean operation. If you take a large circle and a small circle you have a ring. Whether you Difference them, Combine them or just leave them alone, the glowforge will cut you a ring. If you go to the Fill operation, you can see the difference between Difference and Combine:
What you needed to do there was create the rectangle and the shape you wanted removed from it. Then you make sure in the “align and distribute objects” tool box under “align” you have “Last selected”. Then with the parts aligned the way you want them select the part you want removed and while holding “shift” also select the rectangle. Then choose “path, difference”. Easy peazy.
Small detail, this isn’t entirely true. You can shift click on many paths at once to select them and edit their nodes at the same time, regardless of their scope, so it can ignore groupings. This can be very useful in specific situations – if you’re like “why?!” then you just haven’t hit that particular roadblock yet.
Also a minor point, but “last selected” is how I prefer things, but the why is important here. You must know what order you’re intending to select the things to align before you pick how you want it to align. I leave it on last selected, and have gotten used to selecting the “anchor” component last. The other alignment modes are also useful, but it is situational, so just fiddle with it until you understand the way it all works. For example, if you click-drag select a bunch of items, the “last selected” is determined by z-order (aka “what’s on top or bottom”).
Just a quick note, this documentation is excellent but partially out of date. The section about rows and columns has been updated, it’s now referring to the “Object->alignment” dialog.