Cut the board in the center at the thin spots on the diagonal. It won’t waste material and you can shift the print area closer to the middle of the GF. Also double check the thickness of the material and makes sure it is set in the GFUI.
it was pg cherry ply, and that is what is set I shouldn’t have to manually set the thickness for it
took everything out cleaned all the lens’s and cameras and feet and tray etc…
tried again,
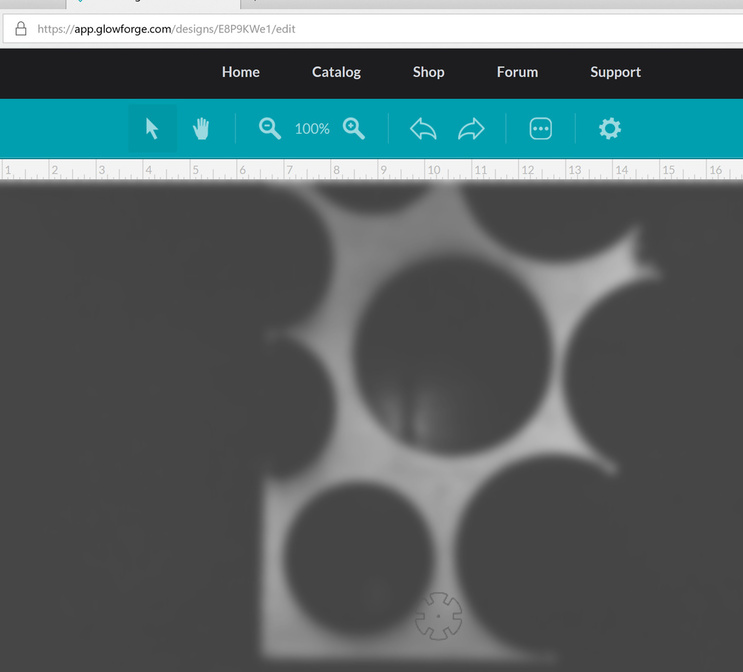
this is what I told it to do
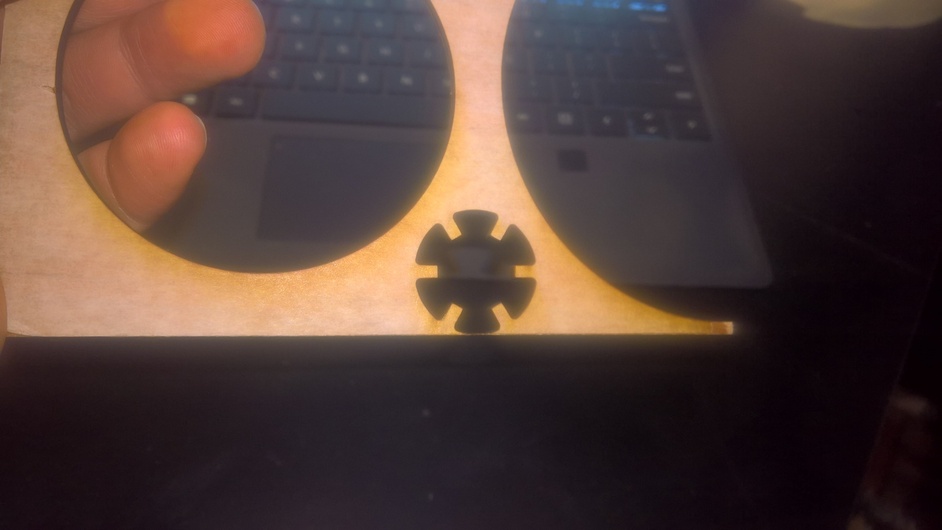
this is what it did instead
also doesn’t help the app keeps crashing and reloading (two different computers have tried)
Just a wild shot in the dark here, but has anyone tried a piece of construction paper or some other thin blockage under the previous cuts in a used board?
Would stop the empty gaps from being so obvious maybe. Just remember that you added ‘thickness’ to the board alone.
If the exposed crumb tray is aggravating the software somehow, possibly this could help it along.
1 Like
I was just mentioning the height to cover the bases. I’ve seen people have major alignment problems when the height was set wrong. PG shouldn’t have that issue but it might be worth measuring the PG and comparing it to the setting simply as a troubleshooting step.
That image after cleaning is rather blurry. I’ve noticed that when I get a blurry image like that it jumps by quite a bit when the properly focused image is displayed,
I agree that things are not as easy as they should be. Just adding in my rather limited observations. As I noted above I try to do cuts as close to the center of the machine as possible for accuracy. I don’t expect they will be able to nail the positioning unless they use both cameras.
It was fuzzy becaus the app kept crashing and reloading back to back after the cut, so thag is the reload image
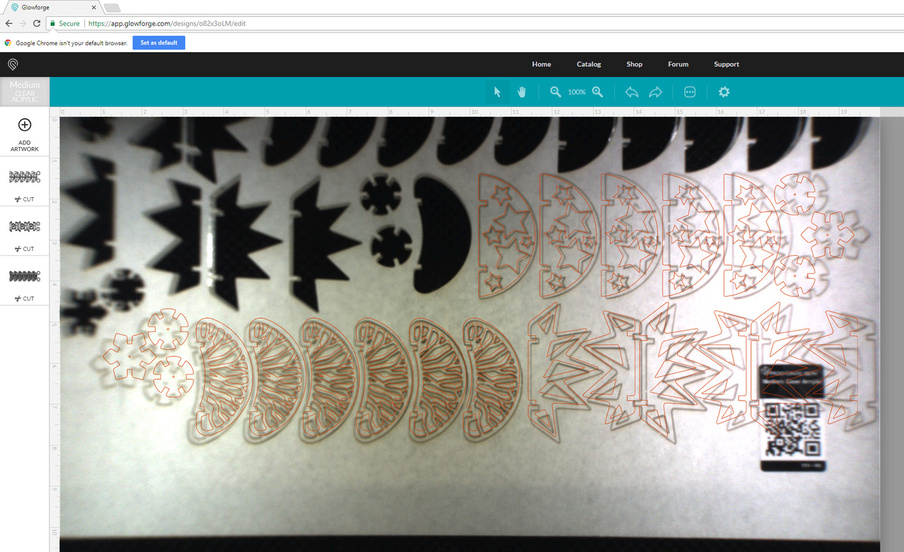
That photo is a really good example of how people were saying it’s accurate directly under the camera, and got progressively more off the further away it got.
Not that that helps you at all. Sorry. Just the first photo I’ve seen that really illustrates it.
1 Like
and well I was pulling that out my button starting glowing teal …
That’s exactly what you would see if you material thickness was quite a bit off. I see it is PG so I’m not saying it is anything you can change just that the fact the cut is skewed right on the right side and left on the left side but good in the center means the distortion correction is likely using the wrong material height.
If it were a camera position problem it would be always left or always right. Might be something that can be fixed remotely, might not.
1 Like
ya i wish that they just said here have a calibration file run this and we will process and re home everything… instead of this must go to the factory nonsense
also a mention i have one of the early units who’s door doesnt actually close well and you have to push down on it… for all i know ‘factory calibbrated’ was with the lid not all the way closed… again the need for us to be able to re home these would be good
But seriously, the tiniest variation in the height of the camera above the surface of the bed is going to lead to exactly the distortion that you have been experiencing. I’m not saying this is your fault: the lid should close easily, securely, and consistently, and the fact that it doesn’t is IMO one of the more irritating hardware design issues.
Some of us have discovered that on our machines, changing the way the machine sits on the table affects the lid closing significantly. On mine, for example, I was able to lift the front right corner of the machine almost an inch without the lid moving, and I found that shimming up that corner improved things a lot. Then I got a new desk and I no longer need the shim. So if you haven’t already, it might be worth playing around with how level/flat the surface under your Glowforge is. Or maybe just weigh down the lid while to see if it changes anything. 'Cause my guess is that’s where it’s coming from.
2 Likes
A fun (ok, fun for a nerd like me) experiment to do is to do a score of small crosshatches in a few places and then mess with the material height in the UI until they line up. The symmetrical picture here suggests you’ll be able to figure out how many thou off it is and in what direction. From that you may be able to deduce in what way the lid position is different than at the factory. It looks like mine is out more than a hundredth actually. IE I close the door about 0.015" more than they calibrated to.
1 Like
or… we just use the range finder in the head to determin true height …
Yeah, but I was talking about what you can do for the next few years while you’re waiting for that software feature.
4 Likes
Oops. What I think of as realistic expectations is sometimes unnecessary skepticism.
1 Like
I’m sorry we didn’t get back to you sooner.
I’m taking a look.
Thank you so much for your patience. It looks like your unit is experiencing an issue that we can’t resolve remotely. I want you to have a reliable unit, so I’m recommending we replace this one. I’ll be in touch via email to sort out the details. I’m so sorry for the bad news.