For photos you need bitmaps and to be able to scale them and adjust the contrast, etc. For that there is the free program GIMP or the paid program Photoshop. GIMP is quite complex, I prefer a simple free program called paint.net.
If you want to cut out the picture after the engrave you will also need a vector box around it. For that you can use InkScape to embed the bitmap and add a rectangle around it.
You probably can just drag and drop a photo into the GFUI but it is unlikely to give good results because a normal photo is unlikely to have enough contrast.
Gimp is great and powerful, but if you want to go the “simple and free” route try fast stone image viewer. It’ll let you scale, crop, convert to black and white, and adjust contrast, which is really all you need for engraving.
So this may seem complicated at first but I promise with a bit of practice it’s really quick and easy. Technically you can simply engrave your pictures as-is, but to really get good results does require a bit of photo editing to fine tune your image. I promise once you get the process in your head you’ll be able to tweak your photo for engraving in under 5 minutes.
Now the next question is always “how do I add a cut line to my engrave”, that’s also pretty fast and easy, but let’s start with photo editing first, then we can talk about cut lines. (They add another few minutes using inkscape. I promise it’s easy, you just need a tiny bit of streamlined instruction and practice.)
I agree with you to some extent: when they’re controlling all the variables (Glowforge makes the hardware, the software, and sells standardized raw materials), it should be possible to accurately model what the end result will be. When I take a picture with my camera phone, it looks great 95% of the time, even though the raw signal from the sensor and the raw data to the display need all kinds of complex adjustments to look right. So it should be possible in the simple case to make an engrave on Proofgrade with full-auto settings come out resembling the source image without having to take it through Photoshop adjustments first.
That said, there are a lot of variables involved, and some of this is artistic choice. I don’t expect a fairly dark and muddy image to print well on a black and white laser printer, and I’m also not expecting fully automagic results to be amazing. You’re always going to get better output if you make some strategic adjustments to the image to compensate for the fact that you’re burning it into a piece of wood with concentrated light beams.
The tracing and layering and nodes is probably more than necessary if you just want to engrave a photo. As palmercr explained, you can get away with throwing a raw photo at it, but it probably won’t look great, so the next smallest thing you can do is to tweak the brightness and contrast a bit. That’s not super technical, and you can find some examples on the forum of the kinds of tweaks people do to get their photo engraves coming out nicer. In short, subtle differences in shades of grey are not your friend. A really “blown out” look on the screen translates better to lasering.
What have you tried making so far and how did it turn out?
If you have 0 graphics knowledge you should still be able to use the glowforge to engrave and cut though. Like if you need to cut out a shape on thicker material you can draw it out on a piece of paper, then use the scan function for the glowforge to get that shape or even engrave it.
Universal has a stand alone software designed to "do all the work of photo processing for laser printing. They have a free trail but I cant find a price for the software anywhere. I was not impressed with my experience with a Universal laser and I am glad I have a Glowforge, but this software sounds like a good tool if you do not want to use Photoshop to process your own images. https://www.ulsinc.com/discover-uls-innovations/1-touch-laser-photo
It’s about as easy as it gets, but it’s also got the ability to do some advanced things, and those are the ones we tend to discuss and hash out on the forum.
Which I imagine can be pretty confusing at first glance.
If all you want to do is engrave some photos (and cut them out, I assume) the process runs like this:
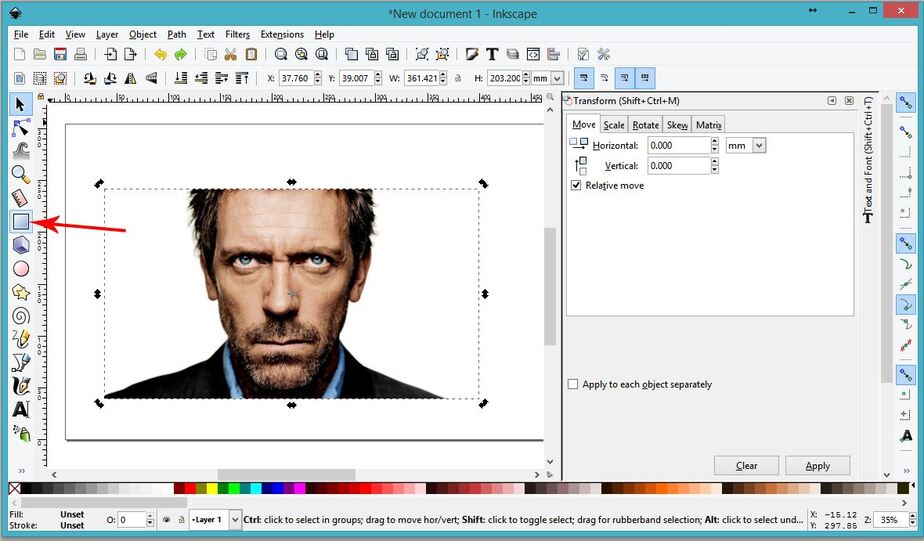
Load your photo into a new Inkscape document. (If you want to clean it up first you would need to do that in another program, but lets assume it’s a great photo with great contrast.)
Just drag the photo over from your desktop and drop it on the open file. (Make sure the little box that says Embed photo is checked.)
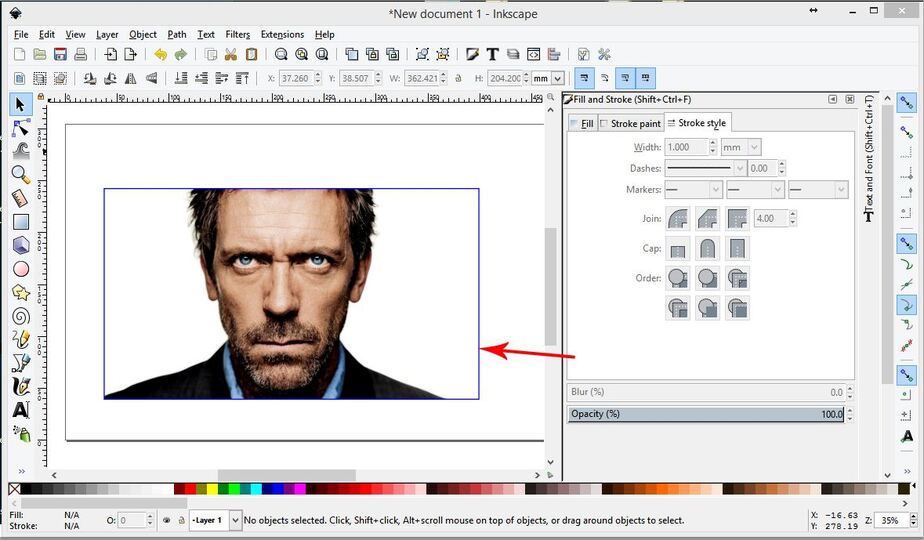
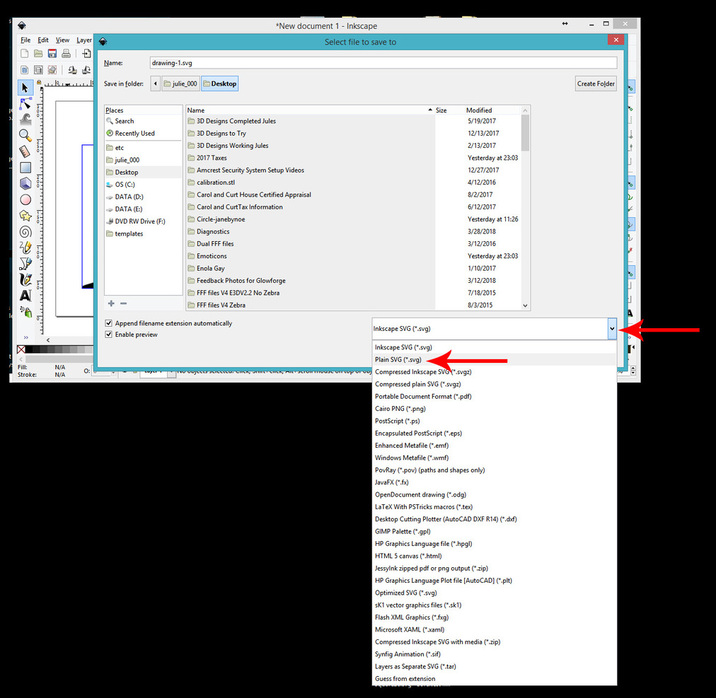
Now you save the file as a Plain SVG. (We choose that because other programs can’t open Inkscape SVG files, although the Glowforge interface can…it just helps other people to help you.)
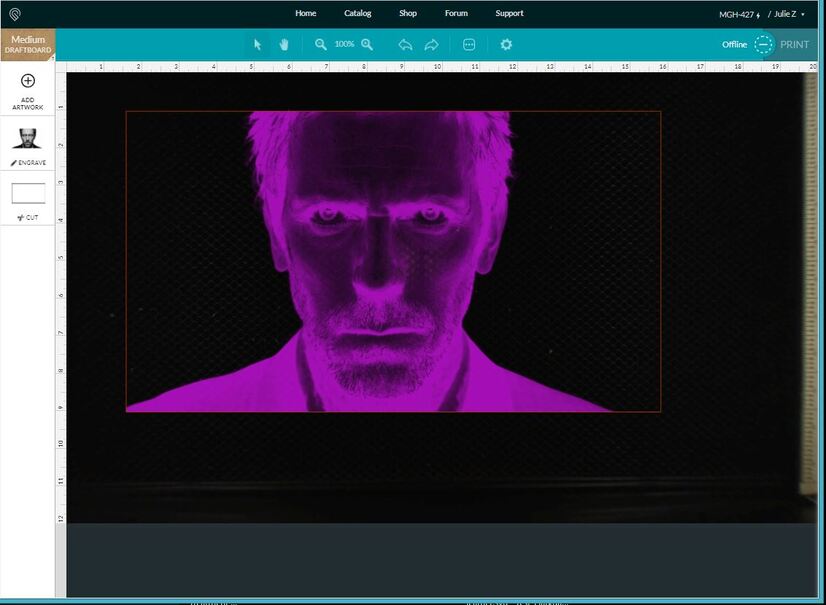
Final step…open the Glowforge app to the Dashboard, drag the SVG file over anywhere onto the Dashboard and let it go. The file will open up in the Glowforge interface ready to go, with a Photo engrave set up already, and a cutline around the image. Load your material and send it to print.
If you want to get fancier with it, instead of dragging out a rectangle for cutting, drag out an oval and place it over the photo wherever you want it. Then just save the SVG. The possibilities are endless, but starting simple is a good bet at first. The rest will come before you know it.
Interesting! Thanks for pointing that out… it looks like it costs about $300, so it would have to save me a significant amount of trouble, but I’m still going to try it. I would rather fight with Fusion 360 for a whole day than Photoshop for 15 minutes. Artistic adjustments just aren’t my thing.
Have you done any engravings using a color vs BW image, using the same image?
I have always converted my color photos to black and white, then fiddled with the levels in PhotoShop. I have never even tried engraving color photos. (Can’t believe I haven’t done this!)
If you have experimented, I would like to hear about your results. It would save me some time!
my one test with it gave me a fairly strong “meh” reaction. it basically converts your image to a dithered image. it doesn’t help you make the image more engrave-ready. so you still potentially have some (maybe plenty, depending on the image) of photoshop (or other image editing program) work to do to get the right levels of contrast and detail enhancement.
there’s no magic button to make an image a good engraving image. and the GIGO (garbage in, garbage out) theory still applies. and probably even moreso because engraving is far less forgiving than printing.
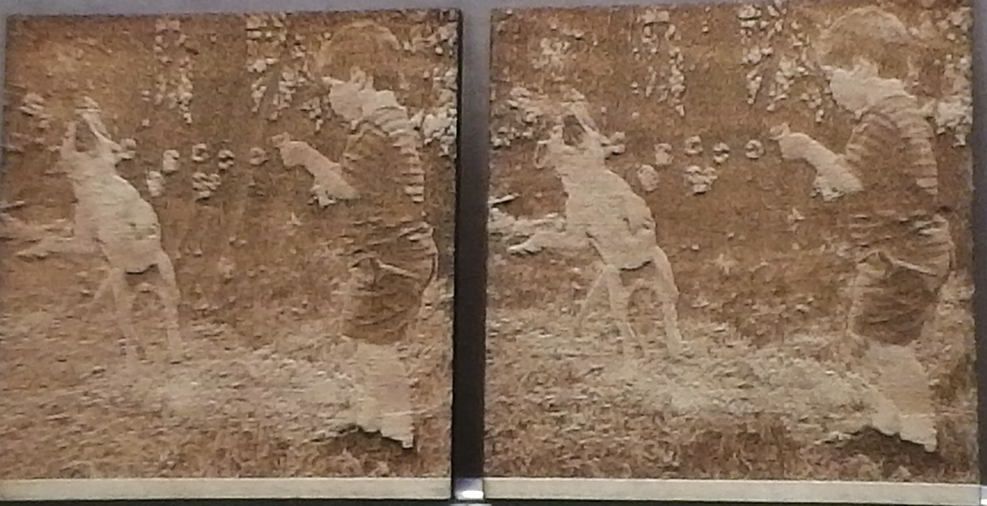
I have a really nice burn of this picture after manipulating the greyscale image.
Before I did that though I did what you asked about. I greyscaled it and printed (left side) then just put the color photo in and did it again.
I obtained more details on the greyscale, as can be seen with the contrasts becoming more defined on the clothing.
That enticed me to keep playing with the greyscaled one to obtain the final print.
It always seems that when the picture looks all washed out and horrible, it gives the best prints, so worth a hard push to wash it out the shadows and see where you are.
I am really quite surprised nobody mentioned Irfanview. When it first came out it was about the only free image editor out there and so went totally viral even before “viral” was a thing. So much it was that his logo was a cat with a tire track across it (as in road kill on the information highway)
Now years later it has many improvements and now it is just the cat with no tire track! But for many basic jobs I can open Irfanview do what I need to do and be gone before Gimp can even open. Another big plus is that it can read a huge range of file types and convert most of them. Even if a PNG is mislabeled as a jpg it will notice let you know and fix it for you if you approve.
It also has a thumbnail viewer that can read SVGs!!! Along with most other formats.
Just a friendly comment that https://www.getpaint.net is the link you’ll want for that. I love paint dot net, and I really hate they didn’t get the domain one would expect
Thanks everyone for all the helpful information & suggestions. Thanks @palmercr & @evansd2 for the “streamlined instruction”, & words of encouragement. Special thanks to @Jules for the walk through with pictures & identifying arrows using inkscape, it made the process very easy to follow. And you are absolutely correct about the advanced discussions, as I became overwhelmed in reading many of the advanced technical discussions containing information that was over my head, and difficult for me to take in all at once. Thanks for taking the time to put the training wheels on this process for me everyone, I really appreciate it.
I was an irfanview user for a couple years, then I tried fast stone and never looked back — fast stone was far better. It’s been a while since I switched (a few years), I suppose I should see how much irfanview has progressed, but it’s a low priority since fast stone does everything I need and does it so well.
I downloaded GIMP tonight and used it for the first time. My first etched photo is about 1/3 of the way through and so far looks fantastic. Took me about an hour of watching the video on youtube and doing the same thing, then going back and doing a bit more to my liking.
Doing it on draft board. As its etched not cut, should I have removed the backing paper first? (bit late now, but be good to know for next time)


 for the walk through with pictures & identifying arrows using inkscape, it made the process very easy to follow. And you are absolutely correct about the advanced discussions, as I became overwhelmed in reading many of the advanced technical discussions containing information that was over my head, and difficult for me to take in all at once. Thanks for taking the time to put the training wheels on this process for me everyone, I really appreciate it.