ooh I am pretty new here and I want to know if anyone can help with…
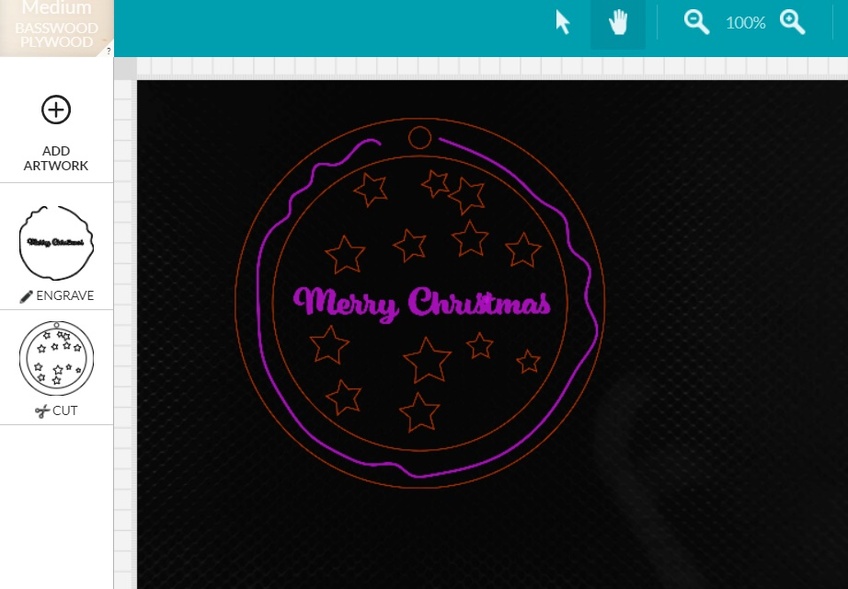
these are my sample works, (Using Illustrator) there are some letters and shapes i want to handle.
How can I separate each work?
I simply want to engrave with different styles.
If you have a vector version of it you can change the colors of the different elements and then the glowforge will allow you to do different things to them
Perhaps you want to engrave the stars. Remove the outline definition of the stroke, which is black and fill it with a specific color, the same as your lettering. Then that will be engraved.
The inner circle and the squiggle create their own problem. You probably want to engrave that. You need to turn it into a filled shape. You do that by widening the stroke a bit. Then convert it to paths. The squiggle can be a different color and you can do a light vector cut or a score as a separate operation.
What vector program to do you have? Edit: Duh. I should read the title of the post!
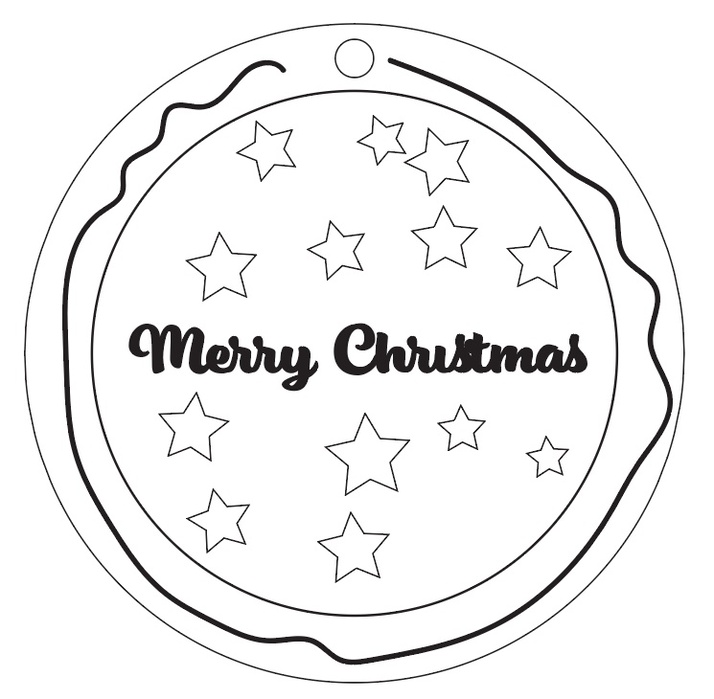
Try this file and see if that might show you different techniques. Right click and save. Its and SVG.
I use Inkscape so I don’t know the Illustrator incantations for converting a single stroke path into a filled shape… Someone who does will pop in here and tell you want those are.
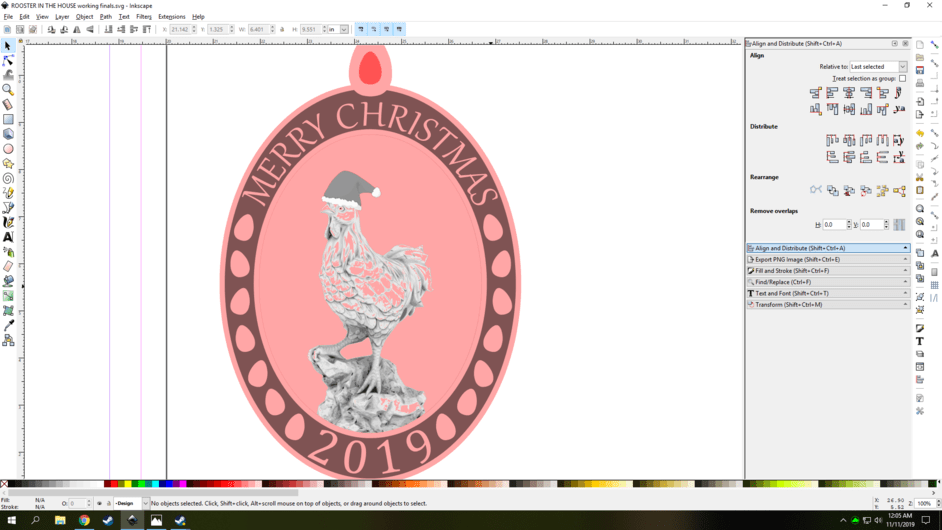
Sry i wasn’t able to help more when you posted i was right in the middle of a design for a customer. They love chickens and roosters and wanted some xmas ornaments as well.
With Illustrator, using Ctrl-Y (or View>Outline) helps a ton. Toggle between it on and off and you’ll start to learn what will fill and what will try to cut/score. It also lets you see hidden paths/shapes that the laser would see but might be the same color as your BG. Pathfinder>Unite will also become your best friend.
Btw, your source file is missing the dot to your i. Technically, it’s shifted to above the S. Take care when selecting and moving elements around in a design. You’ll get to where you’ll always make sure that your text is grouped/united to ensure that all the t’s get crossed and the i’s dotted. Best way to have kept it from getting shifted on this one would have been to lay text with Text tool (T), adjust to rough size/shape/format with paragraph tools, then Convert to Outline, then Unite. The unite at the end is so merge overlapping letters/stems and to put it all into a nice group for you.
It looks like the community has already provided some awesome guidance! Did these suggestions and advice help you get your design set up the way you want it? If you are still running into this trouble, please let us know.
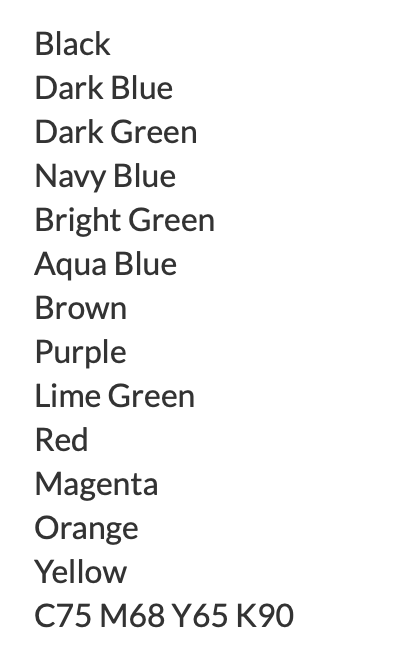
In addition to the great suggestion to use different colors, it’s helpful to be aware that the Glowforge UI reads the colors in Hex # order. Here ‘s an approximate list of how the GF sees color:
This also helps with the cutting process. In AI, I like to color my tiny cuts so they go first with the big outer cuts going last. I hope this helps too!
It’s been a little while since I’ve seen any replies on this thread so I’m going to close it. If you still need help with this please either start a new topic or you can email us at support@glowforge.com.