I’m printing small images on 1 inch wooden discs. I line them up and things look perfect during preview, but when I push “print” and it prepares the design, the images shift significantly. If I open the lid to initiate a rescanning, the images shift back to where they were before…but then when I push “print” again, out of whack they all go. I ran the recalibration of the camera already with the 12 X 20 material sheet. Any suggestions would be greatly appreciated, as I’m really hoping this is operator error.
My first unit was damaged in shipping and I had a lot of performance issues before it was determined it needed to replaced. The new unit arrived yesterday. I tell you, I so looked forward to this machine, but with all of the issues, I’m starting to think I’m really out of my league and lack the intelligence to pull this all together.
I would pull all but 2 of your images off the printable area, set it up as you have been, move one so it looks centered in the interface after you press print, and then try it and see what happens. If one or the other is centered, you have information you can use to proceed with your project.
Yep- what they all said ^^^. Your material height isn’t set correctly when you place your artwork, so when the GF focuses where the surface of your material actually is, it makes the image change.
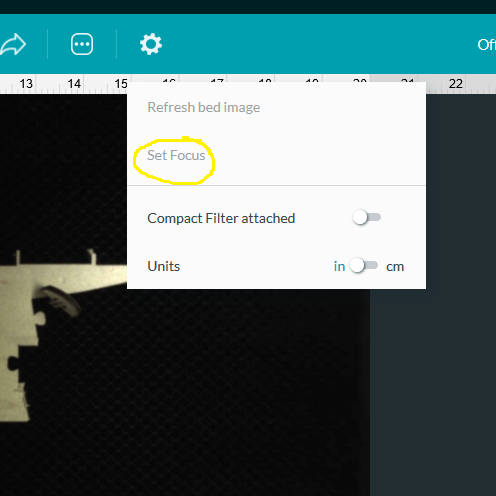
What’s happening is that you’re putting in a material height (either by entering it, or picking a material) and then it goes to double check that nothing crazy is going to happen, and it’s probably missing your little circles and taking a measurement on the bed. The Set Focus aiming square means you can verify it’s hitting your circles (zoom in if you need to)
You are all brilliant! Thank you! So do I have to click “set focus” over each of my images on the bed, or just one, generally? I really cannot express my gratitude enough for all of your fast responses!
You can use it multiple times and it will update each time.
If one wanted to make sure of complete and total accuracy, you could click each item and it would scan each item giving you an accurate overlay for that spot/item/round thing, and it wouldn’t affect the previously placed items.
As for, do you need to? It just depends. If your crumbtray isn’t level, machine isn’t perfectly flat, items have a wide tolerance / it could help.
Huh as they say. I would not have guessed that. I figured it used the last one. Not sure why, but that’s what I thought. Never paid attention when I did do it more than once.
I guess I should clarify (include @geek2nurse). IF the measured location is different than the previously measured location, it will skew the overlay on/for the ones previously placed, but, it will have no impact on where they actually engrave. It’s only the bed image being updated - not the actual positioning of the design elements.
So, say you had two pieces of material in the machine and had two operations with their own focal points - if you set focus on something that’s .100" and place your design element, and then set focus on something .400" and place your design element on that piece, the element that’s for the .100" will look way off, but it will actually engrave in the proper place.
I find that the first time you pick a spot it goes near but not on the spot you pick and on small spaces it could be off the edge. But two or three times and it gets better and quicker, so I always do at least two.
one thing i have found that works is if you hit use the focus tool in the user interface that seems to help reduce the jag… also setting all your steps to “auto”(you will have to type it in for each step) will help to reduce the change in focus height which is what is affecting your potions of your engrave,score,or cuts. IF at this point it still moves DO NOT OPEN THE LID… just hit cancel in your UI, click dismiss, then realign, and then hit print again.
THE WHY OF THIS IMHO
when you hit print the cameras on the bottom of your print head judge the distance to your material and thus change the zoom of your field of vies as it relates to real world grid of your bed, imagine you are looking at your house and take two steps back with a light shining on your door of your house if you were not square in line with your backward movement in reference to your front door then the light of your flashlight would move either to the right or left center of your door.
that is reduce by using the auto focus before you hit print
now if you imagine running back and fourth form side to side trying to flash the light on the center of your door … the faster you did this the more lead time you would need to do that accurately.
these maths are done server side after you hit print but beofe you execute print (by way of that lovely glowing button) so then the image is then moved by the increase or reduction of the buffer zones (grey area in your UI) which again moves your image.
this is why after using the auto focus you may still see a jump.
IF you cancel the print in the UI before you hit the big blue button then those calculations are still set in the UI, and when you adjust after cancel of print WITHOUT opening the lid and then dismissing the canceled print notification, when you send the print job again after adjusting the image in reference to your material every computation is already set in place. Opening the lid resets all those adjustments that the glowforge already made, setting you back at square one. @glowforgesupport this might be a great time for a step to be added called final adjustments??? perhaps???
I just measure my non proofgrade materials and input the height manually in the top left “unknown > use uncertified material” before i setup my job and have never had an issue with the image changing. I also leave all my preset settings with “auto” left in the height so it auto fills it for me when i change it like i said above.
I’m so sorry to hear that you ran into trouble, but I’m so glad so many awesome solutions were provided inside of this thread.
Now that you are using Set Focus, I extracted the logs from your Glowforge and it looks like your Glowforge is performing to specifications. If you’d like, you can use the Camera Recalibrator to see if further improvement is possible. It will only make changes if it can make your camera more accurate; otherwise, it will exit without any changes. It takes about half an hour.
You’ll need a 12” x 20” piece of Proofgrade material with no markings or stickers. The feature was designed to be used with a flat piece of medium Proofgrade Draftboard, used upside-down (with the QR code side down). It may work with other materials that are the same size and use the same print settings as well, like Proofgrade plywood.
It prints a grid of markings, takes a picture, then measures its height in multiple locations. This data is used to make your camera more accurate for future prints.