I agree that your speed is too low.
I uploaded a 4032 × 3024 (2.8MB) image and adjusted to fill the entire bed area. It took less than 2 minutes in the “preparing your print” stage, then was ready to print.
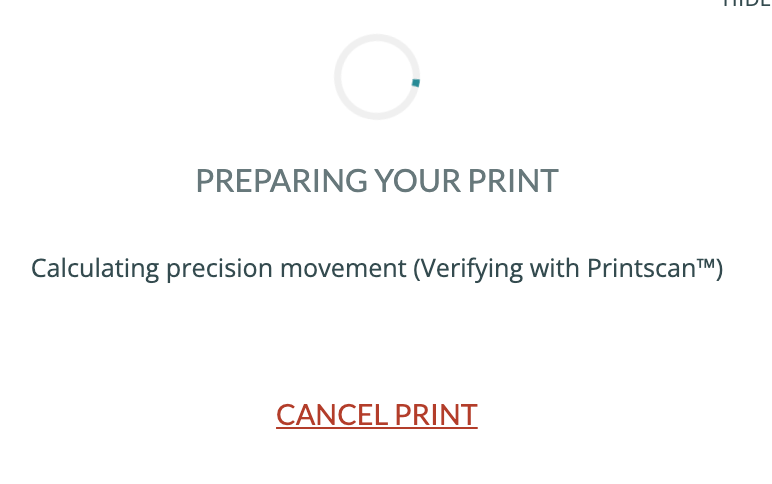
I did the same with your image adjusted to 4.5" high and set to 675 LPI and after 25 minutes on “Preparing” I gave up and closed the window. Something ain’t right.
(edit - this was 1000/full/675/vary)
(edit #2 - when I just walked over to turn it off, the button was flashing, it was ready to print!)
1 Like
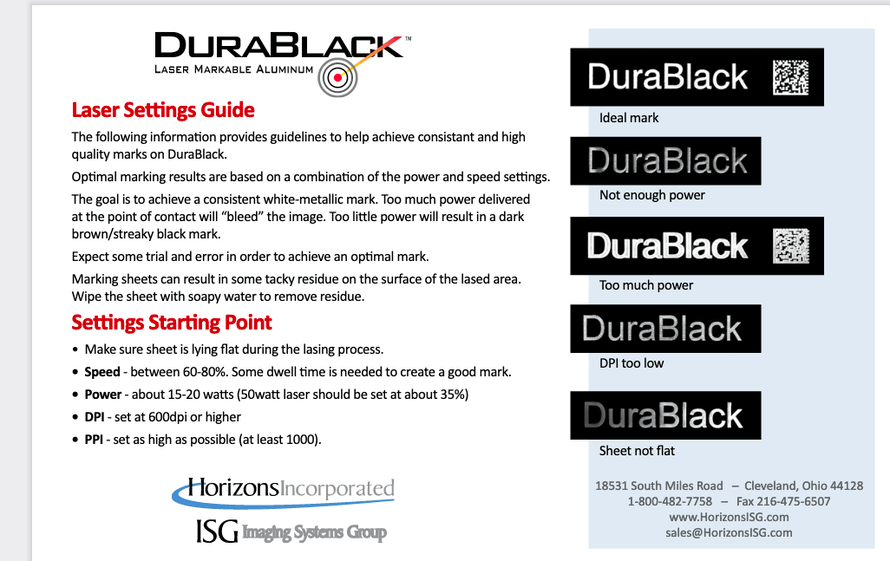
The speed on all of these suggested settings from manufacturers is usually ![]() . 60-80% of what top speed? Just my gripe
. 60-80% of what top speed? Just my gripe ![]()
But yes, trying to do this, that’s like 144 seconds per line. We aren’t talking hours - we are talking days.
That’s what, 1080 minutes per vertical inch. Or 4860 for this graphic at 4.5” tall. 81 hours.
1 Like
I will crank it up to see what top speed it supports in terms of the look. Have to admit that it looked great at 100/85. But will test.
Despite how it’s labeled, nothing in that list are Glowforge settings. If you tried to run most of the substrates at the speeds listed, you’d burn them to ash or start a fire, because the speed and power settings you’d use on other lasers don’t translate to the speed and power settings a Glowforge uses. The scales are different. It appears that all the speeds in that cheat sheet range from 8 to 100, so “100” likely means “100%”, which is often faster than 1000 speed on a Glowforge. The power settings don’t translate directly either.
1 Like
OK, it’s a bug in the UI.
I had a pretty quick print and it never changed from “preparing” like the pic I posted above until I pressed the start button - which was flashing as normal. I then repeated the same print and it did not happen.
The reason I picked up on it is I use a modification created by Chris1 to tell me when it’s time to go press the button (I use the Gov Tarkin “You may fire when ready” audio clip) - but earlier today my sound was muted…
As I stated earlier, after leaving your image in “preparing” I gave up and went to turn my machine off after 25 minutes or so, and found the button was flashing.
… and when I tried your pic again, at 675lpi, it took about 15 seconds to “prepare”…
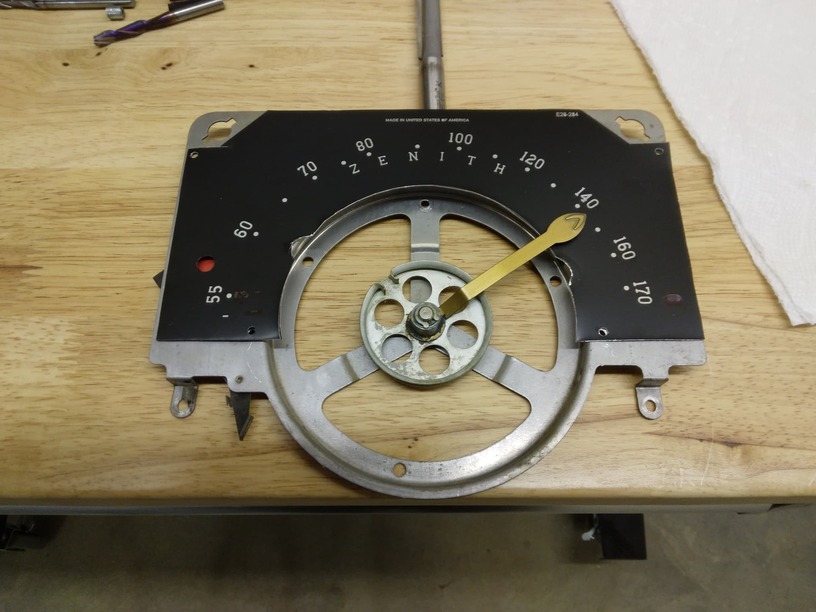
I ran through a variety of settings, and yes 100/100 results in a very clean cut of DuraBlack (without the protective film). I still have it at 675 lpi, but will try 450 lpi as I get closer. I am using a vector test file. The full image with vectors came up at ~3 hours, but had some issues with the vectors, so some additional cleanup is needed. Thanks for the help and advice.
After touching up the pieces of the vector .svg, I did a trial run on the .020" DuraBlack. Settings were 120/100 and 450lpi. Everything turned out. Took about 3 minutes to process and 45 to print. Cutting it out had a few challenges, but for the prototype, very pleased. Have ordered the .005" to see if that works better. Again, thanks for the assistance.
3 Likes
This topic was automatically closed 30 days after the last reply. New replies are no longer allowed.