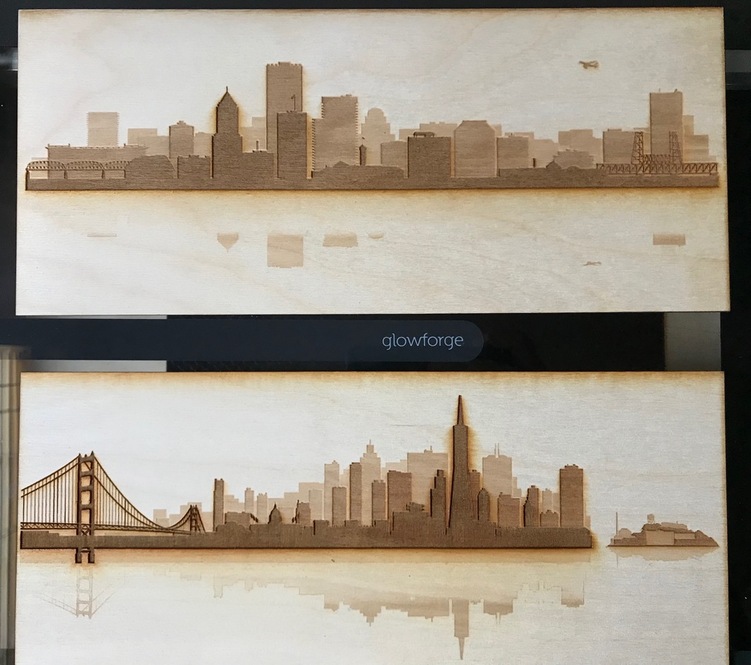
This is my first time etching an image with tones other then black. As the engrave starts at the bottom things look ok, then it fades to almost nothing. If you look at the jpeg you can see the tone should be consistent. At some point, when there are darker values to etch the laser kicks back on. I used the SD Graphic setting. I tried HD, but it said the file was too big, which was surprising because it’s only about 5x13. So these are my issues. Any thoughts on how I can get a cleaner, more consistent engrave? Thanks.
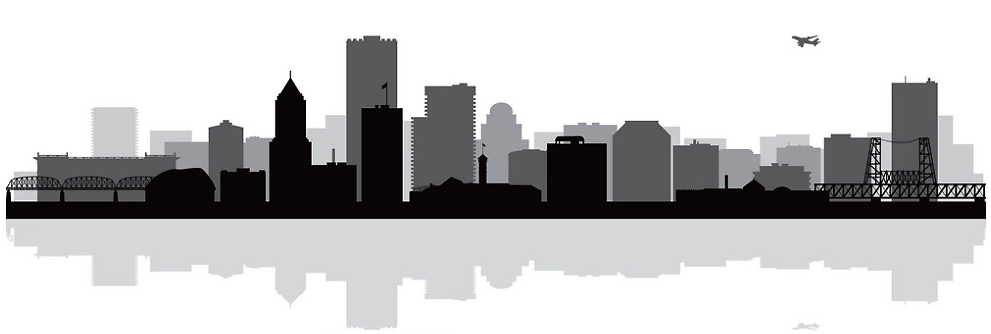
Attached is a picture of the two engraves I attempted on non proofgrade birch plywood. The second image is one of the digital files I wanted to engrave.!
The file too big aspect on the HD engrave is more that it will take longer than ~3.5ish hours to finish, which is the current max run time the onboard storage can handle.
At the lower end of the power spectrum, everything is very sensitive to every detail. How clean your optics are, any warp/twist/deformity in the wood, any discrepancy in the surface, etc.
Are you using masking? That can play a huge factor as well.
Nope, no masking. Each etching was done on different sides of the same piece of wood, so I was surprised to see such a similar location of the faded section.
I don’t think so. The plywood was pretty flat, and the pass is so light it never reached any glue, and there’s no obvious grain change, but I suppose that option is possible.
Downloaded the full res file to zoom in, looks very much to me like there’s something in/on the wood in those areas, especially on the lower one where the loss of detail slopes along with what appears to be wood grain.
Here’s an idea, however- use the first one, which is scrap now? … and try a smaller, different engrave into that area, see what happens…
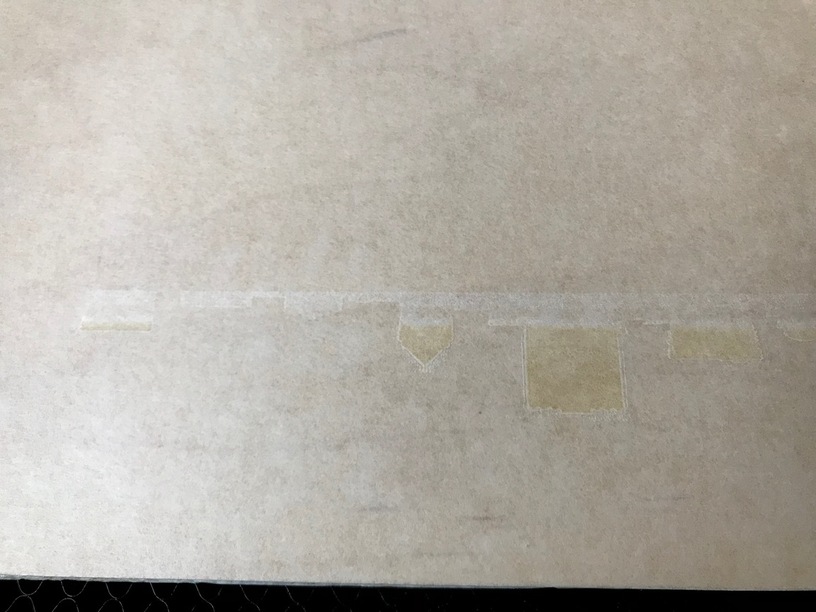
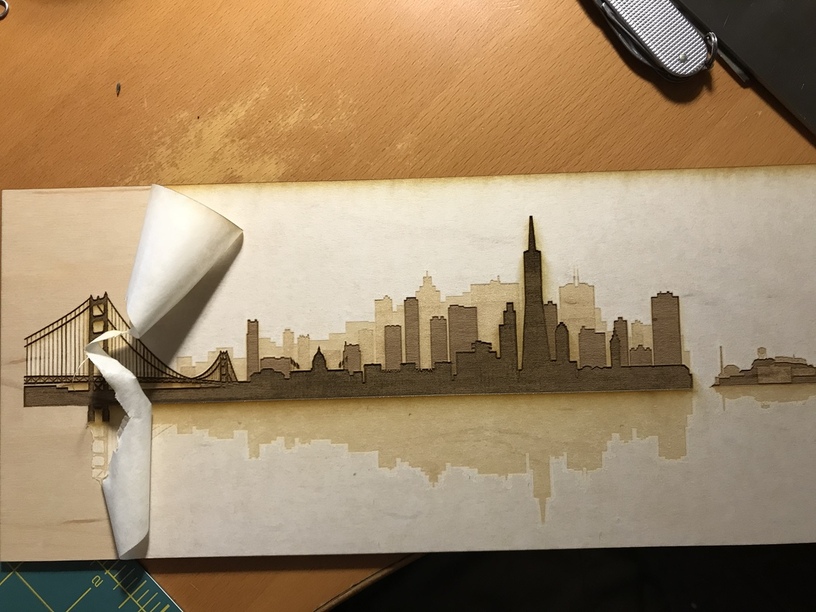
So, in an effort to narrow the possibilities, I started the same engrave on some proofgrade maple plywood. I just did the first part with the reflection. Interestingly you can see the same transition from dark to light when it should remain constant. I also noticed that the darker portion still was not enough to etch through the paper tape. So it seems that this tone is too light yielding in a laser power that is too weak. Perhaps the glowforge can’t maintain such a low power for such a large area.
In any case it is clear that it’s not cutting through the tape set up on proofgrade maple using SD Graphics settings. Is there a better proofgrade setting to use?
Is that the actual graphic (above) you’re working off of? I’ll see if I can run a little sample in a little bit. Just using regular SD graphic settings?
I see the value is about a 15% gray and it’s consistent. Iirc one of those buildings in the back is the same value and showed up ok. Interesting!
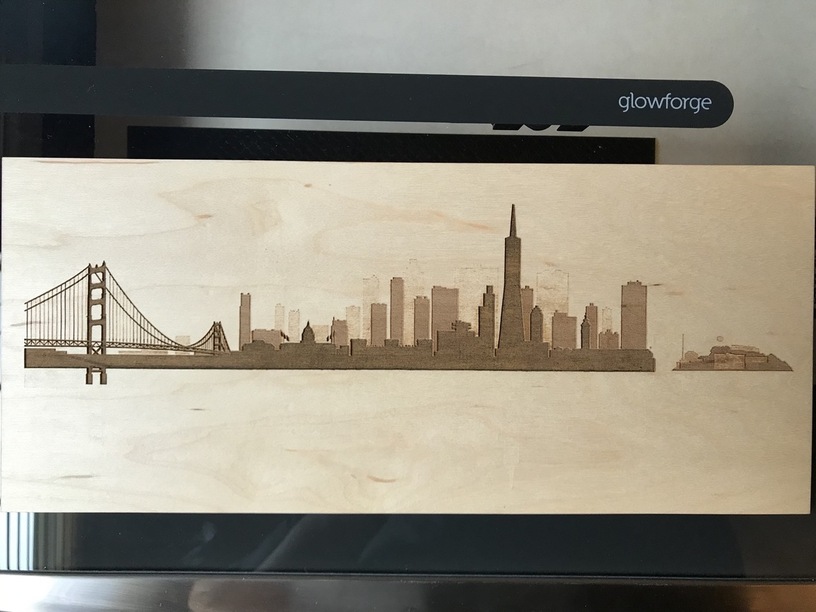
Well, the new machine is up and running. The good news is the reflection portion does not fade out and engraves consistently. The bad news is it still doesn’t engrave through the adhesive paper . I have no idea what’s going on.
Bump the minimum power to 10 or 15. That will make the lightest greys engrave enough to etch the wood. I think it takes about 5 to make it through the paper.
The way it works is whatever you specify for the minimum power in the engrave operation is the power used for the lightest non-white value in your picture. The maximum power is what will be used for the darkest part of your picture. Everything else maps in the range between those numbers.
Using the GFUI’s settings allows you to get what you want without messing with the photo itself, it’s all done in the GF. No need for Gimp or Photoshop.