Continuing the discussion from Glowforge's Trace Functionality:
I’m going to start with Inkscape since it is the cheapest (free) drawing program. (I’ll get one up for Illustrator sometime this weekend; CorelDraw if no one else does one first.)
This technique is used to create a “white space” around the image that one is engraving before cutting it out.
(Like a sticker sometimes has.)
If you need to pick up Inkscape, the link is here, and you want to download the latest stable release: (version .91)
https://inkscape.org/en/download/
Gonna do this extremely basic for those who have never used a drawing program before, so feel free to skip this beginning section if you’re already familiar with drawing programs.
Initially when you double click to open Inkscape, it’s going to take a while to open.
(Like up to a minute or two on my computer, and mine is turbo-charged – be patient.)
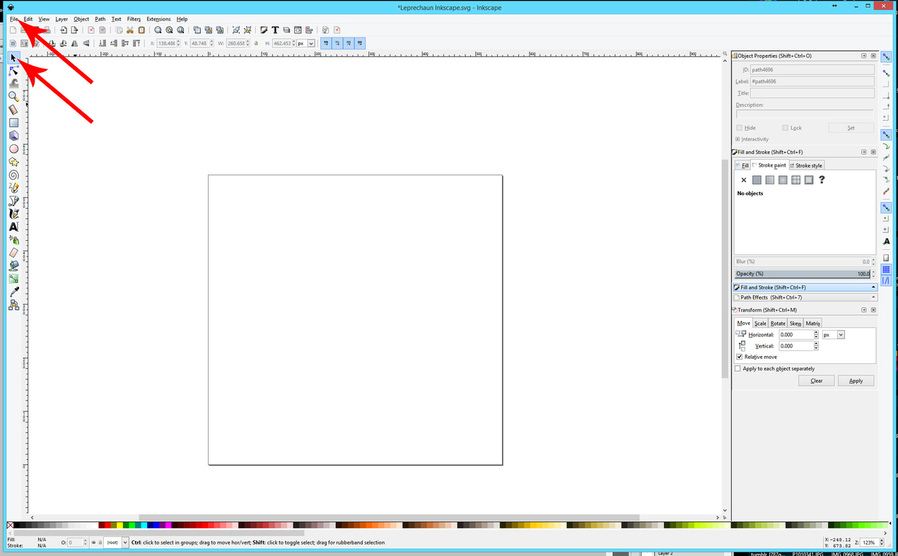
First screen looks like this. The two buttons you’ll need to locate initially are pointed out below.
-
The black arrow in the upper left column is the Selection Arrow. Any time you want to choose something to work on in your file, you click on that arrow first, then click on the item to select it.
-
The 2nd thing you need to locate is the File button.
Some drawing tips:
-
While you are preparing your drawing, try to create as much contrast between the paper and the lines as possible. Black ink on white paper will give you a better result than pencil on parchment. Light colors are not going to scan well, most auto-trace programs cannot differentiate well between pale yellow or pink and white.
-
Smudged lines are going to give a very messy outline when the item is traced. You want to create a clean crisp delineation between the black and the white for the auto-trace function to pick up.
(There’s a reason why they use markers for the Glowforge demos.) -
The higher the dpi (dots per inch) that you scan with, the better detail you are going to get in your scan, but the larger file size might crash the drawing program. It’s a trade-off.
Stuff you screen cap from the internet is 72 dpi, low resolution, and you generally don’t get a very good trace from it. Try to scan in the 100-300 dpi range for a better trace.
Okay that’s it for the basic stuff…here we go:
-
Scan your image and save it as a jpg file to your computer.
-
Open Inkscape.
Open the image file:
-
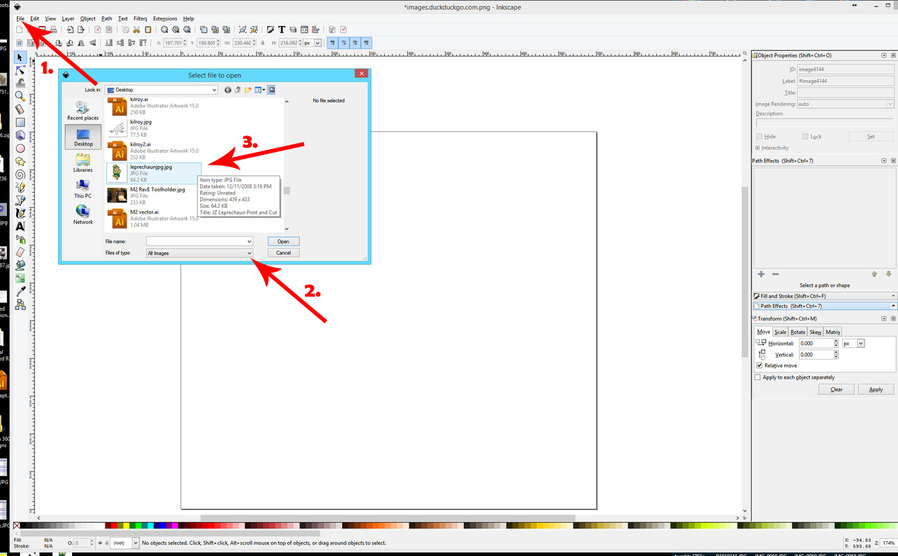
Click File >Open
-
In the Files of Type: click the little dropdown and choose All Images
-
Find your jpeg scan file and open it.
(I’m just going to use this little leprechaun because he’s handy. Pretend it’s a drawing with clean edges.)
Trace the image to create a vector path around it:
-
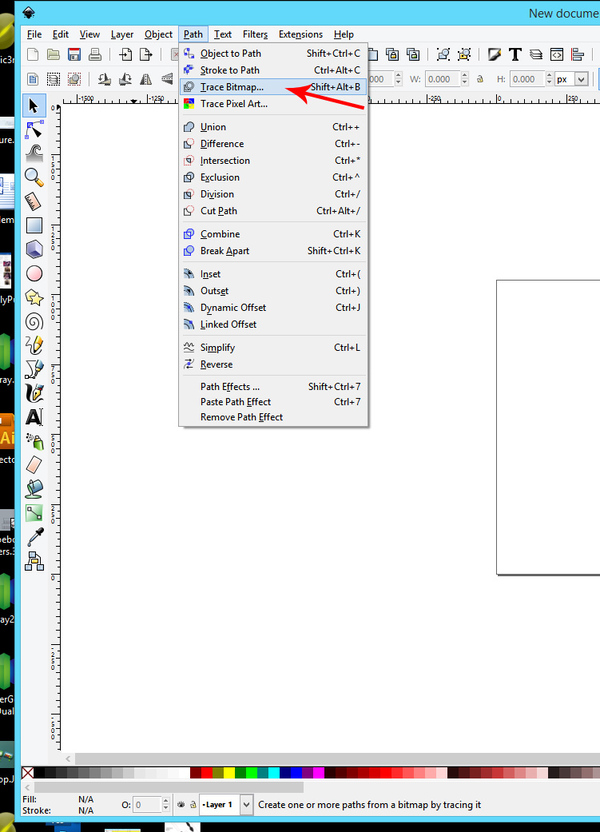
Select the drawing by clicking on the black Selection Arrow, then on the drawing.
-
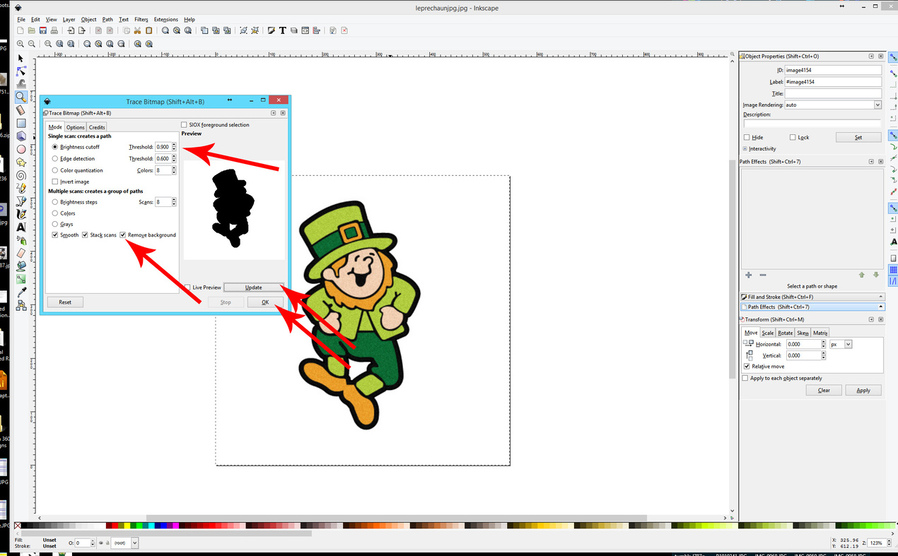
Click on Path > Trace Bitmap
In the little dialog box that pops up:
-
Choose the Brightness Cutoff radial dial and set the Threshold to about 0.90
-
Check Remove Background.
-
Click on Update to refresh the little silhouette and see how it looks.
(You want a solid black silhouette of the drawing.)
When you get that looking about right, click on OK.
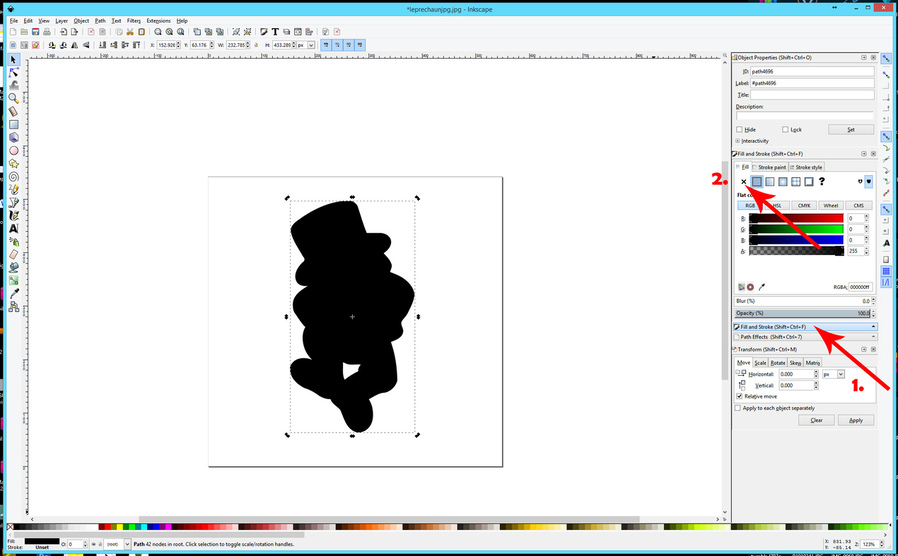
You just created a vector path around the object.
To see the path, which is currently filled with black fill color, and has no stroke color assigned to it:
-
Click on the Fill & Stroke button in the right column.
-
Click on the X in the upper left corner, with the Fill tab selected, to remove the Fill color.
-
Then click on the Stroke color tab to bring it to the front.
-
Click on the solid rectangle (2nd button) to assign a stroke color to the vector path.
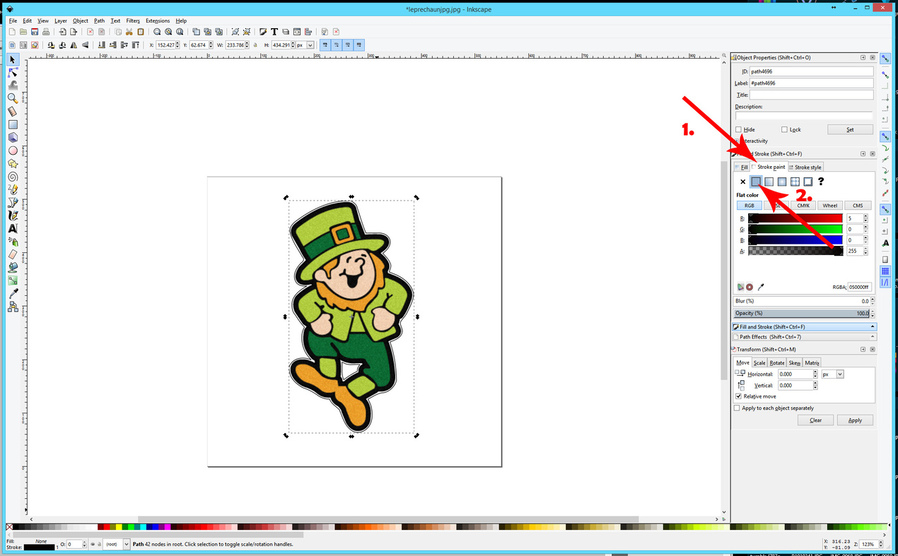
Now you should see the vector line appear around the image.
Offset the vector path away from the image:
-
Select the vector path itself. (Click on the black selection arrow, then anywhere on the path.)
-
Click on Path > Outset several times. (The vector will move farther out away from the image with each click.)
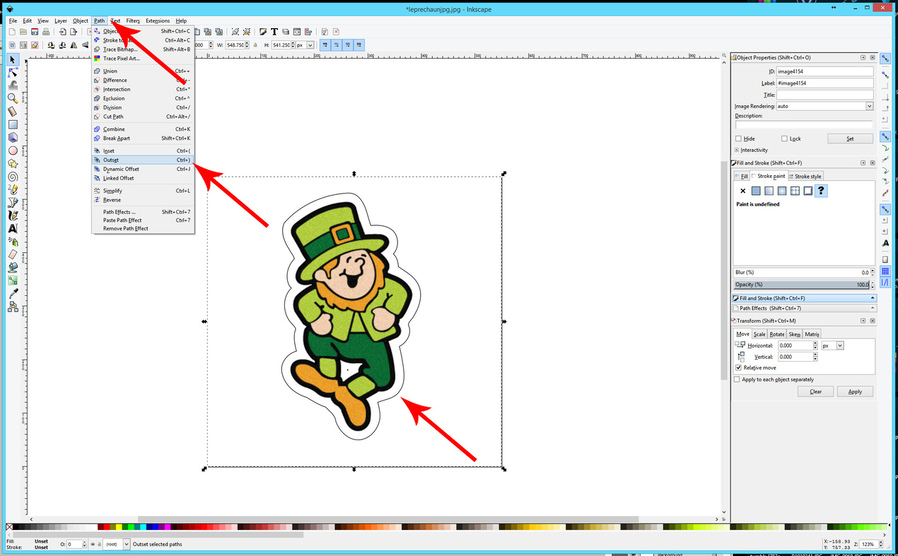
When you are happy with the placement, you’re done. (You can use Path>Inset to move it backwards
if you need to.)
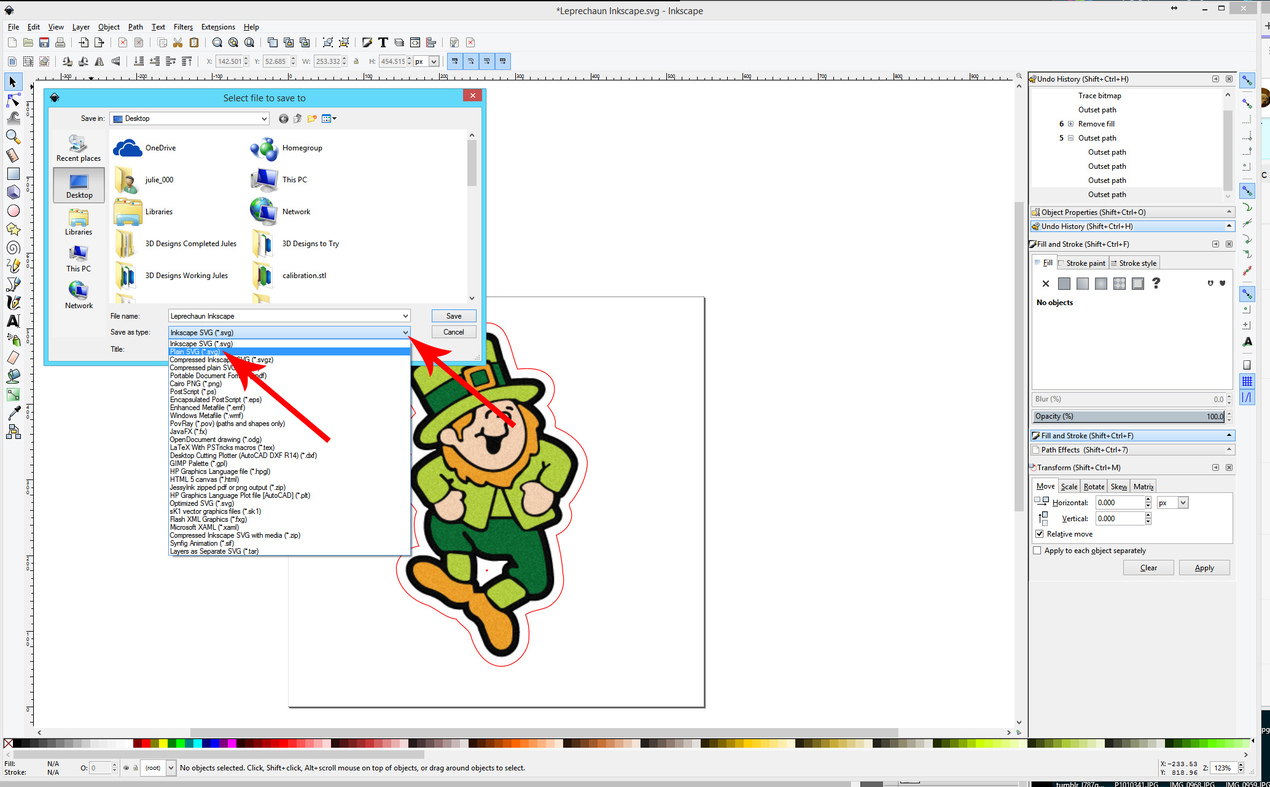
Save the File:
- Choose File > Save As
This next bit is very important, so be sure to read it.
When you save a file in Inkscape, it automatically defaults to a proprietary Inkscape SVG format that no one is going to be able to read, (update: although Glowforge might be able to, so you can try it and see.)
If not, you can select Plain SVG as the File Type in the dropdown.