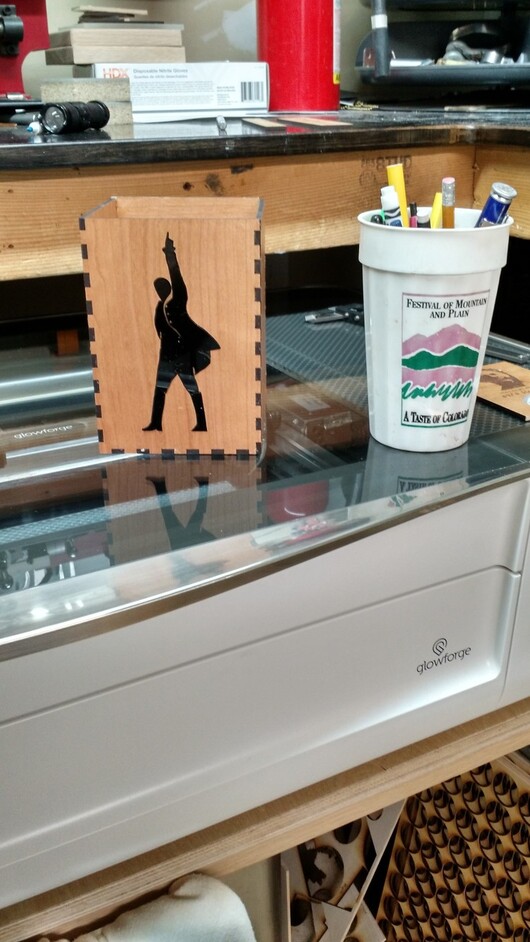
Inspired by Jules, I went to upgrade my miscellaneous bench top storage. Used This to design the box. The ‘cut width’ under Advanced options made it easy to sneak up on kerf compensation for a nice tight fit.
I had this ‘Founder figure’ cut from black acrylic left from the original idea I was working on before the HDD fail, and I thought he would make a nice embellishment. The problem was the acrylic figure had been reduced in the UI from the original size, so I thought I would try a trace of him just to see how close it would be. So I fished him out of the scrap box and tried. The screen resolution didn’t instill enough faith in the process to risk the box I just made, so I went with plan B.
Like the fire inlay I did, I put him in the bed on top of the material and loaded a vector file of him that was still in the GFUI which was much larger.
Using the handy scaling feature and a 250% zoom level I positioned the outline next to the acrylic cut out and reduced the size to match as closely as I could.
In my usual ignorance and exuberance I would normally make a new mistake and print on the intended material, but this time the kid decided he would run a test on a scrap. He made the cut, positioned the acrylic and was trying to determine how far off it was when Behold! it dropped into the cut - and he shat!
Moral of the story - Keep a box for your scrap, you never know what you might find useful. Speaking of useful, that scaling ability built right into the UI… Yeah, thatRocks!
I have thought about inlaying a contrasting species of wood, but not ever really thought about inlaying acrylic. This looks really sharp! I agree…he gives a nice embellishment. And good job, trying out the trace function. That’s amazing!
Except the ‘tool size’ changes with the material. Kerf compensation is ‘in the hopper’, but I expect it could only be accurate for consistent material - AKA .
BTW, For those who haven’t heard them, the songs in the musical Hamilton are very good, and if you only listen to one - make it this one. (NSFW) Yorktown… The world turned upside down.
but but just like you can set a manual height or thickness I see it as a pretty simple thing to add a box that you put the kerf in for whatever material just like speed and specifi this side waste this side keep. in one of the original videos this was talked about
It was very approximate to the kerf of a piece that had been cut out, slightly tighter. I set it with hot-melt from the rear.
Agreed, and compensation will be great when we get it! Are there any other lasers that do that? I have no idea.
I wouldn’t be disappointed, the company decided the build was close enough to ship and I am happy to live without that detail for a while and have the machine. One big plus to cloud hosted, is improvements they can push to us as the software evolves.
no you fluff the item with a offset in inkspace because other printers send as a print driver. so its a bit diff where as we have a UI at the qsudo CAM level . but a cnc is a cnc etc… you don’t set your mill to a 1 1/8 x 1 1/8 to get a 1x1 because you know your going to loose a 1/16 from the blade on each side of the center cut. you set it for 1x1 and then set tool size and then you say left side or right side etc… anyway I just hope it gets there. the reason being if you design complex parts in CAD and do all the motion planning etc… and then have to bring them into inkscape to fluff them all up eh bla
 That looks fantastic! (You might be getting a little over-exuberant though…maybe just a touch!) ROFL!


 .
.