i haven’t done anything on PG either. i’ve done some pencils, pens, and printed pieces that i cut out, either on stickers or that i’d adhered to wood and then cut/engraved. so far, my favorite thing has been doing die cut label mockups for liquor bottles. before i had to do a lot of annoying hand cutting with exacto knives. the last set: snapmarks and laser cut.
4 Likes
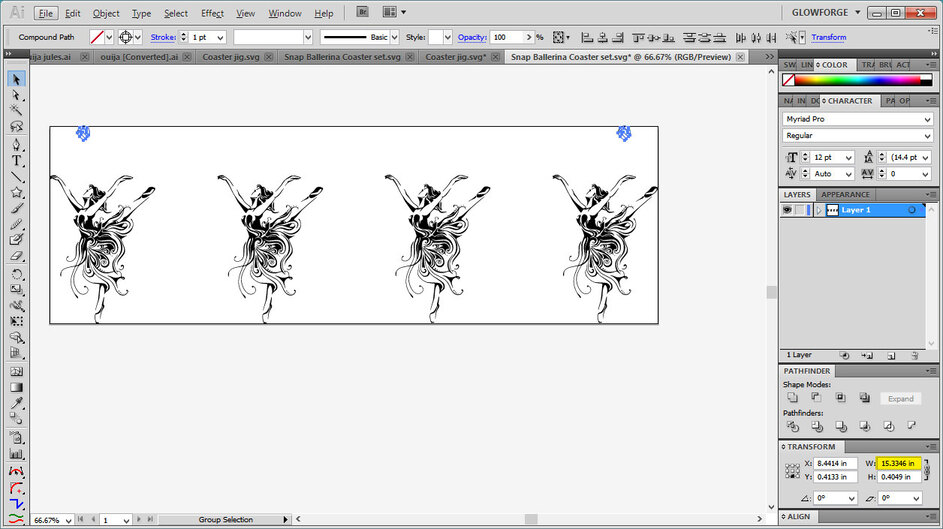
Not sure what my issues are here. I just cant get snap to work. I’m using the same file that was used to make the jig but have inserted the artwork into it so its centered. But the same file when loaded in now the snapmark spacing are off. not sure whats causing this or if this is even my issue because it does not snap. I assume the spacing is the issue but why is it off? I’m using AI.
coaster jig.zip (57.5 KB)
Any help would be appreciated!
It appears that the distance between the snapmarks on your jig and in the file are different. I’m pretty sure they need to be the same distance apart to allow them to be recognized and to snap. Otherwise, I think it would re-size the rest of the design.
3 Likes
i noticed the same thing @todd.hassell did immediately. it appears that either the original snapmarks file was scaled or the subsequent artwork file was scaled, possibly in the GFUI. but they no longer match.
Its the same exact file. I dont know why its making things smaller than when I cut it out.
is it possible you accidentally grabbed a corner on one of the two versions inside the GFUI and accidentally resized it a little? check both print files against the rulers in the GFUI and see if they match in scale.
Does it just look smaller onscreen, or is it actually printing it out smaller (actual measured dimension vs. the vector file)?
The lid camera can “lie” a bit…
I agree with you. I overlayed your two files and they match exactly. The only thing I can think it might be is the spacing between Snapmarks.
I conducted a test using your files and no joy. I put one of my files in just to make sure Snapmarks is still working and it is.
Try move your Snapmarks closer together, say 9 or 10 inches.
the snap marks are the same distance as the pencil file. I didnt change the spacing for it.
Still no snapmark for me! 

In the files you loaded, they aren’t the same distance apart. Look at the width when both are selected:
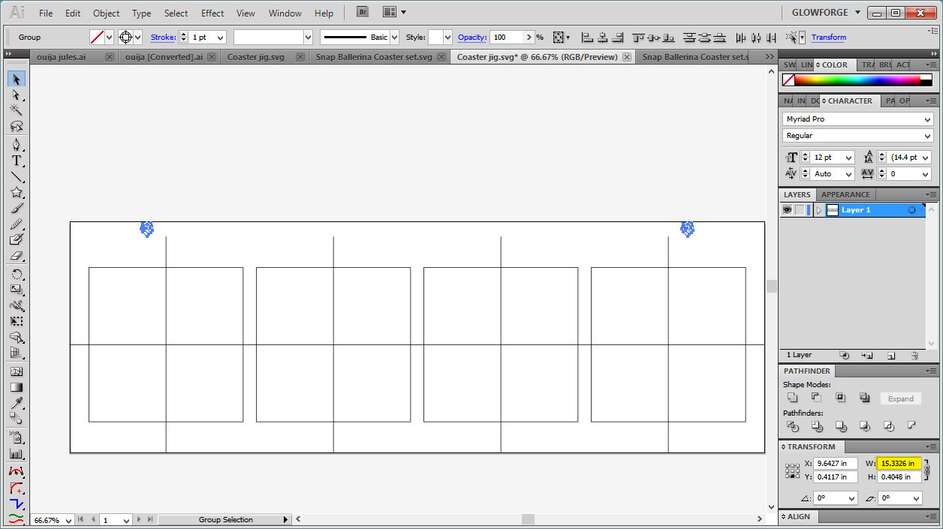
They are 0.002" off.
(I don’t know if that amount is sufficient to keep it from snapping, but it might be. They told us to make the distance exact.)
2 Likes
Hi. This is Sarah – my husband Jones also uses this ID. He’s the one making techie comments/questions, while I’m over on the artist side of things.
We had Snapmark activated on our machine two weeks ago and I wanted to let you know how it is working/not working for me. Jones may also post about this later.
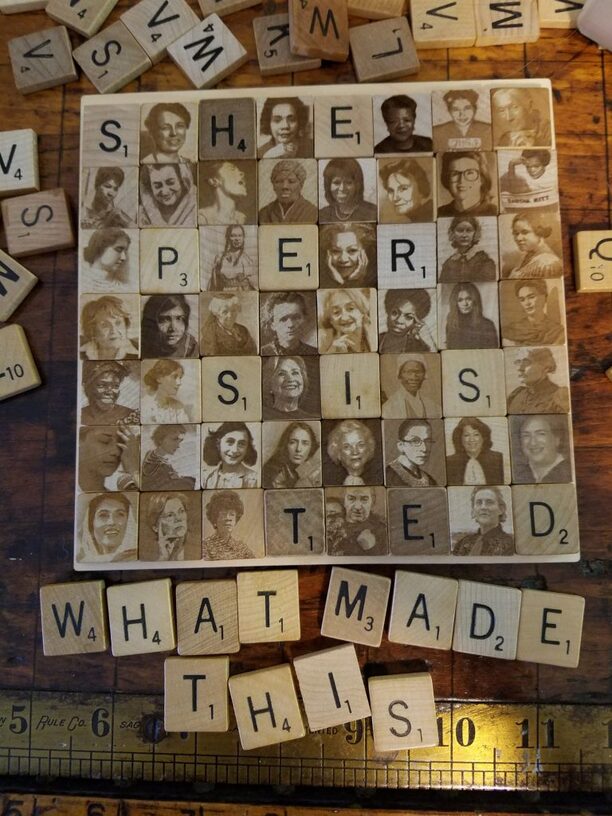
I am engraving detailed images on the backs of Scrabble tiles, something that requires a great deal of accuracy. I have been pretty let down with the lack of accuracy of the Glowforge thus far. I have thrown away hundreds or perhaps thousands of tiles because the images are not centered on my tiles and they are unusable. It takes me 2 or 3 times longer to get the tiles I need for my art pieces and the waste is abysmal.
I was super excited to get the Snapmark feature activated on our Pro. I think, for my purposes, the feature is potentially incredibly helpful, though it isn’t quite there yet. I use a frame that I can fit 25 tiles in and set them in to batch run. Each tile has a separate image to be engraved. We have found that we can engrave Snapmarks on the edges of the frame and then create an identical file to snap to those marks. I then set up my images to be engraved following the lines of the overlain file rather than using the camera view of the tiles, and then “ignore” the guide file when printing. It’s remarkable how far the snapped lines are from the camera view of the tiles. I could never have aligned them properly by sight and it’s no wonder I’ve had to throw so many out.
Here’s how this system (using a file image of my frame that is snapped to the actual frame that is in the glowforge holding the tiles in place) could work better for me. If the file I am overlaying on my frame had brighter or darker hue or just more visibility, it would be a huge help. As it stands I can barely see it and I have to blow view up to the max and squint to see the guidelines so I know where to drop my image.
I hope this makes sense, it’s not the easiest thing for me to describe.
It makes sense to be, and I don’t have a software answer. But I wonder it you made the jig out of white material, or painted it white, would the lines be easier to see?
2 Likes
The guide lines are hair thin and are very pale grey. The problem is that they blend in with the scrabble tiles. Maybe if we put a piece of dark paper over the jig before dropping the images…if the snapmarks hold through two openings/closings of the glowforge door. I’ll give it a try and report back. Thanks for inspiring that idea!
so, your image should be embedded in a file that has the same Snapmarks (SM) as your frame. you shouldn’t have to align your frame, then drop in an image. Then you put in the frame, load your file, hit the SM tool, and ignore scoring the SM in your file again.
IF that is what you’re doing I guess I didn’t manage to make sense of it ![]()
If it’s not what you’re doing, you might give it a shot. The jig should hold an individual tile in place to whatever accuracy you’re looking for.
Tried putting a piece of cardboard over the jig and it made the guidemarks much more visible…but the glowforge software is being very glitchy today. Not allowing me to cut/paste images, or worse, only pasting images I used earlier and have moved on from, and changing the dimensions while at it. ( i usually make a row of 5 of the same image, so 5 different images on each run). Gave up after several tries to fill the full frame of 25 images. Printing 10 tiles now. Alignment looks excellent, but it’s an awful lot of work to get the laser to print with accuracy.
We have tried doing this in Inkscape, but so much resolution is lost it has made the tiles unusable. We continue to try multiple ways of doing this.
It sounds like the solution then is getting higher resolution files out of Inkscape with your graphics embedded.
I’m not an Inkscape user so I can’t help, but try check the TOC in Tips and Tricks for Inkscape help.
1 Like
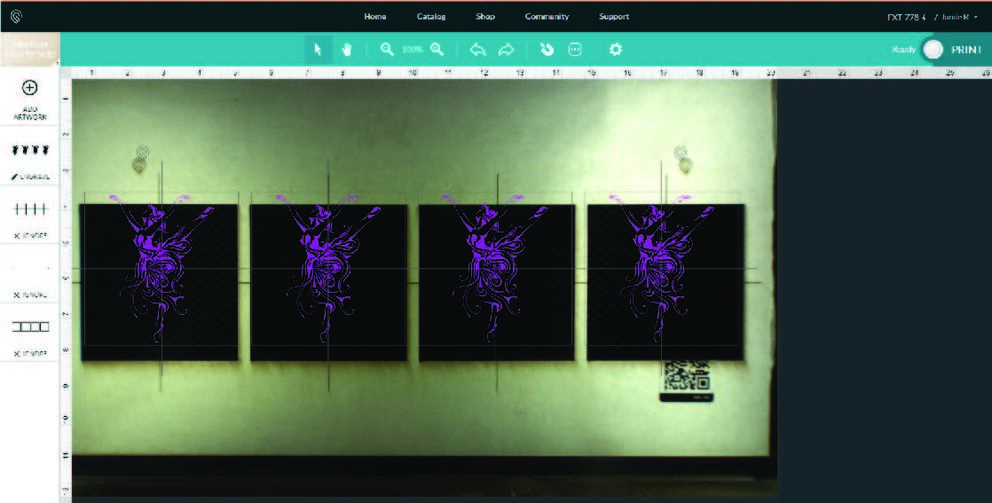
Hi - I’m consistently getting “Not Enough Snapmarks” from the template file downloaded directly from the Glowforge site. Any ideas how to resolve this? I have not added any artwork I just wanted to see if the template file would work. I have noticed that my camera seems skewed relative to the material on the bed. Notice the QR code for the material is out of focus.
45%20PM|537x266