Issue in cutting proofgrade materials on Pro

Hello all!

My machine is not cutting through proofgrade materials on proofgrade settings.

I have made sure the material is flat. I have cleaned the machine, all lenses, air assist fan.

I have even tried to lower the speed setting and it still does not cut through. Even on proofgrade settings there is a slight flame, that never was there before when the machine was cutting correctly.

Anyone know what could be happening? And any possible ways to correct?

Can you show us a picture of the results?

Sure can! Here are just a few of the many I tried. Once I realized it wasn’t working on my project, I resorted to just trying to cut out a circle.

Looks great on the front. But nothing is cutting through. Slowing the speed only produces more flames and still doesn’t cut through.

Can you confirm your lens is oriented correctly? I am not sure if those look like they are in focus or not.

The laser lens has an arrow on in it. That arrow should point up.

Have you checked the air assist fan?

Yes the lens is in correctly. Checked and cleaned.

I have. Pulled it off and cleaned it as well.

Does is it also increase the smoke generated? Can you cut through acrylic?

No increase in smoke. My issues have been with acrylic. These photos were black thick and I am also having issues with clear medium.

So this is with PG acrylic? I’m sorry if it sounds like an interrogation, but my mind keeps telling me this is the problem, but the evidence doesn’t support my theory.

Correct. All PG acrylic.

To determine our next steps, could you please do the following?

  1. Turn off your Glowforge, then turn it back on
  2. Place Proofgrade Draftboard in the bed and load the Gift of Good Measure design.
  3. Set the score and engrave steps to ‘ignore.’ Print the Gift of Good measure using the default settings. Allow the print to finish.
  4. When the print finishes, leave the lid closed and wait until the fans stop and the picture of the bed updates.
  5. Check the completed print:
    • If the Gift of Good Measure fails to cut, please let us know the date and time of the print
  • If the Gift of Good Measure cuts successfully, please try another print of the design you saw the issue with, and let us know the results.
  1. If the issue still occurs, please let us know the date and time of the finished print.

The gift of good measure did not cut.

Print done at 11:26am est on 03 Sept.

Thank you so much for that update. As I review your machine logs from the Gift of Good Measure, I would like to check over just a few more things.

At your earliest convenience, could you do the following for me?

Please send photos of all your cleaned optical components, with special attention to any damage you might find:

  • Both windows
    • The printer head window, on the left hand side of the printer head
    • The laser window on the inside left of the Glowforge
  • The printer head lens
    • Both sides of the lens, top and bottom
  • The mirror inside the printer head
  • The bottom of the printer head

Once we have those pictures, we’ll follow up with next steps.

No damage is noticeable. Here are the photos.

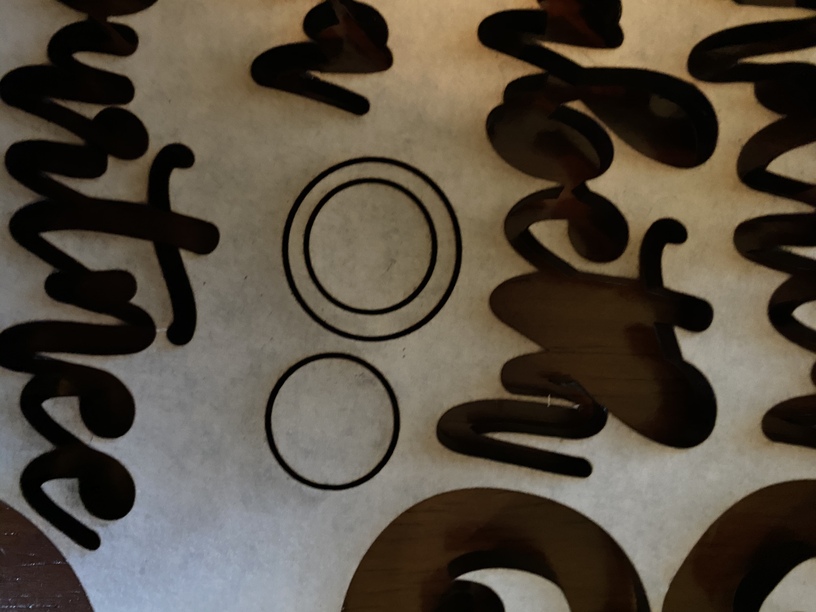
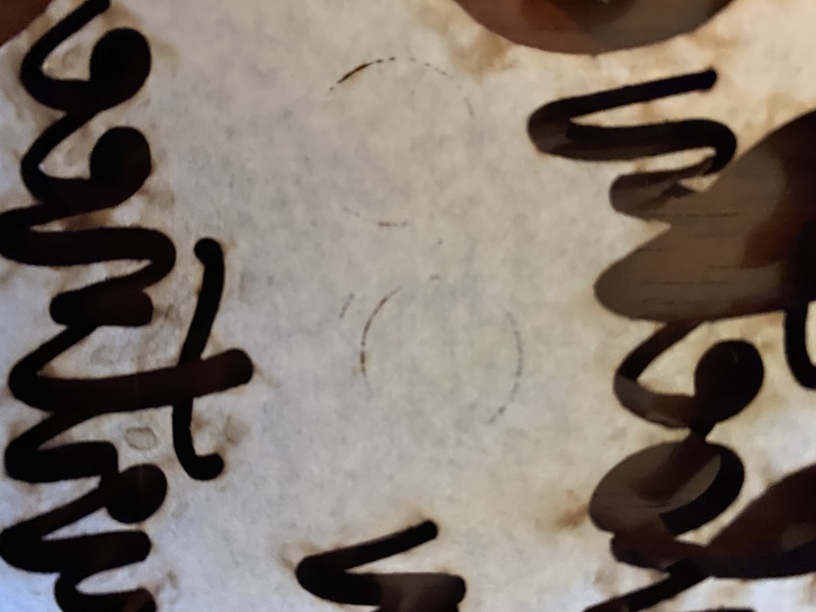
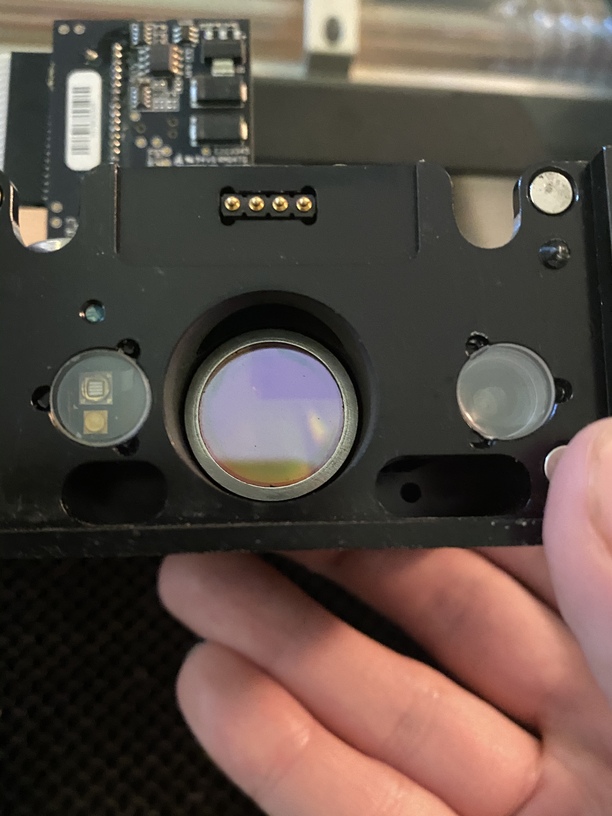
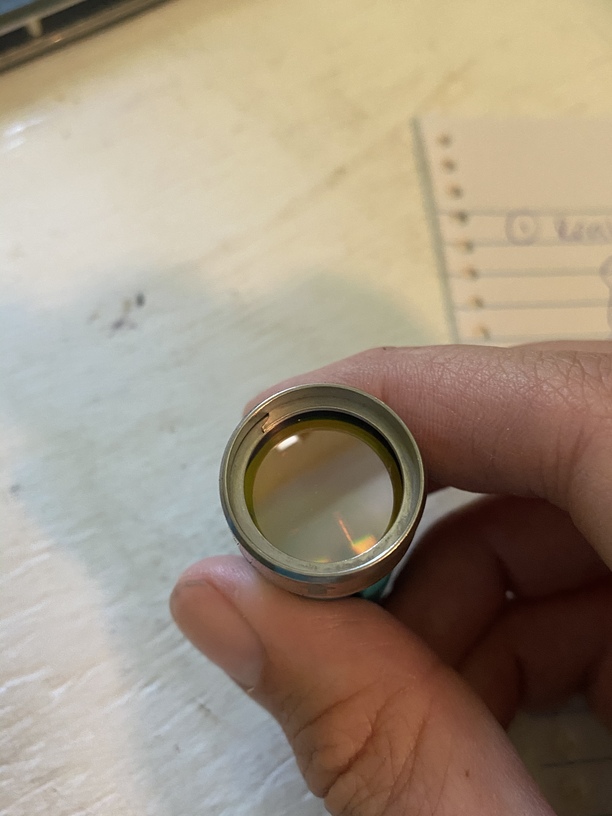
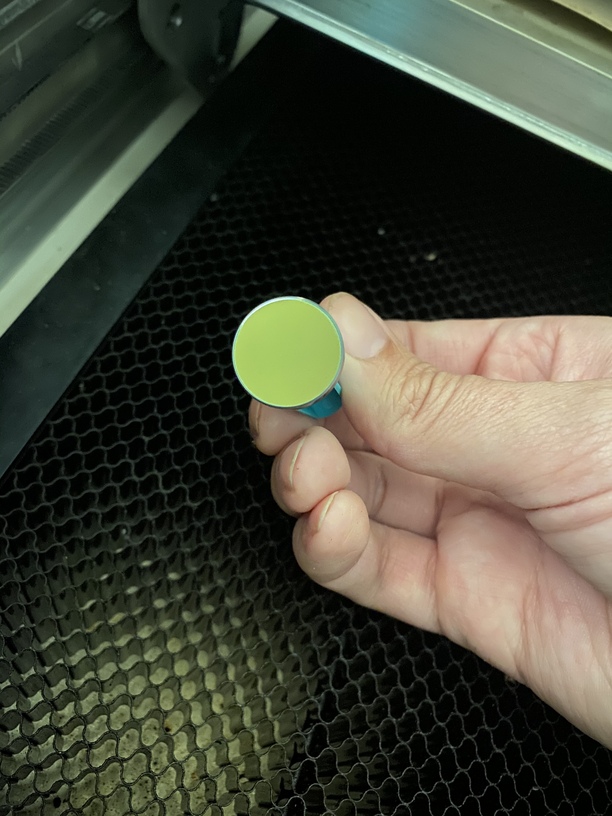
Hello @marleeshealy, thank you for providing those photos. I agree that your optics all look to be in great shape.

After reviewing the logs for your unit again, it looks like your Glowforge might be having trouble communicating with the printer head. There are two key connections I’d like you to check for me.

Could you please do the following?

  1. Turn off your Glowforge.
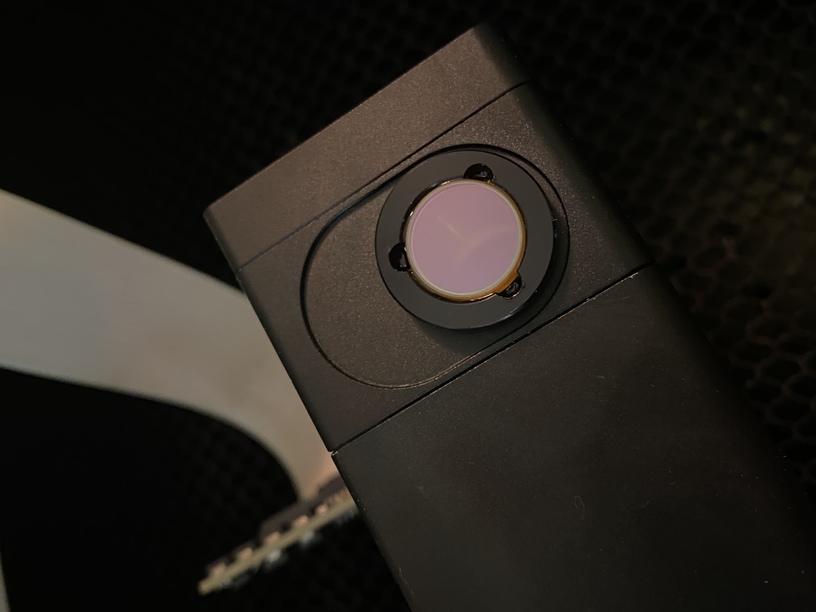
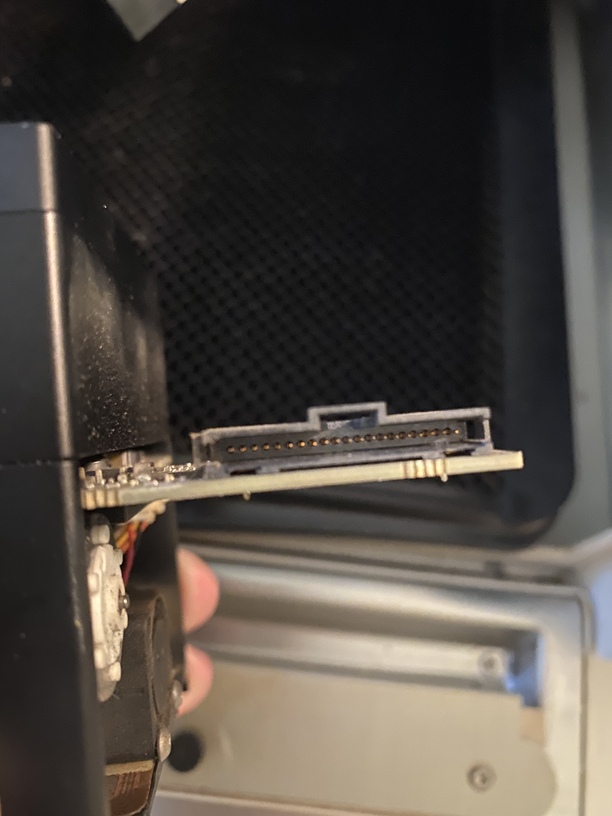
  2. Holding only the finished black surfaces, grasp the printer head as shown. Pull gently up and back to disengage the magnets and remove the head.
  3. There is a small tab in the center of the wire ribbon. Push down fully on the tab to release it, and gently pull the wire ribbon plug from the printer head.
  4. Take a clear photo of the gold pins inside the printer head where you just unplugged the wire ribbon. It should look like this.
  5. Pick up the printer head and wire ribbon. Make sure the tab on the wire ribbon is facing up. Slide the ribbon back into the head until it clicks.
  6. As shown, lower the printer head over the metal plate so that it rests next to the two round posts. Then push it gently away from you – you’ll feel a “click” as magnets pull the printer head until it sits snugly atop the metal plate.
  7. Pull the laser arm all the way forward.
  8. Reach over the laser arm, and to the left of the inside of the unit and you’ll see this circuit board:
    ​​
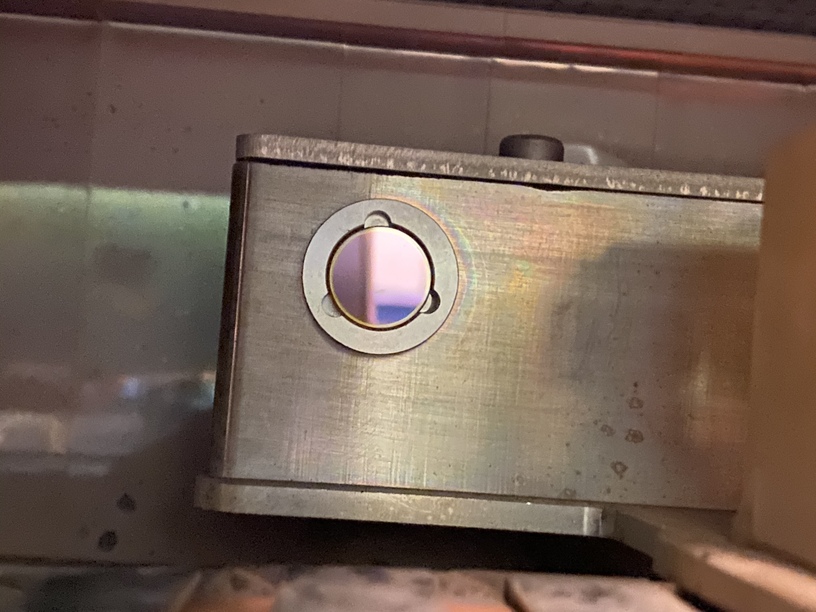
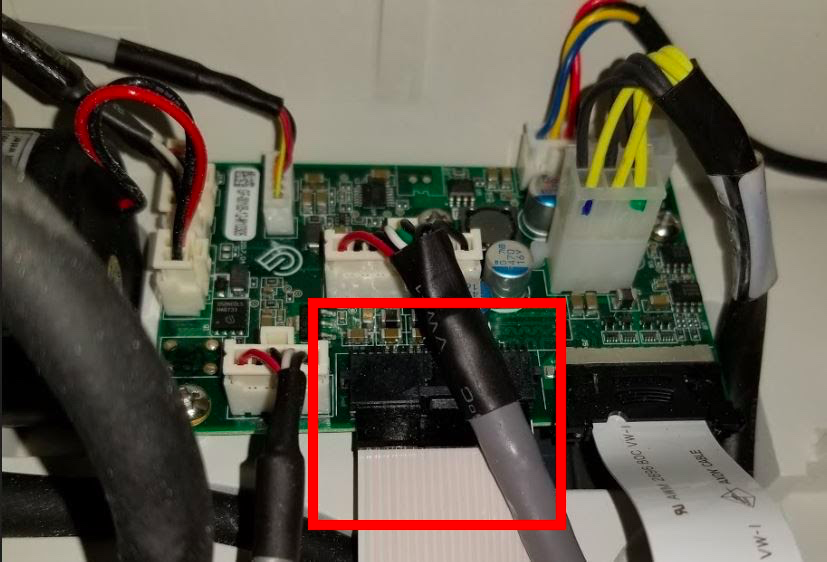
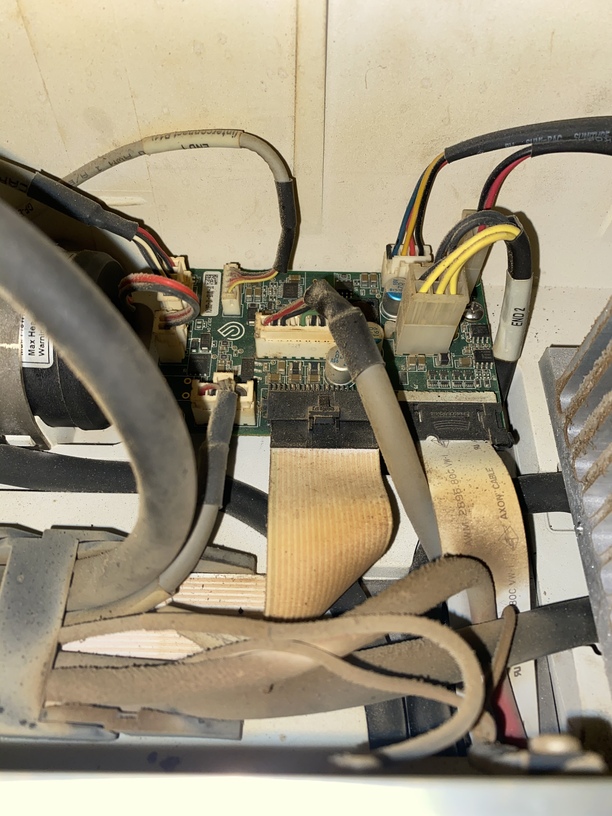
  9. Take a photo of this board. I’m specifically interested in the cable connection highlighted by the red square. Please orient your photo to capture that connection.
  10. Turn your Glowforge back on. Retry the Gift of Good Measure test print.
  11. Send us the photos you took in step 4 and step 9.

We’ll review the photos, and follow up with next steps. Thank you!

Thank you for continuing to help me troubleshoot. Here are these photos.

Thank you for working through those steps, and for sending over these images.

Unfortunately, it looks like your unit is experiencing an issue that we can’t resolve remotely. I want you to have a reliable unit, so I’m recommending we replace this one. I’ll be in touch via email to sort out the details. I’m so sorry about the bad news.