My sister’s a military wife. She’s been doing stamped coasters for different squads and planes her husband’s been in, or they have friends in. But she can’t find stamps for the KC-10. When she found out we’d gotten a Glowforge, and had been engraving a few sample tiles, she asked if I could do something about her situation. I had to get her to clarify exactly what she needed, and we finally figured that out. I ordered a sheet of the clear stamp material (Laser Engravable Rubber & Polymer), rounded up some KC-10 images, fiddled with them, and am trying my first stamp!
Can’t give settings, since I had to run the job 3 times to get it deep enough. I’ll give those next time.
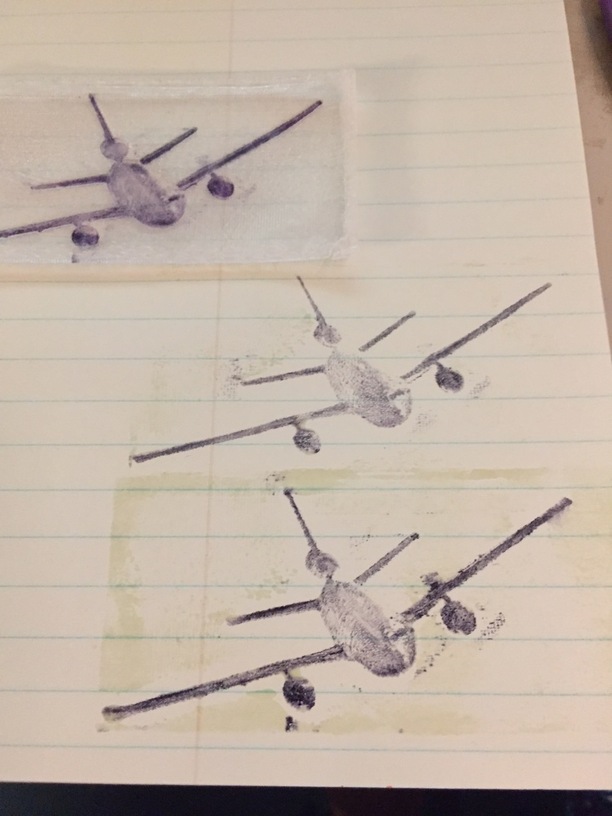
The stamp is at top. The middle and bottom are the first two stamps to see how it worked.
When I first opened the bag around the material, there was definitely a whiff of rubber, but it didn’t last. Engraving did not stink at all! No charring either.
However, engraving does leave little melted drops behind the lasered edge. I took a paper towel and blotted it really well as soon as I opened the lid. The melted drops did not soak all the way through the folded paper towel, so there wasn’t much, but I didn’t want it pooling back into the engraved area. I handled it way too soon…the corners where I was holding it tore off. And today, there is a rubber smell occasionally, or if you sniff it.
I’m still experimenting. I used the settings from another post, and those barely made a scratch. So I upped the power considerably and slowed the speed. That run etched about 1/4 of the way through the material and didn’t cut all the way through. I ran it again, and got the depth I was thinking it should be. I don’t use stamps, so I’m kind of guessing. Had to run the cut line a third time.
So after using it more, the stamp material does have an odor. But only when you get close to it. The exhaust definitely has odor, as we found out when we opened the door outside, which is only a few feet from the exhaust port. Good thing we’re going to move it before summer.
The settings sweet spot for engraving for me are: power 70%; speed 300; LPI 450, 1 pass.
The cut line is: power full, speed full; 1 pass. This doesn’t actually cut all the way through, but I didn’t like the cut line on the sample. The backing, the one that you take off in order to stick the rubber to an acrylic block, got rigid and ruffly around the edges. I intend to use an exacto knife to complete the cuts.
Now I have to go buy 2 more sheets so that I can make stamps for the ideas I have now.
Oh man! The longer I work with it, the more odor it has. It works beautifully though. I would also suggest that you have paper towels ready to blot the stamps after the lasering. The rubber, or what ever they’re made of does not completely vaporize…not even close. There will be a pool of liquid in and around the stamp. I don’t KNOW that it will re-solidify, but blotting thoroughly makes sure that it won’t. Again, I’m not cutting the stamps apart with the laser. I didn’t like the way the backing came out, so I’ll be using an exacto knife to cut them out.