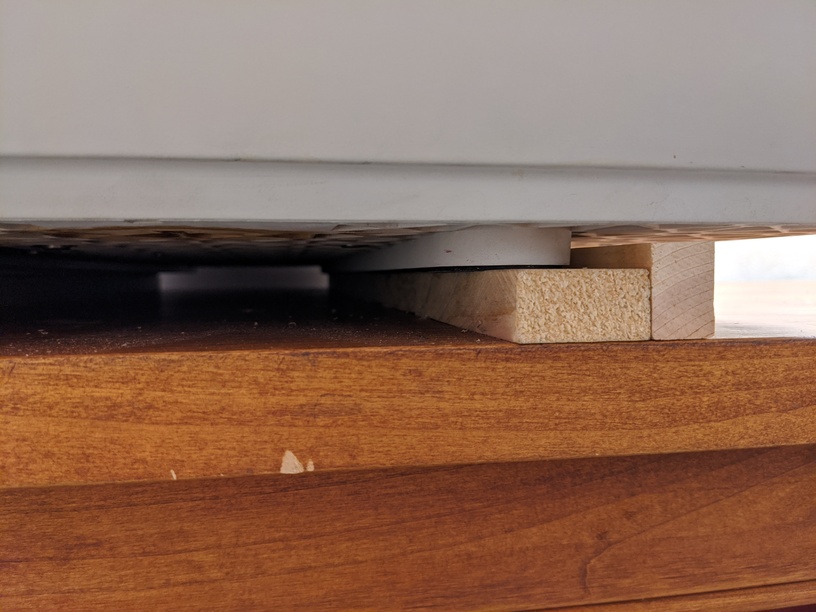
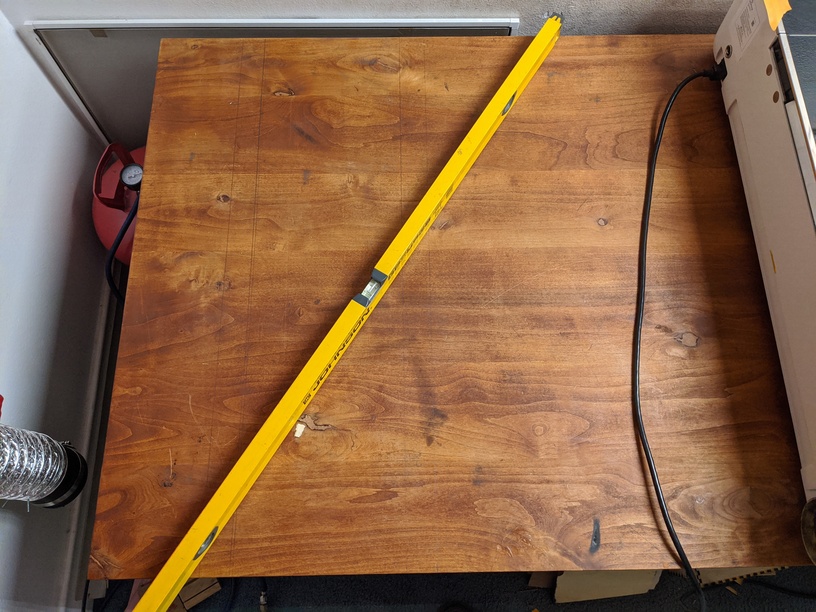
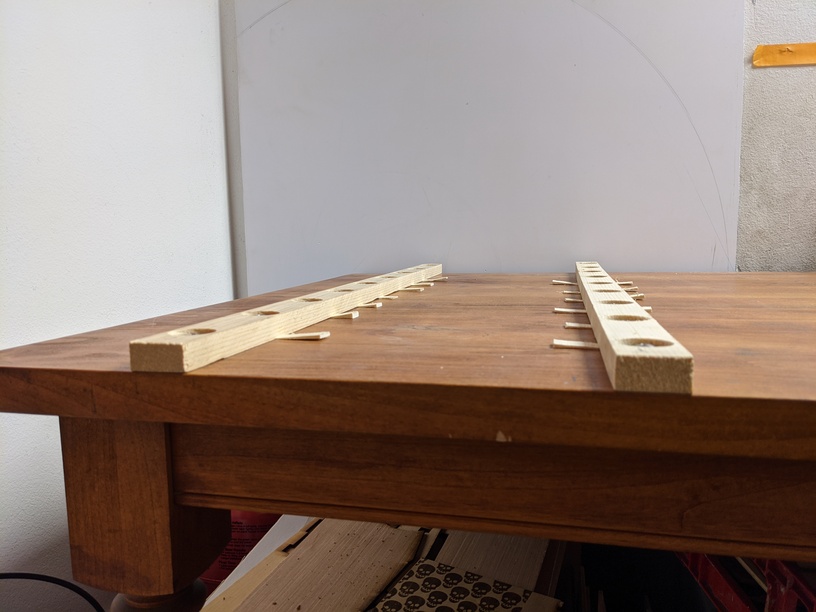
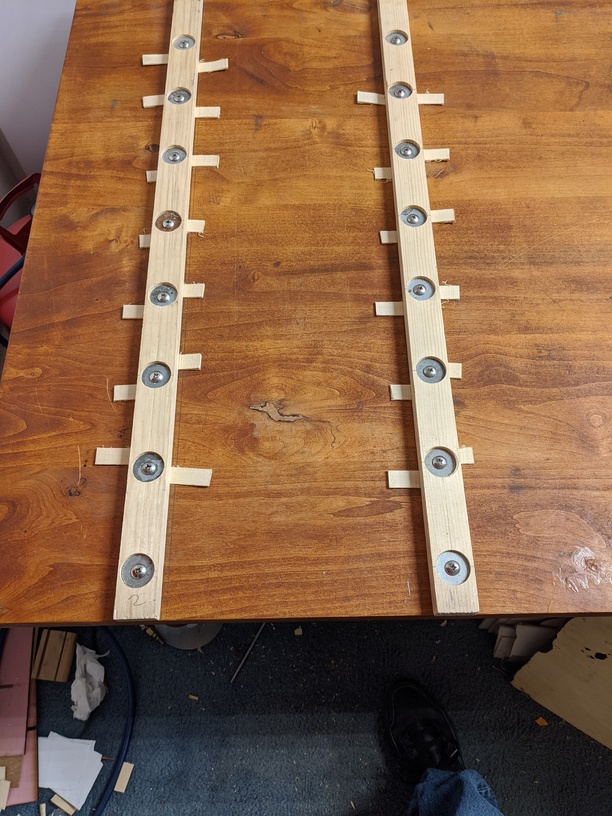
I thought that i had the perfect home for my Glowforge it is a 5’x3’x1 1/4" solid wood table the tables are 26 " from floor the top. i put them end to end with room enough for Hp printer, Cricut Explore 4 , monitor,key board and still have enough room to slide 5’ of material into the Glowforge that set on the end of one of a table. But when i went to level the Glowforge i noticed that it was not ridgid that it twisted with ease. don’t get me wrong it wasn’t a problem to level out by shimming a couple of corners to make level and the seams of the door were true and straight when it was closed. But i wasn’t happy with with the results because by shimming any one of the corners it leave o void between the top of the table and the bottom of the glowforge. This unsupported area will sag in time because the body or frame is flexible and the carriage wont be able to run run true if the distances between the rails art not true to each other causing a roller coaster effect that would change the distance between each rail raising or lowering the lazer from front to back as it travels. It may not seem like a lot but for those who are having problems with calibration then look how true your table is. This is how i fixed my table the two railes are shimmed at each bolt to correct the errors in table then tighten down to secure. Not sure if this will help you but my table was 1/8" lower in the center to me eventually it would of become a problem. Try picking up one corner of your Glowforge just a 1/8" inch a see how it affects the seems when your door is closing. Thank you for you thoughts
![IMG_20200323_1510571|666x500]
The design is such that it is only necessary for the four feet to be on the same level. If you wanted all the feet and surface to be level a chunk of half inch or more plywood placed on the table would have the Glowforge feet on the same plane even if there were a fraction of a degree off horizontal. I happen to have a slab of PVC foam that has served well for a couple of years now,
Agreed. The case is designed to accomodate flex. There are three structural members that matter, the plate across the rear and the two side rails. They are connected to the four feet. As long as the machine is flat (level is not critical) such that the internal frame is not twisted, the machine will run true and the lid will close correctly. Checking the lid is the only practical way to check if the machine is flat.
That’s a great effort but the only thing that matters is that the surface is flat at the points where each foot contacts. Additional support might distort the case and introduce twist into the frame.
i agree with you level not so much of a problem as long as it is flat. I cant see putting this Glowforge on just any surface with out making sure that it is as true as it can be.
if you have ever noticed that part of your project just doesn’t quite burn all the way threw and does every were else ? I believe its because the surface is not true the glow forge is sitting on and sure you can turn up the power to make it work but all that does is unnecessarily scorch your project. additional support can only help if done correctly . and if the glowforge was intended to rest only on the four corners it would only have four legs instead of legs that run the entire width of it .
I’ve never leveled mine. Just plopped it on a flat surface and it was good to go. As long as the cover opens and closes without binding you’re good.
you are correct flat surface is important mine was not a this how i corrected it. and i was thinking some of the people having problems calibrating their lid that this could be something to look in to. personally i don’t believe that if the lid closes then all is ok because i can lift the corner of the glowforge even a 16th of a inch and the lid would still close and that 16th of a inch will throw off track high to low on the opposite corners and that would change the focus off on the laser.
You might think that, but it’s also possible that this made the mold a lot simpler to execute (and more likely, it provides a fair bit of rigidity to the case). As far as I know no one from glowforge has ever talked in detail about the case design intent, especially to that level of detail.
I’m not saying you’re wrong; I’m just saying that you might not be 100% on the mark either.
I don’t mind being the one to say you are wrong.
There is no structural support to the frame of the machine between the four corners. You can run your fingers along the rubber pad and feel there is nothing behind it.
Beyond that, well done. Nothing wrong with going overboard. I just don’t want people thinking they have to go to those measures, because they don’t. A twist in the frame won’t cause the cut-thru issues.
One of the things that set my mind towards 3dPrinters was buying a food chopper and having it break the first time I tried chopping something harder than a banana and investigating the person doing the drawings had used the offset command instead of trying to center a circle, making the critical weak point. China would not take my call making the suggestion.
Ok eflyguy i give up but just try one thing just put three quarters seventy five cents under each of the four corners of the glowforge for a couple weeks and let me know if see any changes in performance. to test my theory just burn one inch holes at a diagonal front to back and take pair of calipers and measure each one at the same point and i will bet you there is a difference between them.
This topic was automatically closed 32 days after the last reply. New replies are no longer allowed.