Indeed. In my head what I was thinking is two separate thoughts…
If I tried to apply pressure to something that wasn’t right on the edge, that pressure simply won’t translate because the material is so thick and dense.
Additionally, if I were to figure out a way to apply horizontal pressure to the object somehow, inner cuts on the object would compress, distorting the overall shape of the object.
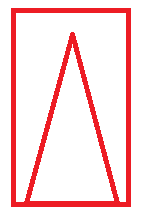
Say this is one of my objects. These are all cut lines. So I imagine that, once cut, there’d be a small gap where material was evaporated and if I squeezed it, it would change the overall shape so when it’s flipped, it wouldn’t be quite right. Maybe I’m wrong about that.
Tom, is the acrylic cut part through or right through ?
If the former, then it’s still solid and pressure on the side wont move anything.
If the latter, then the triangular shape will fall out, if you flip it over or not.
Could you enlighten me ?
Thanks
John
EDIT If the sloping lines dont meet the bottom, but they’re cut right through, I cant see you compressing 3/4" acrylic with the wedge.
I can’t imagine being able to squeeze a cut line closed with my hands, and the amount of pressure needed to hold in place will be much smaller.
You could hold it in place with only a small pressure from your finger, after all !
You could probably hold it in place with just a piece of 220 grit paper folded over and wedged in the cut line !
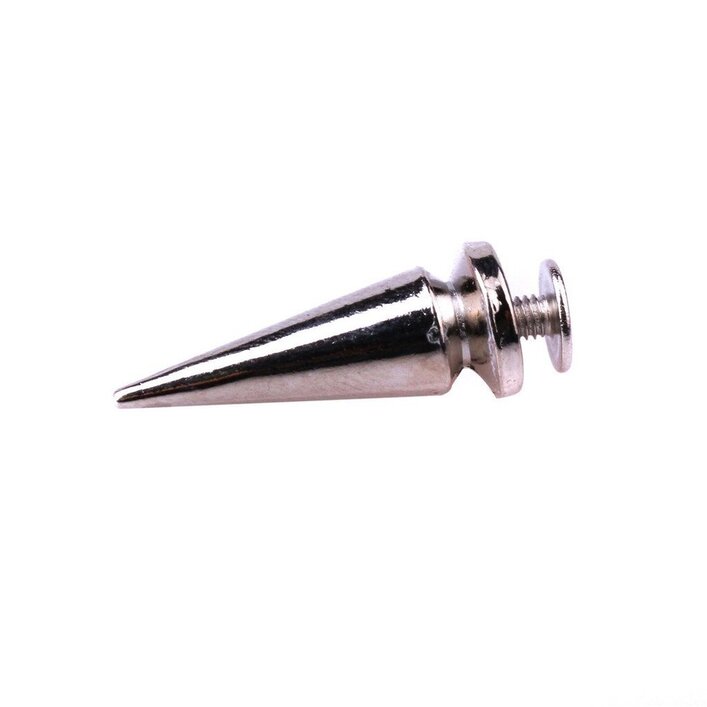
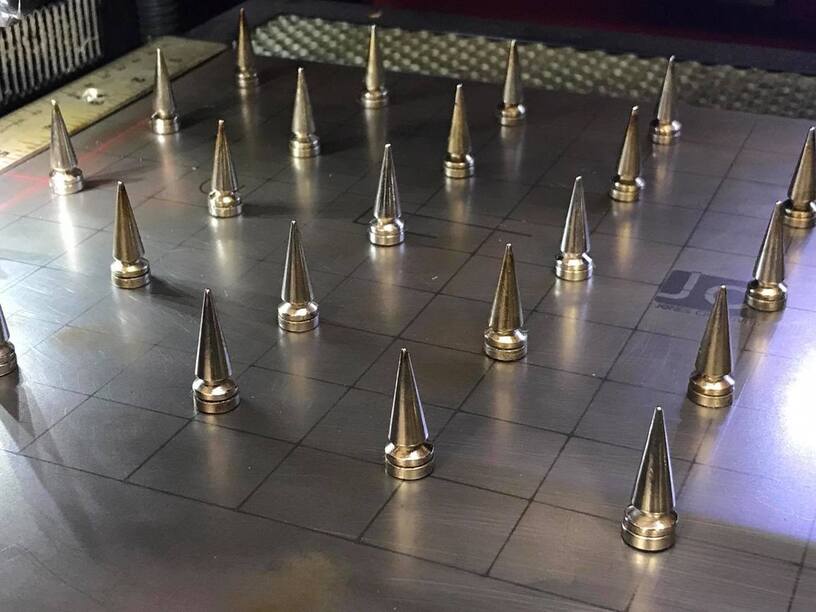
I’ve seen some really cool pin set ups using pins attached to small magnets. It looks to work really well since you don’t have to attache them to a board and you can place them anywhere. You just need some countersunk magnets and screw the spikes to them.
Well, yes… That is true. Although I’m keeping the rectangle piece as kind of a jig within a jig for the actual object (the triangle, in this case). So it just fits all right back together when flipped.
That said… I get what you’re saying about not needing much pressure. But let’s say I’m using an 8.00" x 8.00" x 0.75" brick of acrylic here (which I am). And let’s say my object is dead center of that brick (at some point that will be the case). I don’t see a way to apply pressure to the center of that brick the way you’re describing.
Let us for the moment go with the folded grit paper wedge.
You cut the rectangle, say 2"x3", and the triangle inside it, out of an 8" x8" block ?
Then you remove them, and flip just the triangle, or both, then replace them, but need to keep both rectangle and triangle level with the remaining part of the block ?
when you’ve flipped either or both, you push three wedges, two between the sloping sides of the triangle, and one at the bottom of the rectangle, and a shim of the same thickness at the top.
So long as the three are the same thickness, I see no placement difficulty.
The one at the bottom will push the triangle piece into its correct position, which in turn will push the rectangle into its proper place.
In fact you could just use shims of the appropriate thickness on the sloping sides, and just need pressure to be applied at the bottom of the rectangle.
EDIT Just use shims of the same thickness as the kerf, and apply pressure only from the bottom one.
I’m kinda slow on the uptake and I realized we already had a usable pin design from. @eljefe4. It really is an amazing little design.
I made them pointer, but now don’t think it’s really necessary and the original rounder top works fine. (Please ignore the filthy tray. Apparently I’m a dirty girl
That might do it. I’ll play with some of these ideas over the weekend. I’m excited!
Those really are great. I wonder if they’d stand without the tray if I cut off the part that sticks into the tray. Well, I guess really I could just cute triangles out of whatever and get the same result, huh.
How very interesting! I do like this idea a lot… It’s so nicely simplistic! Plus I think I have some screen downstairs, so…
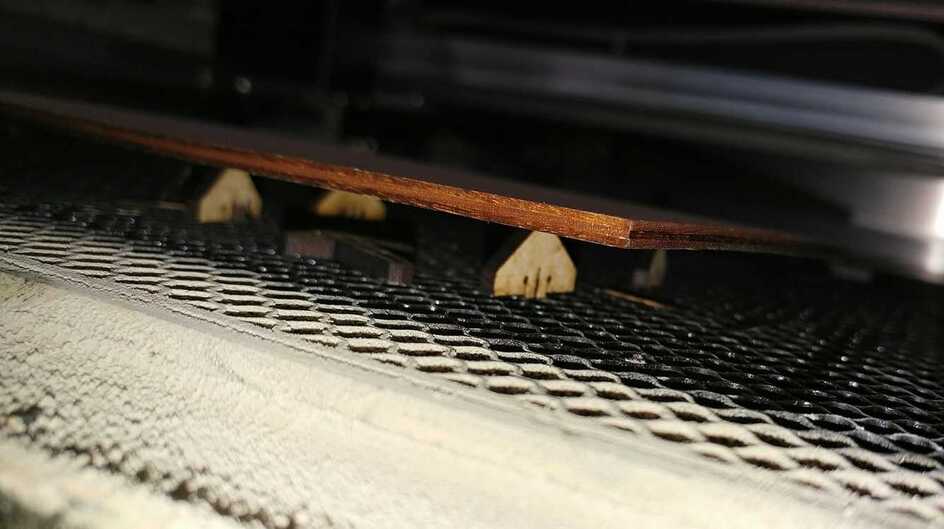
I look forward to @kittski’s answer. But I’ll tell you when I was working with this acrylic and the bottom was open to the air, when it cut through, it lit the bottom masking on fire. So I removed the factory masking and applied my standard beige masking tape. Same thing… lit it on fire, melting the underside of the acrylic a little. So that’s when I moved to no masking. I can’t say if this holds true for other materials.
Any idea how high the bottom surface of the acrylic was above the bottom of the forge ?
I assume the tray was out is what you mean by the ‘bottom open to the air’.
Just wondering about reflections of the beam heating the air as well as the acrylic above it, if it was only a small gap.
I don’t math well. But maybe you can.
So it’s .72" acrylic that I raised to just clear the air assist. So close to the air assist that it warned me I may be too close (but I wasn’t). Whatever that works out to, I would not call it a “small gap” underneath.
Well that idea just crashed. there’s plenty of air space underneath, but perhaps it’s reflection of the beam. I hope not !
Ah, second thought. you’re cutting through this with several passes ? Perhaps with the large air space underneath, the air assist is fanning the flames more, down through the cut !
With the honeycomb present, perhaps that restricts the air from swirling around underneath.
I’m so far from a laser expert it’s a wonder I can make the Glowforge glow. However, I can’t imagine the beam would be cohesive enough to get through the 3/4" acrylic, pass through the gap underneath, reflect and make it all the way back up to the material and catch the masking on fire.
Once the beam has cut through, that power is not diverging very much, but I think the heating effect is still pretty concentrated, and the extra oxygen from the fan helps blow it into life.
See previous afterthought and edit.
Another thought. The honeycomb might restrict the movement of the products of combustion of the material, which in turn acts as a fire retardant like a fire blanket, for a split second, as the beam moves on.
Without it, the burnt particles are free to disperse into a bigger space.