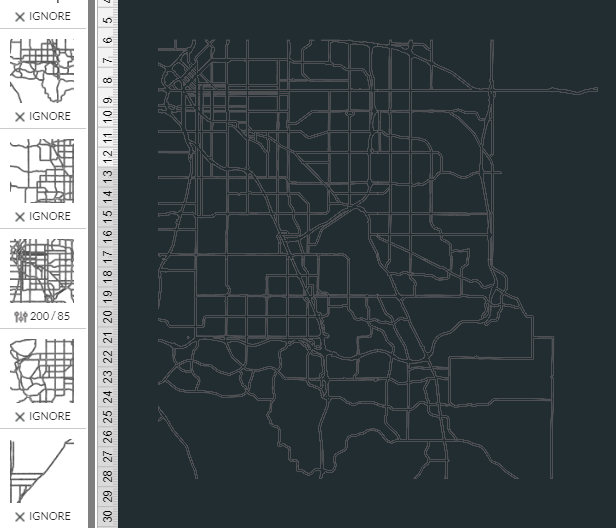
I’m cutting a large map that I have broken up into 11"x11" sections. Each section in inkspace is colored differently. Everything loads fine with all the layers in the left-panel but for some reason some of the layers are bundled together in the cutting area.
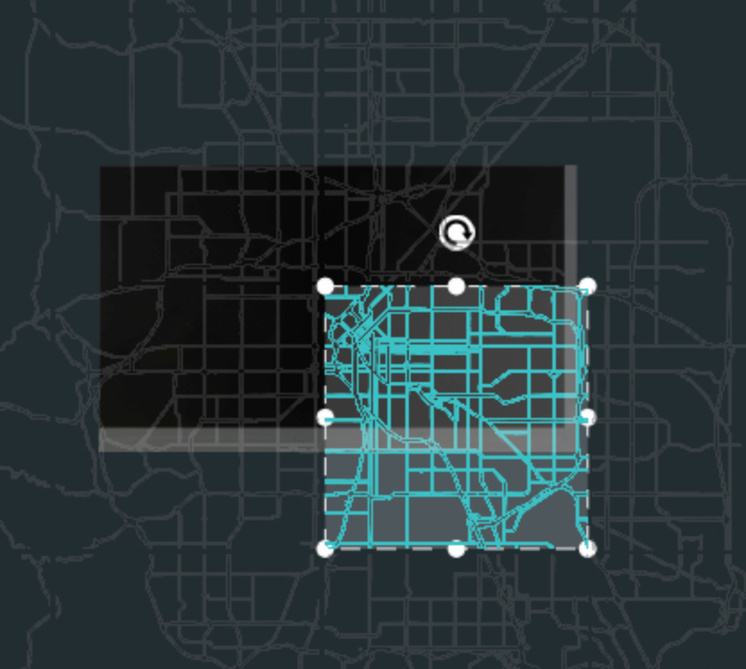
The image shows a 2x2 section which should be 4 separate cutting steps but they are combined together so that I can’t move them independently. How do I ensure that the glowforge UI will treat these panels separately so that I can properly position each one for a cut?
In the image you can see that I have defined cutting rules for the section in the upper left corner, but the rest have been set to ignore. However I can’t move just the upper-left piece, the entire group moves together.
This isn’t the first time someone’s posted about dissimilar colored objects being grouped.
The way the UI is designed, they should not, so this is something support should investigate.
If you want support to look into it, you’ll need to share the file with them, either by including here, or sending via email.
Just out of curiosity, what happens if you delete all the other portions in your design app, then load the file with only the four that are currently grouped.
As long as they move together but cut separately I would think that would be a good thing. That way as you move the material about you can see the alignment to the next area easily.
The GFUI does not care how big the piece is as long as the layer you are cutting fits in the cutting area. I frequently do this as by using only the arrow keys the design keeps one axis correct while moving the other.
It isn’t a good thing because the positioning of the layer has to be done using the offsets rather than drag and drop (each layer is exactly 11"). When they are grouped together the positioning includes all layers. Also it isn’t super easy to figure out which layer is which given that many look similar and the highlighting doesn’t work as it should.
Several of the segments overlap each other by the smallest amount. That causes them to be automatically grouped. That is by design, so enclosed features are treated as part of a larger design element.
I just moved all segments apart by a few pts, and all segments are now separate in the UI, and can be manipulated individually.
Exactly 11" high will not cut, however a series of numbers or horizontal and vertical lines of a special color and put on ignore will help position if 10.5 square or 10.5x19 rectangles are used. in any case if the area can be cut it will be red, if not then it will be gray. With arrow keys it is possible to precisely locate the area to be cut by watching for the color change.
You can precisely locate using the numbers just by typing them in in the new popup.
If you are saying that “touching” is sufficient to group them then I would understand. The objects don’t overlap. They were a single continuous object that was cut by a repeated square in Inkscape. Performing an Intersection operation yields an empty object in Inkscape.
Is this a bug or simply an odd UI choice. If I wanted them joined I would color them the same regardless if they overlap or touch. Seems like the UI is joining them in one place but keeping them separate in another (the cut panel).
It’s your file, not the UI. Quite simply, they are overlapping. Whatever method was used to create it or divide it results in overlapping areas.
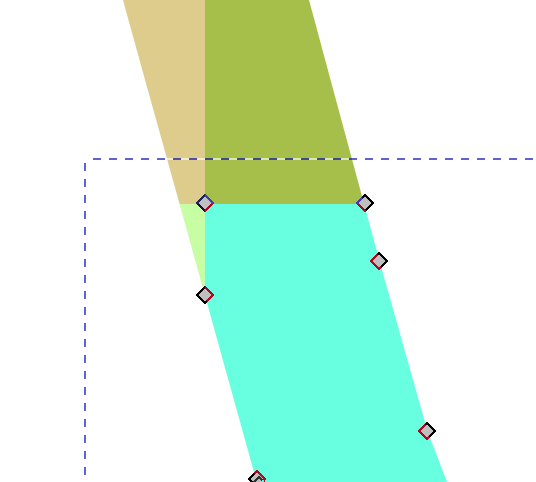
Here I have just the lower-right segment selected, but look how the selection box significantly overlaps the adjacent segments. All the corner nodes of those additional segments fall within that area, so they are grouped as one.
… and, as I said above, moving them apart solves your problem.
Also just confirmed, objects with overlapping end nodes are also “grouped”, which is the behavior I would expect.
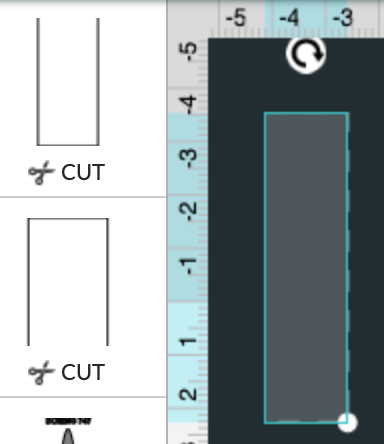
Simple rectangle cut horizontally. End nodes of each have identical coordinates. They have different colors so they are split in the side-bar, but they are inseparable in the workspace because the end nodes overlap.
I’m sorry that you’ve run into trouble while setting up prints with your file. Has the most recent advice which @eflyguy shared helped you to be able to set up and print your design?
Earlier on in the thread I also saw that you mention having difficulty differentiating between print steps in the app:
Something which might help would be to refer to a guide on our support site which shares how to use colors to cause print steps to automatically load in the order you want. Here is a link to the guide: Advanced: Setting the Order of Your Print Steps. Please let us know if this helps you to more easily identify the individual steps of your design!
It’s been a little while since I’ve seen any replies on this thread so I’m going to close it. If you still need help with this please either start a new thread or email support@glowforge.com.
 That way as you move the material about you can see the alignment to the next area easily.