Wow! Those are fantastic! When we get our super-duper low power settings we should be able to do just that.
4 Likes
How beautiful! (Wonderful to see all of these leather crafters in the pool…it’s something I eventually want to learn to do.)
2 Likes
Cool! Did you feel that this process was faster or had better results than traditional tracing/carving/tooling? From what you’re describing, it sounds like the only step that the laser helped you to skip was tracing, is that correct?
Whose class did you take?
2 Likes
I’m not sure it is was faster than tracing it, but i think it would definitely be helpful if you had an intricate design - effectively you could turn an hour or more of active labor into 30-45 min of passive labor. But you definitely still need to carve and tool it by hand if you want dimension to the design. The light etching gives a particular finish to the leather that could make some cool visual effects, but not any depth.
I work at Playmakers (the resident theater at UNC Chapel Hill) so I was auditing Rachel Pollock’s graduate class. I’m doing the same thing with her decorative arts (gloves, bags, shoes, parasols, and other accessories) class in the fall and I hope to incorporate the Glowforge into my projects.
8 Likes
Very cool! I hope you’ll share your results here 
2 Likes
Had a chance to give this another try, here are the results. Both @kennethclapp and @takitus suggested that the laser engraving + tooling leather concept might work better with a super light engrave. Per Takitus’ suggestion, I used manual settings this time around instead of PG settings and set it to lowest power/max speed (1/197). The leather is 5-6 oz proofgrade, and the engrave is approx 1.25" x 1.25" - so these photos are highly magnified.
Photo quality is poor, but hopefully you can see that this attempt yielded slightly better results. Even though I cleaned the soot off well before tooling, I had a bit of issue with the charred edges crumbling down and smearing across the surface. This is probably not a big deal if you’re going to dye or antique it, but it’s not as clean as I’d like. You can see this mostly in the section that was done with the edge beveler:
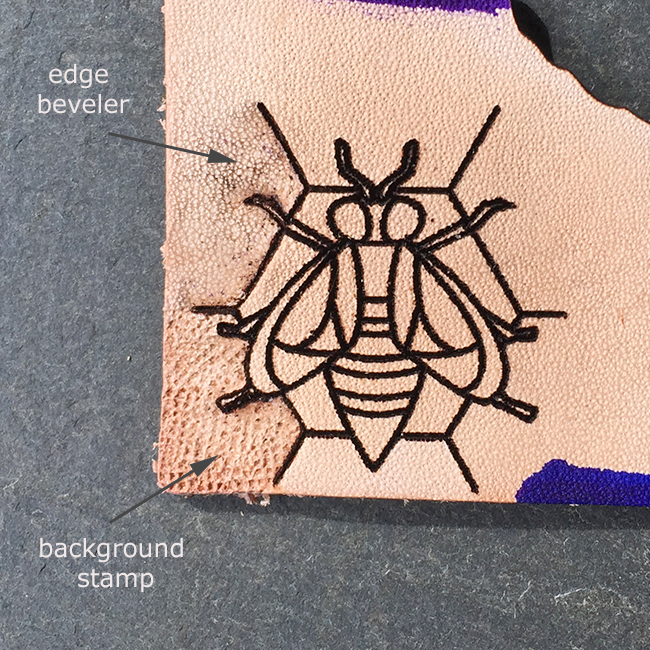
This photo shows the degree of texture/beveling a little better:
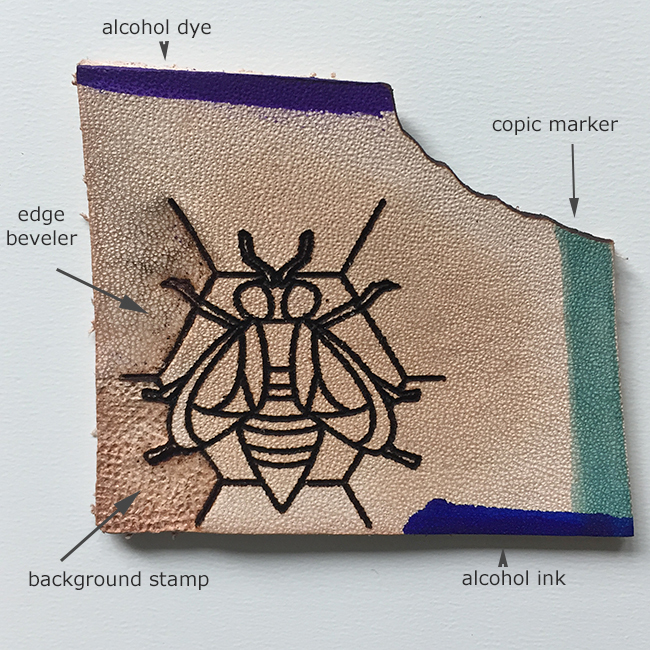
So I feel like the lower power worked better, but still not ideal. If you scroll up to the photos from @marmak3261 's experiment you’ll see some great side view shots that he took. These help to illustrate how the engrave really slices through the leather - similar to the effect you’d get with a swivel knife, but with a bit of charring along the edge of the line. That charred edge just crumbles to mush when you try to tool it. This effect was greatly lessened with the lower settings, but it’s still wonky.
A couple weeks ago, PRU users got a brief glimpse onto a super light engrave setting that the team is (hopefully?) still working on. If they refine that and bring it back, I think it will offer the kind of pale engrave that @aruba described and had success with 
10 Likes
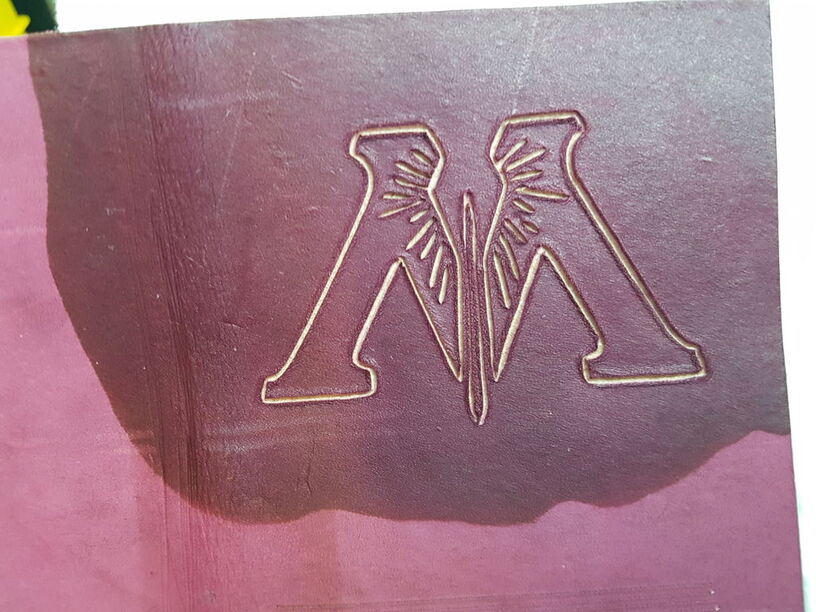
After taking a look at the results, it does seem like the charred edges present a problem. I have an alternate suggestion if you still want to use vector drawings to create your cuts. I created a Ministry of Magic leather passport holder with my Silhouette. I created a vector drawing and had my Silhouette cut the lines I wanted cut before using traditional leather tools. I know this is a Glowforge forum, but this process worked really well for me. All the details are in the link.
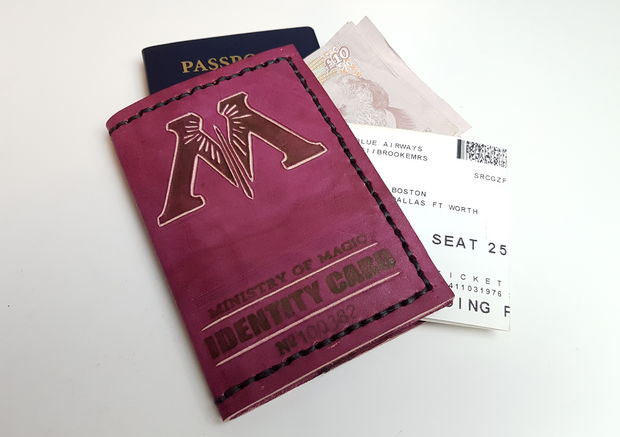
21 Likes
I tend to love leatherworking, laser related or not, so please, keep sharing  Is there no way to simply remove the charred edge by maybe taking a little extra off with a beveler? I had also wondered how deep the edge char would be. Too deep for simply sanding it off before finishing your edges?
Edit: it will be interesting to see how etching may differ when the low power setting are put back in…
2 Likes
pretty sure that this will be the piece that opens up engrave + tool
2 Likes
You are doing awesome work with the Silhouette. I love mine, but do the basic stuff, paper cards, stickers, HTV t shirts, signs, decals, etc. You are pushing its capabilities to their limits and getting wonderful results. Can’t wait to see what you do with a 
I actually don’t have that many leather tools, so it may be possible to remove the charred edge, but I wouldn’t know how. Sanding an edge may be more likely, but I doubt it would be worth the trouble on small detailed cuts in the center. I’m excited to play around with it and experiment with different options, but I don’t have access to a laser until my Glowforge arrives or school starts again.
2 Likes
All tools are welcome in the Everything Else category! That’s really lovely.
4 Likes
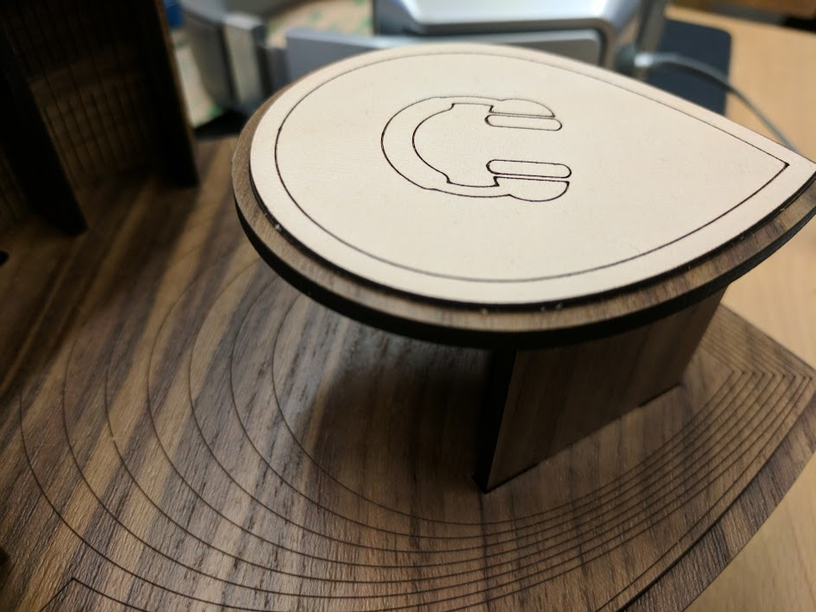
I’ve not had problems with edge char on leather - a wipe with a cloth and that’s it (and I often skip that step). You get a clean, black edge. You can also lightly sand it and then finish it as you would for a cut edge, if you prefer. This is what it looks like with no further operations (not even a wipe).
15 Likes
Like that design too. Catalog?
2 Likes
If I was just engraving or cutting and leaving it, then you’re right, it’s great. I’ve engraved and cut leather on another laser before and was very happy with it. However, if the engraving is the first step of a tooling process where you want those edges to then take on another shape, it seems to become more of an issue. There’s a pic somewhere else in this thread where the edge was flattened by a tool of some sort and the charring was then spread out and not pretty.
Heat also makes leather harden, so it won’t have the same kind of flexibility it would have without having been exposed to the laser. I certainly don’t want to diminish the coolness of being able to laser leather, it just may not be the best option for all leather processes. I could also be proven wrong. I don’t have access to a laser until my Glowforge arrives or school starts back up, but I’ll be sure to post my findings when one of those things happens.
2 Likes
I can’t wait to see what you’ll do with it!
It’s the headphone holders I printed with Will Smith at Maker Faire this year - I suspect they’re headed for the catalog, yes.
4 Likes
Oh, my, that’s lovely. I was just thinking about a headphone stand as one of my first projects and that gives me some ideas!
ohhh so thats what they needed my leather for. well worth it =)
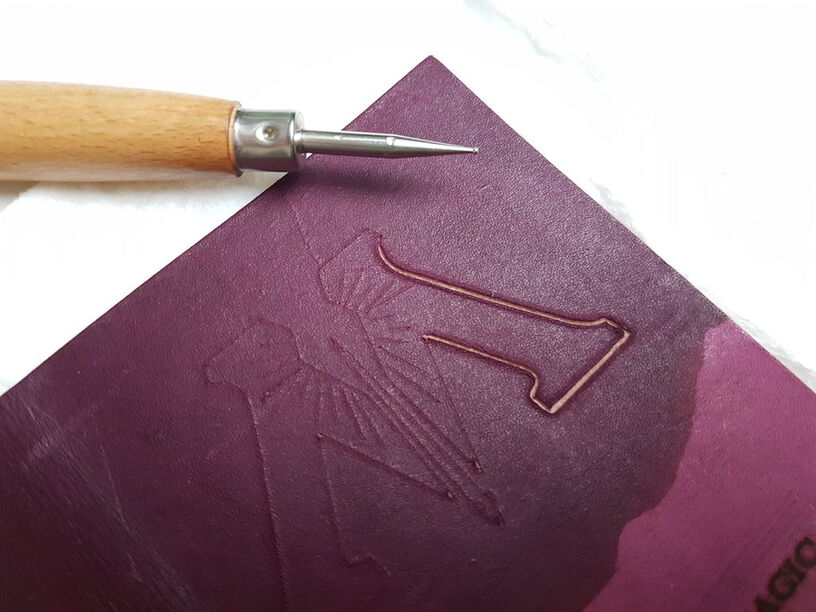
FWIW, that technique is more like embossing (using a stylus to trace or enhance an existing line) than what I would consider “tooling”… which is where you use a stamp or tool and actually tap it with a mallet to create varied textures along the edge of the carving. That’s not a knock at your work (which is lovely) so much as a clarification of terms. The result that you’ve shown in that image is relatively similar to the texture effect of the GF engrave feature in terms of the depth and texture achieved.
The charring is not problematic when you’re using the laser to cut or engrave the leather, but it’s not conducive to traditional leather tooling. In the image that you posted, the burned or charred line actually serves as a design feature. But when you go to tool it using traditional methods (i.e. case the leather and use a leather tool or stamp along the edge of the cut line and then tap the tool with a mallet to create textural elements) the charred leather begins to crumble and does not tool as neatly or nicely, as shown in this post. As a few have already suggested, using the laser to trace/engrave a pattern for tooling may work better once the lower power engrave settings are dialed in again.
I have a feeling that my above descriptions are not as clear as I’d like. Will try to revisit this concept this week - with photos, so that you guys understand the distinction that I’m making. Bear with me if it takes a bit, I just got back late last night and am still trying to catch up on sleep and work ![]()
8 Likes
This was my whole reason for purchase. My plan was to have the machine pre-cut my designs like you describe and then cut out the whole project so I can go straight to tooling. Possibly add etching and 3d etching to tooled designs for a multidimensional product.
1 Like