Last year, after I finished what I could designing the matchbox, I was thinking about another project that would be practical and showcase the laser’s precision. I have this roll stamp case on my desk and while I don’t use stamps too often, the case does make a difference for keeping the stamps from getting messed up.
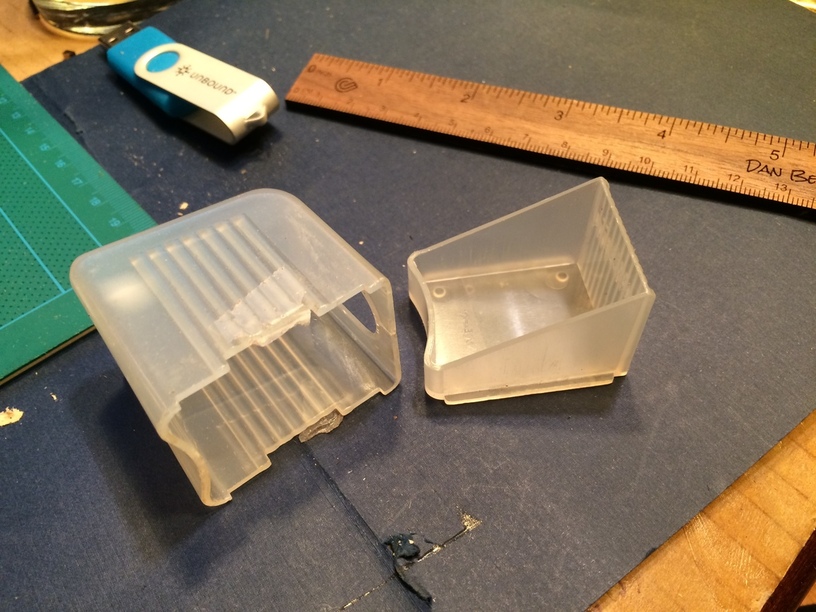
I had several different ideas and iterations, but never came up with a suitable design. I had to wait until I got the material to do this project. Since the case would be small, it needed not to be bulky or from thick stuff. I had thought about two boxes that fit inside each other. That would work very well and would be easy to do, but I thought that it needed to be slim and light as a desk or drawer item that didn’t look clunky.
The Inkscape extension elliptical box generator gave me some ideas and @m_raynsford’s flex box had potential. The 1/8" acrylic is pretty thin, so the case would be small. So how small could I make an acrylic round box or a flex box? What is the tradeoff between flexibility around a small radius and strength to hold up in the tabs and in the many kerfs.
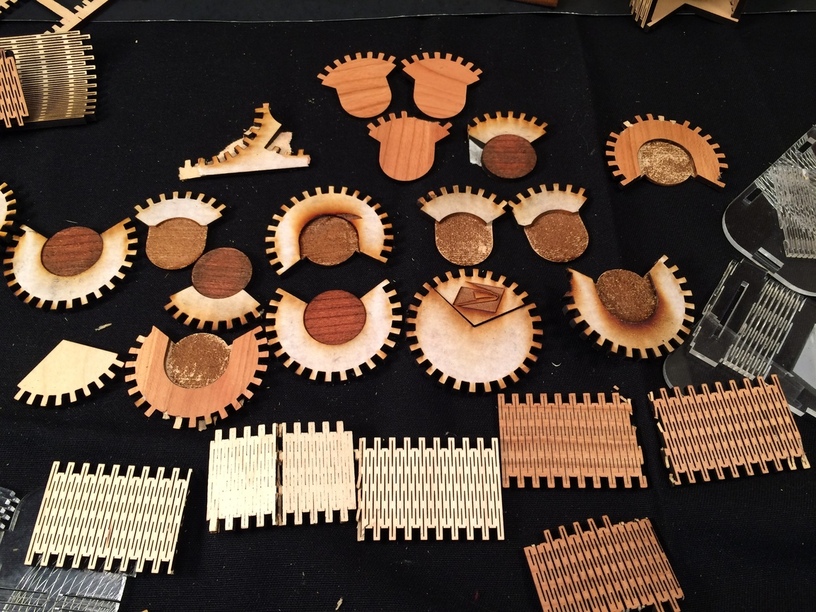
Here are some of the acrylic tests:
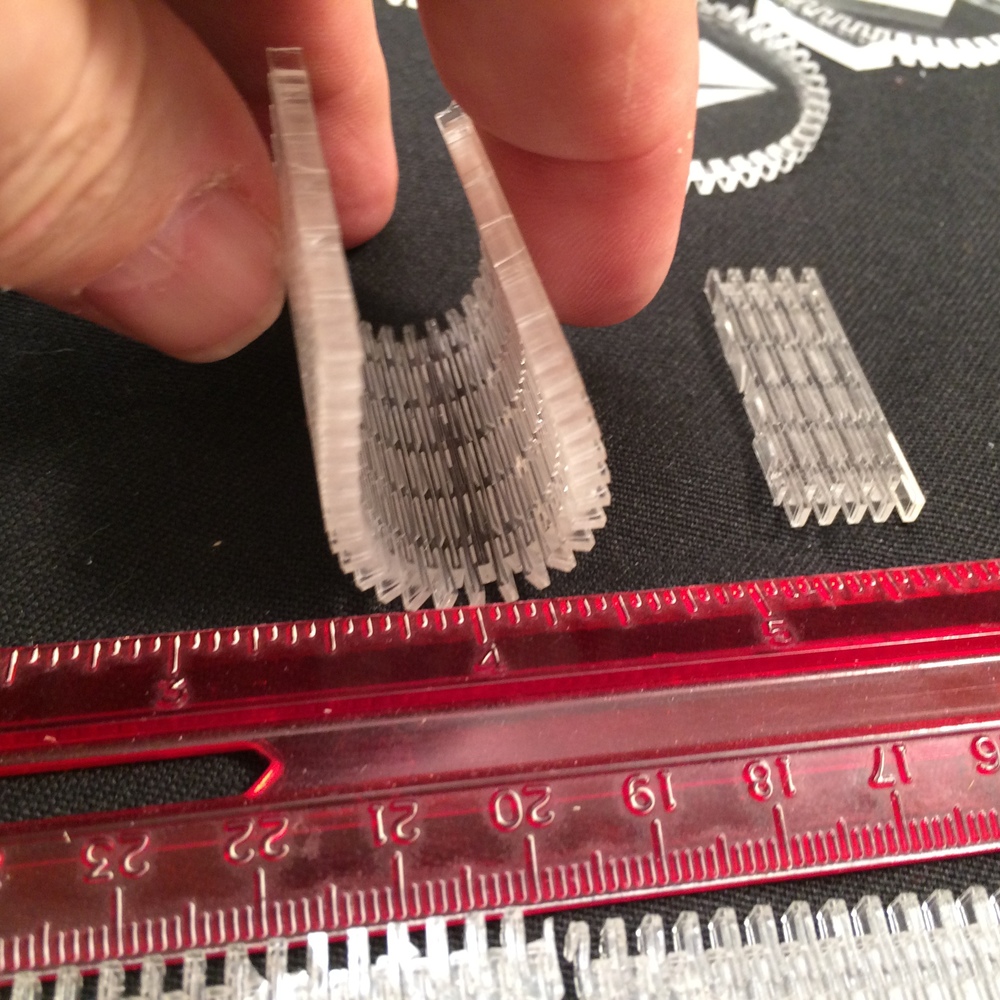
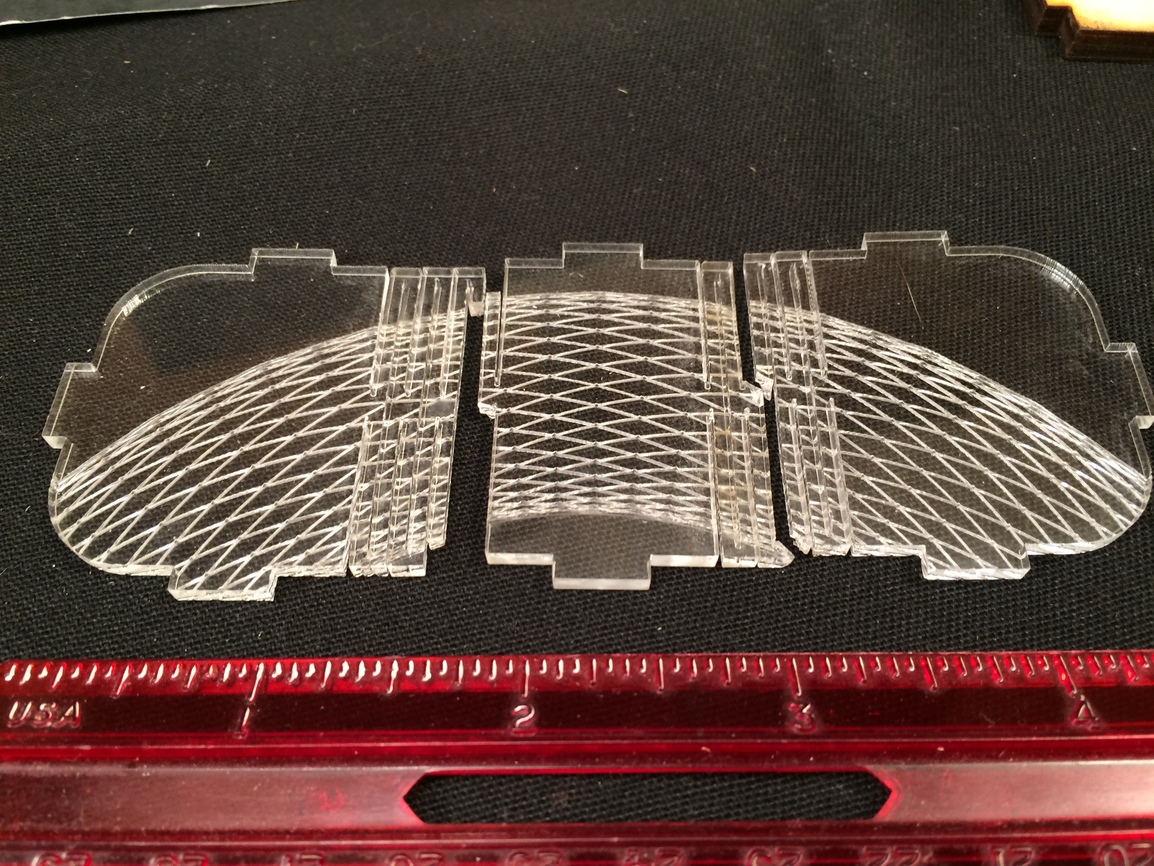
Pretty tight radius. Not strong enough. I think that was around a millimeter in between kerfs.
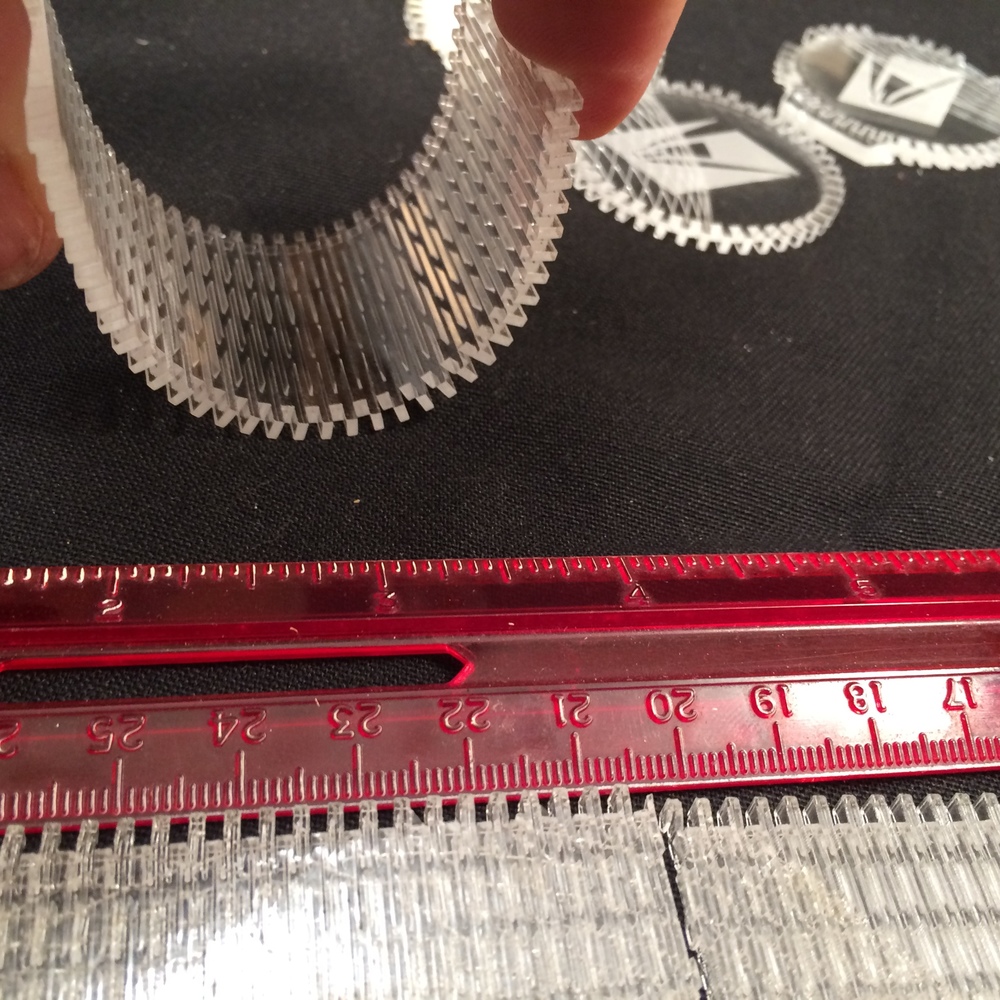
A little wider in the kerf for strength but not flexible enough to make an inch and half box.
1.4mm spacing seemed to be about right for strength and curvature at least.
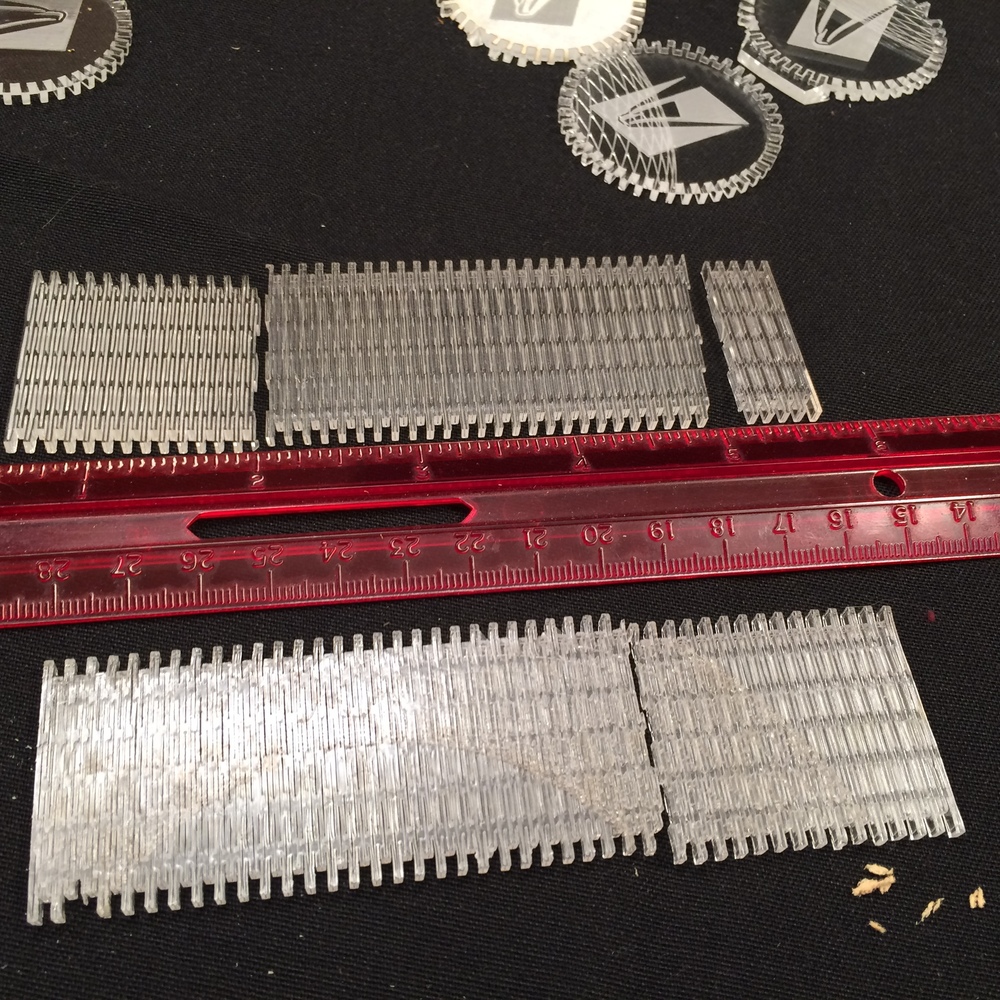
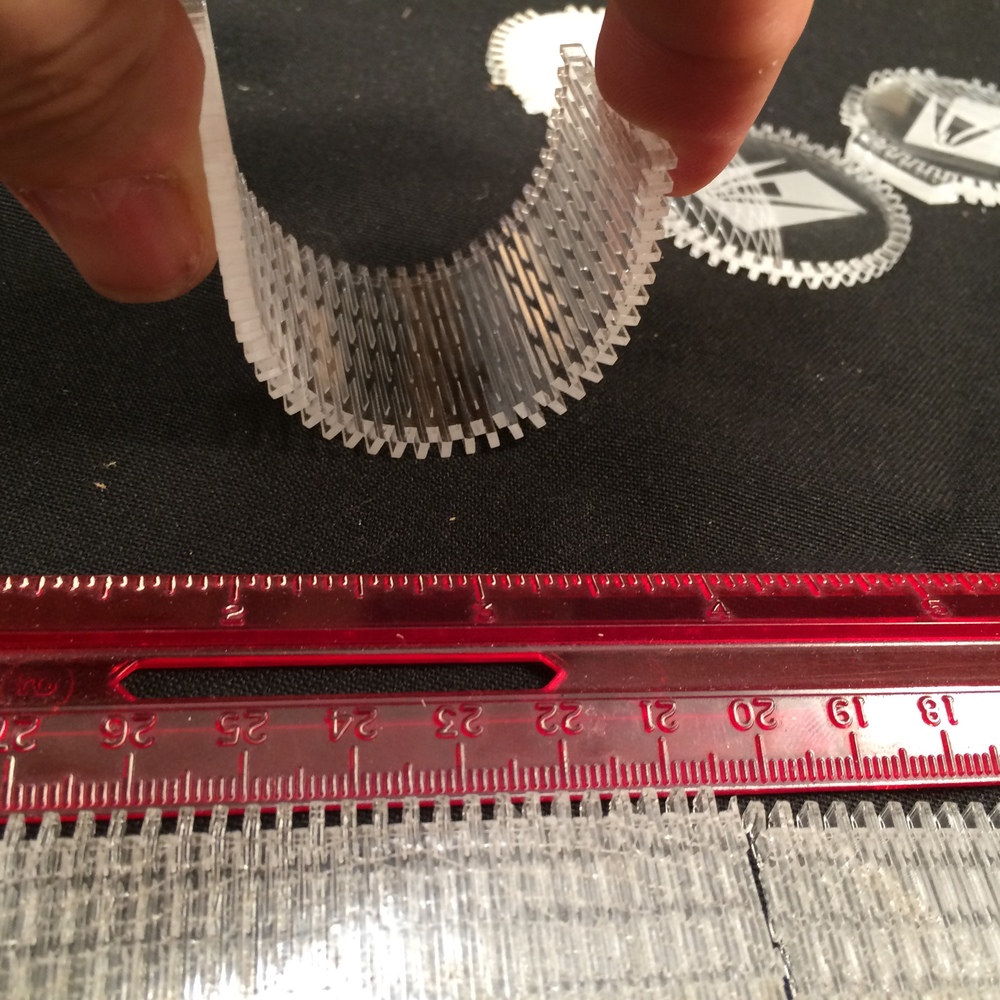
However, no matter what I tried, I couldn’t quite get the tradeoff correct without breaking the tabs or breaking the sheet.
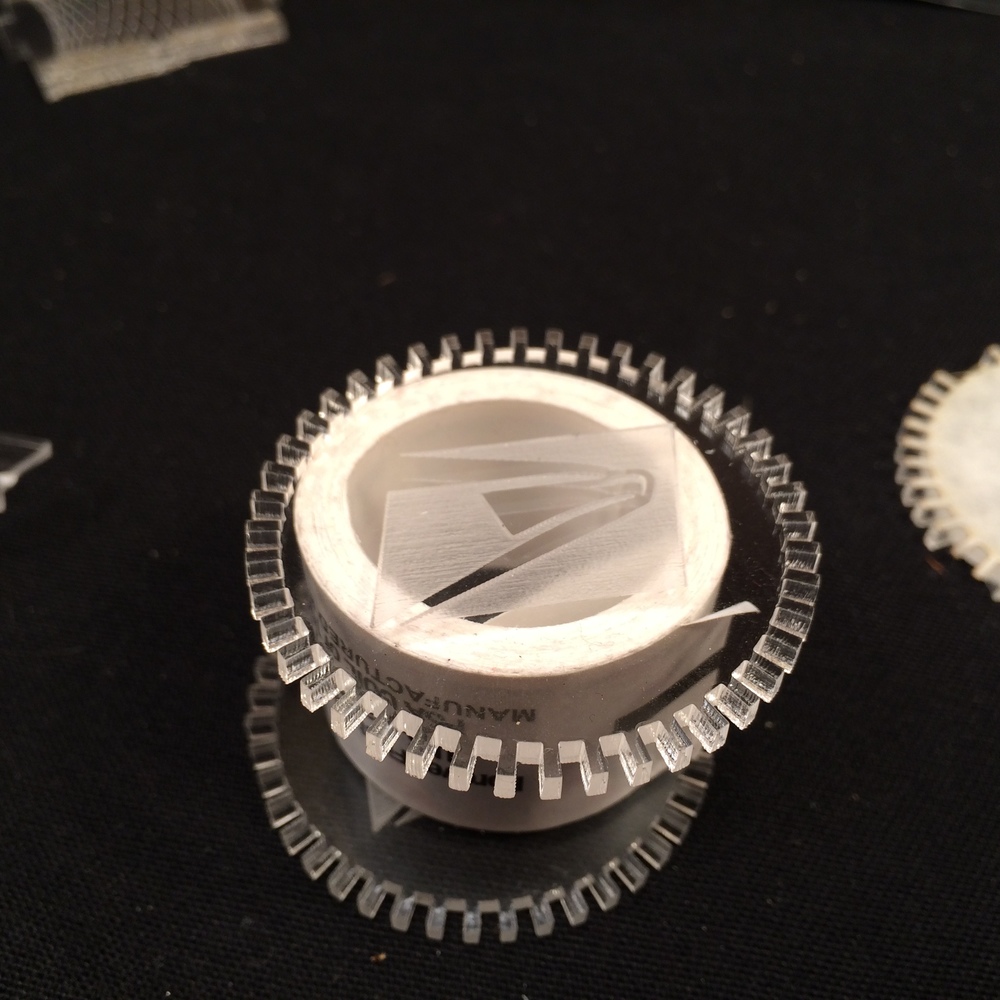
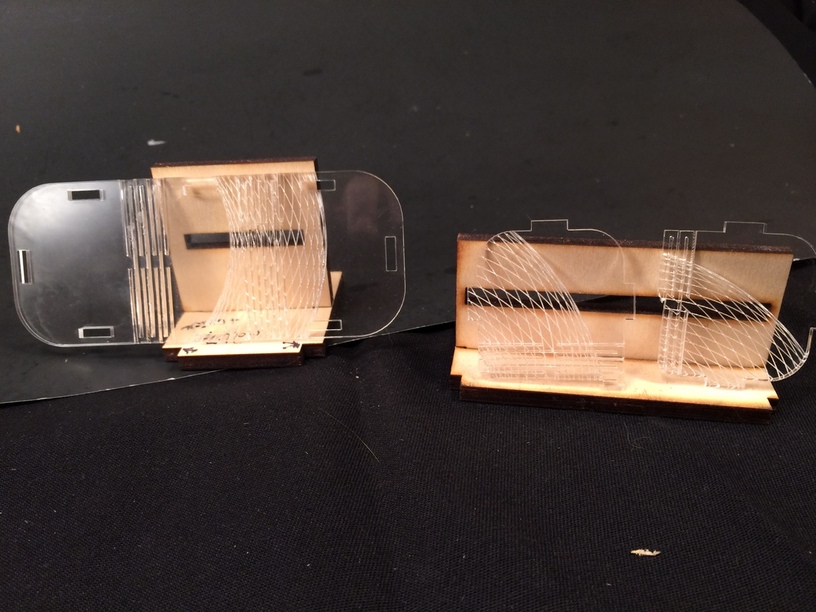
The ends really looked nice. But the tabs kept breaking off. It’s hard to assemble a living hinge this small without breaking something. Also, I hadn’t tackled the removable lid yet.
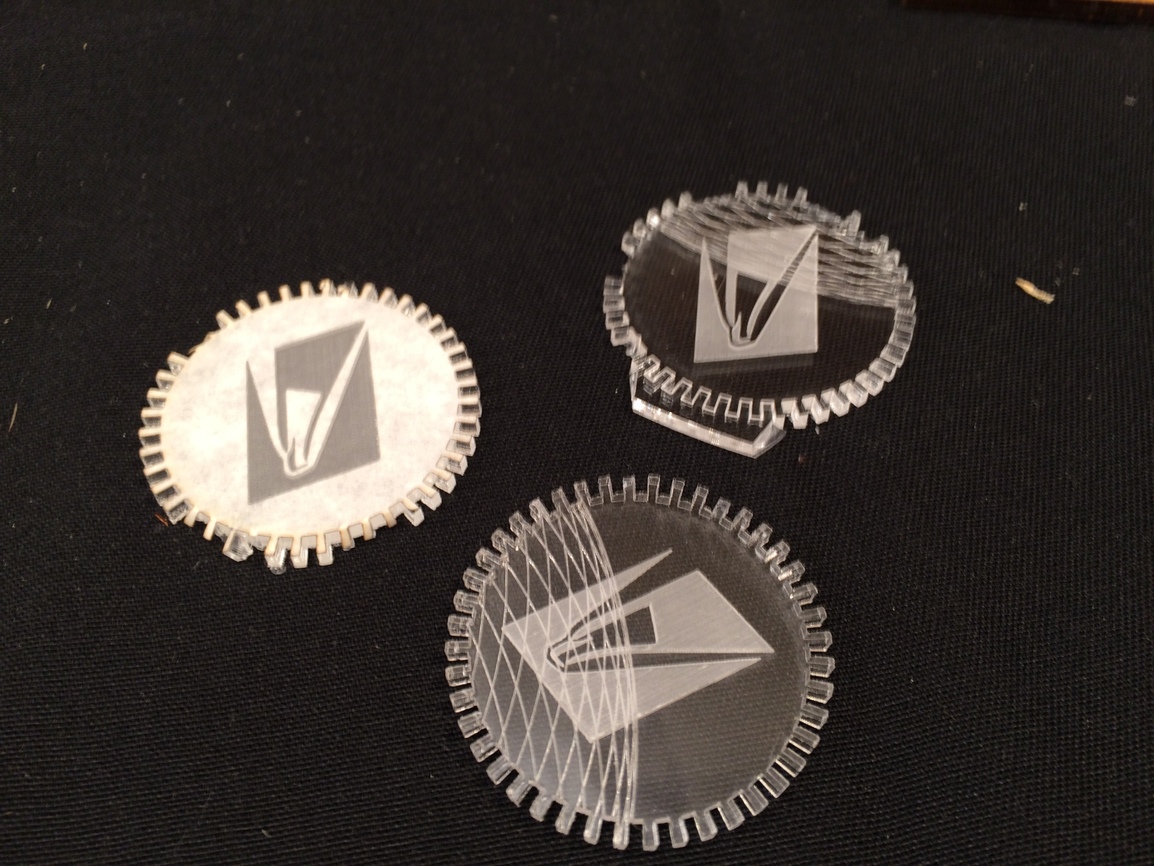
I tried the OpenSCAD flex box a little. Varying the relief cuts. This was a promising direction, but I couldn’t quite see how I would make an easily removable lid. More tests.
Kerfs to wide apart to make the bend. Also, didn’t help to have pre-scored acrylic. Just using up the scraps.
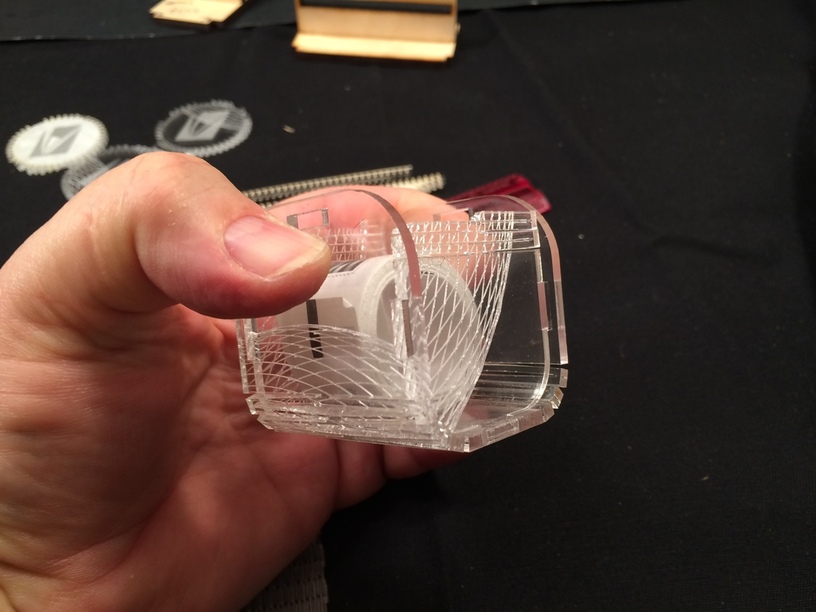
The OpenSCAD file works great. With a little fiddling, I am sure I would be able to use the 1/8" proofgrade acrylic to make a box. Just wouldn’t work for a stamp box.
So back to wood and using scraps of Proofgrade walnut (and some scraps of maple)
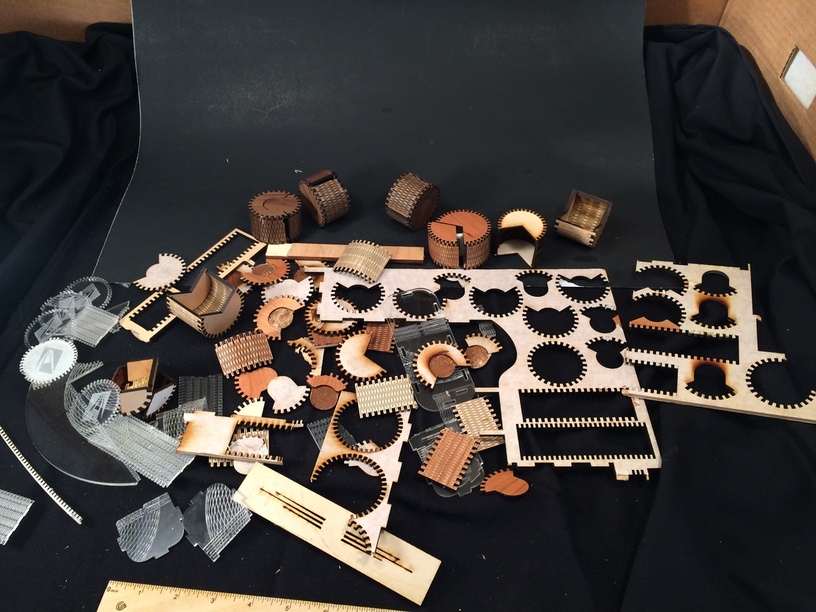
Here is the detritus.
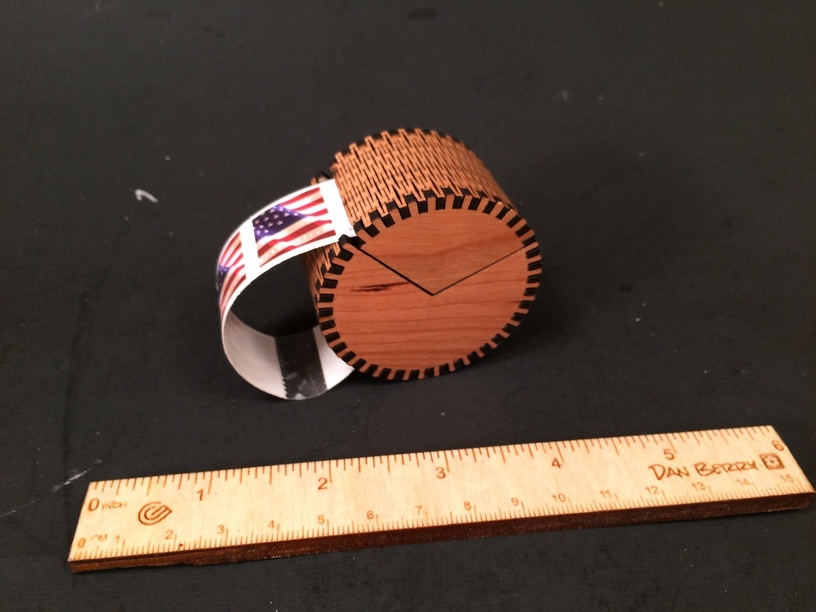
This is a cherry box that worked out well when I was testing the elliptical box maker, but I had to think about a hinge and a closer. Additional hardware was something I wanted to avoid. I was determined to make a design that didn’t require anything beyond assembly.
So using the the design with the 120 degree angle lid, I thought about putting matching slots so that the top would slide into the bottom in matching engraved slots. That took a lot of tests to get the engraving depth correct and exactly 1/2 (as well as I could) on the top and bottom side pieces. It also took a little mental gymnastics to think about orientation and rotation with the engraving slots needing to come together. Easy enough in 3D land, but I’m 2D Inkscape. So you have to match and flip the top and make it as symmetric as possible.
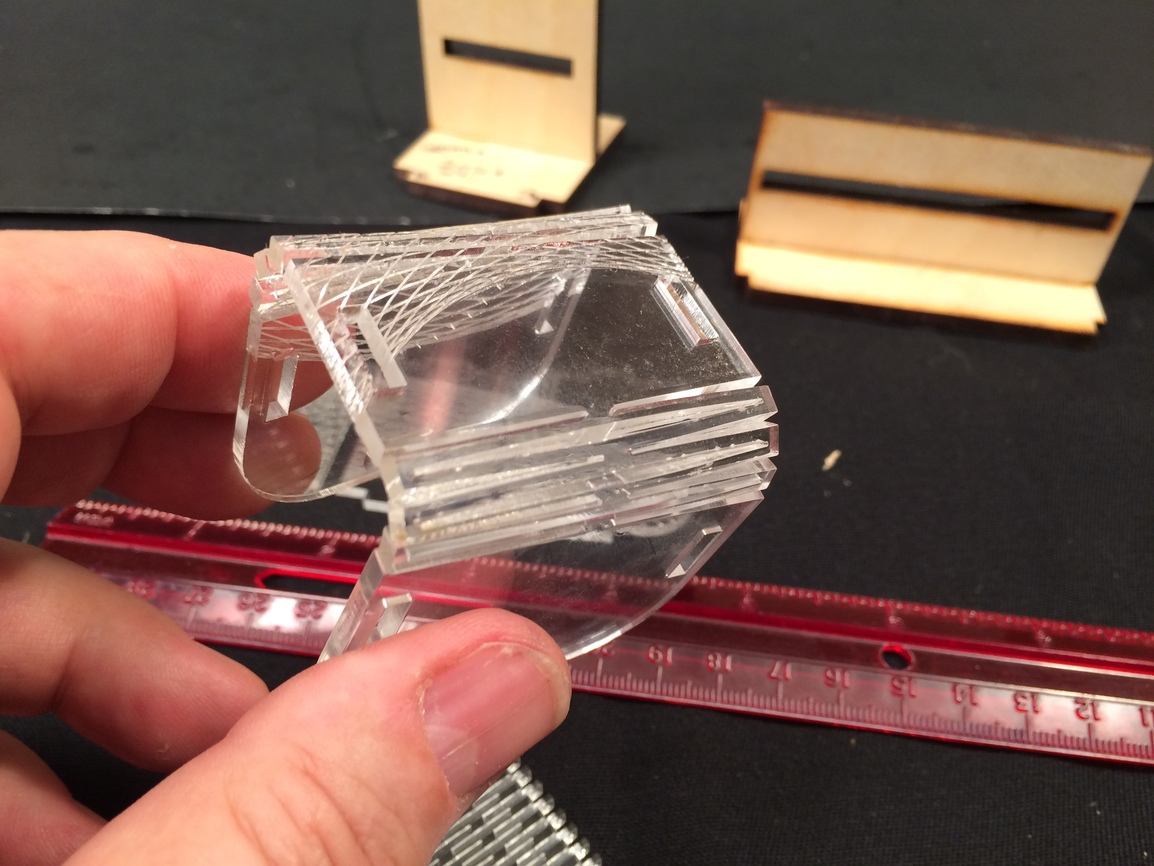
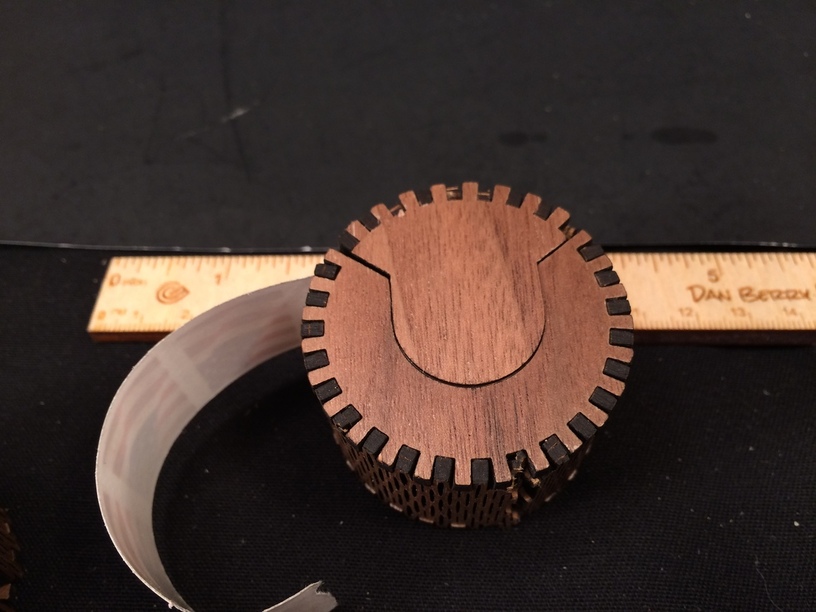
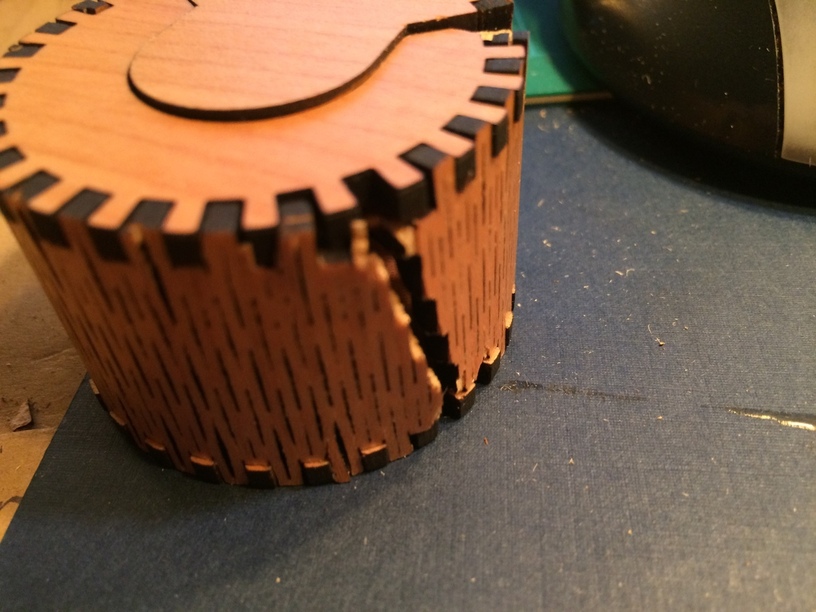
In the meanwhile, I wrestled with the round sheets that would wrap the box. Once again, adjusting for flexibility and strength. Those tabs are pretty small. They kept popping off and the sheets kept breaking. It’s pretty tough to get the bigger piece all the way around. Couple that with making sure I had to orient the sides correctly. It holds together and assembles without breaking IF, and ONLY IF you get it right the first time. I kept having to take it apart and reassemble because I didn’t get the matches and sides right. More room for errors and damage the more you take it apart and reassemble.
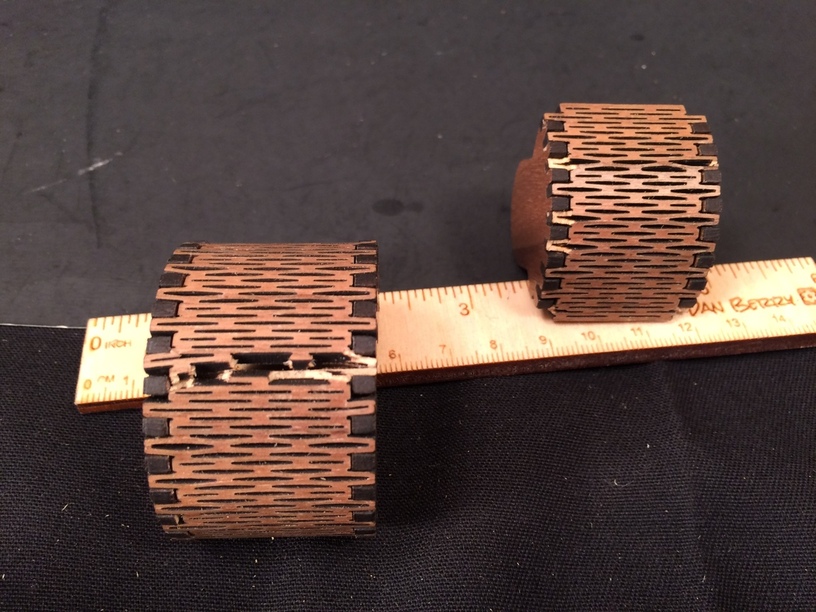
Getting closer, but hard not to break the sheets or the tabs.
In this picture is a slot that I hand carved because I forgot to set it for 3 passes and instead it did one. Not deep enough. Arg! Note the tabs are a bit mangled. This walnut plywood seems to have an MDF core. It’s very consistent, but doesn’t hold small tabs like this well unless you are very careful. Which is hard because you really have to wrestle with the covering to make it go all the way around.
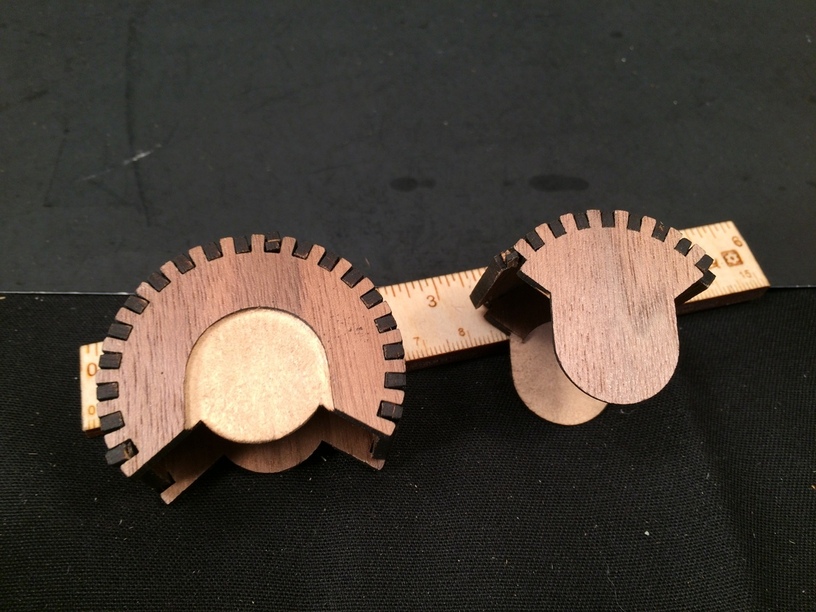
Getting closer. Challenging to tweak the matching engraves and cuts to perfectly go together like an inlay.
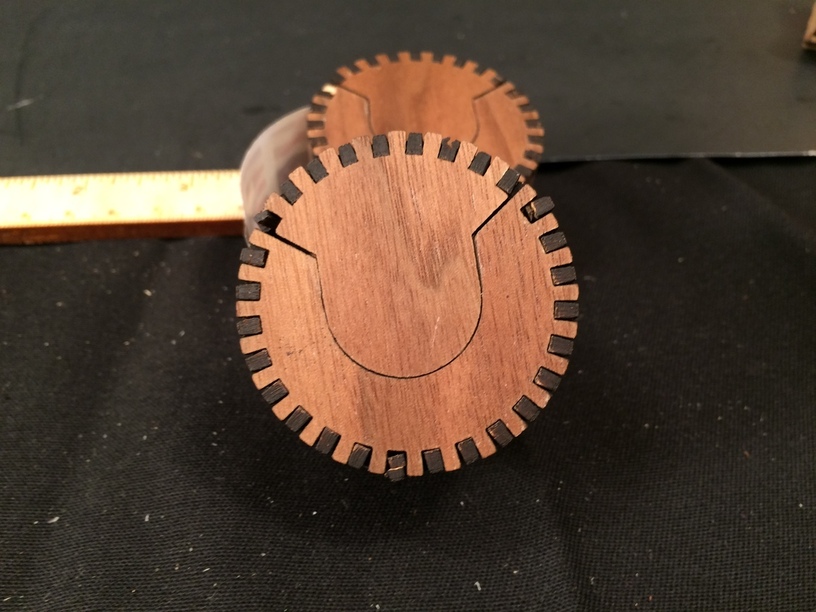
Always something wrong. Still can’t get all the parts together without breaking something or having the slot off just a little.
These weren’t too bad, but not perfect.
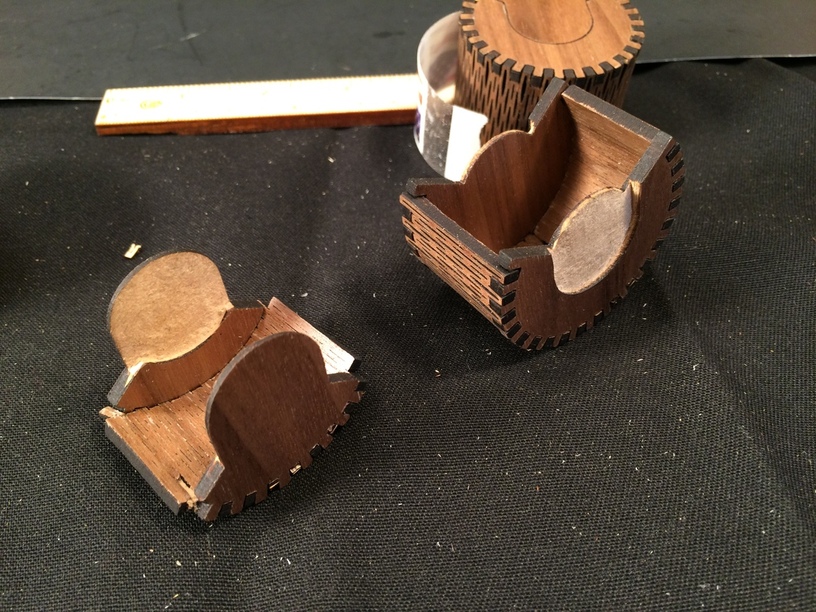
So I gave up on the walnut for the time being. The tabs are just a little too small for this type of plywood to reliably assemble without breaking something. Once it goes together, it turns out pretty well, but I’ll have to rethink this because I’m so far unsuccessful in getting a perfect assembly.
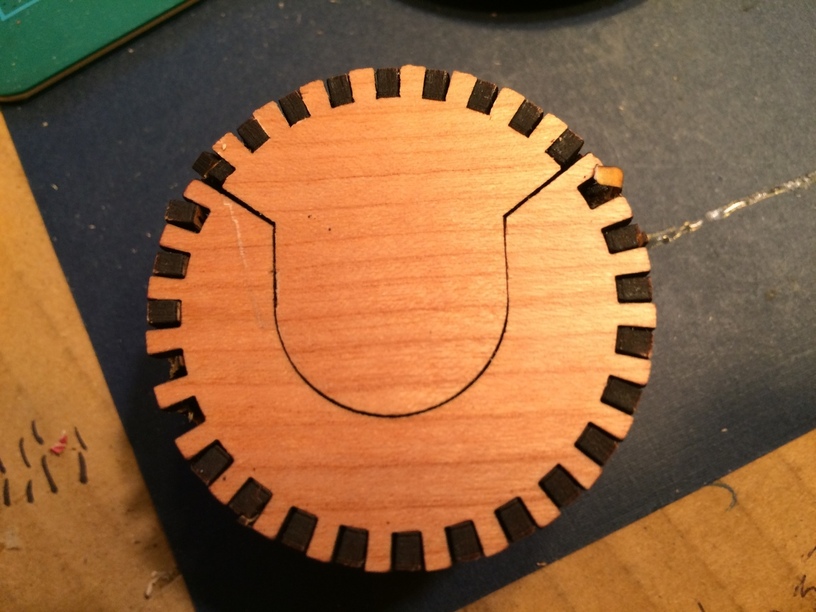
Here is the piece in cherry. This side is good, but with a scratch from a blade where I was cleaning out the soot in the engrave and slipped.
Pulling it apart to fit without breaking it is hard. I keep yanking too hard and forcing it. The hinge will work but it has to be finessed in. Interesting enough. I’ve learned that the hinge can be more flexible with the top to the inside rather than the bottom. The wider kerf at the top allows for compression more.
So that’s it. I’ll try again to get it together without breaking, but for now I’ll leave it as is.


 ). Thank you for sharing your experiments in such detail.