I get asked to do photos all the time but I cannot for the life of me figure out how to do them without spending hours upon hours adjusting them. I’ve tried the actions, different settings, dodge and burn, youtube, etc. Once I get it right they look great but a lot of the people who walk into my store want little keychains, bookmarks, small signs, etc. so I can’t charge a ton of money and I don’t want to turn people away. I’ll think I have it down and then I get a different project and I’m back to square one. The frustrating part is I’m a photo editor by trade so the fact that I can’t pinpoint how to get it right every time is driving me insane. At this point I’d pay someone to convert the few images I have to do a month. Is there a service that does this or does anyone have a surefire method of converting photos?
I’ve got a couple tricks, but they boil down to “use curves to fine tune it and stop when it looks right”.
I also find that I’ll do one and be like “it’s fine, I guess, not great”, people still love them. For most people this is pretty much magic.
Oh and also, another not apples-to-apples situation here is that I will look at a photo and just be like “nope”. If it isn’t a photo that will engrave well (like a poorly defined subject with too much clutter and noise), I just shut it down. Harder to do with customers. I don’t want to fool with masking a subject and then editing for hours, like you said.
TLDR, for most photos, if they’re decent candidates for engraving, I use curves to ensure the dynamic range is almost the entire range of black to white, and go for it. It usually works out.
Thank you! I’ll give it another go. It’s usually people’s dogs or horses which I think makes it a little tricky because they tend to be really dark or really light. I have also noticed that people do not care as much as I do in regards to quality. I have pieces that I messed up and wouldn’t sell online because I worry about reviews but they fly out the door at my store and get compliments. I’m definitely a perfectionist but in this instance I can’t even seem to get it close. In some cases it’s just a brown blob. I’ve mostly been messing with levels and dodge and burn so hopefully just going for the curves will help significantly. Thanks again!
Yeah dodge and burn is great for touchups, but going after the curve right away will let you make really quick progress.
After that, if you’re still not happy with it you can isolate areas with a mask and curve those separately as needed.
this is a really big key. you can spend hours on a crappy photo and only get a mediocre engrave. you can spend 15 mins on a great photo and get a great engrave. the most IMPORTANT rule of photo engraving is garbage in / garbage out.
i’ve had to tell people “no” to images for engraving on a guitar because i don’t want to do something crappy looking. nor do i want someone to be unhappy with what i did.
A reasonable contrast on a cloudy day is the easiest. Folk often go for high contrast with half a face super bright and the other half in shade, and it is near impossible to get a decent result.
Another thing is to use dithering to provide shading, and not the variable power. Black is black and deeply burned black id the same as black that is not so deep. Dithered dots all equally black do a much better job by concentrating where dark and spread out where light,
Variable power works best where real differences in height are needed as sculpted 3D.
It’s like a recipe. The image, the edit and the material are the ingredients. The settings are the cooking process. The better quality ingredients, the better the result - if it’s cooked right.
Most pet photos are either over exposed or under exposed. Sometimes, or often times, by enough stops that a regular jpeg just doesn’t contain the data for the edits to be worth a damn.
As a general rule, push the shadows and pull the highlights.
The black and white mix is huge. For example, portraits. Skin tends to have lots of red and yellow tones, so you’ll generally want those colors to be pushed up in luminosity.
I’m not a big fan of the Proofgrade photo settings. I think they generally burn too hot, or in the case of HD, not hot enough in a lot of cases. I don’t really have the patience for the LPI of the HD setting anyways ![]()
I prefer using a midpoint as a starting point: 1000 speed, 50 power, 225 or 270 lines per inch, convert to dots and drop the max dot density down to 85 or so. If it’s a generally light photo, you can raise the minimum dot density up to 8-10. The goal isn’t to dig into the material. Just make your color change.
Black, white and red dog.
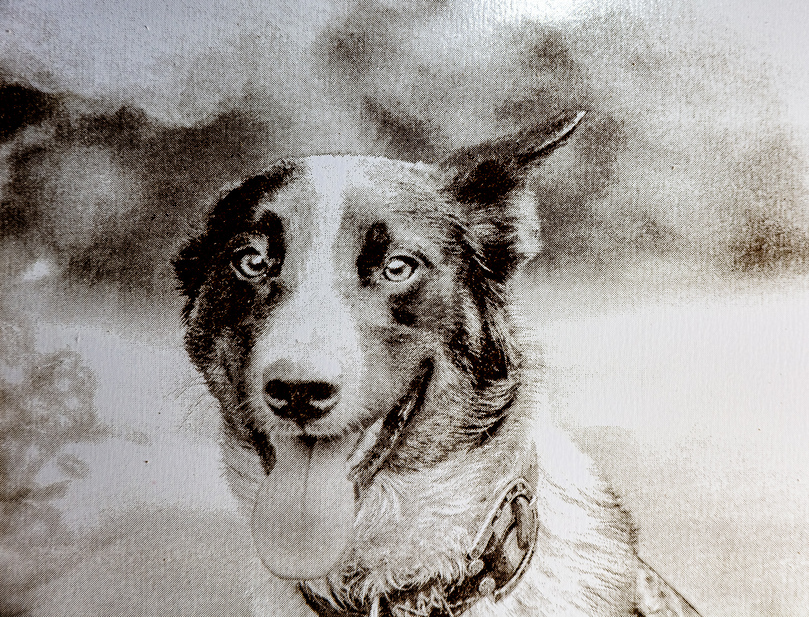
Even a busy background can work well enough. (Even if it’s upside down lol - I’m too lazy and or tired to go back and find that in my camera roll again and fix it)
The master of this for sure, other people’s photos (OPP) are likely to have focus issues and jiggle as they try and hold the camera by hand. The out of focus mountains are fabulous in your image but would not be so great if the dog was unfocused too. I am currently trying to work with such an OPP that is a bit iffy with the focus and on a 6" tile was not very good
Thank you again! This advice was amazing and I think I at least have the concept down. The dots and power really helped! I also think that I may not be able to do smaller items. The keychains didn’t come out so well and my guess is size is the biggest factor in that. People loved the signs I made though and I feel comfortable adding it as something they could order from me in my store now.
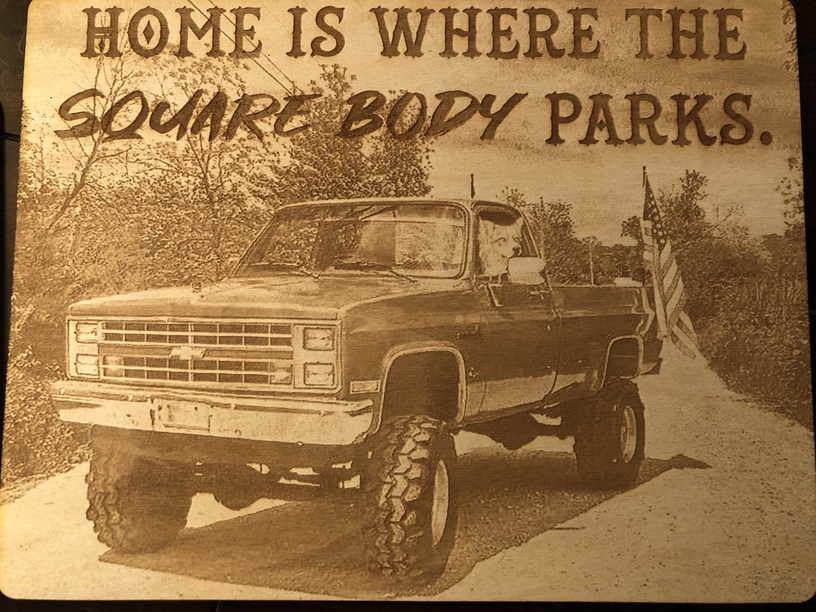
Those look great! I love how the flag colors stand out in the second piece. You definitely have this figured out.