I’ve discovered a couple of loose screws during setup. Searching the posts reveals others have had similar experiences except mine is double the fun.
My screws seem to match this post
and this post
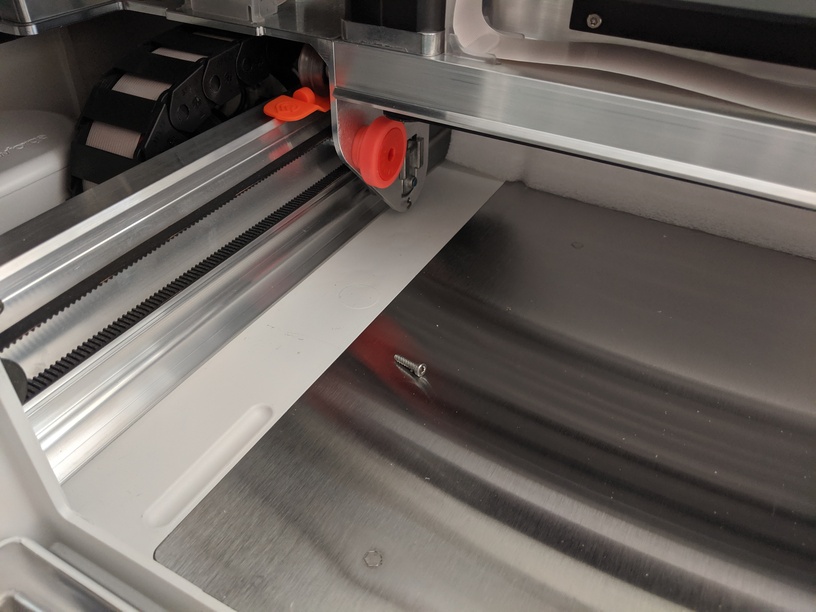
Neither of them were resolved, however I have discovered the likely spot for one of my screws, under the stepper for the X carriage. (see pics for info) However fitting the shorter screw in there reveals that either it’s the wrong screw (too short) or the hole was threaded as the screw no longer bites into the receiver. Examination of the hole shows tooling marks so I assume something was in there at some point, and the screw has threadlocker on it, which shows signs of wear, so it seems this screw was used for something at some point.
I’ve yet to find a likely home for the larger screw. Looking at the thread it’s likely its screwed into plastic.
At this point I’m not overly concerned and I’m keen to continue with my setup. I’m not concerned because
a) the stepper seems to have three other screws to keep things in place, and
b) none of the plastic housing appears to be critical to the functioning of the unit
If someone has ideas on where I can continue my search (esp someone who knows the design and knows where these screws are used) I’m happy to keep searching for a hole to match the longer screw with.
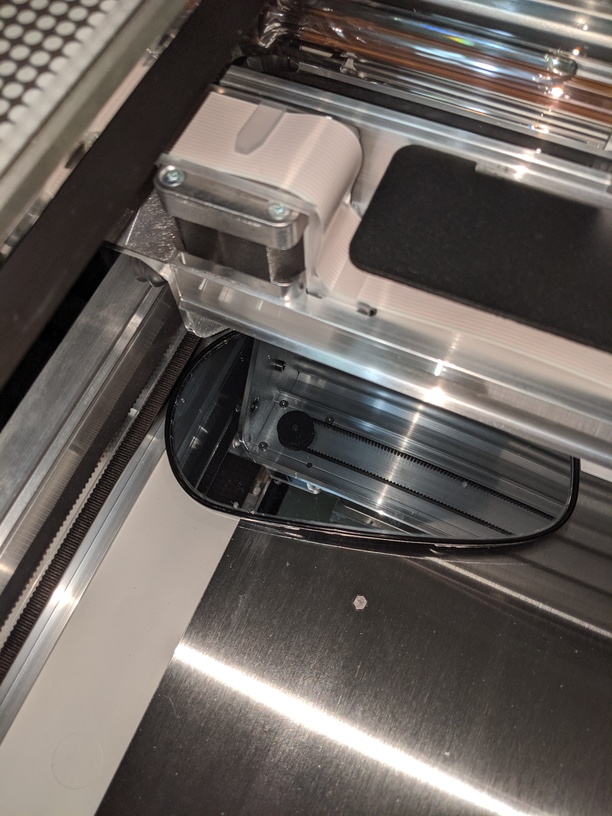
If that longer one has a T10 head, it’s likely one of the three on each side that secure the side glass panels to the front or rear aluminum supports. You can see them when you lift up the rubber flap that the lid closes against.
Yep, T10 head. I found the screws under the rubber flap earlier and as far as I can tell they’re all present. I note one on the front and two at the rear (one of those two not covered by the flap)
The screw for the stepper is a T8, and it matches the smaller T8 screw I found. But as mentioned it doesn’t want to bite. It’s either too short or the threads have been damaged.
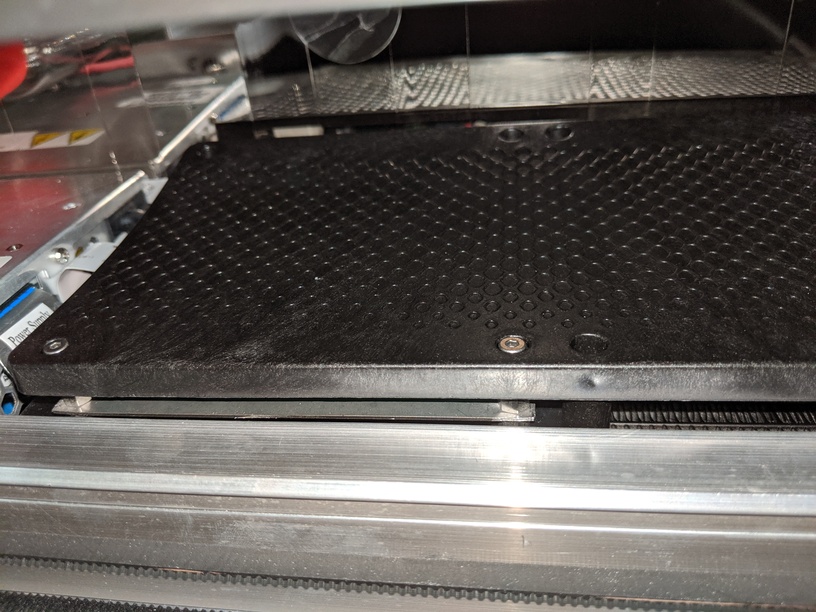
That was good detective work looking at the bottom of the laser arm! I checked with the team and confirmed that the stepper motors only have those three screws in our current build, so you are not missing anything from there. You are correct about the longer screw, there are three on each side of the printer under the rubber flap, two in the back and one in the front. That was most likely an extra from the factory. The smaller screw is used to secure the black radiator cover on the right hand side of your Glowforge.
Can you try the following:
Reach into the right side of your Glowforge and try to wiggle the black radiator cover a little bit.
If it’s secure, the screw was most likely an extra screw that may have snuck in before your Glowforge was shipped.
If the radiator cover does have a significant amount of movement, please let me know.
I apologize that you received two bonus parts. Thank you for all of your through troubleshooting!
Are you talking about this unit? I’ve had a good look and can confirm I have a total of 8 screws. So I guess that’s positive confirmation these screws are alien to this unit. Phew! Now I can finally use it!
Yes, that is the radiator cover! It is good to hear you aren’t missing any screws. Thanks for reaching out about this. Since everything looks good, I am going to close this thread. If you have any more trouble please start a new thread or email us at support@glowforge.com.