I’m having a hell of a time getting a perfect square cut.
I’ve done the squaring tutorial in the help section, but is there anything I can tweak on the machine so I can avoid having to do it every time I start up? Even after I square it, it seems better, but not great.
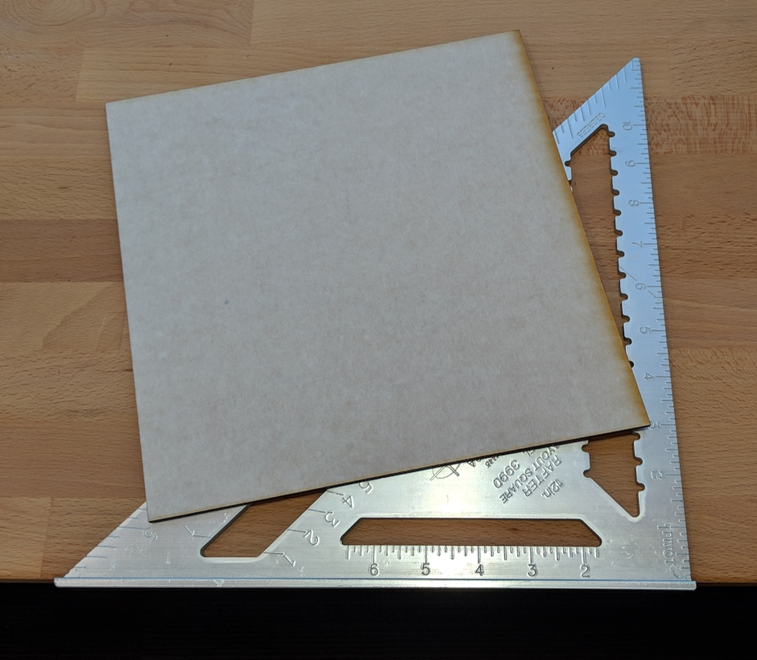
Here’s pics of a freshly cleaned and started machine cutting a 20mm square (no squaring done):
Your complaint doesn’t seem to be about the cut being square (ie: 90 degree corners) but rather about the square not being the same height as width. If so that is not caused by the gantry being out of square.
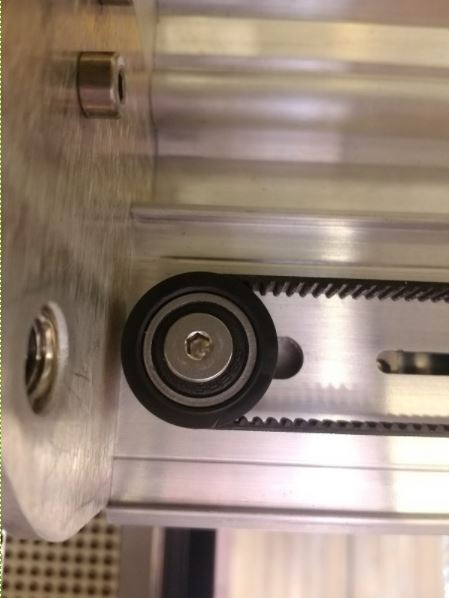
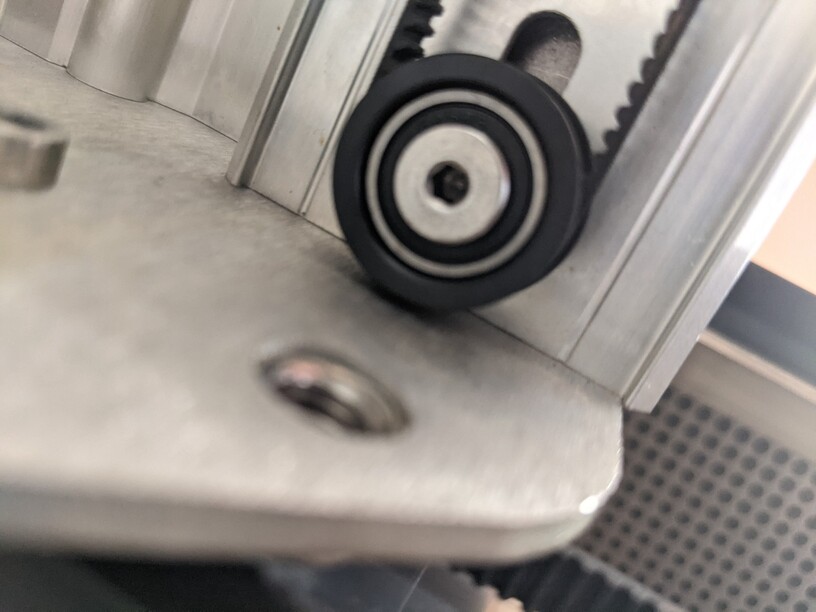
Everything looks good. No cracks or damage on the wheels of the carriage or the wheels on the gantry itself. Gave it a little cleaning while I had it off.
Tension on the side belts mimic that of the gif, and the gantry belt seems similar from what I can see, although it is a bit difficult to see.
I should mention it doesn’t always screw up cuts, it just decides to do it sometimes. If that helps.
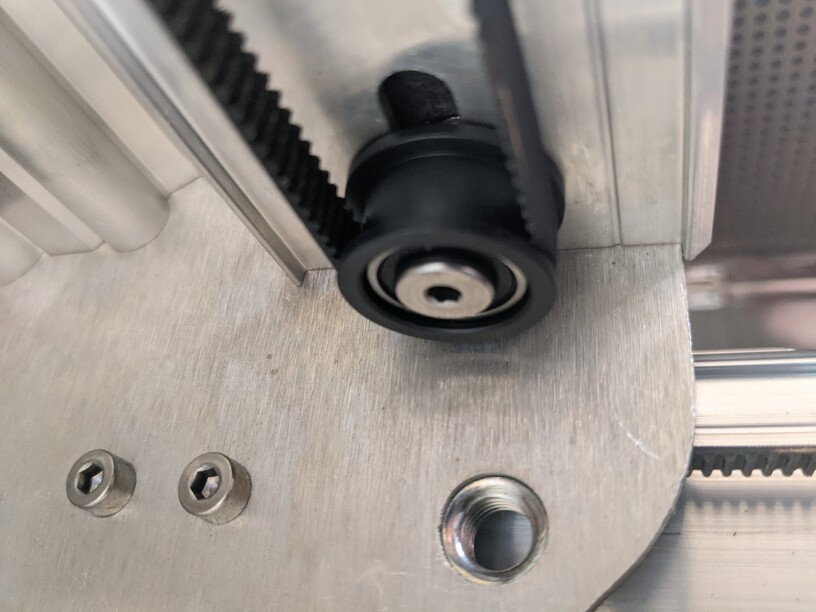
Hi @Kronok. Thanks for getting back to us after trying David’s suggestions about the Carriage Plate wheels and belts tension. Since the issue appears to be intermittent, I’d like to get a closer inspection of parts of your Glowforge that can potentially cause the experienced trouble.
I realize that some of this may overlap what you have recently checked with David’s suggestions, however any photos will give us more insight with the interior of the unit.
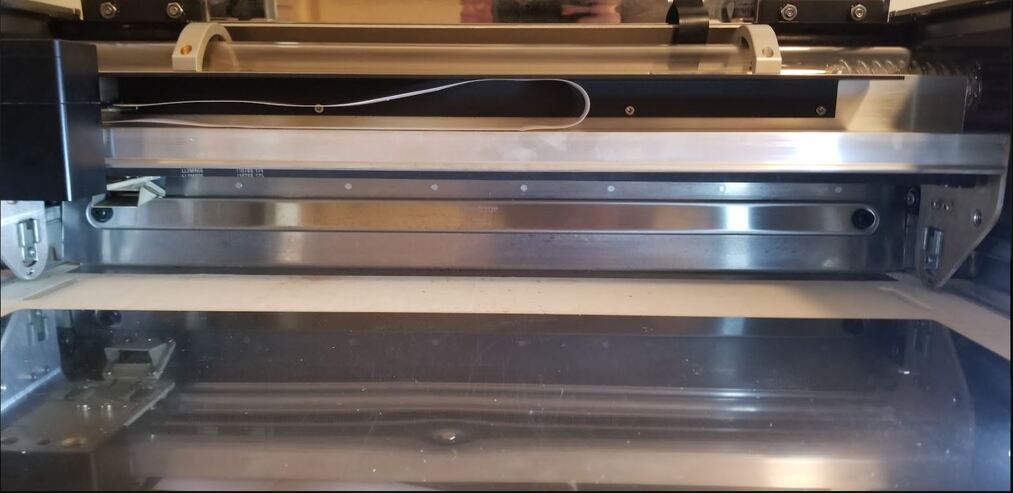
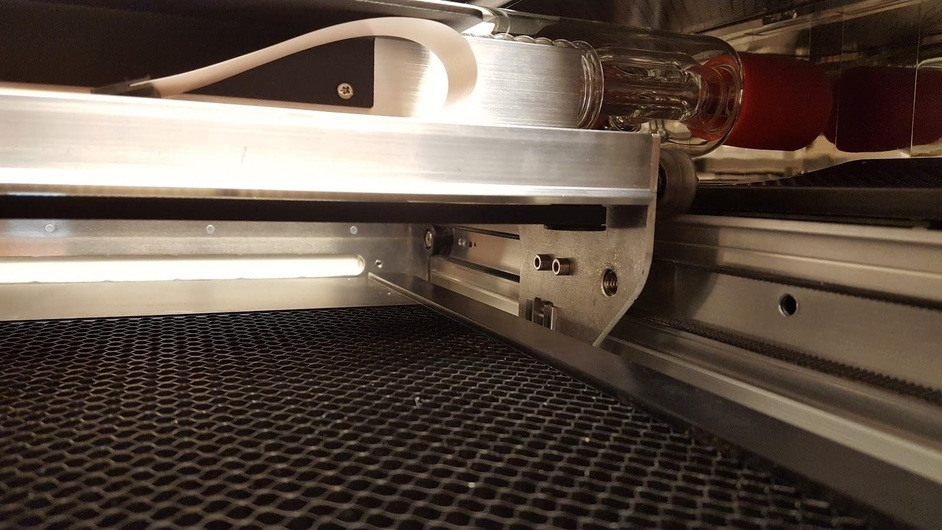
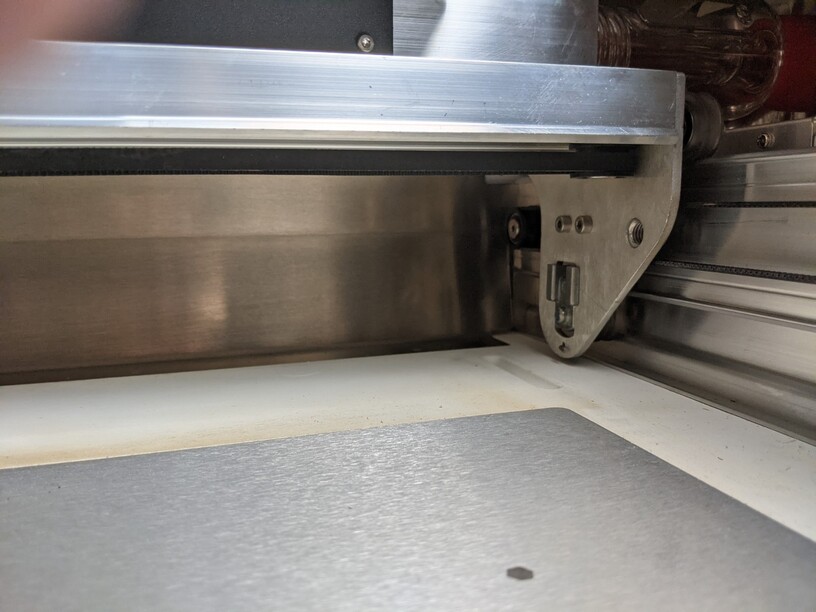
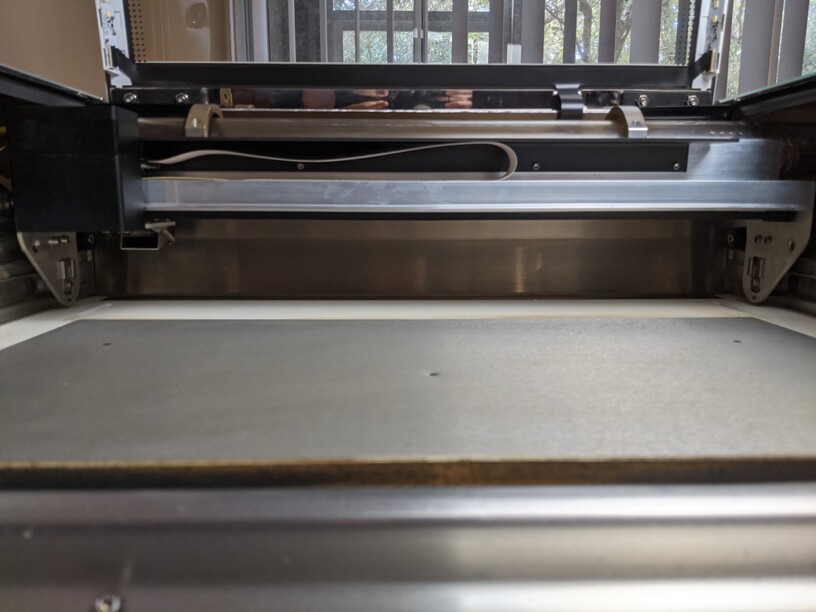
Can you power off your Glowforge, remove the crumb tray and take photos of the following?
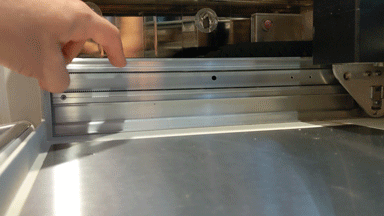
1.The belt under your laser arm with the head pushed to the left:
The machine is simply not designed for the level of precision you’re expecting. If you’re working within a kerf’s width, it’s usually not an issue.
The resolution of the stepper motors and spacing of teeth in the belt mean there are “gaps” where the head simply won’t go. It’s highly repeatable. You can cut the same square in the same place and get almost precisely the same results, but move it down a little and you’ll likely get a different measurement. It’s worse in the Y/vertical direction, likely due to the fact there are two motors/belts involved.
This won’t help because I can’t find my own post, but I shared similar data a long time ago. Squares that won’t even fit back into the hole if rotated 90º. You can have real fun working with 45º cuts. Then start looking at how the head is “canted” - the beam is not vertical in many cases (varies from machine to machine.) My carriage plate hangs slightly “down” at the front, so the beam is angled slightly towards the back.
Thank you so much for working through the steps my colleague @Brandon.B provided, and for sending over these images.
Based on the photos, the tension on the Carriage Plate belt, and the position of the Pulley Assembly appear to be correct.
As @eflyguy pointed out, this may be a snag related to the level of precision, but I’d like to have you perform a quick test print, and see if the same behavior occurs.
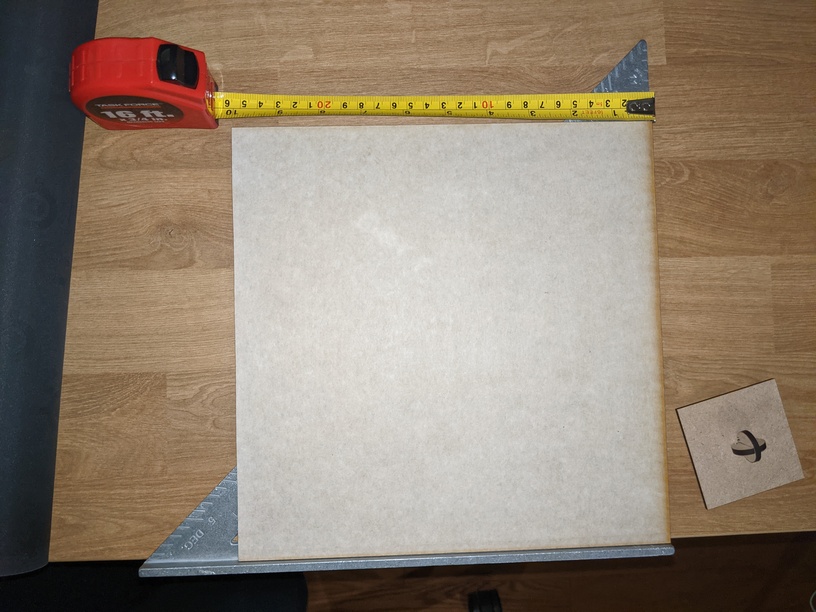
When you have a moment, could you please perform a print, using the Glowforge App to create two “Squares” (without uploading a file) of any size, and see if the measurements between the two squares match after they have been printed?
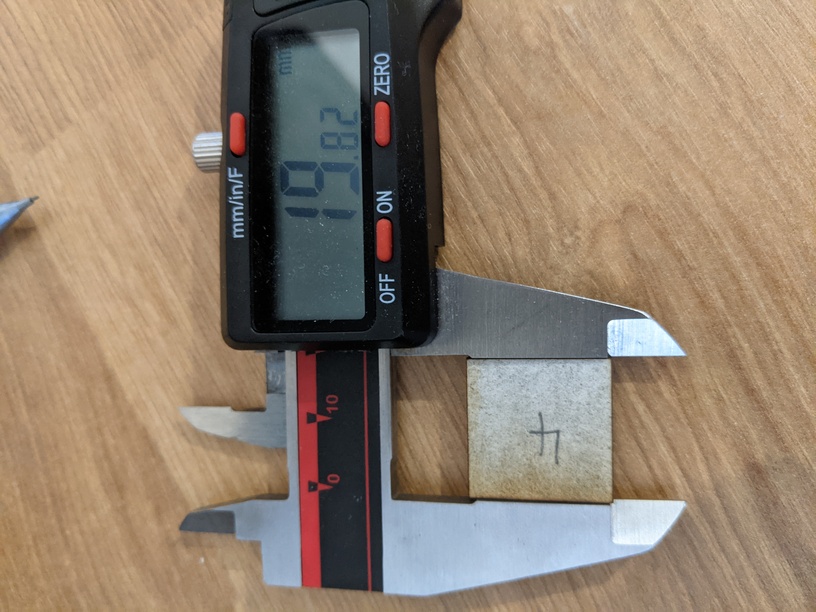
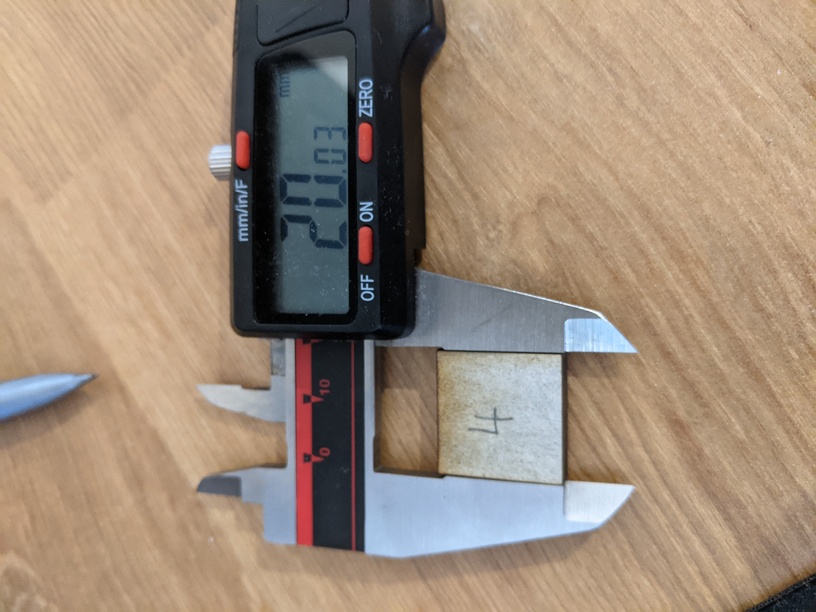
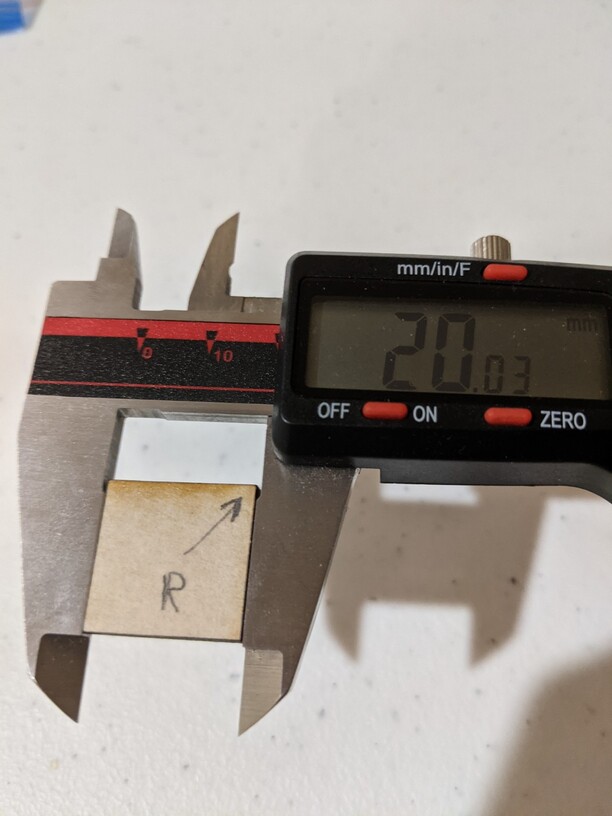
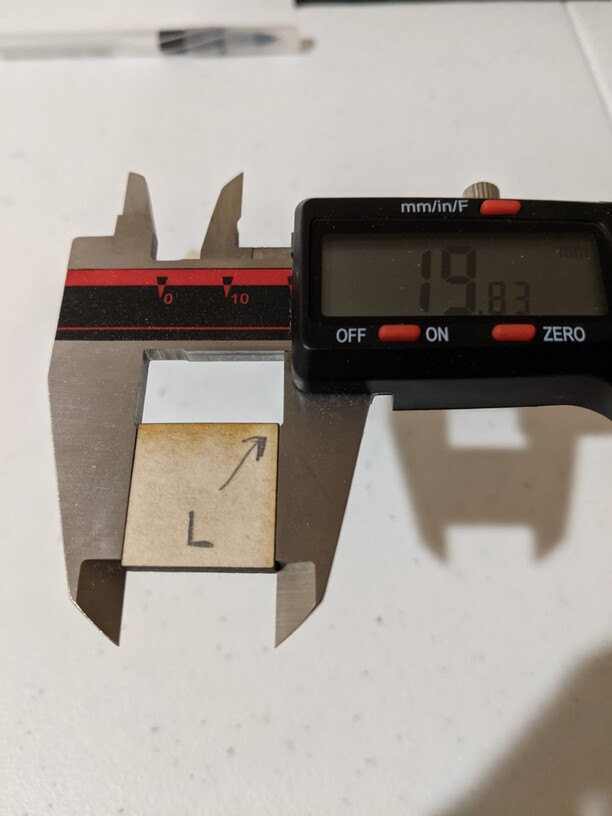
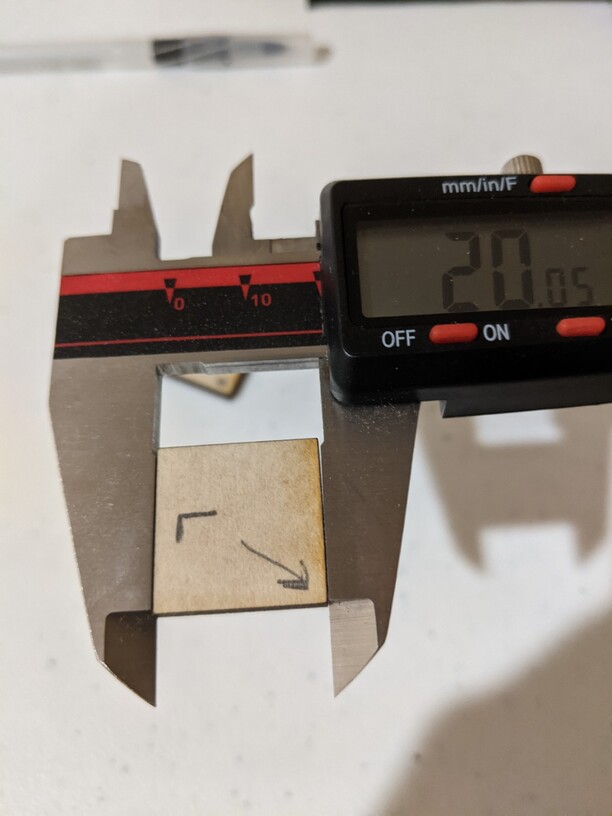
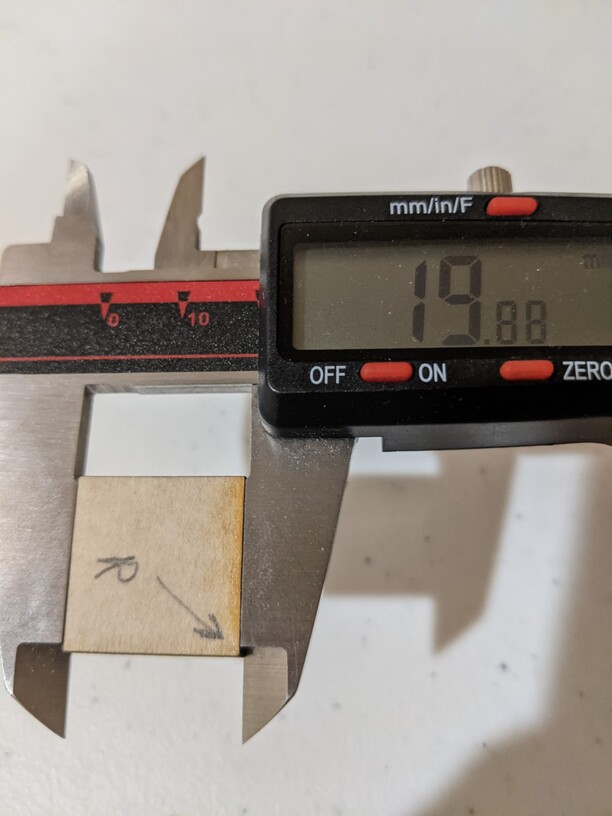
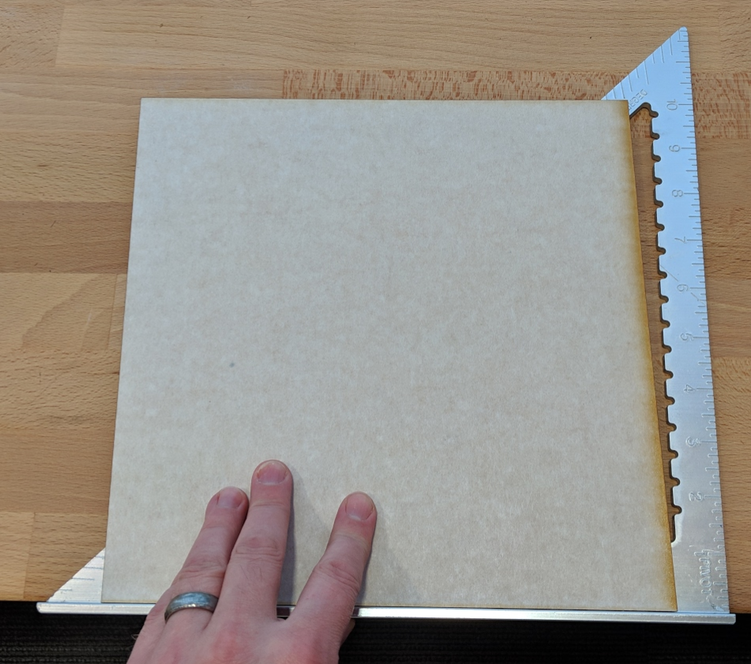
I cut one 20mm square on the left side of the board, and a 20mm square on the right side in a single job. Terrible pic, but they’re labeled “L” and “R” on the far left and right sides. The arrow drawn on them points to the upper right corner of the square.
The results seem a bit more interesting than I thought they would be. I re-measured the squares multiple times and got extremely similar results as the pics each time.
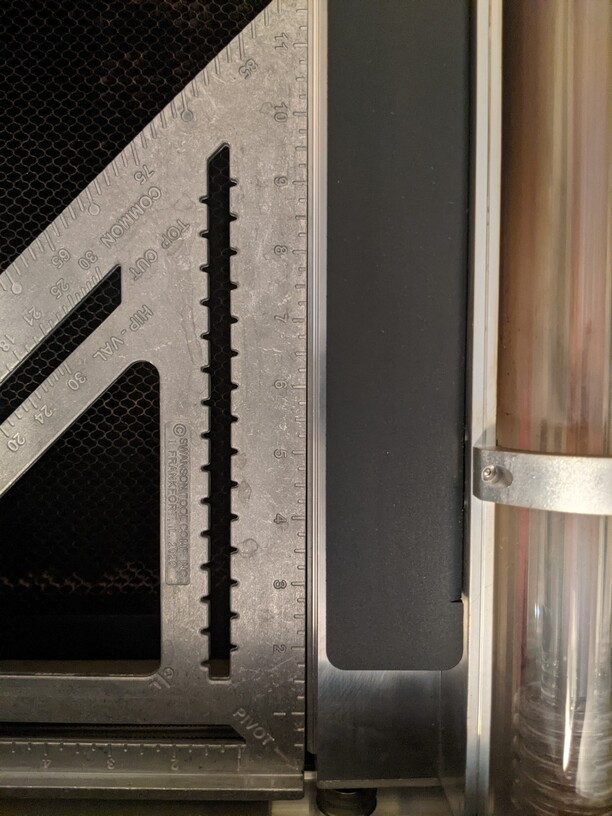
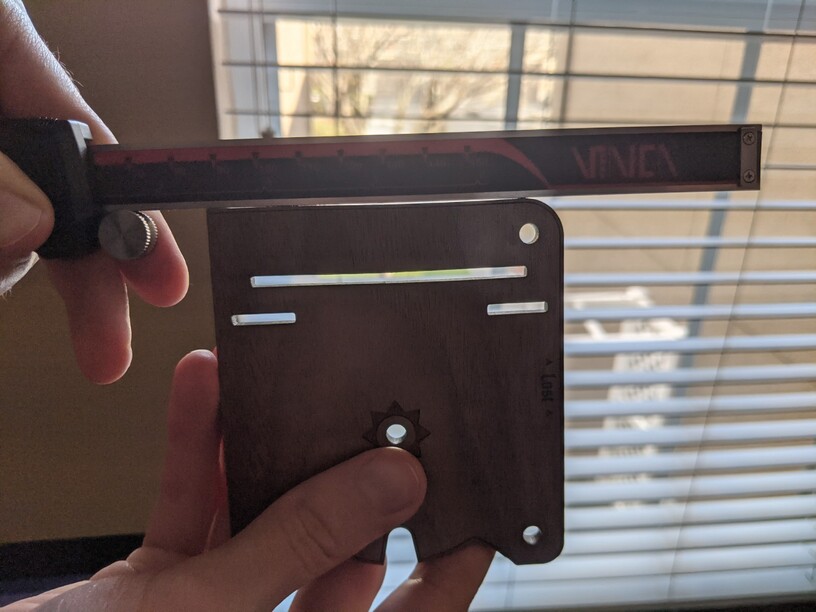
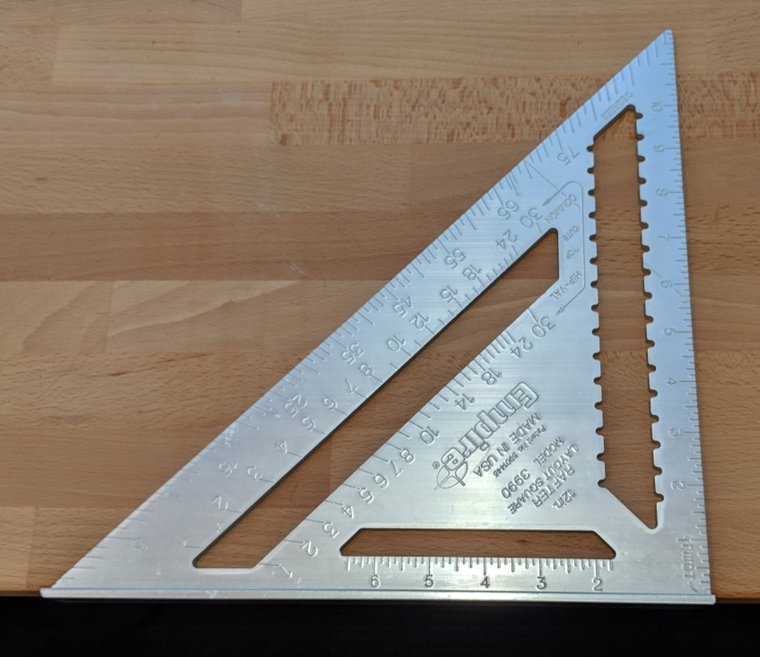
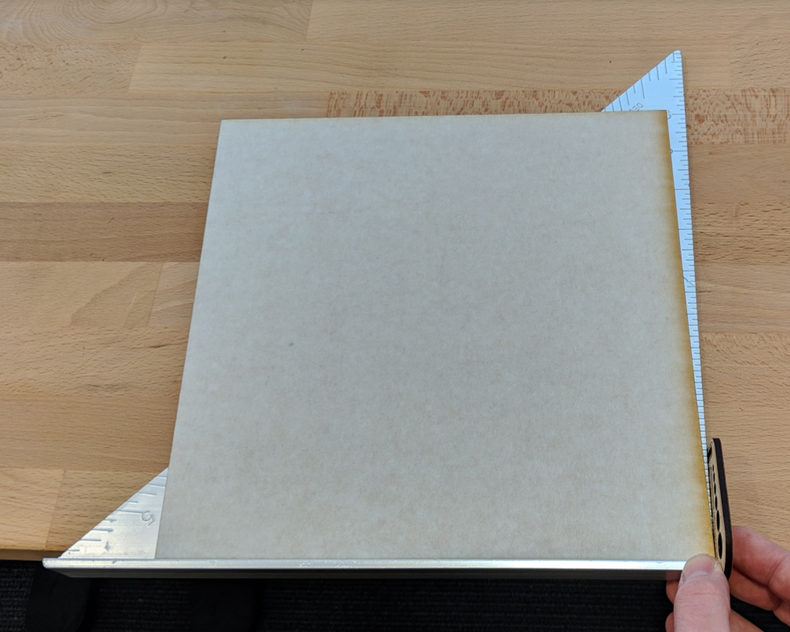
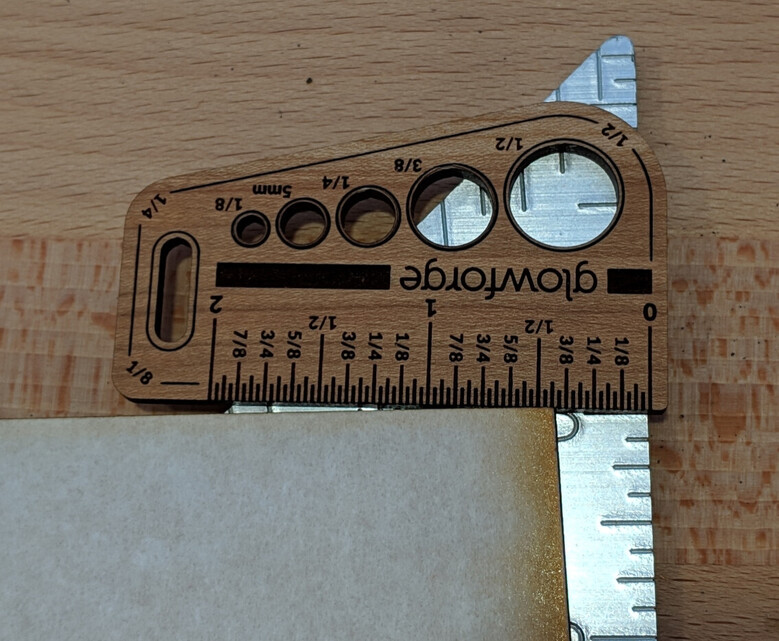
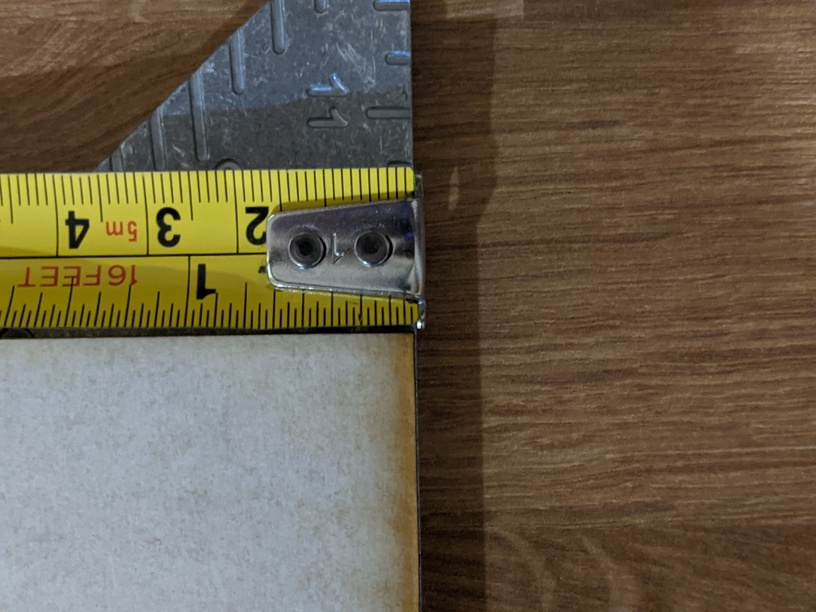
Lay a measuring device like the Gift of Good Measure across the gap we’re measuring (take a photo just like this one)
(Tip: It might help to zoom in, but keep the camera far enough back for good focus.)
Send us those last 2 photos, and we’ll determine our next steps.
Since your unit is resquared first, this measurement should be reasonably square. If the unit drifts from square over time, that would be a separate issue. Determining how quickly it drifts out of square, and how far from square it is would be the next step at that point.
Note: This does use most of a sheet of Proofgrade, I’m happy to send you a small gift card to cover the cost of a sheet of Medium draftboard.
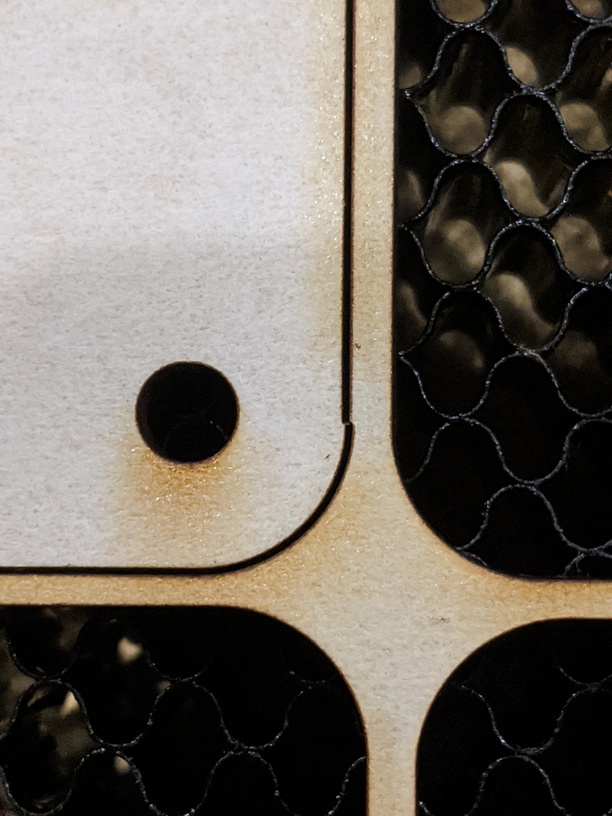
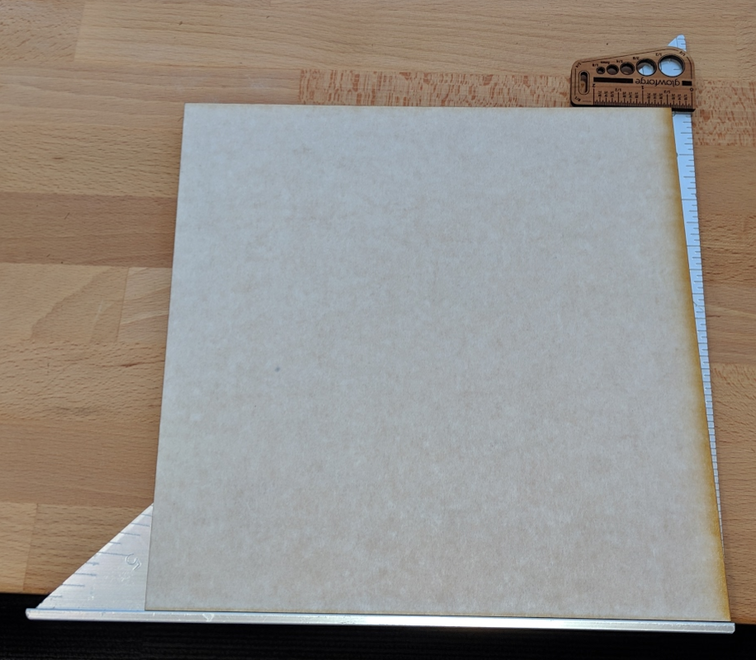
Thanks for the photos. In this one, it looks nearly perfect.
You can try rotating the piece of material to see if there is another orientation that shows a larger divergence, but unless you find some other orientation, this looks to be in spec.
I’m going to close this thread - if the problem gets worse, go ahead and post a new topic.