I was wondering, if it’s possible to add a feature, that would allow the user to adjust the camera offset. This has probably been discussed earlier, hence the issue is not new, but I’ve not been able to find an answer.
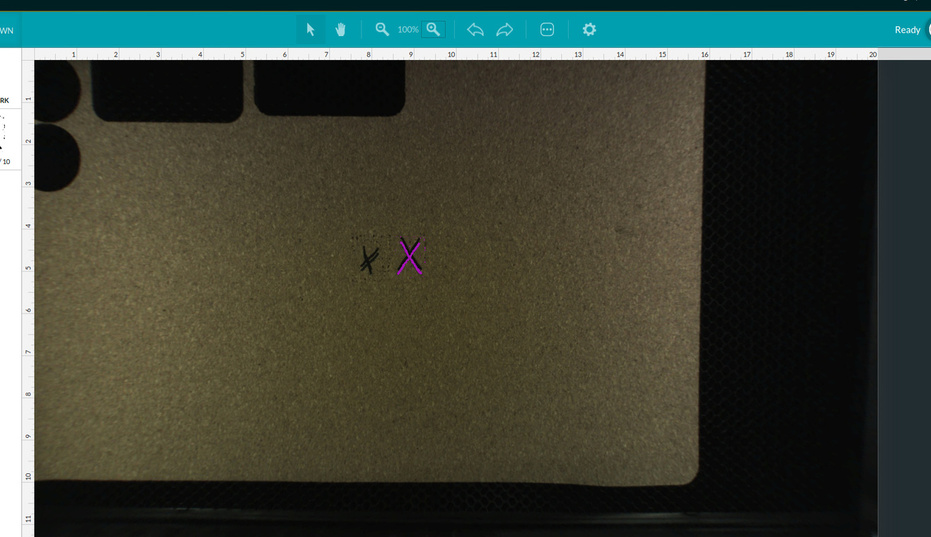
In my instance, it seems I need to move my x-axis 2.5 mm towards the front, and perhaps tilt a degree counter clockwise. Tilting would only be for more specific references, it does not seem to affect, the actual engraving. I engraved both “X’s” straight beneath the lid cam, as instructed in earlier threads. Also tried with proofgrade.
In genaral, I know the wide angle has it’s limits with the short focal length. But is it possible over time, to improve the alignment through software?
I was really looking forward, to toss my macbook pro in the Forge, and have Calvin pissing on the Apple logo …
A handy way to check your alignment prior to running the job, is to mask it and run the file at very low power to just mark the masking.
Another method would be to put a bounding box around your image in a different color and run only that to mark the mask. When you are happy with the position just ignore the bounding box.
The problem, for now, with manual offsets is that I don’t know if it would be totally reliable. My offset is different for different material heights.
If you already know this - my bad. But, the lid camera image is dewarped based on the material height either entered manually or identified by the QR code. In my experience, my dewarping algorithm is more accurate in the mid-ranges of the heights allowed (eg material height between .2-.3”). When I use thinner material (entering the height as necessary), the offset is greater than it is for thicker material in the above range. If that makes sense.
The software on your Glowforge is responsible for ensuring that the print lands on the material in the same place as the preview. When you’re done with a print, let a new image load. If the print appears on screen far from where it was supposed to go, you may have an alignment problem.
Most alignment problems come from the material being closer or farther from the camera than expected. While the software is still improving, you can take these steps for the most accurate alignment results:
Use Proofgrade™ materials.
If you don’t use Proofgrade materials, use a precision set of calipers to measure your material, and enter the thickness in the “uncertified materials” dialog.
Use material that is not warped or tilted.
Place your design near the center of the bed.
Clean the area underneath your crumb tray, particularly the four indentations on the floor.
Reboot the machine. Alignment can drift over time, particularly if you bump the head of your Glowforge while removing material.
Should you finish all of these steps, and find that you have an alignment error of more than 1/4", please contact us so we can investigate.