Hello! I have been cutting exclusively proofgrade medium draftboard for the last year and suddenly ran into a snag with my machine. I keep getting a thickness error even though it is the exact same material I used the day before without issue. I noticed a few other people started a thread with this issue but the resolution is never in the thread as they were messaged privately and the thread is closed. I sent an email to support and haven’t heard back, meanwhile I have orders piling up and need this resolved as quickly as possible. Does anyone that had this issue know what the solution was?
Have you cleaned the lenses on the bottom of the head? One is for a camera and the other is a red diode laser that the camera takes pictures of to determine the material height.
Yes, I cleaned everything after the error popped up the first time. Sadly the cleaning didn’t help and I am still getting the error code.
Sadly since you also sent an email they will come and close this thread too. No idea what they’re doing on the back-end, but in each thread they’ve asked for a series of photos - if you didn’t attach those to your email you should either do that or post them here so you are ahead of the curve on getting an answer 
Sounds good will get a screen cap. I figured since it was the same as the others they wouldn’t need to see it, but good call on covering all my bases.
Hi there @kerri.alexandria.low - I see that you’ve got an open email ticket, but I wanted to go ahead and respond here based on your observation that none of the answers for this appeared to be public.
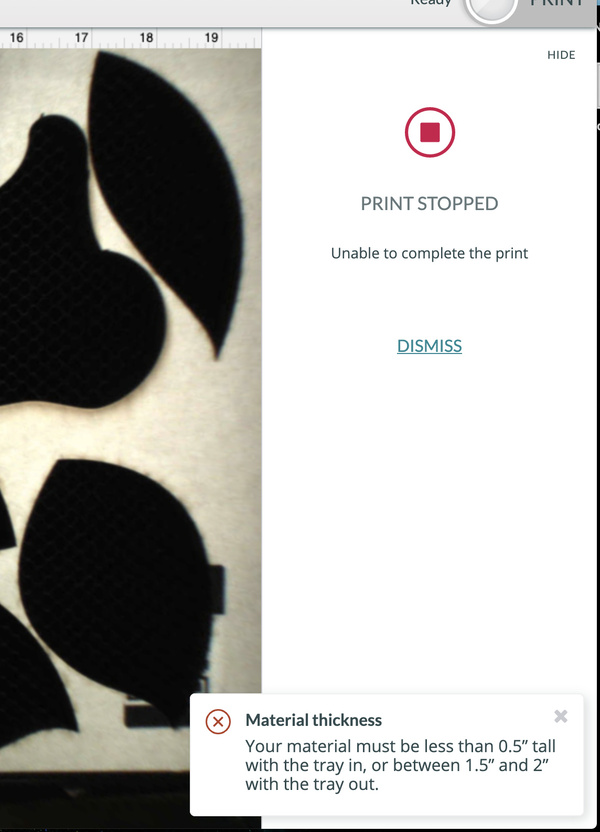
When we run into a thickness error, especially one that states the material is too short, one of the common reasons is that the red dot used to measure the material simply missed.
I extracted the logs from your printer around the time you were having this issue to review, and I believe that may be what happened here. Reviewing the images from some of the prints that didn’t work (the same images the web app shows you while printing) there’s a fair amount of the material that’s already been cut out.
I believe the red dot may have ended up measuring in one of these empty spaces. In this scenario, we might have more luck using Set Focus to place the focus area on the material, so it’s not near an edge. Then watch to make sure the red dot hits the material.
The Set Focus target allows you to select an area to take a precision measurement of the material’s height using the red dot in the printer head.
Please give that a shot and let me know if you’re still having trouble!
5 Likes
It’s been a little while since I’ve seen any replies on this thread so I’m going to close it. If you still need help with this please either start a new thread or email support@glowforge.com.