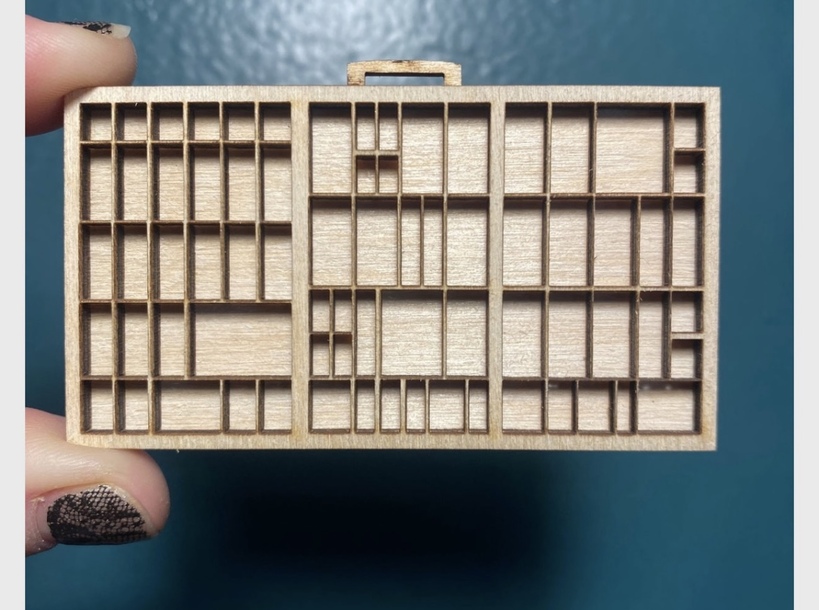
Does anyone have a file for a miniature printer tray style display box? I would be willing to pay. Below is an example of the type of thing I am looking for. Thank you, any help is appreciated!
9 Likes
This would seem to be a pretty simple thing to do, if you know your way around vector software.
Are you proficient with inkscape or illustrator or anything? This is really just a 20-ish minute project, even for someone who is not expert at it.
I’m sure we can get you going in the right direction if you don’t feel like you quite have the skills yet, the forum loves to help people level up.
7 Likes
This category of the forum is for posting files for others to use - not for requesting files (which is against forum rules). I will move your post to Everything Else.
3 Likes
Thank you!
Hello, thanks for the reply! I am a beginner at Inkscape but currently struggling a bit with it. I still do not really understand how to execute this type of design.
Hang on a second and I’ll make a quick tutorial about how I’d do it.
5 Likes
OK so it’s going to seem complicated, but really this is just using the same few skills over and over.
Things you’ll want to know about:
-
- Importing an image
-
- Clones
-
- Snap alignment
-
- Boolean actions (union and exclusion in particular)
-
- Combine/break apart path (semi optional)
Here goes, let’s essentially copy this design… you can use the skills you pick up here to make your own custom layout, but this is a good start:
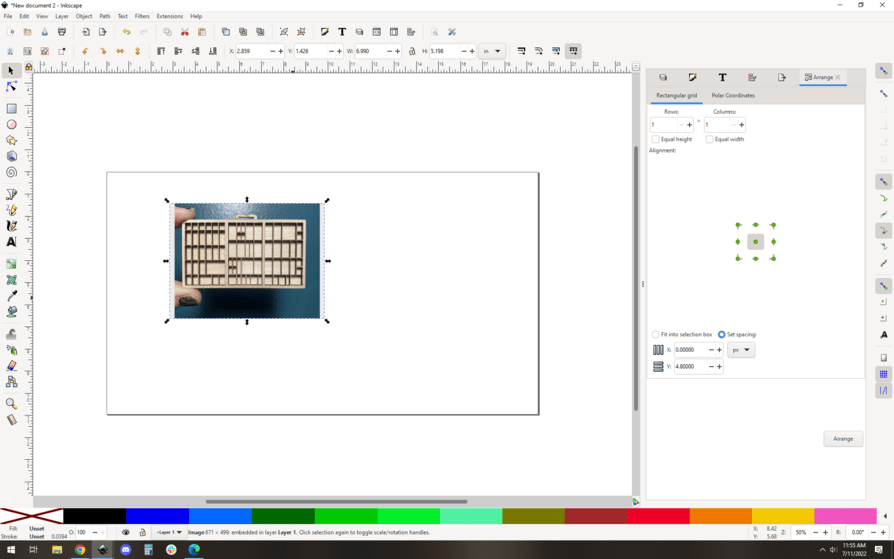
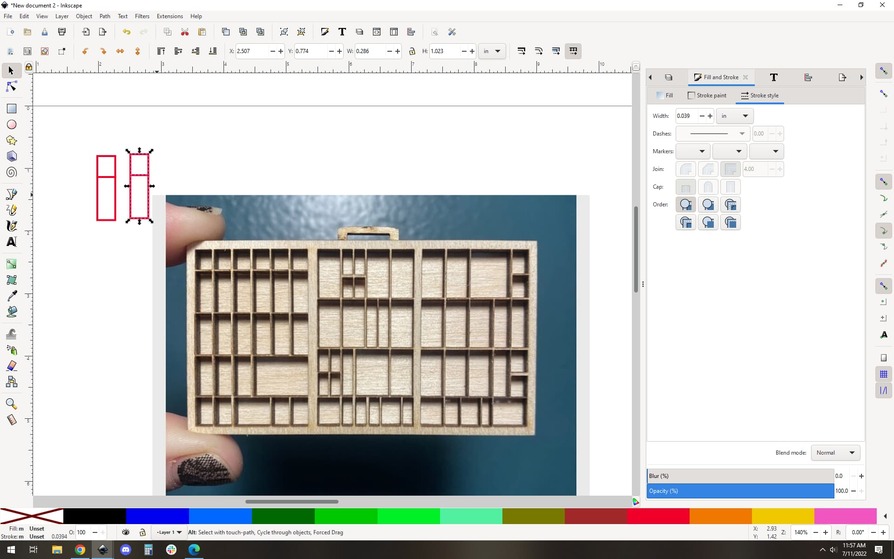
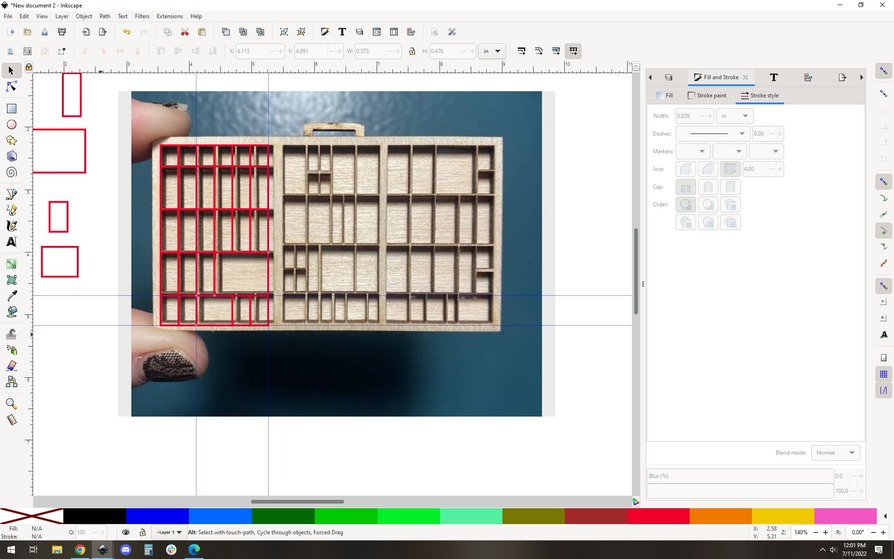
Start with a new SVG and drag the image into your workspace:
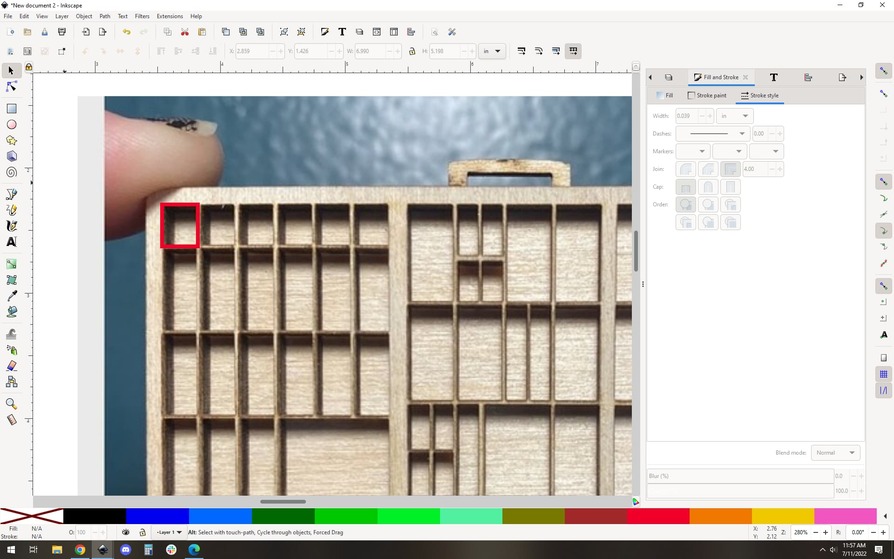
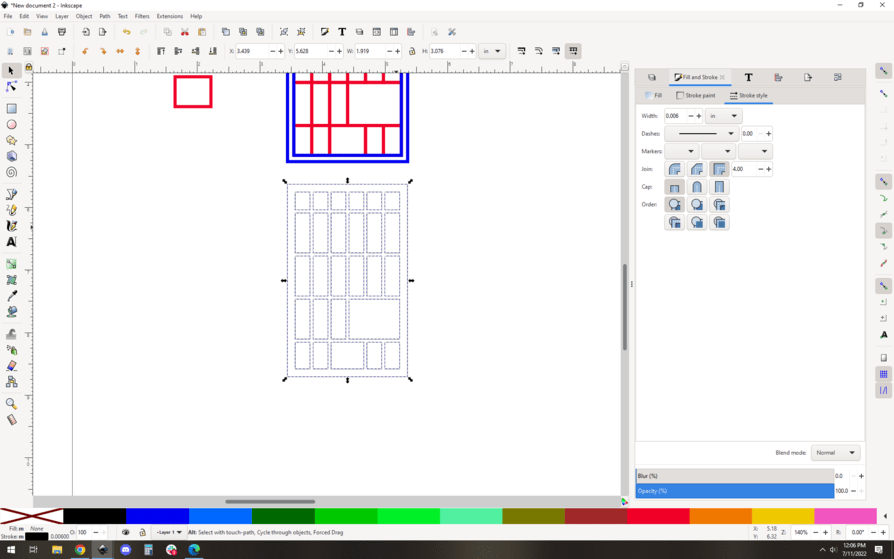
Now let’s start tracing the boxes by drawing rectangles on them (in red for easy visibility):
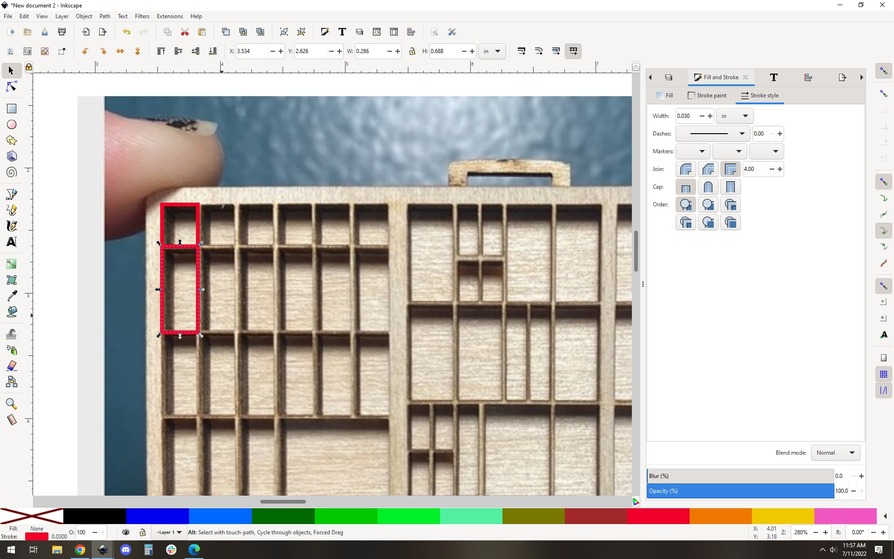
You an see how this is repetitive, so let’s use clones to make changing things a little easier later (trust me). I pull the original rectangles we just drew off to the side, and clone them (edit->clone->create clone)
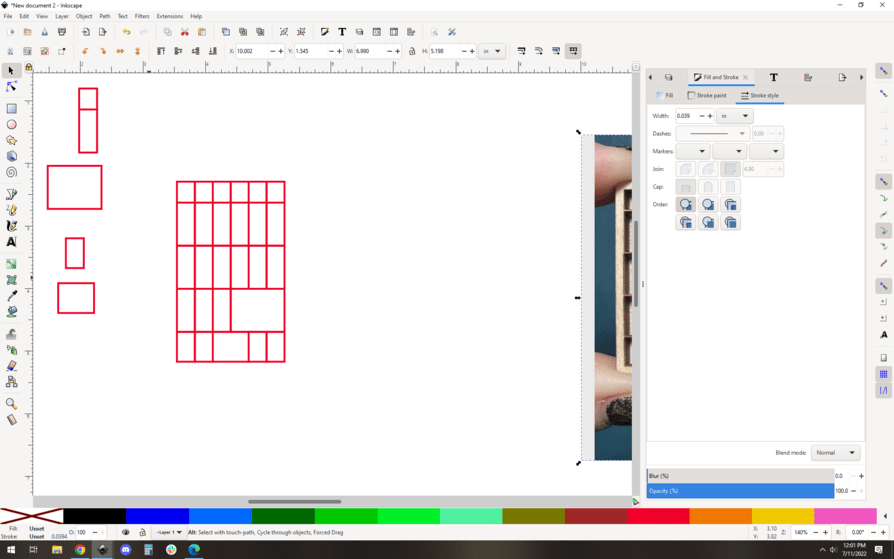
Now drag the clone back into place, and then copy and paste the clone to snap them together and start to build your grid:
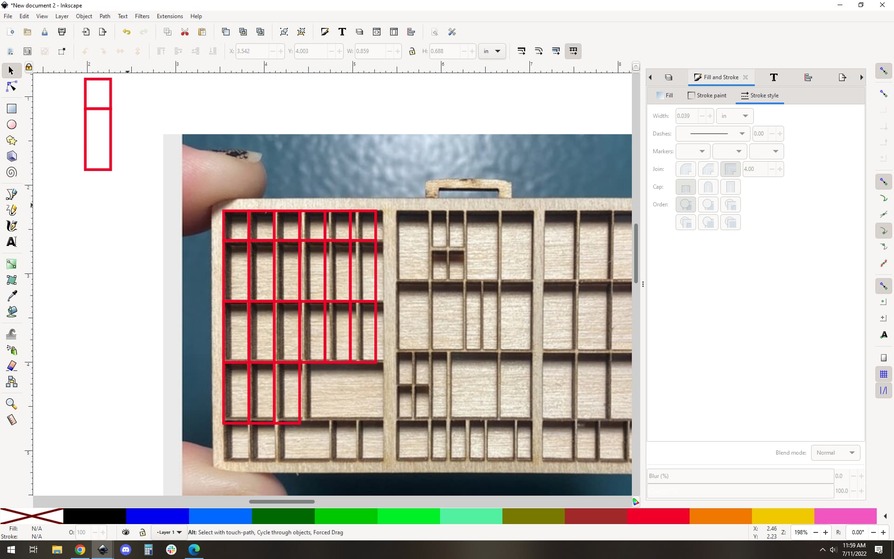
You can see I got the horizontal scale a little “wrong” but whatever, let’s go with it. For this demo scale isn’t 100% important.
That large rectangle needs a couple of guides to make it “snappable” as you draw it:
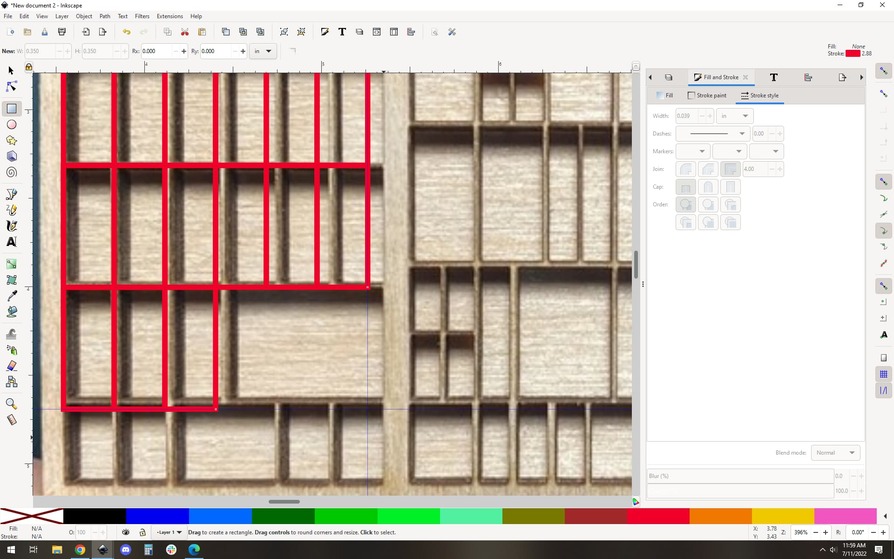
And now we can draw the rectangle in place:
Of course we pull any new shapes out and make them clones as we go. You’ll have a nice grid of clones in no time:
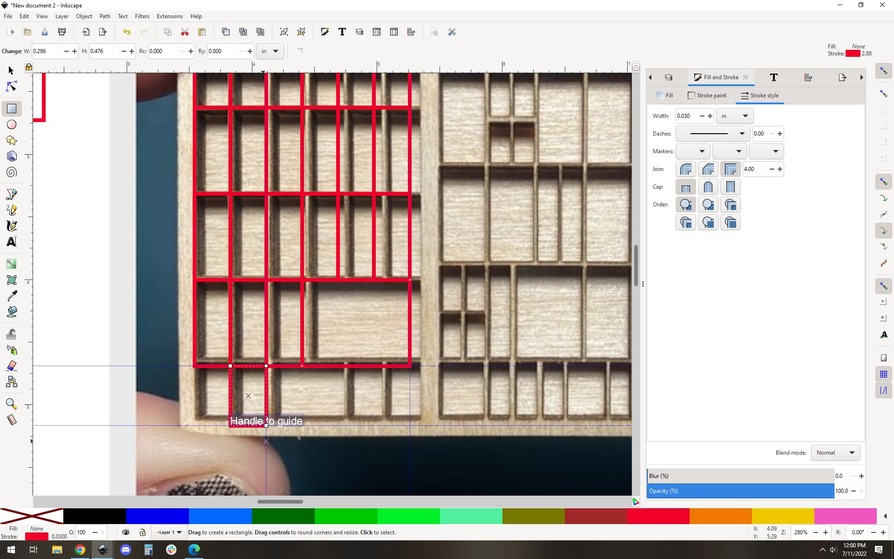
OK step 1 is done. Let’s move the picture to the side to make visibility a bit clearer.
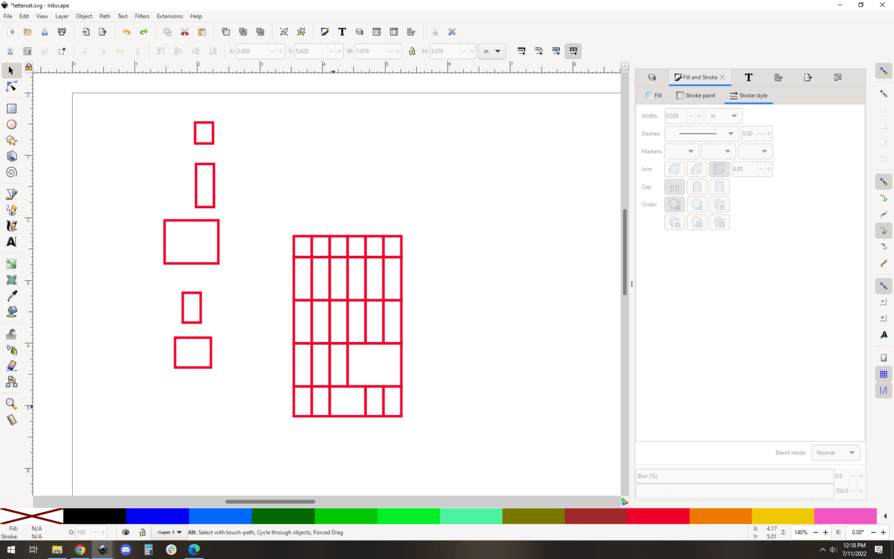
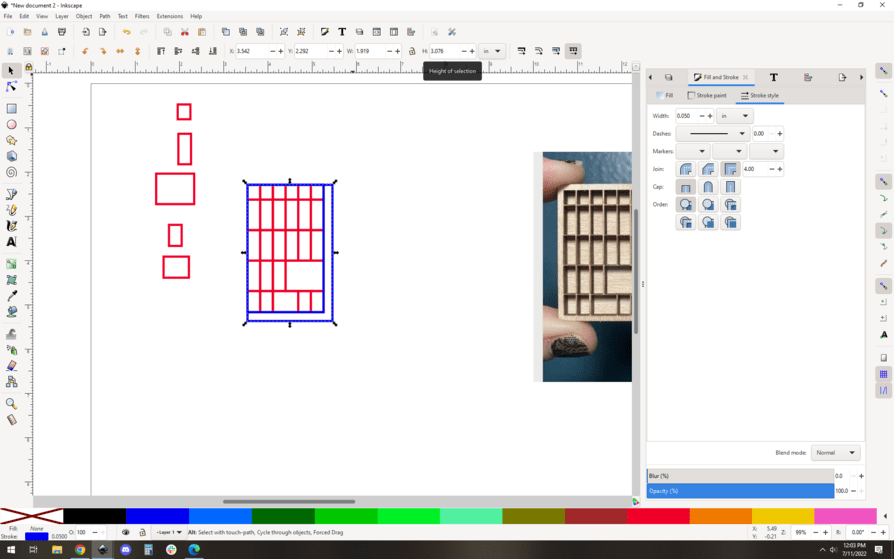
The dividers are too thin as it is, let’s make them wider. This is where the power of clones comes in, we can change the width of the clones’ lines and the entire design updates. I chose 0.04". which is still very thin and might be too thin to laser without significant overburn, but it’s a good starting point:
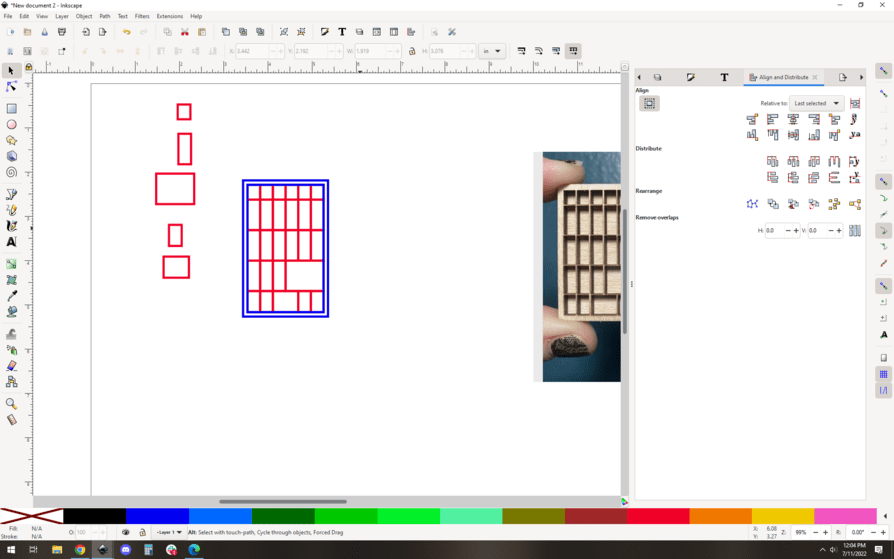
Now let’s handle the “border”. I am going to do this the most manual way. First I draw a rectangle around the entire tray (in blue for visibility):
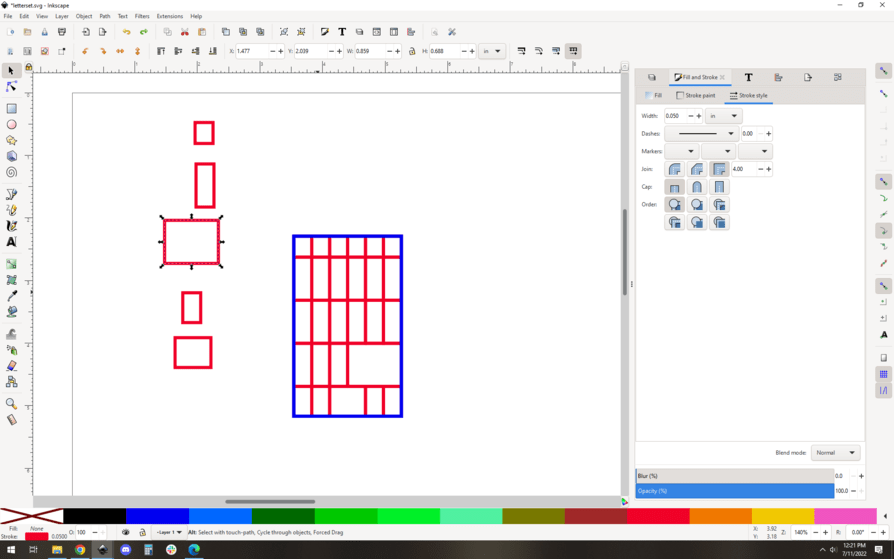
Then I copy and paste that same blue rectangle, and manually make the rectangle .2" wider and .2" taller. It looks wrong for a second:
Then I align the blue rectangles to be centered:
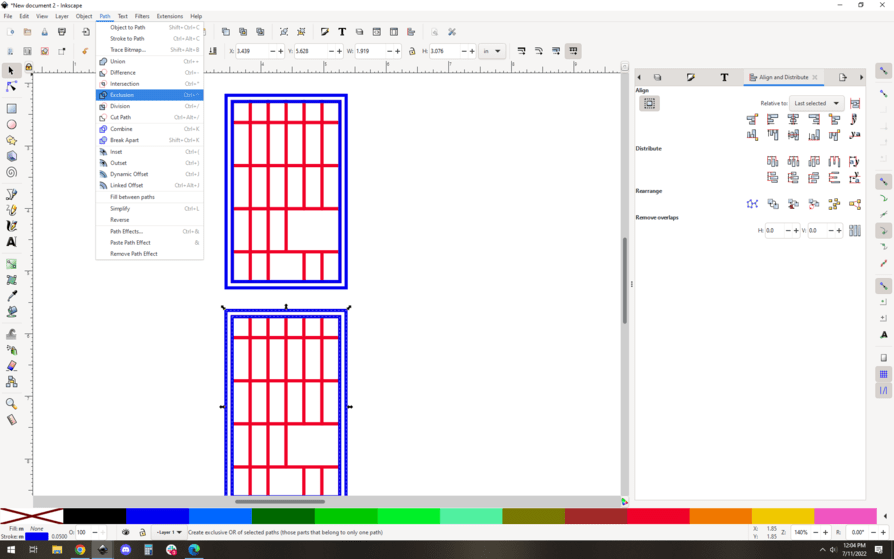
OK starting to look like a tray! Now we need to leave our clones behind. It’s a good idea to copy and paste the whole thing to a new copy, so you can keep the clone version in case you want to modify it later. Once I have my new copy, let’s turn that border into an actual shape instead of two unrelated rectangles:
Select the two rectangles, and do Path->exclusion. This will punch the inner rectangle out of the outer rectangle, making a “donut”:
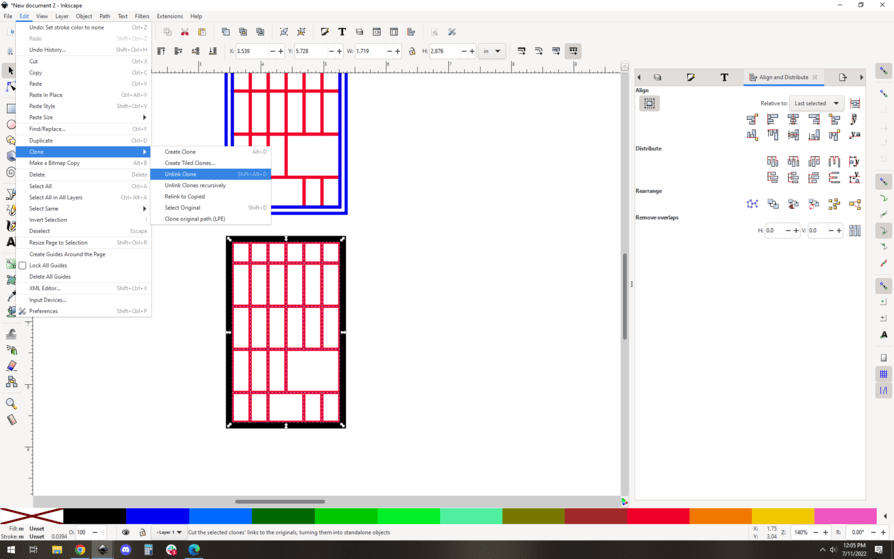
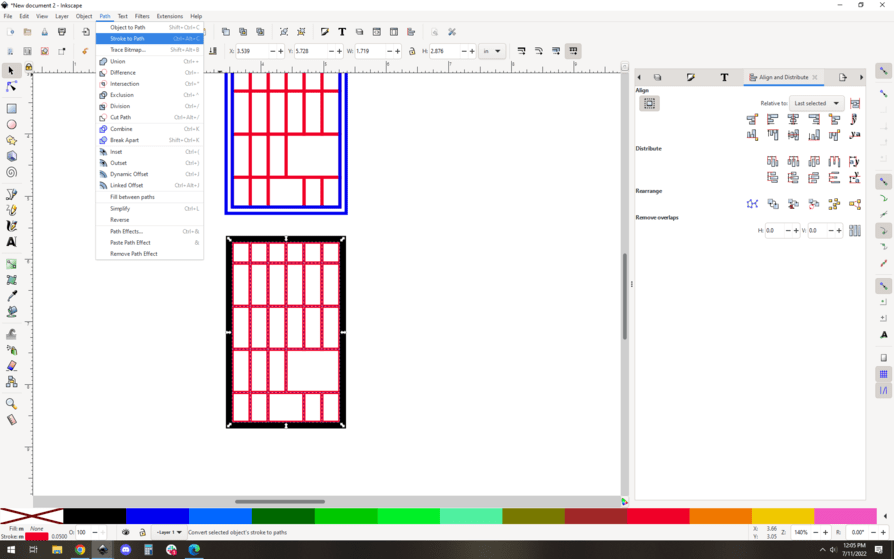
Now we need to convert the grid into shapes as well. First up, unclone them. Select them all and do Edit->clone->unlink clone (I’ve converted the border to have a black fill with no border just for visibility):
Now they’re back to being independent rectangles. Cool. We need to convert them to actual “donut” shapes with thickness, so we do Path->stroke to path:
Which make them a bunch of donut shapes, but now we need to merge them all into one big grid by using Path->union. I’ve put it in node mode so you can see the actual paths involved are merged:
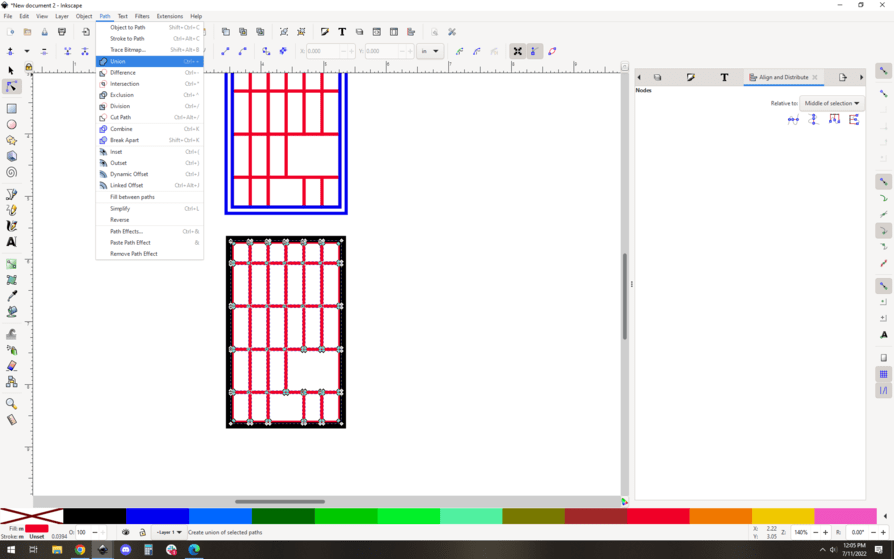
And OK the last thing is to merge the grid path with the border path by selecting the whole thing and using Path->union again:
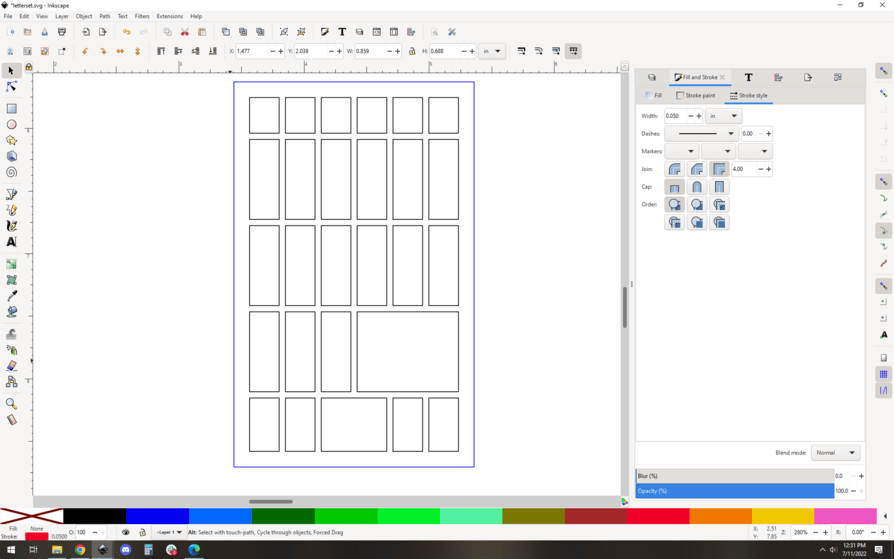
And then I convert it to have a stroke and no fill:
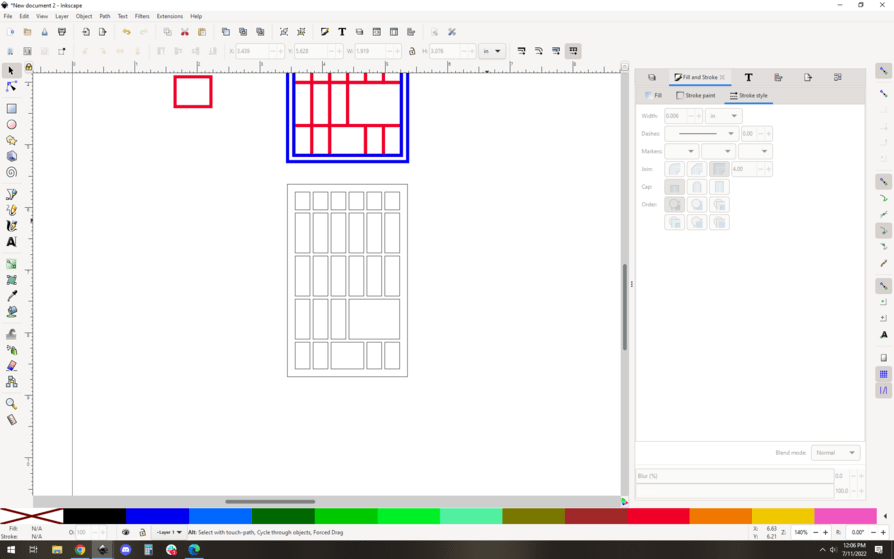
And that’s it, you could cut it right now… but there is one last optional step if you really want to do it “right”: It’s generally a good idea to cut inside holes before the outline. To do that, you have to color code them differently so they’ll be separate actions in the GF interface.
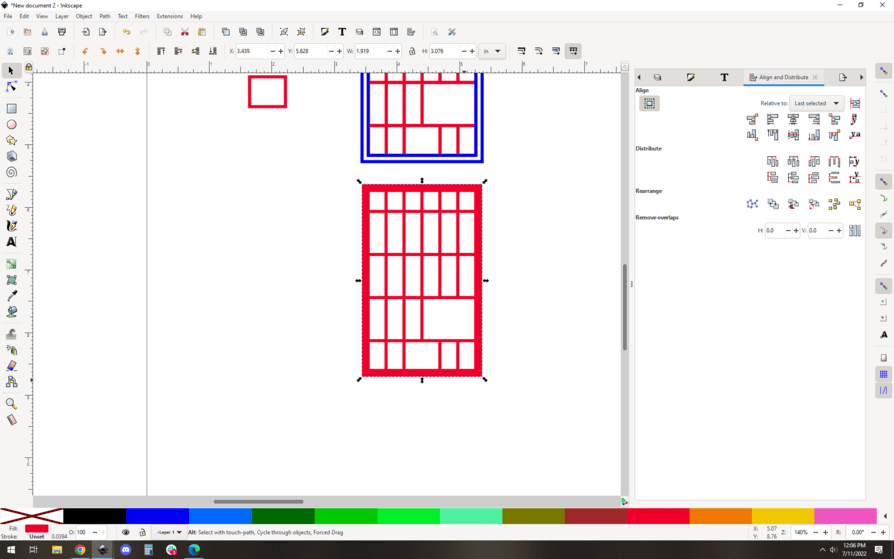
Select your new grid, and use Path->break apart. You’ll see your design breaks into lots of individual shapes:
Select the outer cut line and make it a different color:
And you’re good to go!
Easy, right? I know it sounds like a lot when you’re new to all of this, but if you learn these skills (they are key when making your own designs) they will become second nature. Writing this up took at least five times as long as actually doing it. I didn’t time myself but I suspect that the entire process took me less than 5 minutes.
If you have any questions, ask away, one of us will be able to help if you get stuck. ![]()
30 Likes
You’re the man. This is why I love the community.
5 Likes
Thank you so much! I appreciate you going to the effort to make that so detailed and easy to follow. I will be giving it a try once I get home!
5 Likes
Very nice write up. Thanks for taking the time!! ![]()
4 Likes
I agree. Many, like Dave will go the extra mile. @kimberlint, you have just discovered why this place is the best accessory for your laser! ![]()
7 Likes
Absolutely! Certainly never expected such a kind and helpful response!
3 Likes
Does anyone else here feel inadequate whenever @evansd2 is like, “hang on a sec and I’ll whip up a quick tutorial.”?
In all seriousness, that’s awesome man!
11 Likes
Wow, the memories. When I was in high school (Class of 77’) one of the classes we could take was “Printing Shop”. We learned all the methods that were in use at that time including hand set type from cases like this. we also learned various camera processes, film methods, photo plates, and we even had a line-o-type machine. I’d wager many of the processes wouldn’t be allowed to be taught these days due to the various chemical exposures you’d encounter.
6 Likes
Yes, things have changed, and the pace is accelerating.
1 Like
Oh you shouldn’t!
What I do is what I call “building with the small legos”, meaning I know a few of small tricks and just string them together in various combinations. I’m not the most advanced vector editor on the forum, I’m sure many people who read this will think “he really took the long way”. ![]()
But thanks for the compliment anyway!
11 Likes
You’ve just described almost every profession. ![]()
10 Likes
A huge yes.
2 Likes
Yup - that’s been keeping me employed in IT for 30 years now. I still rely on tricks learned 25+ years ago and that’s the stone ages in networking, storage, etc.
6 Likes
I took “graphics” class in Junior and Senior year. Learned AB Dick printing press 1 color and 4 color printing plus a crap ton of photography. I remember the chemicals well…
That lead me to being a photographer for the college newspaper - I’ve spent days in a dark room and I always wondered what all of those chemicals may do to me later in life!
3 Likes