I know this issue is beat to death but I just wanted to share some pics from what I’m seeing.
Pic 1: Here is a print I did earlier today. The print itself came out fine but alignment is still off.
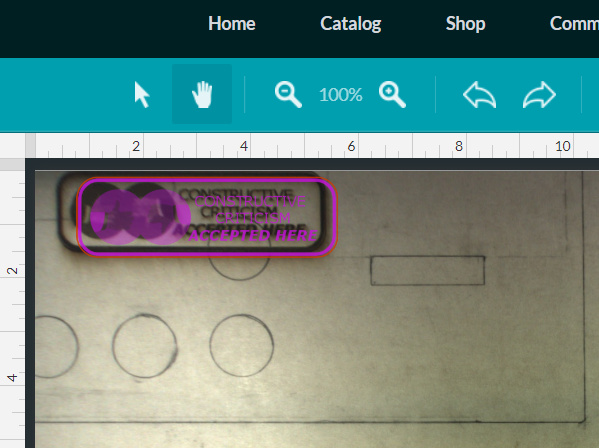
Pic 2: So, I made a VERY light engrave (1000/5) on some medium draft board. I put in my ruler to get a pic from the lid cam to see just how much it was off.
Pic 4: WHAT THE UNHOLY MUCKLE FRUCKLES! It was clearly off my a dead on .5in, now it’s .25? but, but, nothing moved? I refreshed the bed image. I did another visual on the GF. I followed up with this pic from my phone.
Mind. Blown.
Before I did this print series I made sure that every thing was level, crumb trey in, doors fully closed, etc. What is so frustrating about this is that my first… MANY prints were all perfect. I’m just not sure what changed or went wrong.
Since what “alignment” amounts to is the dewarping and cropping of the bed image, the critical information is the thickness of the material at the point in question (that’s why warping is important).
What material is that? Is it Proofgrade? Did the machine recognize it? If not, did you choose the correct Proofgrade type manually? If it isn’t Proofgrade, did you measure it accurately to 1/100" and input that into the “use uncertified material” box?
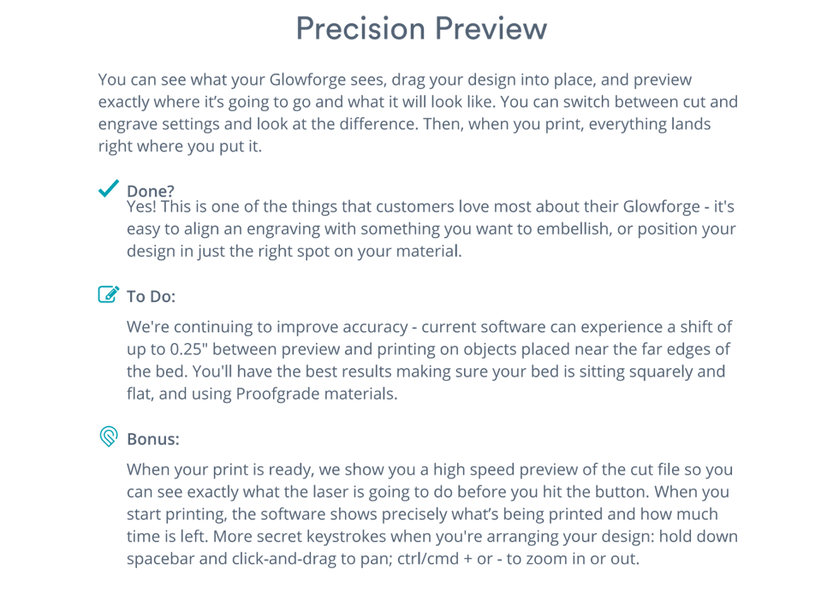
Either way, currently 0.25" is the current expected deviation. Especially as you get father from the camera.
So I guess your confusion is that you put the ruler on top and are seeing different offsets than what is reality?
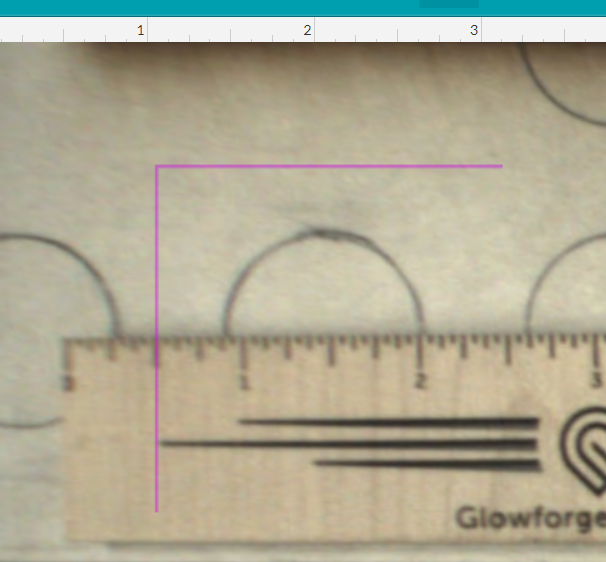
Your image is distorted one way or the other. I’m not sure how thick the material of your ruler is - But you now have that material sitting on top of other material and a material height that is attempting to dewarp the lid image based off of that material height.
You aren’t going to get an accurate measurement of how far off it is, by taking a picture of a thick ruler on top of your material.
You should flip the ruler around so that you can see the end of it on that spot. It’ll look like a giant tower there. It helps drive home why the thickness of the material is so important.
Yes. Proofgrade draft board.
Yes. It was recognized.
Can you point me to a reference for the 0.25" tolerance? I may have missed something as I don’t frequent these forums.
Also, I get that the bed image is adjusted based on material and so forth but the etch was done ‘without’ the ruler in the GF. I added that after (as described in OP). Also, both materials are 0.125" PG. So, the image distortion between the two pics being 0.25" is something I can buy that but the actual print was off by 0.50"
That is what I am attempting to show with these photos.
I suppose that it’s possible that the print is off by whatever amount that it’s off and adding extra height of the ruler caused it to double compensate in the follow up image?
I did another print later that covered the whole bed. The area in the center is, indeed, closer to true. The far right edge is off by ~about~. 0.25 (just using my eyeball) but the left edge is way off. I’ll re-clean the camera lens and see if that helps. Maybe there is a smudge or something on that side? shrug
Everyone who ordered during the pre-order period had to accept or decline delivery. The acceptance process laid out the limitations in the current machines before accepting delivery. Don’t know when you received yours or if the process is still the same .
Yeah, placement accuracy changes every once in a while. I think it has something to do with the constant modifications behind the scenes on the software. Hopefully that will get tightened back down soon.
Until it does, there are some work-arounds that we use that can help, and it’s always a good idea with new systems to give yourself a little extra room out at the edges of the bed. Placement should be a lot tighter right under the lid camera. (Fisheye effects.)
Since you don’t frequent the forums, I’ll list a couple of tutorials on how to get better alignment between elements of the design - just give yourself some extra room out at the edges of the bed when you’re placing things, and make sure to enter the measured thickness of the materials (using calipers) if you are using non-Proofgrade materials.
There are a few others that I like to point people towards as well - they speed up the learning process on the machine tremendously.
Mine mostly cuts above and to the left. It’s easy enough to click the arrows a couple of times if the placement variance is stable.
It’s not always stable right now, which is why I prefer to do my aligning inside the design software. (The tutorial linked in my post above.) If jigs are necessary, they add a couple of steps that are not terribly difficult.
We’re all waiting on the final alignment tweaks. In the meantime, I’m not about to sit on my thumbs. No telling how long it will take.
Or if it will ever happen, especially now nearly every customer has agreed to take delivery of a machine with 1/4" accuracy. Am I the only one to turn that down?
If would be better for folks to assume that the preview image is, at this time, only a helpful feature for approximate placement and not something to use for precision.
Won’t bother describing how I get good placement because the predictable and repetitive response that would follow was boring after the 40 or 50th time.
Thanks for the help everyone, that’s right. I’m going to close this thread. Thanks for letting us know about this!
If your alignment seems to be off by more than 1/4", please either post a new topic or email us at support@glowforge.com and include screen shots of a Gift of Good Measure test, and we’ll take a look.