Trying real hard not to complain about things since my GF has been a great machine for work and play. I’ve so far been able to adjust for the 1/8ish discrepancy in the alignment with the camera etc. And yes…ALL the things have been cleaned and levelled and position correctly so please no more suggestions on ‘clean the tray’ or 'hold your work down"
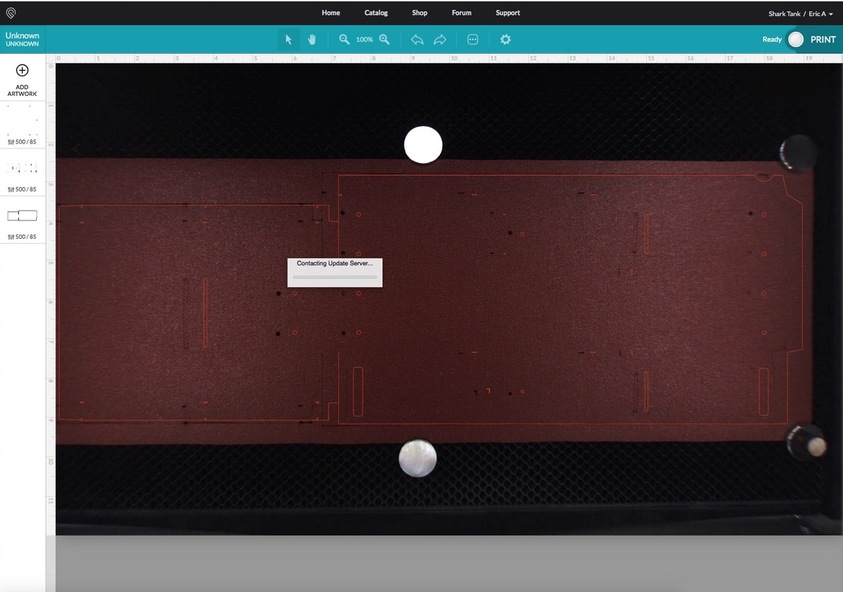
The magnets are as flat as you can get them, the material, as flat as they come (.02" nylon CORDURA). You can see here the actual cut vs the aftermath. It cut fine just…what is going on?
I’m assuming you remembered to enter the correct thickness in the Unknown Materials box?
What follows is pure speculation…take it with a grain of salt.
I don’t know if this is what is causing it, but a lot of folks lately who are showing large discrepancies between cuts and placement have been using neodymium magnets and have files that bring the heads in really close to the magnets.
This is just something I’ve noticed. It does not mean that is what is causing it. And I’m not going to risk messing up my head by trying it and seeing if throws off the cut.
But maybe we need to keep the magnets out at the edges of the material away from where the head has to pass to create the file. Painter’s tape works just as well to hold thin materials down against the tray.
It’s been more of an issue as of late. I never paid too much attention to it when I first got the machine because I was so excited to have a laser at home instead of at the community shop.
Well, support is probably going to have to look at the metrics…if you can recall roughly the date, time and time zone that you ran the problem print it helps them to know that when they go back and look at them.
(And they don’t always get to the requests right away, so if you know when it happened, post it here.)
Sorry about that.
It does look like it’s outside of the 1/4" variance, but it’s a little hard to tell from the photos. They’ll be able to tell, although they might need you to run a test on Proofgrade draftboard first.
I use 1/4" ceramic magnets and had issues with my PRU where the GF would lose its place if the head went directly over one during the material scanning/focus. My standard practice (superstition?) is to leave the path from head park position to the center of the current job magnet free.
Absolutely worst case was when some neos jumped from the bed to the gantry when cutting thick material – they were just far enough from the bed so that the gantry was more attractive in a very literal way.
We included an extra piece of Proofgrade Draftboard with your materials shipment for troubleshooting. Place the Proofgrade Draftboard in the center of the bed and print the Gift of Good Measure using the default settings
When the print finishes, without moving your artwork or your material, take a screenshot of the workspace to show us the difference between the artwork placement and the actual print placement. Make sure to include the rulers in your screenshot and show as much of the bed as possible.
Mac: Press Shift-Command-4 and click and drag a box around your image. You’ll find the screenshot file saved on your desktop.
Windows: Click on the Start Menu and search for the Snipping Tool. Open the Snipping Tool > New then click and drag a box around your image. Click the Save icon and name and save your file.
Send us the screenshot along with the date and time of the print, and we’ll investigate
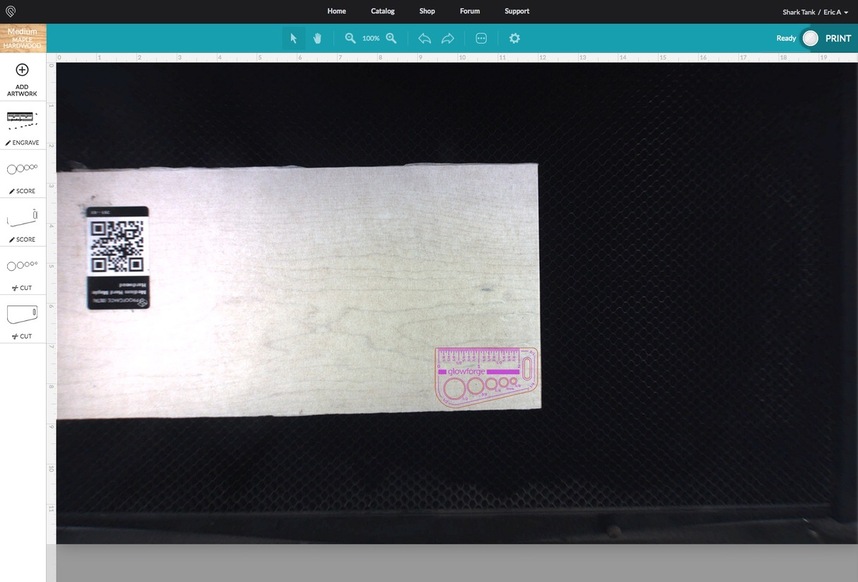
I was not sent a piece of draftboard for calibration so I am sacrificing a bit my Med Maple Hardwood to do this test to prove once and for all that I am not crazy to myself.
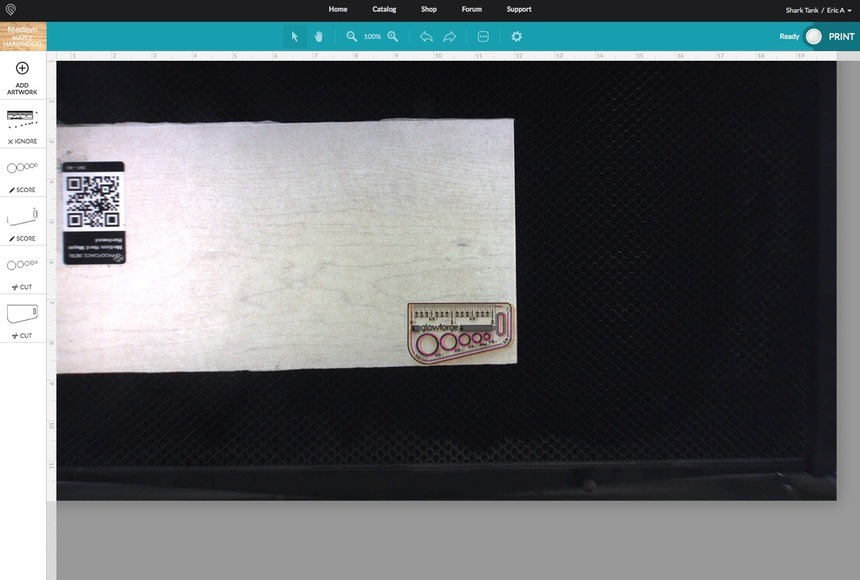
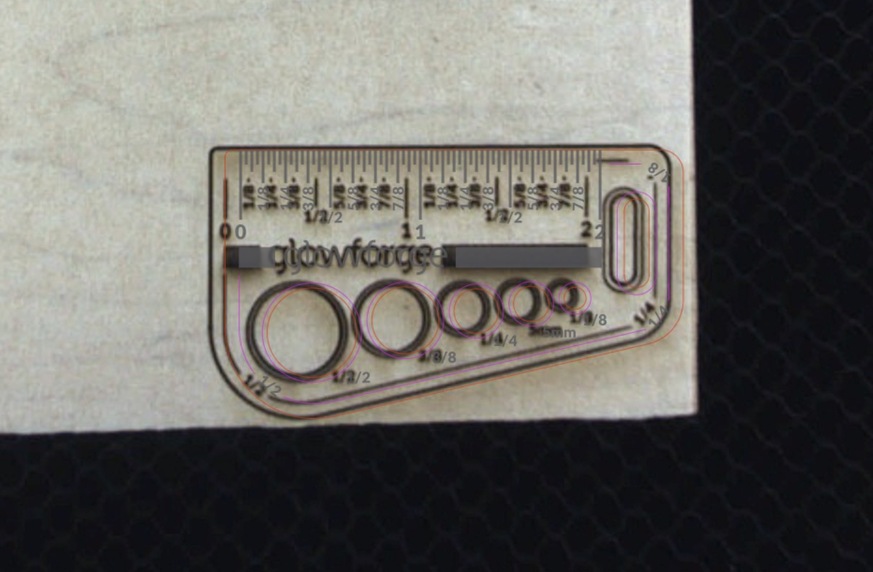
Here’s before the cut and after the cut (and a zoomed in version). This couldn’t be more in the center of the camera and the bed.
This is after a full clean, fresh start up of the app and the machine and now with proofgrade material.
Thanks so much for taking the time to do this. We’re still improving our layout and alignment, so your print may appear offset from where you put it by up to 1/4". The test with the Gift of Good Measure shows that your Glowforge is performing within the range of accuracy that we expect right now. Most importantly, that means that as we make improvements to the software, I expect you to see better alignment.
While the software is still improving, you can take these steps for the most accurate alignment results:
Use Proofgrade™ materials.
If you don’t use Proofgrade materials, use a precision set of calipers to measure your material, and enter the thickness in the “uncertified materials” dialog.
Use material that is not warped or tilted.
Place your design near the center of the bed.
Clean the area underneath your crumb tray, particularly the four indentations on the floor.
Reboot the machine. Alignment can drift over time, particularly if you bump the head of your Glowforge while removing material.
Sideline question here for you @Rita .
There was a post that showed a huge view difference before//after cleaning with just 10 hours of use on the machine.
Doesn’t this also cause a shift in how the camera software is sorting things?
Just mentioned, since if this is true you can add it to your ‘to do’ list…
Added it to my check sheet already because it seems like a good thing to do when stuff is going sideways.
Use Proofgrade™ materials.
If you don’t use Proofgrade materials, use a precision set of calipers to measure your material, and enter the thickness in the “uncertified materials” dialog.
Use material that is not warped or tilted.
Place your design near the center of the bed.
Clean the area underneath your crumb tray, particularly the four indentations on the floor. Clean the rails and lenses. Check for debris.
Reboot the machine. Alignment can drift over time, particularly if you bump the head of your Glowforge while removing material.
The display definitely gets a lot clearer when you clean the lid camera off but it shouldn’t impact the accuracy. The dewarping algorithm is all based off material height.