The Glowforge has been running perfectly so far and along with a sundry of little toys, emblems and such for my kids (draftoboard is awesome btw) I have been experimenting with paper cutting. As many of you might know, I run Encarded.com and produce highly collectible playing cards, and the forge is going to play a key role in letting me develop intricate limited edition boxes and collectible items for my card collectors.
I can’t say I’ve had complete success yet as it is going to take a lot of fine tuning of the settings to get a perfect result, but the experiments so far have been great. My primary goal of these was to see how much detail could be squeezed out of the glowforge onto paper. Many of my card designs are incredibly intricate, a challenge even for traditional offset printing and hot-stamping, so I decided to toss one of my most difficult designs at it and see what happens.
For these experiments I decided to try the bitmap engrave route to do most of the detail cutting and engraving. Traditional vector cut and score was used for the main outline and fold lines. I’ve seen some work here on the forum that was pretty impressive so wanted to see how small of a detail I could get. In this design, some of the details are far smaller than a mm.
These two boxes are on different papers and I noticed that the color of the paper seems to affect the power, which was interesting.
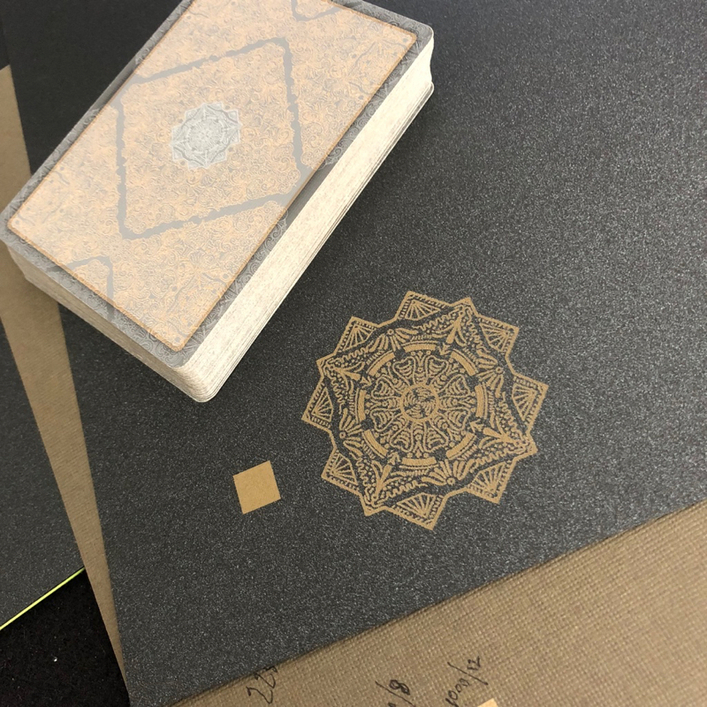
As you can see, the detail is pretty intense. Probably my biggest “complaint” at the moment is that the processing phase of a print can take a long time with a design this complex. I do hope that for those of us that need to batch cut things, that there would be a way to save this layout and the accompanying data and just swap in new material and cut immediately. Please Hopperize that. ![]()
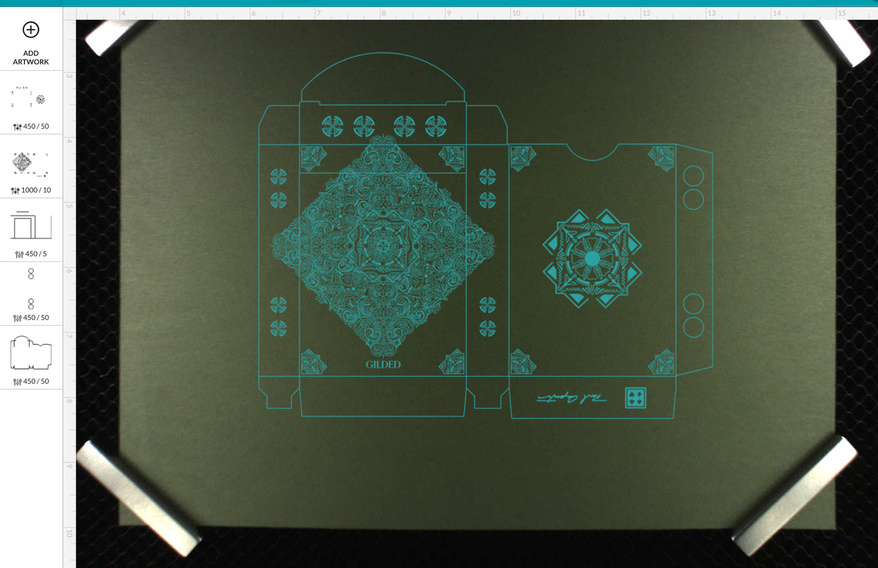
As you can see there are 5 operations. A manual engrave at higher power to do a cut. Engrave to just skim the paper. A vector score at low power and then two vector cuts.
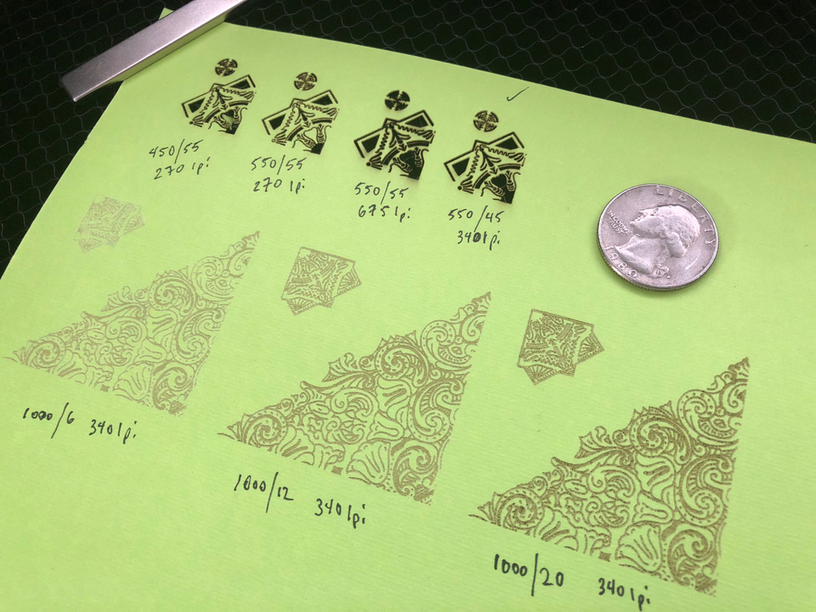
Results are decent, though it is going to take a lot more experimenting to get the speed/power/lpi just right to get crisp details in some areas.
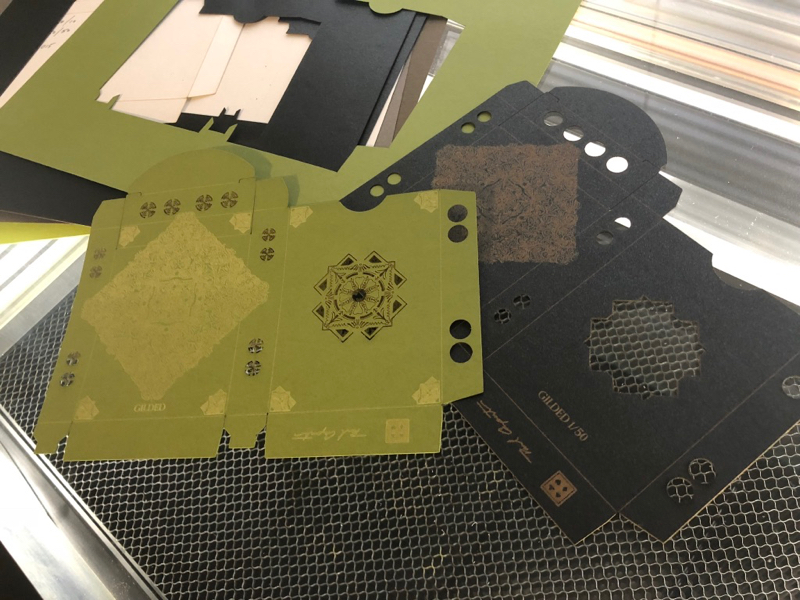
The color that you get with the engrave is interesting and a little unpredictable. With the green paper below you can see that it handled the yellow engrave part ok, but that needs crisped up. The cut out parts (ignore the lower circles that I started cutting but needed to cancel and readjust) are pretty amazing. Those smaller circular areas in the middle are only 6mm wide and the detail lines are perhaps .5mm.
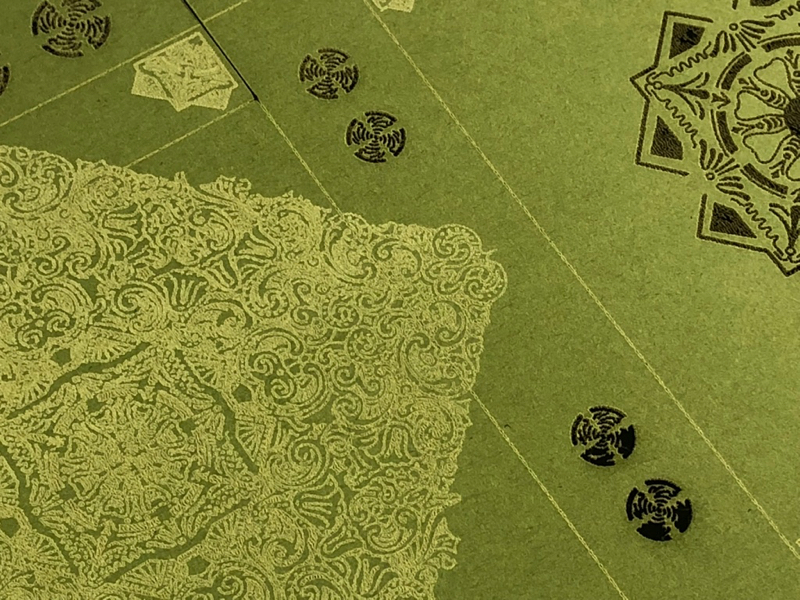
These papers are not final, they are just colors I had laying around. They are scrapbooking stuff from Hobby Lobby, nothing special, and measure out to about 0.018" thickness. The black one is actually a lamination of a thin weight metallic black on a thicker backing paper.
On the whole, this is really exciting. There are really no decks out there like this, and being able to experiment so easily is a wonder. If the processing time can come down a little for repeat cuts, I will be able to speed through this kind of production in a fraction of the time I used to use with my die cutter, and of course I couldn’t get even a 100th of this detail with that machine.
Onward we go!!