I am progressively losing my ability to see and scan on the left and top of my glowforge. It has gotten worse by a little bit each time I turn it on. Additionally the camera is so fuzzy it rarely recognizes proofgrade material codes. Not to mention it has become almost impossible to scan anything at a decent quality. When I first got it, only a few months ago, it was exceptional. Not scanning is almost impossible.
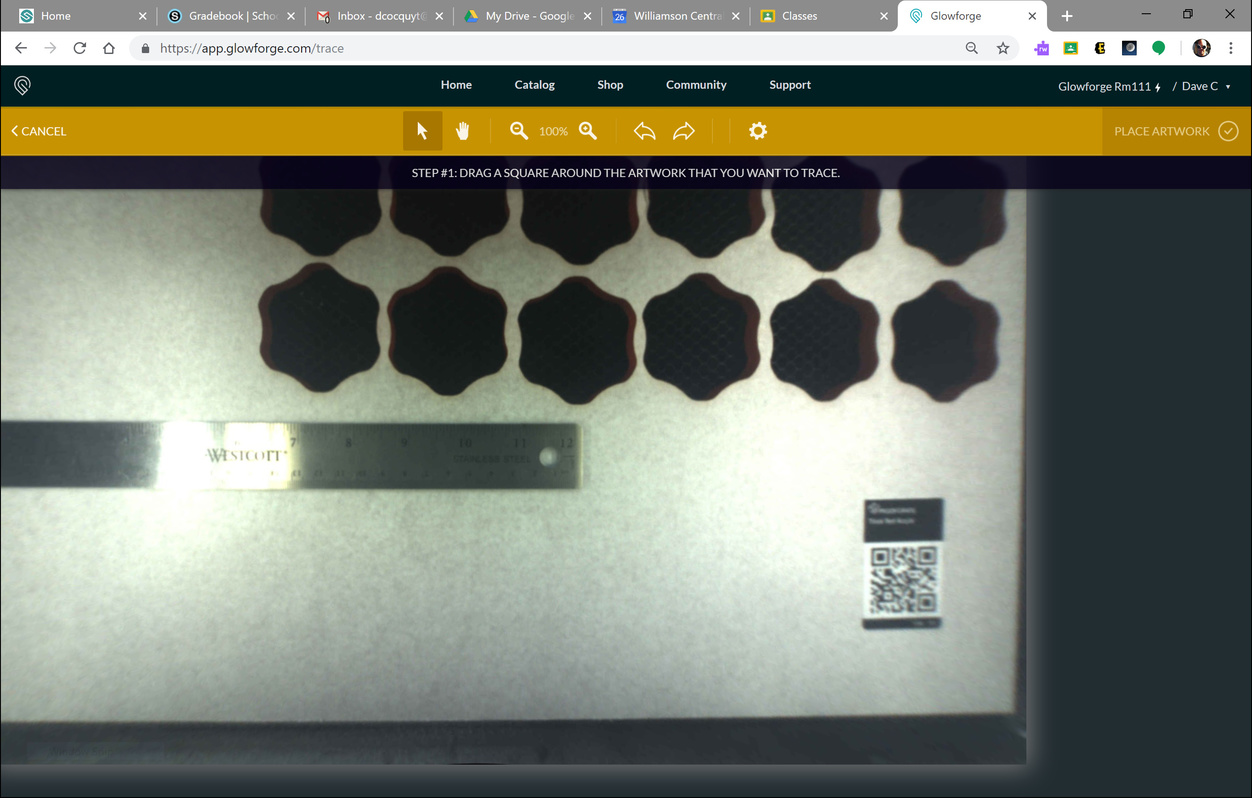
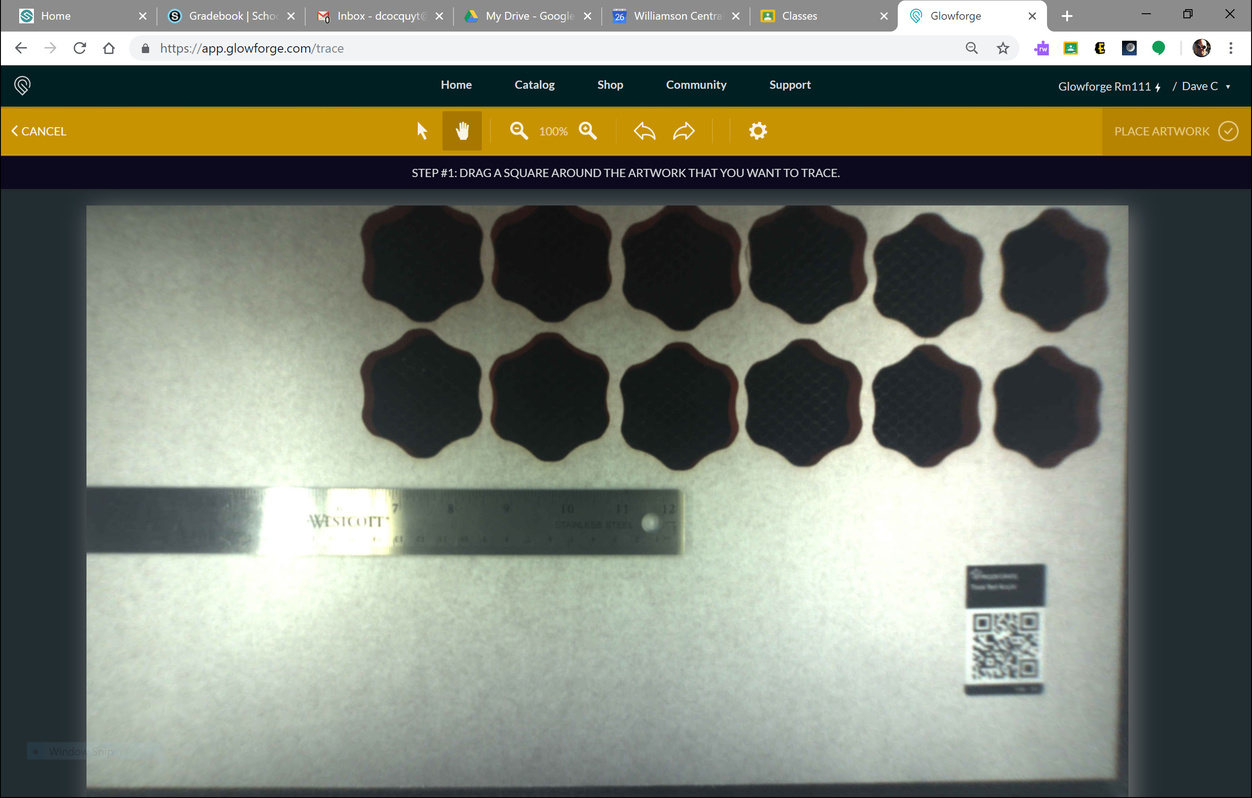
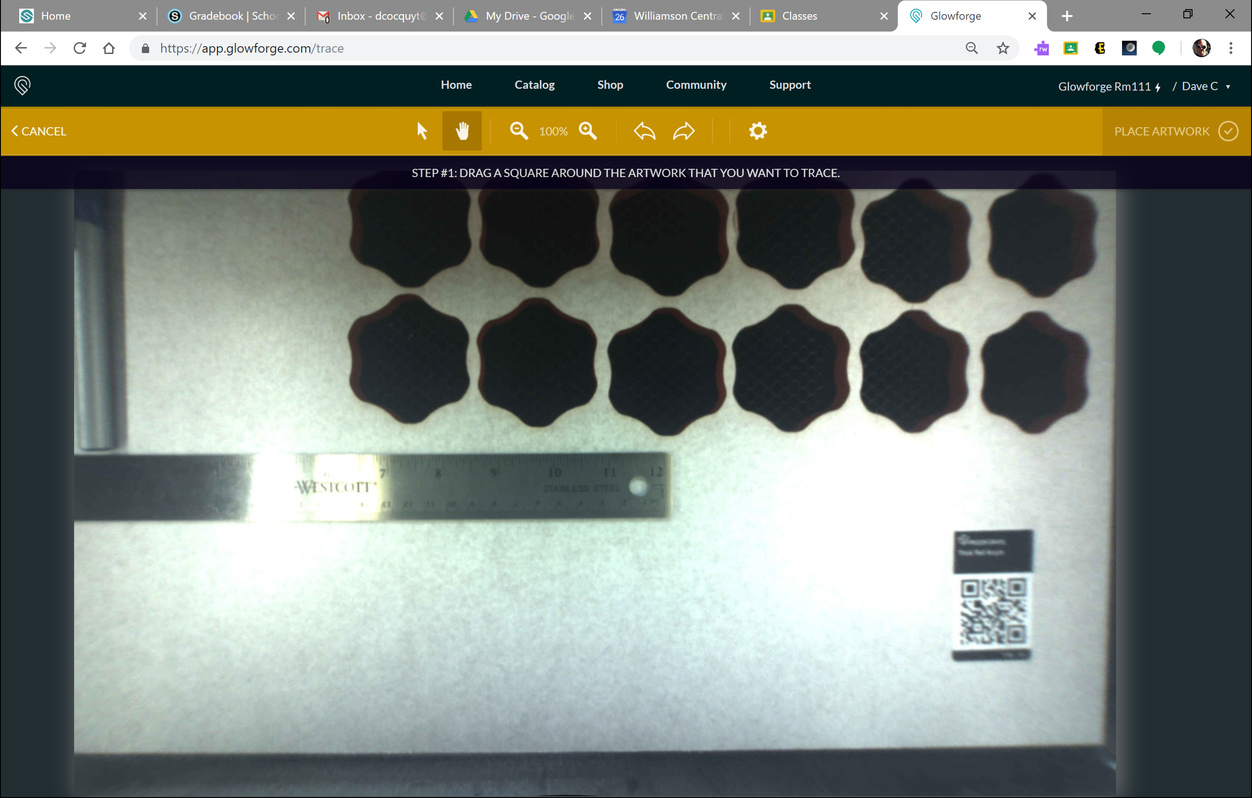
The first pic is when I first try to scan without doing anything, second pic is after I move the screen over a little bit, 3rd shows a pen 2" from the left edge of the 12 x 20 proofgrade material. You can’t even read the pen or the barcode. I have cleaned my lens with a microfiber very gently a few times. Is there an adjustment or calibration I can do??? Thanks
Lens or camera? I clean the camera (under the center of the lid) using the same Zeiss wipes I use on the mirrors and head lens usually when it starts getting fuzzy in the GFUI.
Can you move the view using the hand tool on the top bar?
One thing you’ll notice over time is that as they make adjustments and updates to the software, there can be a period of time when things at the outside edges of the field can get a little fuzzy for a while.
The camera view that we see on the screen is not the entire picture that they capture, but they are using an algorithm to correct a lot of fisheye effect from the camera, and sometimes what we see is fuzzier than what they see.
It’s a little disconcerting for us, but it doesn’t really affect how well the alignment works or whether the stickers can be read by the camera. You’ll probably notice it gradually get better as more metrics are captured for your machine.
For scanning, the camera is capturing the image even if it looks a little wonky to us. You’re going to get your best results by trying to scan with the image right underneath the lid camera…there’s less distortion there. You can then place the scanned results wherever you want on the material for engraving and cutting.
My issue is that I’m losing 2 inches where I can’t scan or even have available to cut on the left edge too. I could deal with a little fuzzy But I’m gradually losing surface area. It’s also not a matter or seeing my work. Whatever I scan is terrible to try and engrave. I’ll try to post an example later.
Doubt that you are losing anything. There has always been an area on the left side that the camera does will not show. But that hasn’t changed. I did notice that the preview image is skewed right in the last couple of days. Use the hand tool and drag the image back to where it should be. The usable bed area is the same as it has been.
Your Glowforge can currently print up to 11 x 19.5 in. Engravings take extra room to speed up and slow down, so the area may be a bit smaller. We’re working on software improvements that will increase the printable area as well as the camera’s field of view.
Would you be willing to do the following to help us investigate further?
Turn off your Glowforge.
Check for small pieces of debris or dust.
Check the lower door to make sure it closes all the way. It may require some force to open, but open it, wipe any dust off the edges, and close it all the way.
Remove the tray and clean any dust or debris from the surface underneath. Pay careful attention to remove all debris from the four dimples where the tray rests.
Check the lid to make sure it closes all the way. Small particles of material, such as dust or debris, can prevent it from closing completely.
Check the surface your Glowforge is on to make sure it’s flat. Ensure it is not twisted slightly and that there is no debris propping up one side of the machine.
Turn your Glowforge back on.
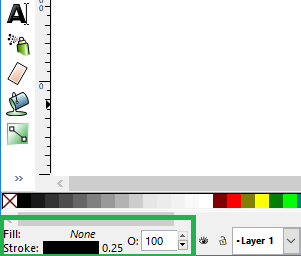
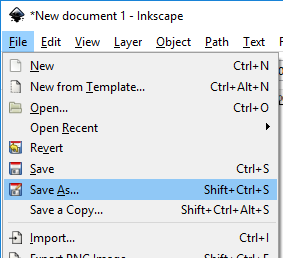
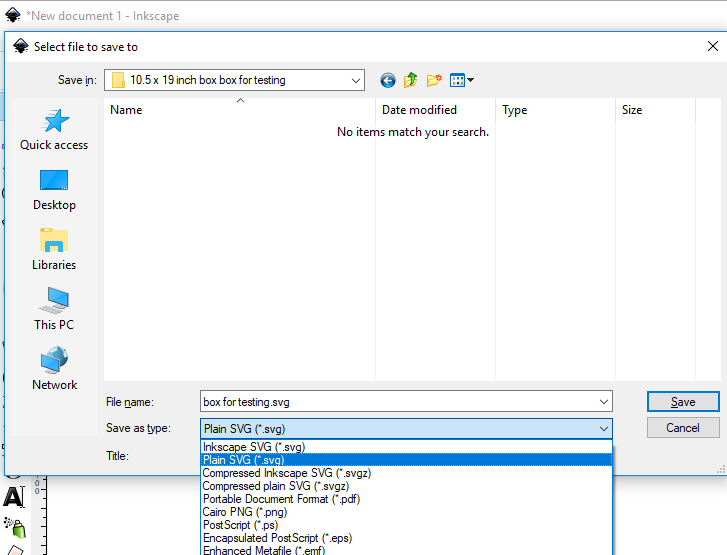
Create a file with a rectangle with a stroke and no fill that’s 10.5" by 19". (If you’d like instructions on how to do that, just let us know.)
We included an extra piece of Proofgrade Draftboard with your materials shipment for troubleshooting. Place Proofgrade Draftboard in the center of the bed.
Upload your file, and center it over the Proofgrade Draftboard.
Take a screenshot of the workspace to show us the artwork placement. Make sure to include the rulers in your screenshot and show as much of the bed as possible.
Mac: Press Shift-Command-4 and click and drag a box around your image. You’ll find the screenshot file saved on your desktop.
Windows: Click on the Start Menu and search for the Snipping Tool. Open the Snipping Tool > New then click and drag a box around your image. Click the Save icon and name and save your file.
Pip, can I make a suggestion? Don’t say it does 11" - I got that same instruction and built out a project that was exactly 11" and could not cut it. The actually supported area is somewhat less than 11". Maybe 10.95"? Might not seem like much, but it was a pain and is confusing.
I get the impression you guys are still fiddling with this. I would strongly suggest underpromising until you have it worked out - if you say 11", it has to do at least 11".
Just feedback from an annoyed customer who spent more time than he wanted to fighting with limits.
I have inkscape, please give instructions. I know it isn’t right and I want to follow your procedure step by step so you can see. I will await instructions on how to make the appropriate rectangle with ruler. Thank you
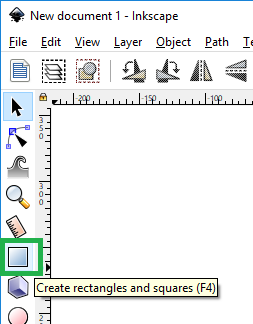
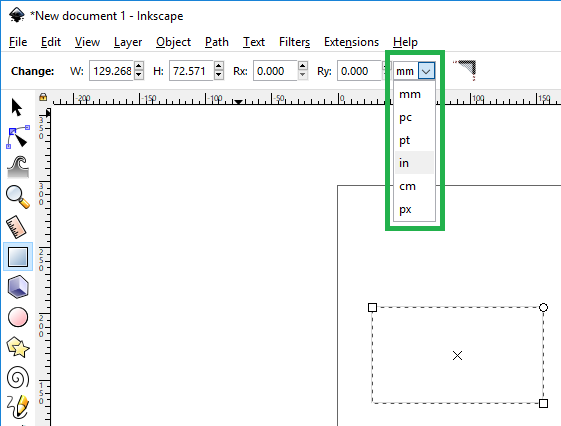
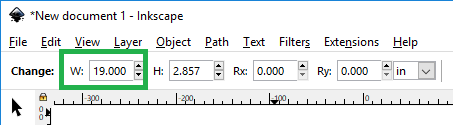
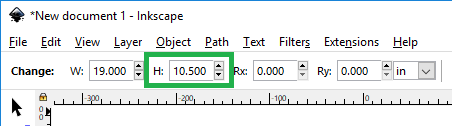
Thanks for following up, and I’m sorry for the delay in getting back to you. Here are the instructions to create a file containing a rectangle with a stroke and no fill that’s 10.5" by 19":
Upload that SVG to the Glowforge app. If the rectangle in the file doesn’t fit in the bed area in your Workspace, please take a screenshot and send it to us (or reply with it here)
If you run into any trouble with these steps, please let us know.
It’s been a little while since I’ve seen any replies on this thread so I’m going to close it. If you still need help with this please either start a new thread or email support@glowforge.com.