Hey there- I am new to this community so any feedback would be greatly appreciated (I’ve read lots of threads before creating this.)
I made this hanging earring holder. I used PowerPoint to create it (I will download the free program I’ve read about or if anyone suggests a program I should pay for please let me know- a newbie that can learn pretty quickly)
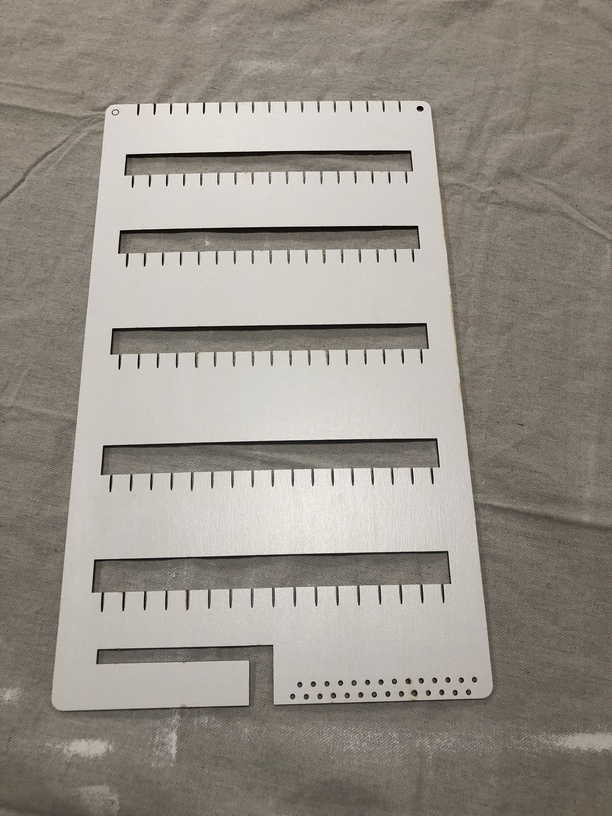
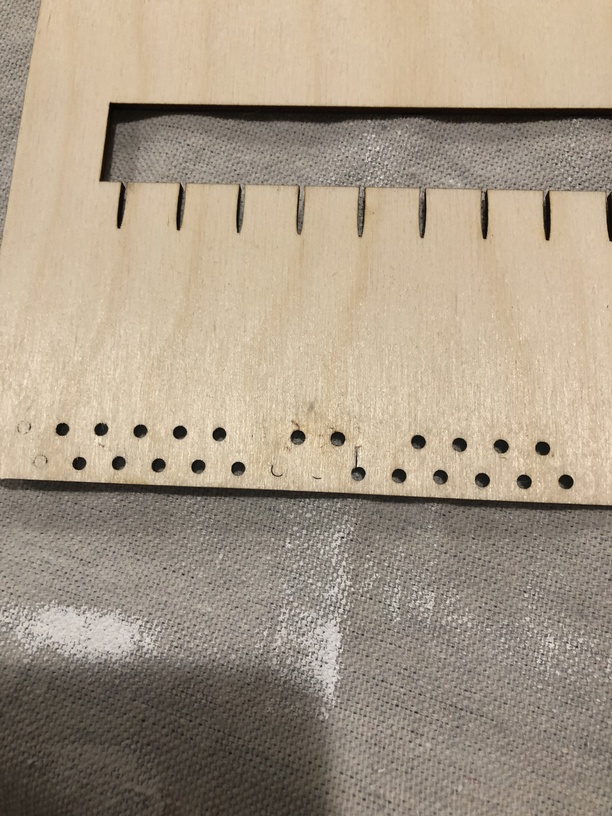
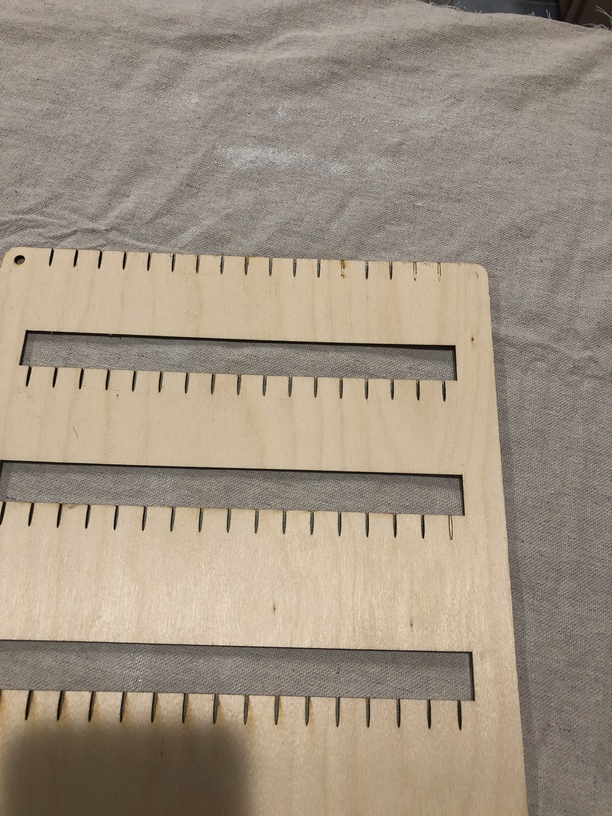
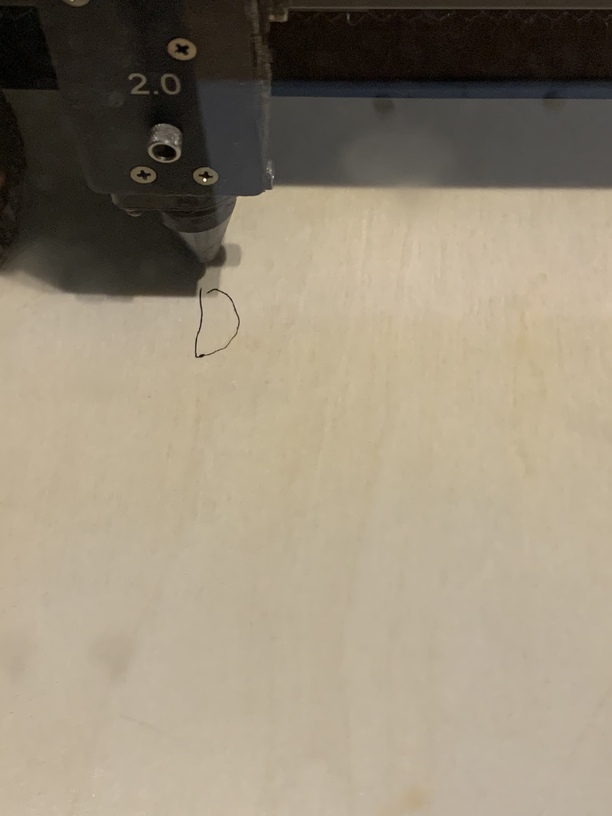
Earring display - used 1/8 Baltic Birch plywood (not proof grade) I used primer, then sanded, painted, Then a top coat of something. Used the green frog tape on top. Set it to 200 full power .125 measurement (sorry if this doesn’t make sense- I don’t know what I’m talking about)
Should I use different wood for an item like this?
Should I use thicker wood?
Is prime, sand, paint, seal the correct order I should be doing it?
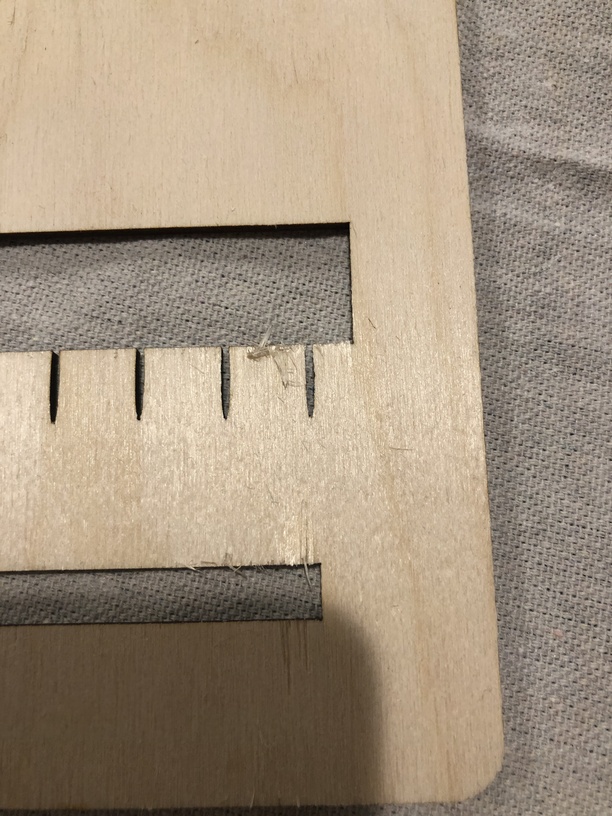
Why did most of it cut but some didn’t (like the circle on the top corner)?
Is the chipping common for Baltic birch or is that just because my settings were wrong?
Should I use green frog tape or is there something better?
Wood is “warped” if it doesn’t lay flat…right? Is there any way to fix it?
I prefer no proof grade because I want to paint my projects.
Amazing work considering the tool used.(Power Point) Run don’t walk to download Inkscape. It is free, a bit futzy to learn but there is lots of help both here and on YouTube to help you.
It looks like you should use a bit more power or go a bit slower for consistent cut through. You might get a bit of scorching but everything is a trade-off.
Hi and welcome to the forum! We’re more than happy to help folks so don’t worry about asking questions. (We especially like helping folks who try to help themselves. ) I agree that you should definitely give Inkscape a try becasue if you did this well with with power point, you’ll do some really great things with Inkscape! I’ll give my 2 cents and try to answer some of the questions for you. Others will chime in I’m sure.
Earring display - used 1/8 Baltic Birch plywood (not proof grade) I used primer, then sanded, painted, Then a top coat of something. Used the green frog tape on top. Set it to 200 full power .125 measurement (sorry if this doesn’t make sense- I don’t know what I’m talking about)
Your settings look pretty darn close. I would up the power by 5 or slow the speed down by 5 and give that a test to see if it cuts through a little cleaner.
About your measurement; Most 1/8" material is not really .125 and is generally closer to .10-ish. If you didn’t do so, you should either use set focus or use calipers to get an exact measurement of all your material. Even being off by .01 or so can mess with a cut so it needs to be exact. Even the same sheet of material can vary from one end to the other and personally I think everyone should own a set of calipers and learn to use them. (They’re cheap on Amazon if you don’t have any,)
Should I use different wood for an item like this?
-Nope, I think BB is a good choice. A lot of others would work as well though, especially if you wanted a natural look. But BB is a good all-round choice.
Should I use thicker wood?
-Does it meet your needs and hold your earrings? If so, it’s the perfect thickness! It’s the one I’d use too probably.
Is prime, sand, paint, seal the correct order I should be doing it?
(-I’ll leave this for others as I don’t use primer much.)
Why did most of it cut but some didn’t (like the circle on the top corner)?
-I’d guess it wasn’t perfectly flat and needed just a tiny bit more power or a tad bit slower. You had several others areas that just barely cut as well.
Is the chipping common for Baltic birch or is that just because my settings were wrong?
-Chipping won’t happen if you get the settings right and cut cleanly all the way through.
Should I use green frog tape or is there something better?
-What you’re looking for is called “masking”. I know people use it and it’s not wrong per se, but using narrow tape seems like a lot of work to me. You can cover a larger area quickly and there’s no overlap to mess with the cutting or engraving. This is the stuff I use, but there are several similar “vinyl transfer tapes” that work. (“Vinyl” is what the tape transfers and not what it’s made of. Just make sure to get the paper version of the transfer tape and not the plastic stuff.) https://www.amazon.com/gp/product/B07DF68FR5/ref=ppx_yo_dt_b_search_asin_image?ie=UTF8&psc=1
Wood is “warped” if it doesn’t lay flat…right? Is there any way to fix it? I prefer no proof grade because I want to paint my projects.
-All wood including PG wood warps and yes, it means it’s bent, twisted or bowed/cupped and doesn’t lay perfectly flat on the tray. It’s one of the top reasons wood doesn’t cut all the way through in places. The best solution is to use “hold down pins” that you can find in the free laser file section. They are amazing!!
There are a few updated versions of the pins so scroll through the post to find the newer ones. You cut them out of medium draftboard.
One thing to keep in mind is that not all 1/8” birch is the same. If it’s really Baltic birch from a reliable woodworkers source it should not have any of the voids and plugs that are common to lesser birch sources. But those flaws will certainly give you failures to cut through.
Welcome to the forum. As far as I know you’re the first to design with PowerPoint, cool!
Couple of things:
What machine do you have? Basic? Pro? Plus? If plus, 45 or 40 watt? (They just announced that new pluses will be 40w going forward.)
I ask because “full power” is different depending on your machine. I hesitate to offer settings without knowing which model you have.
You say it’s Baltic birch. Are you sure? Where’d you get it? One common misconception is that all birch plywood is the same, but Baltic is a different thing from generic birch ply.
The advice you’ve gotten from others has been spot on. I’ll add a couple BB pointers:
Although is usually pretty good, even BB can be inconsistent. Use this trick to spot major issues before you paint or cut:
Using masking is a great idea. @Kittski pointed you to 6” stuff, if you’re going to do a lot of BB, consider this 12” roll, it’s 65% less expensive per square foot:
As always I’ll recommend learning solid testing routines to dial in material settings. This will serve you over and over as you try new things:
Testing is the way to go for figuring out your settings, but 200/full sounds a little fast. I might knock it down some, like 180. I pull 210 on my pro when I’m feeling confident, and honestly, when I just want to be 100% sure it’s going to cut I take it to 200. (Oh also, I’ll drop the speed by 10 if I know it’s been a while since I cleaned my lenses. Sometimes you just want to cut and will clean later, you know? I mean, don’t go crazy long between cleanings, but you have some wiggle room)
There’s a balance right? You want it as fast as possible, and faster generally means less char with BB. The tradeoff is that if you ride the bare minimum line like that, you will miss some cuts.
Test, test test. You’ll find the right settings that work for you.
Already lots of great answers to the process, so no need to say anything more there.
And as @markevans36301 recommended, get Inkscape, as it should be a lot easier to get a design (once you’re along its learning curve–don’t be afraid to try something as UNDO is our friend)–and am impressed with what you’ve done, esp. with a program not intended for design work like this!
But functionally, would recommend wider slots for the ear wires so easier to move in & out of the slots. And make the bottom rounded, or even a “key hole” shape, since sharp corners can lead to cracks (in any material) with stress/time.
For ? on thicker wood, I’m guessing with only the two holes at the top, you plan to screw it to a wall or door? Then it should be fine unless you have a lot of heavy earrings, or do find it flexes too much with use. For now, you could always just cut a couple small pieces with the same sized holes & glue on to strength the area for the fastener, and maybe a strip for section to help stiffen it & position so the ear wires aren’t affected.
It looks like you have added the design at the bottom to the file I shared here on the forum -I cut the original file from .11 birch, so fairly thin. Hope that helps.
@kittski , I was searching to see if it was safe to use frog tape as masking and stumbled on this thread. When I clicked your link for the masking you used, it specifically says “NOT FOR USE WITH HEAT TRANSFER VINYL OR ANY LASER CUTTERS, ENGRAVERS or LASER DEVICES.” Not sure why it is still recommended. I know this is an old article so I was wondering if you or someone could clarify further please?
The thing about paper masking is that it can unstick itself and start burning, or bits of it can fly around in the machine. I’ve never had a problem with the EnduraMASK High Tack that I use, but it’s always a risk and a good reason not to leave your machine unattended.
I have my doubts that any paper transfer tape is that different from any other in terms of chemical composition and the gasses it gives off when burned. But I’m neither an expert, nor have I had anything analyzed in a lab to back up my opinions.