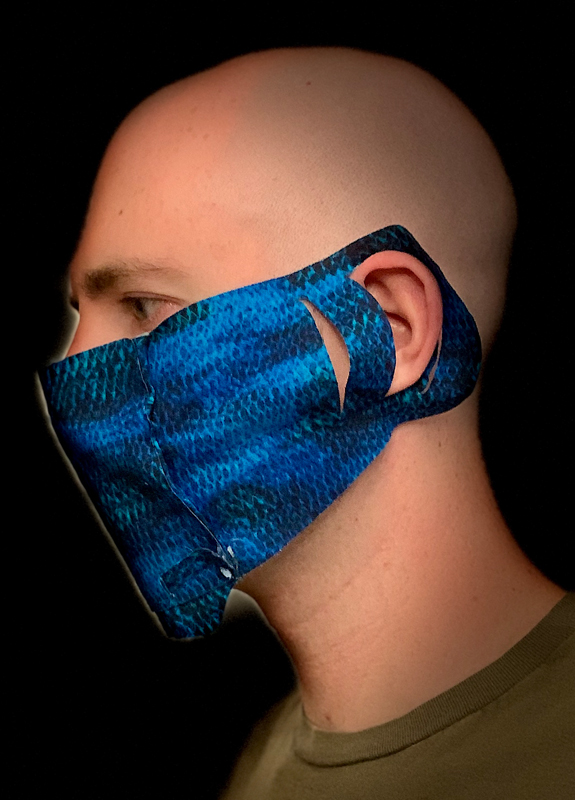
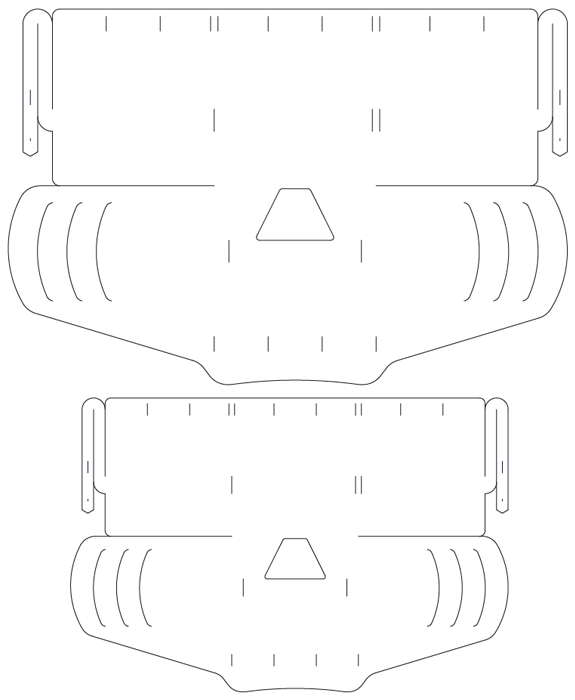
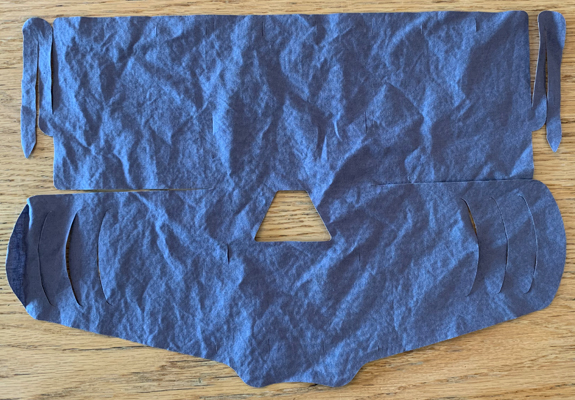
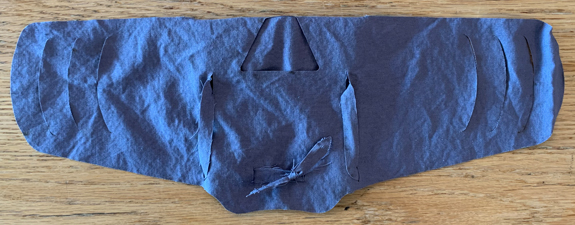
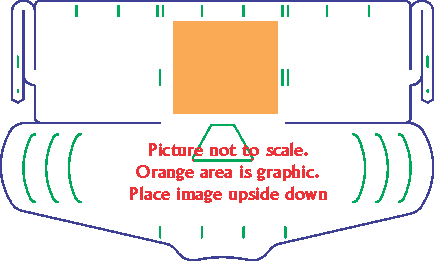
If anyone is interested in making face masks, but doesn’t know how to sew (like me), the link below has the files and other info for a single piece no sew laser cut mask!
Feel free to share/modify/etc. Also if you end up making one out of a cool fabric pattern, post a picture!
From what I have gleaned, at best, this is to stop you spraying goblets all over the world.
Unless you are also wearing goggles/shield, you will be remain venerable.
If you are concerned, it is advised you wash/sanitize your hands, a lot.
On the plus side, I made some of these for the stores and areas that require a mask. I lowered the height to 9 inches to allow two masks from a pocket hanky and the results are very usable.
Wife says no fogged glasses and it remains very breathable as you shop.
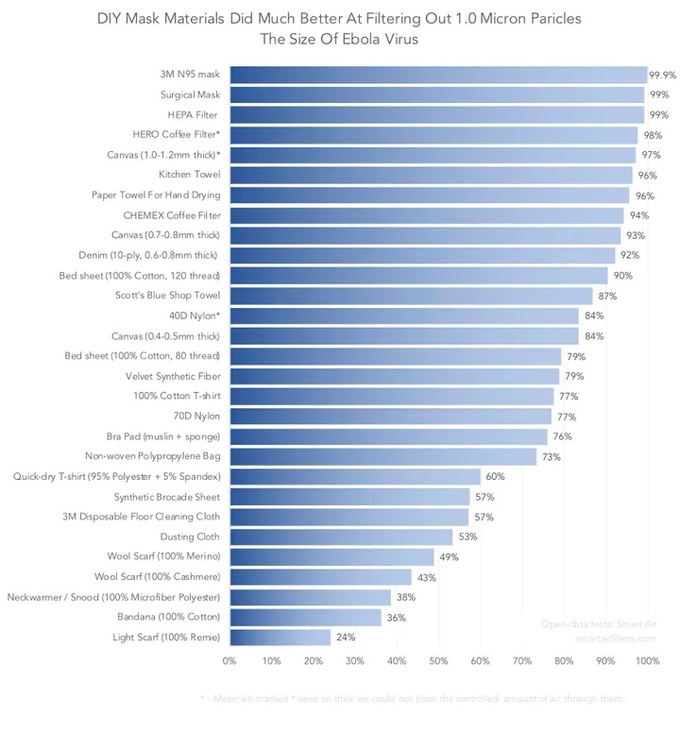
A materials list is available. Which you use is a trade off of safety v breath.
Yeah, I guess you’re right. At the beginning everyone was concerned about holes very tiny like what a sewing machine needle would make, but I suppose that was for the medical-grade masks (not that any of the homemade ones could be medical grade, if not for lack of testing alone).
Yeah it would be interesting to try sealing all of the edges and see how it performed (although like you said, would need a way to test it haha). I’ve started to make them out of polyester fabric because it gets rid of the fraying issue with cotton, because the laser melts the edge as it cuts. I wonder if there is a way to heat seal the edges of the polyester with an iron or something. Probably turn into a gooey mess without really accurate temperature control. If you end up finding something that works let me know!
I actually tried making this pattern and though I loved the innovation and the ‘one’ that came out successfully was very comfortable, I couldn’t for the life of me get any more made. There must be some trick to it. Even though I fastened the material down really well, as soon as a cut was made near any of the ‘flappier’ parts (around the ears), the material would get hit by the air assist fan and get folded over on itself or folded over another part not yet cut.
Hi! Yeah that was an issue I noticed early on when I was designing it. I ended up making a part to block the air assist fan. There is a file for that part at the bottom of the website link. Be careful if you do this, flare-ups are more likely with it blocked, you will also probably need to clean the optics more often, and make sure you don’t leave it on when it isn’t needed. Another option would be to use something you don’t care about, like scrap cardboard, on top of the fabric and cut through both.
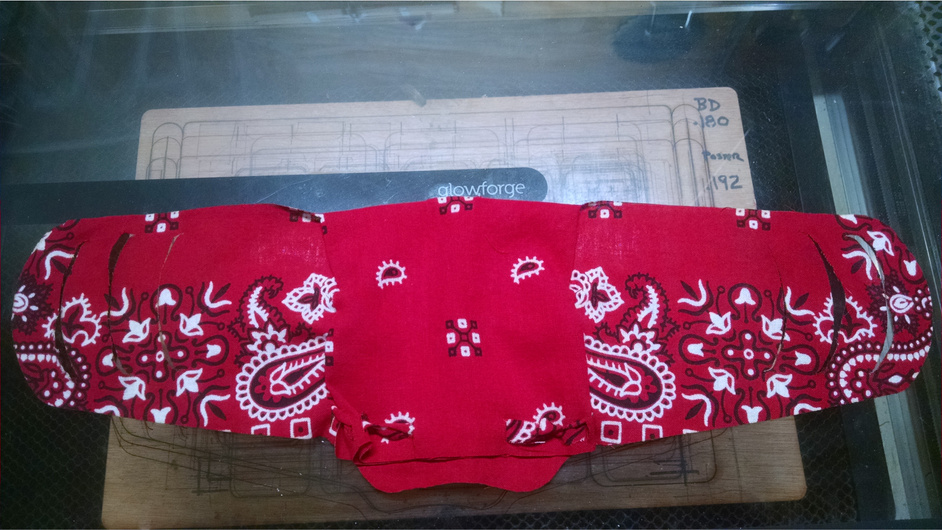
I use a home made cut board for paper, cloth, anything light that can be blown around. The depth of the board is 0.180 and I always set focus to 0.192 as a default (wrote it on the board because getting old is over rated).
You can see it in the background on this picture. Just give it a light mist of some tack spray, pin it down secure and stick your resource on it for cutting.
That tack spray misting will last for several cuts. Only downside to using that board is when I cut some cards that had a lot of little hearts in it. Getting all those tiny hearts off the cut board took longer than the entire project.