I’m still working toward finding the exact cutting edges on the GF bed. I work in Corel then export as SVG.
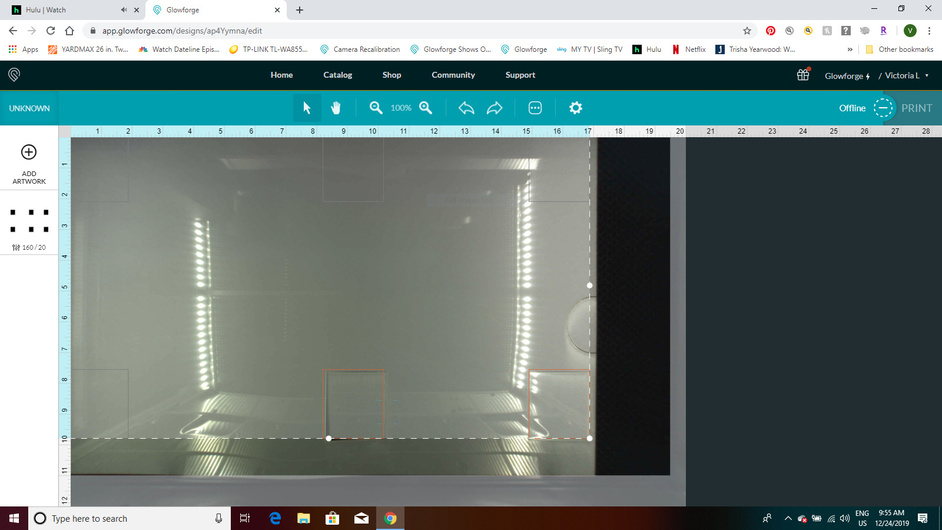
As a test, I drew a box, placed it in the upper left corner of the size the GF is 12 x 20", copied then pasted to the center edges and opposite edge. I exported it as SVG, imported it but it only cut the two boxes on the right.
In the program, only these boxes were RED. So I re-did the file, turning them all RED and exported once again. Still, it only cuts the two boxes as shown.
Any idea what I’m doing wrong here? I don’t see where I can upload the screen shot.
You image hasn’t loaded yet, but I’m guessing the issue is that while the bed of the is 12x20 the cutting area and the engraving area will be smaller depending on settings. For example, if your engrave speed is at max your bed width will be as small as 6". For cutting you are generally safe going with 11 x 19, and can squeeze out some partial inches in each direction if you really really want to find your max!
The easiest way I’ve found is to upload a straight line - and then put that on each edge of your piece of wood in the bed clicking with the arrow key until it turns grey, and then go back 1. Cut that out and measure - that’s your max cutting area.
In this instance you should be able to drag down and to the right to get at least the top boxes - you might not have enough space to do the left because of the aforementioned 19" and change
Also, keep in mind that if you put your material closest to the bottom right corner you’ll have access to the greatest amount of it
Thank you. I just also found that if I click on each box in the program, it turns red and then cuts. I’m wondering why there is so little in the GF manual about where the “no go” areas are. Sure difficult to figure out on your own since that seems to change with settings. Pretty disappointing.
It’s a question that is asked frequently here on the forum, so those of us who read here see it answered - I’m pretty sure they don’t tell you that in the GF official pages because they try pretty hard to stay away from anything like absolutes when talking about designing - because in reality you can design in any way you want! It’s an interesting balance they’re trying to set. This forum is definitely an incredibly useful guide. The search here is a touch clunky, but it’s workable and, as you’ve learned, just asking the question can get you an answer within a few minutes.
The thing is, I’m replacing my old, ailing laser with the glowforge. I have over 300 designs to try to work out with the GF. I’ve been working with lasers (commercial models) for 25 years and none were as confusing when cutting a design than this one is. I appreciate your input. Thank you and Merry Christmas to you!
it’s a paradigm shift from using some other interfaces. i started with GFUI and then a month later we got a universal at work and i had to learn the UCP at the same time. there are good things in both. i think the basics are a lot more flexible in the GFUI, but when you start to dig into it, there’s a lot more meat in the universal one (which makes sense, it’s a significantly more mature interface).
I think this may be the biggest thing. This is my first laser and I’ve found everything to be very intuitive. I made my share of mistakes, but they were all my mistakes, not issues with the . I think in this instance the more laser experience you have the harder the GFUI is to get - it’s designed as a hobby laser for folks who haven’t used lasers before so those who have experience have expectations that are getting in their way All my experience is in design - so their flexibility there is a huge win for me.
It’s a great machine, and soon enough you’ll have it figured out.
I see you’ve been given some good advice here already but I am going to chime in as well.
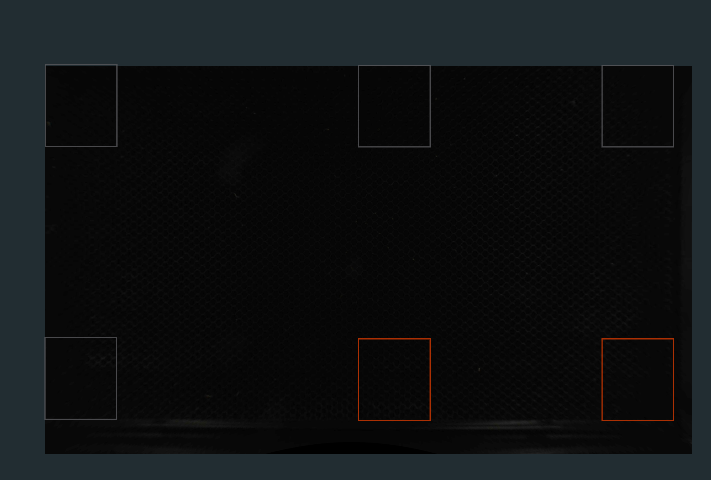
After extracting the logs of your Glowforge I believe I have found the cause of why not all the squares cut the first time. I replicated you designed based on your screenshot and uploaded and when I did I notices a few things.
When a design has multiple individual pieces that can be moved sometimes one can move in the out of bounds area.
The bottom two are good to print as indicated by the red color, however, the other four are in the out of bounds area and are grayed out so when you hit print they will be ignored. I was able to replicate this and can confirm that is what happened here.
To ensure your prints fall within the printing area you can fine-tune its placement using the arrow keys to push it down till it is red like everything else.
I hope this information helps! I am going to close this thread at this time.
 is 12x20 the cutting area and the engraving area will be smaller depending on settings. For example, if your engrave speed is at max your bed width will be as small as 6". For cutting you are generally safe going with 11 x 19, and can squeeze out some partial inches in each direction if you really really want to find your max!