I just set up my glowforge tonight and I tried cutting the gift of good keychain. The first time it did not cut through. I read through troubleshooting and cleaned the lenses and grooves of the crumb tray and tried again. It still did not cut through. I looked through the community and other people said to try 2 passes. It cut through on the 3rd try. Is this normal? When I changed the settings I got a warning that these were not the recommended settings. In reading through the community it seems like I shouldn’t have to change the settings on the proof grade material. Is there anything else I should be trying?
Recommend that you get the Hold Down Pins (in free laser designs), if you don’t already, to ensure the material is really tight against the crumb tray. Any sheet may look flat, but if you tap on it, you can tell the difference from when it’s tight against the tray, or when there’s a gap.
And if you’re in an area with higher humidity, or the boards have experienced higher humidty (than Seattle) in storage, also try slowing down the speed by 10…
2 Likes
One thing that you want to check…when you took the lens out to clean it, did you insert it correctly after cleaning it? The bowl shape goes up into the head, with the flat side pointing down at the bed.
You shouldn’t have to clean the lenses first thing, it’s very unusual to have that be the problem on a new machine. (They do get dirty after using them for a while though, so you’ll want to clean it once in a while.)
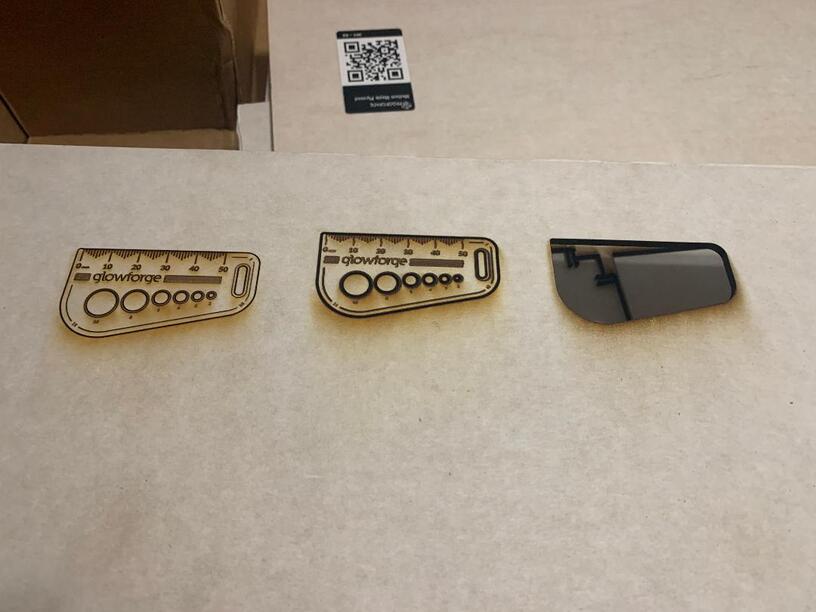
Just check to make sure that your lens was inserted correctly after you cleaned it. Your second cut there looks like the lens is in upside down, and that will keep it from focusing, so your third print might take multiple passes to cut through. (And it can damage the head, so be sure to check.)
Instructions are here:
It’s a sad truth that people who live in humid areas frequently have to slow the speed down by about 5-10 points to get clean cuts in draftboard in one pass. So you can either try slowing down the speed once you check your lens, or you can check the print using a pick or some doubled up tape to remove just the cut without shifting the background material, and if it doesn’t come out easily, you can send a second cut just to finish it off. (That’s hard to do if you don’t have the material pinned down, so I usually recommend just slowing the speed down a little bit. Looks like your first cut was almost all the way through.)
Or you can wait to see what support has to say.
3 Likes
Thank you so much for the reply. I made sure the lens was in the correct way and I will try again in the morning. I will also try and pin the board down. I really appreciate the help!!!
2 Likes
Thank you so much for the suggestions I will give them a try in the morning.
1 Like
I’m pretty sure that middle one was cut with the lens upside-down. 
1 Like
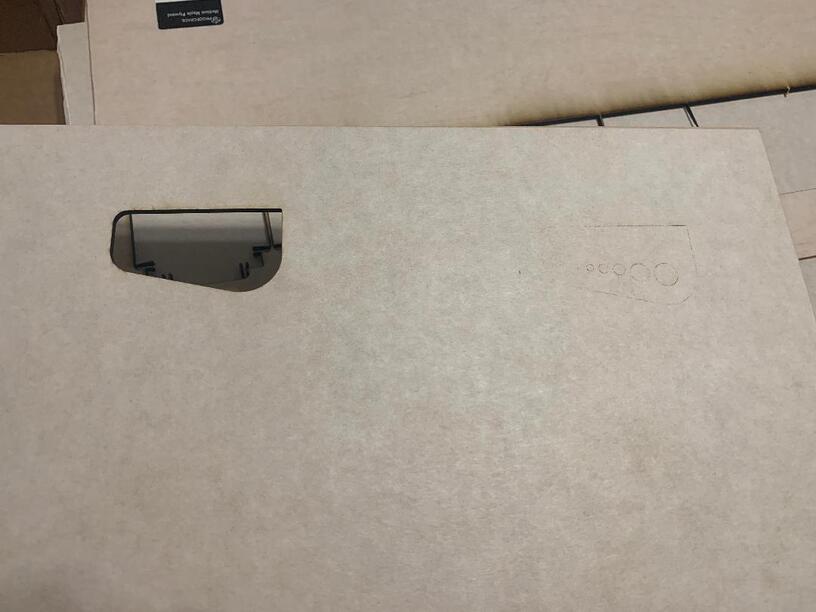
So i double checked the lens, I made sure the board was pinned down, and I slowed down the cutting speed. I was able to cut out around the key chain but it was not clean and the inner circles did not cut through. This was done with medium draftboard proof grade material
This happened to me as well, this is my first day with the glowforge, it arrived today, I tried two times to make the keychain but it never cut out. So I made something else, and it worked.
Unfortunately, it looks like your unit is experiencing an issue that we can’t resolve remotely. I want you to have a reliable unit, so I’m recommending we replace this one. We’ll be in touch via email to sort out the details. I’m so sorry about the bad news.
I’ll now close this thread.