After having received a replacement GF (my previous one had alignment issues) this past Friday, I printed a large sign for a friend of mine as a housewarming gift. It however didn’t print through completely and of course I only noticed it after I removed the entire PG piece of wood. With a bit of force, I got it out with only very minor (unnoticeable except probably to me) and with a bit of sanding was able to salvage it (had no time to reprint).
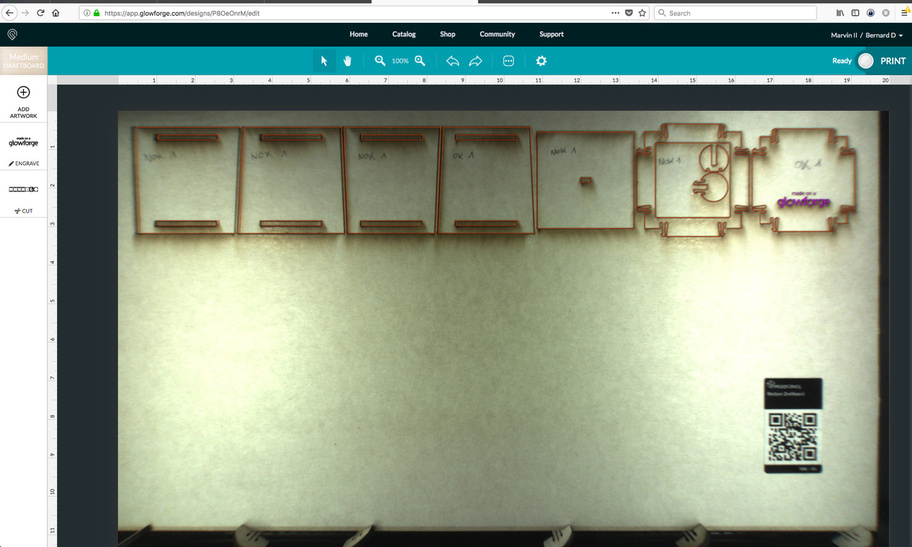
So this morning I did another set of test prints based on the “Snap and store box” - these are my findings (screenshots attached):
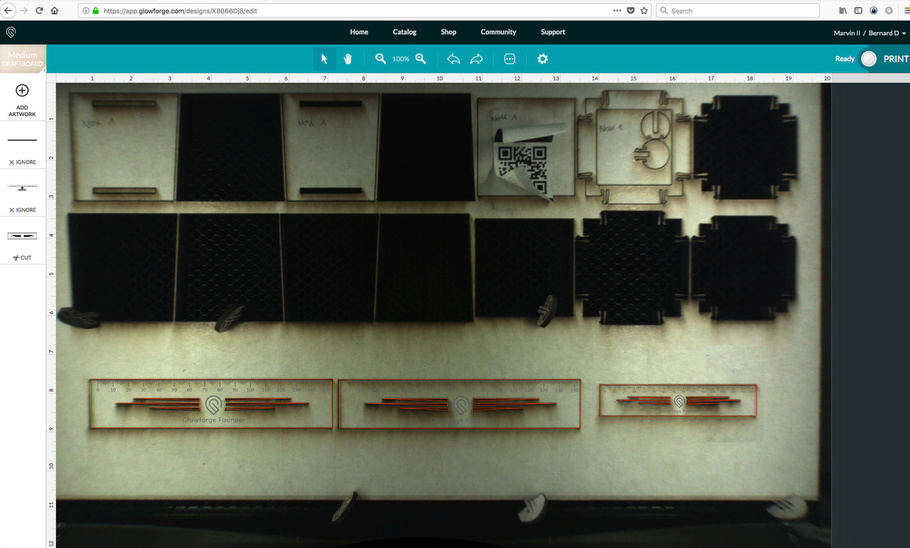
First print resulted in 2 pieces fully cut (see the ones marked OK 1) - the rest were not fully cut:
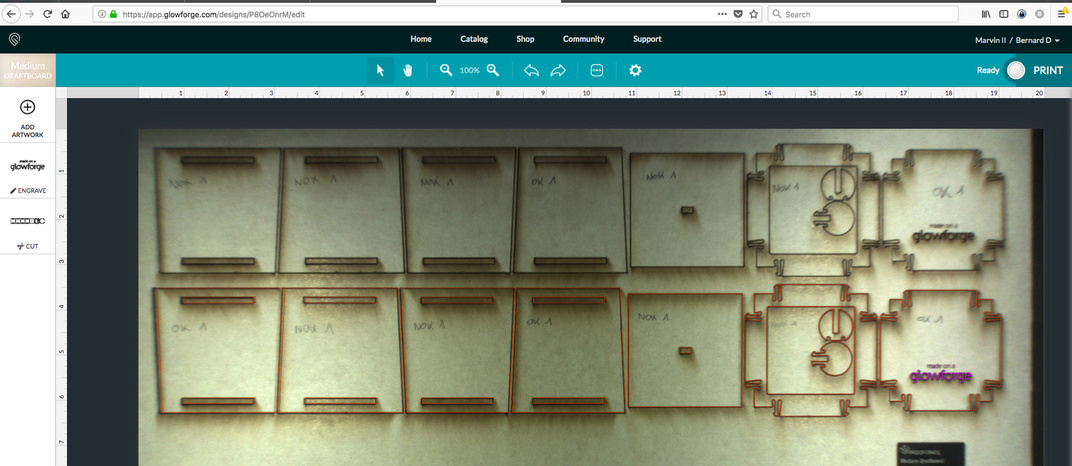
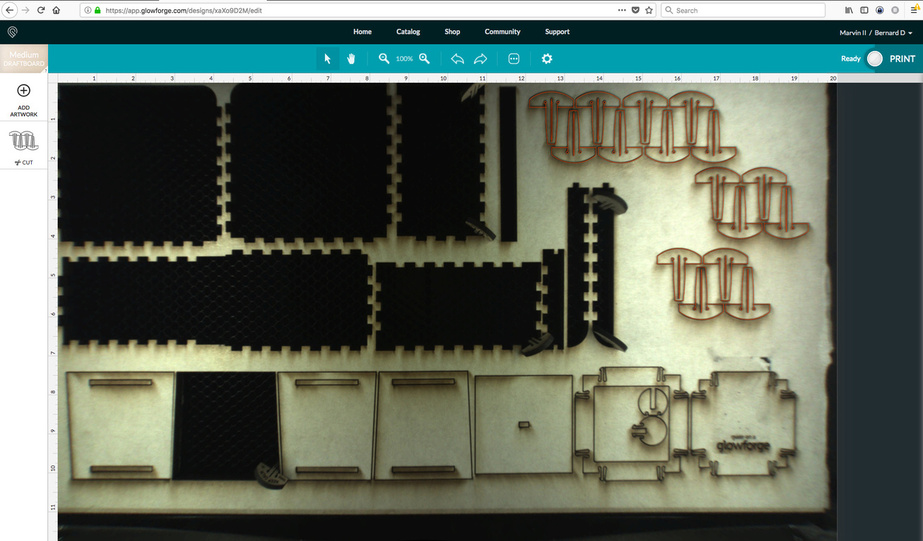
Third print was a reprint of the same box on row 2 in the exact same location - all items are now cut (though one, marked NOK 2 needed an extra push to come loose)
It’s interesting that the rules cut out perfectly - not sure if that’s because of the location of the place where I cut or because of settings (I used the standard PG settings)…
B.
(ps. to the support team - my email earlier with the same details created a case 83234)
I’m assuming that the cuts are almost all the way through and there might be just a hair left uncut?
I would look for one of two things…either a variance in the material (it’s manufactured, sometimes there can be dense spots in it, although it’s pretty rare with Proofgrade.)…or it might be that the material is not quite level. It’s pinned down beautifully in your last cuts at the bottom there, so that would indicate maybe the tray is sitting a little higher in the back than the front, or vice versa…the variance in cutting seems to be at the back side of the tray.
So maybe check that you have got the tray sitting evenly down in the dimples - it’s easy to get a little out of kilter after removing it for cleaning.
If you didn’t use the pins on the first prints though at the top picture, there’s a third possibility that it might have been a slight warp in the material. That’s pretty common, and it’s tough to pin down the whole sheet when it’s new. You know about sending the second cut, so the only other thing I could suggest is if you want to try modifying the settings, generally slowing the cut speed down by from 5 to 10 points does an excellent job of taking care of any of the variances caused by man and nature.
@Jules - THANK YOU for that advice of reducing the cut speed -> I just did another test and reduced the cut speed for a piece of thick draftboard by 10 (to 115) and it worked just perfectly, straight through cut at first attempt!!! You are a lifesaver Sir…
Perfectly safe with 5 or 10 points. The trade off is that you cut a slightly wider kerf through the material, and might get a little more flashback on the bottom. (Usually handled by the masking.) If you want tight little lines, you want to go as quickly as possible. (The default settings optimize the cut, but don’t leave a lot of leeway.)
Cutting oak ply is always a problem as it is tough and so takes more cut than anything else I use regularly. but I am getting a wider variance than would seem reasonable. when I have to make a second pass I have tried setting the focus to 0.18 or 0.20 (the wood and first cut I make at 0.22 that is the measured thickness) on the theory that if the first cut did not go all the way through, the actual thickness will be thinner by the depth of the score. but the result is sometimes better and sometimes no so it is hard to judge if it is a good idea, Sometime everything just falls on the crumb tray and sometimes I have to use carving tools to get it apart. The filler will of course make a difference as will some harder winter wood but these things do not account for all the variation (i use the pins and make sure all is flat, though when it comes a bit loose it is easier to see that it has cut as it falls the distance.
On thinking about it I am wondering if the fan in the head might be weak or clogged a bit as the strong wind coming from it seems not as vigorous. I attached a C-pap hose to the vacuum and pulled air both ways and it seemed to help and I also got carbon chips falling out, but it has not been really strong in quite a while. Beyond a bit of exercise is there other possibilities?
Thanks for reaching out and for providing that information. I’m sorry that your print didn’t come out beautifully!
Like @Jules mentioned, there are a few things to check. First, your material must lie flat. This requires a clean, properly installed crumb tray and flat materials. Second, there must be no obstructions, dirt, or damage preventing the laser light from reaching your material. Third, your design must be set up properly - for example, with lines that are fully on the material and that are set to cut. It’s hard to know which issue might be affecting your print, but if you follow the instructions in the cut-through troubleshooter, we’ll be able to get to the bottom of it.
Once you’ve inspected and cleaned, please try another print. We included an extra piece of Proofgrade Draftboard with your materials shipment for troubleshooting. Please print the Gift of Good Measure on that Proofgrade Draftboard and let me know the result. If it doesn’t print well, please let me know the date and time of your print and send photos of the front and back of the print.
It’s been a little while since I’ve seen any replies on this thread so I’m going to close it. If you still need help with this please either start a new thread or email support@glowforge.com.