Hi I am trying to print on the clear acrylic a volleyball bag tag, the ball cut out and the Name engraved but it did not engrave the volleyball lines. I did a proof run of Draft Board and it print just fine why is it not printing the same on the clear acrylic?? I hit ignore on the cut parts and the engraved name but left the engrave for the volleyball lines active to try and engrave over what cut but When I click on the focus tab to read it, it says no artwork found?? Can you please help me I have to make these by Monday for a team going to Nationals:( Thank you Debbie
1 Like
Can you please share a screenshot of the interface with the acrylic on the bed and your file on the acrylic along with the sidebar showing settings.
2 Likes
It is possible your design is too close to the edge of the Glowforge for engraving to occur. When engraving, the machine needs room for the printhead to change direction and speed up to make the engrave going back in the opposite direction. Since you are getting the “no artwork” message either you have the engrave area set to ignore, or your engrave part of the design is not within the workspace parameters. A picture would really help us help you.
1 Like
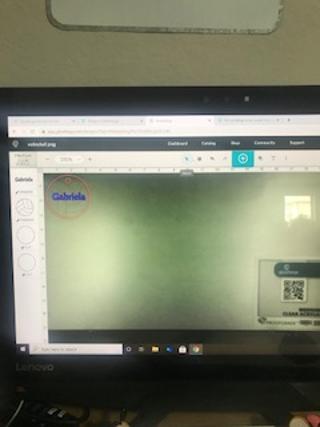
I am trying to send a screen shot please hold.
1 Like
1 Like
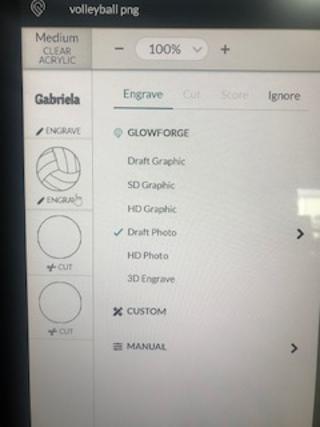
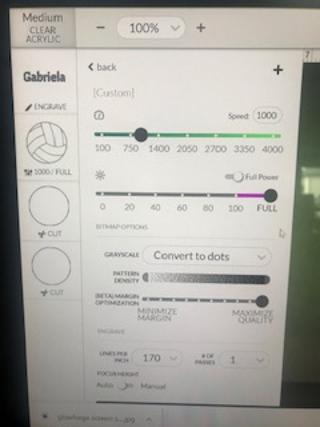
These are the settings for the engraved volleyball lines. I already cut the ball and engraved the name so not sure why it would not engrave the lines inside the cut?
1 Like
Try using the Draft Graphic (or SD Graphic) setting instead of the Draft Photo setting. I believe Draft Photo is only for raster images.
1 Like
will try it now
1 Like
No still says no artwork??
1 Like
When you select the drawing on the bed, does any part of it fall onto a gray bar at the side? That margin is a “No Engrave” zone at high speeds. It will get smaller at slower speeds, but you also have to reduce the power to compensate.
(Basically, just make sure that when the whole thing is selected, none of it falls into the gray margin at the sides…it will prevent the engraving, but not the cut.)
1 Like
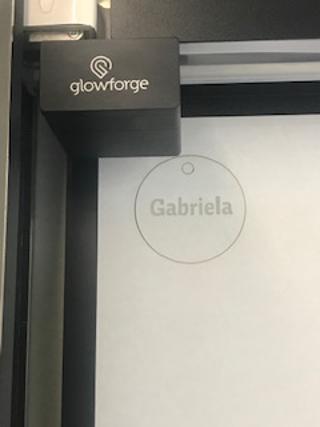
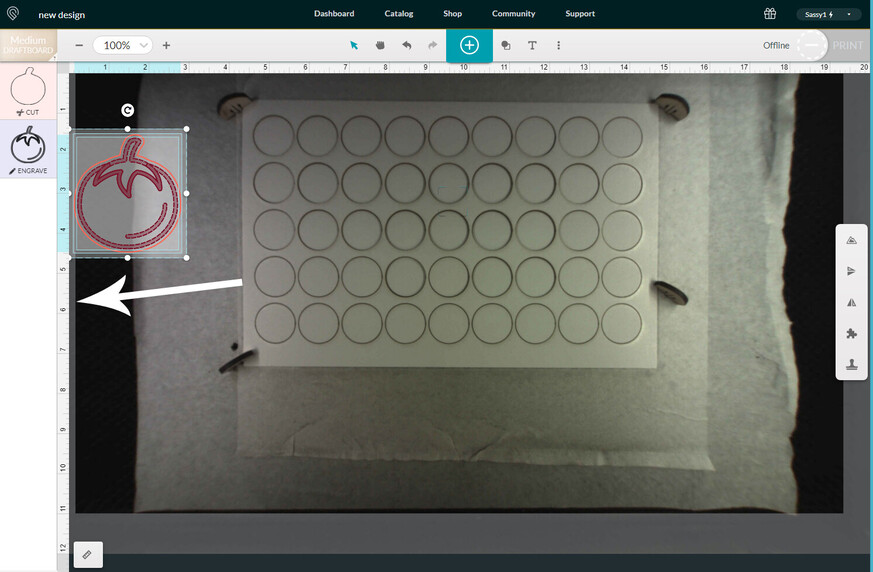
This is how it cut. I have only used my GF about 10 times so everything still new to me. No it is not in the gray.
1 Like
No, the gray bar will appear on the screen when you select the design. 
1 Like
I dont think it did. If it was in the gray why would it cut and engrave what it did? I cut it in Draft wood and it worked just fine, it’s baffling.

1 Like
I suspect the artwork was not as close to the machine margin when you did the draftboard.
Experiment time: Click on your entire artwork and move it to the right. Does the “no artwork” message go away? You can hit the undo button to move everything back.
1 Like
You can just try moving the design over a bit to the right and see if it works. ![]()
This is what can happen…the cut will happen because the margins for cutting are narrower than the margins for engraving… but the whole design is treated as one unit. Even if the engraving doesn’t actually cross the gray margin, it will not engrave at those speeds. (You can lower the speed and the power, but until you know what you’re doing, you might not get the results you expect.)
1 Like
Ok, I think that was the problem but I didn’t see the gray on that side the first time. That wastes a lot of product having such a large edge.  Thank you
1 Like
Ok so now I’m so confused I moved it over and it still didn’t cut the volleyball lines.
1 Like
When you did the draftboard version, did you choose draft graphic for the engrave or draft photo. Did the printhead go through the motions of engraving but not actually engrave?
1 Like
Use the front right corner (black star) as your origin and build out from there…you can use up more of the material that way. There’s always about an inch at the left side and the top that the head can’t reach, so it’s hidden from you. If you start at the right corner and work the other way, when you get it filled up, you can flip that part over and use it on the right side for smaller cuts.
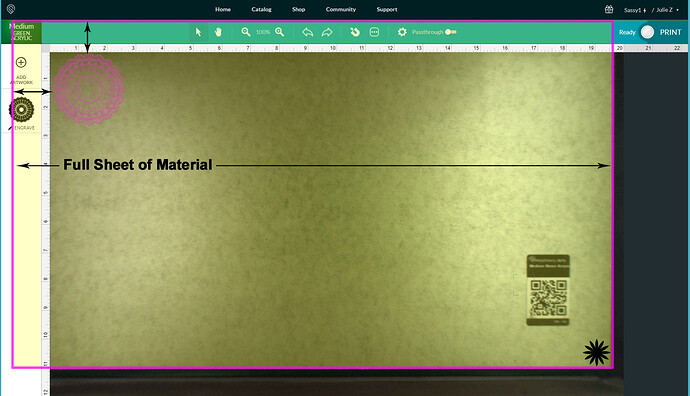
(It’s also easier to see the margins on the right side.)
3 Likes