You’re pretty dangerous too! 

(And you @markevans36301…I see you typing.)
(Don’t you think i ought to let some other folks get a word in for a while?) 
3 Likes
I’d suspect that this is going to be machine dependent based upon the individual calibration of each machine.
One wouldn’t think so since it’s using the head camera to fine tune positioning but I’ve seen varying levels of accuracy dependent upon where on the bed the Snapmarks are (varying from really good to not even being able to tell that you scored the Snapmark twice).
2 Likes
Hey folks!
Here’s a possibility that has the potential to be really cool:
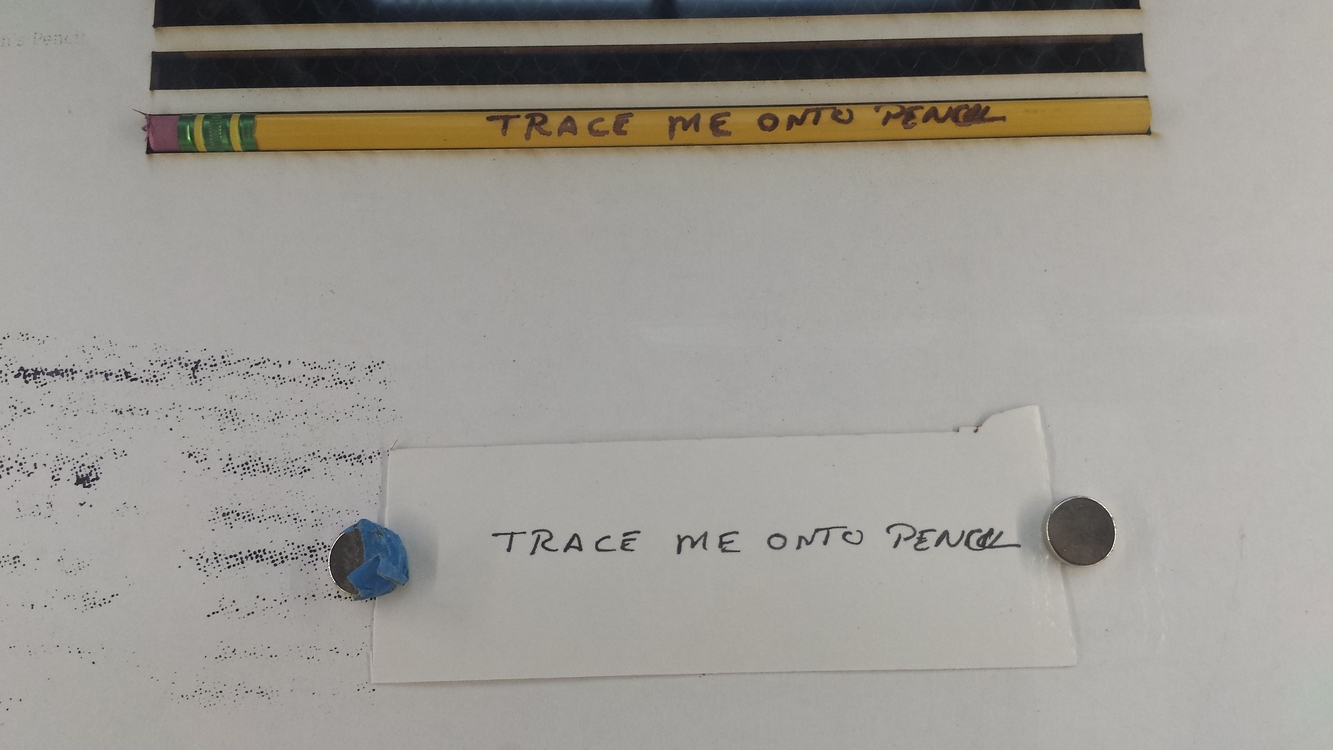
(Especially for those who can draw, write or spell.)
Put jig in GF, snap. Add items to be zapped, very carefully (or add before snapping). Put artwork to be traced somewhere else in GF, Add Artwork via tracing. Move, resize, rotate etc using jig lines as guides. Zap.
12 Likes
You don’t actually need Snapmarks to do any of that. But…
It might be cool to test using a piece of paper with Snapmarks on it already to write a message and then see if we can capture the Snapmarks accurately in the trace. I don’t think I saw anybody try that.
Doing a trace with embedded Snapmarks would allow using snaps with a lot of different jigs potentially.
nope, snap marks were perfect and it happened on multiple files with copy and pasting the snap marks from the template to each one. I saw about 1/8" out of alignment when they were only about 4" apart and about 1/32" farther apart but at the top of the file. the 1/32" is good enough for my purposes but moving them to the middle makes it even better because it splits the error distance.
And you downloaded a new copy of the Snapmarks template? Or did you just copy the marks from the first one you downloaded multiple times? (If that one is corrupted, they all are.)
If it’s not the marks or a particular file, you might have an issue with your machine that you need to tell Bonny about on the Introducing Snapmarks thread. That’s the only one they are currently monitoring for problems with the Snapmarks, and they need to know about them to fix them. (Vertical lines should come out vertical.)
never re-downloaded the file. I don’t know how the same file as everyone else would be corrupted enough to display just fine but change the contents.
I linked the thread in there. I can see how compounding errors with printing and reading will cause alignment issues if you don’t place your snapmarks far enough apart because that doesn’t give the math enough space to tell just how level they are (similar to how a 4’ level is more accurate than a 4" level all things being equal)
Thank you so much @Jules. It’s really wonderful that you’re sharing your experience and tips/tricks. So looking forward to Snapmark when it shows up!
1 Like
My pleasure! (Be sure to check back occasionally - I should have the Passthrough writeup finished tonight or tomorrow.)
(Little bit draggy this m̶o̶r̶n̶i̶n̶g̶ afternoon, I was up late last night.)
1 Like
For anyone who did not notice, Jules snuck the passthrough instructions into the OP last night. They are great!
6 Likes
I haven’t had success with Snapmarks yet. I will have to try them again with @Jules instructions in front of me.
I have a couple of questions that I may have missed in the writeup above.
I thought that the jigs themselves could be rotated (the point of the snapmark would no longer be pointed down)?
Can we have the two snapmarks be oriented one above the other (put both snapmarks to either the right or left of the jig)?
Finally, Is it possible to run multiple jobs, each with their own snapmarks (multiple pairs of snapmarks appear in the GFUI to delineate different combined “jobs”)?
I’m moderately embarrassed to even ask, but how in hades do you download the template on a mac? I am remedial, I guess, but it won’t download – it won’t even let me screencap the image when it opens in a new window (because it’s not a “standard webpage”). My options are open it in a new window and inspect element. And no amount of swearing at it changes that.
Is anyone else having a problem with step 0? Lol.
2 Likes
It’s not the amount, it’s specific words, and how they are emphasized.
(Sorry, don’t have a mac, so I can’t offer other help)
6 Likes
two finger click on a trackpad, at least for me.
2 Likes
@erin
Yup, two finger click/tap will bring up the menu and you can select save image. ( it’s like right clicking in windows )
3 Likes
From my testing:
They can, to a degree. The snap will accommodate some rotation in the jig but it has its limits).
It was never a recommendation from Glowforge, but from my testing yes, with some caveats. They can’t be perfectly vertically aligned. IIRC, if they are perfectly aligned, it would flip the design 180 for some reason. The only way I got this to work, was for the bottom Snapmark to be offset slightly to the right of the top Snapmark.
As for multiple jobs with multiple sets of Snapmarks in one design, no, unless that’s changed but I’m pretty sure it hasn’t.
3 Likes
No trackpad, unfortunately, but I finally figured it out! Thanks for trying to help, guys.
For any one else on the struggle bus, you want to select “save link” (right under bookmark link). Which makes not very much sense to me, but woot!
4 Likes
In addition to the two-finger trackpad tap, you should also be able to hold down the option key while clicking to get the context menu.
4 Likes
Right click on the file and select “save image as”
Yeah, weirdly not an option. That’s what was throwing me off. The only save option is save link. Which I hadn’t encountered before.
1 Like