When doing an engrave step at one focus height and a cut step at another height (in the same job), the cuts are off-center of where they should be compared to where the engraves are.
Is this expected or common? Is this a coincidence on the different focus heights? Is it just because of #gantryprobs?
All same file. I do this print often. Just playing with settings this time around.
This was using proofgrade hardwood but I tried setting up my own settings. (Something I learned - setting material thickness to what you measured yourself for proofgrade makes alignment more accurate!)
I changed the focus height of the engrave step but not the cut. (Trying to find the best focus height for the best engrave texture.)
Running a very similar print, I also changed the focus height of the cut and it worked as well as it normally does (thankfully normal is perfect!). Though this problem doesn’t happen every time. I’ve had at least one good run on another print, which makes me wonder if it’s general gantry problems.
That helps a bit… I can’t help you, I don’t think. But narrowing down the process of how you’re going about things might help someone else offer suggestions. I wanted to make sure you weren’t changing the material height areas and trying to align things with a different camera view.
FWIW, a couple of things. I’ve ran quite a few testing files with each operation using a different focal height and those come out exactly where they are supposed to in relation to surrounding objects.
And I’m not sure how/why just changing the focus would indicate any kind of gantry issue. It’s just moving the lens up or down in the head to accommodate your request.
How far off is it? Are you printing this design at one of the far ends of the bed? All the way to the right? Somewhere in the front right corner?
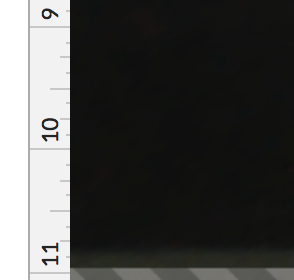
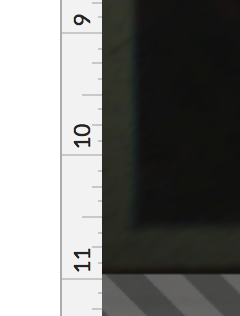
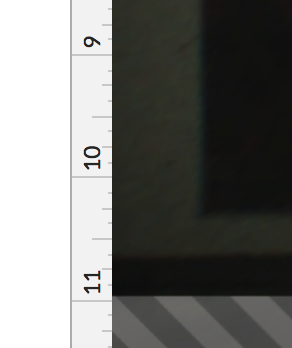
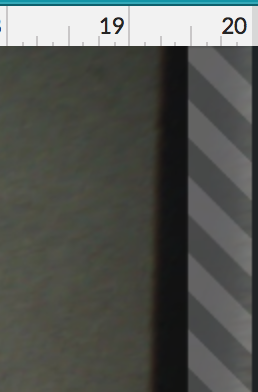
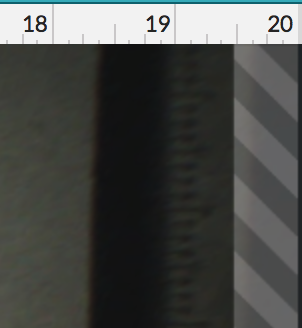
Printing near the middle of the bed. It’s not far off. In one instance of this issue, I’m cutting out small circles so the small error makes the border around the design on them noticeably imperfect.
I have gantry problems. And I believe an issue I’ve had multiple times may be due to that: After an engrave step, when the head moves back to cut things out, it’s sometimes off-center like this (I don’t know what else would cause this though, the gantry being skewed is just my guess). So maybe this case is just another instance of that.
If the focus height changes the position it implies the beam is not perfectly straight down. That could be due to the head, mirror or lens not being seated properly.
What is not straight down is the fish eye camera. If you change the thickness say cut 1/8" and then go to cut 1/4" the size and location in the GFUI will not change but the available area does get smaller. with those kinds of changes something has to give. the size of the finished piece cannot change, and the size in the GFUI does not, so it has to go to printable area.
Weird, as I was trying to engrave leather disks and had cut the jig a hair too small so the disks did not fit. When I tried to engrave with the disks above the jig (with the height adjusted to leather and jig,) they would not all engrave, so I put the jig over them (and readjusted the height to the height of the leather) and they did.
Trying now I no longer see that issue, but I certainly saw it then.
Since this problem is being seen using manual settings, we can’t offer support for prints that don’t come out as expected. I’m going to move it to Beyond the Manual so other folks here can help. Should this happen with a print on Proofgrade materials, please open a new ticket in Problems and Support and we’ll help you right away!
If you still think it’s a problem you will likely have to resubmit. But the problem is still not clear. If the cut and engrave are in the same job the only way the final cut and engrave would end up in a different place is if the material moved or if the laser head moved between the two actions. For example if the head bumped the front right side. Have seen that happen on a few machines.
But maybe we are discussing apples and oranges… Are you talking about the preview image or are you talking about the end result? If it’s the preview image that is to be expected. If it’s the end result (cut and engrave), the focus wouldn’t cause the beam to hit in a different place. Doesn’t matter if the head is tilted or if the gantry is skewed. The beam would go the same way for both. Only if something got bumped or if something was loose could they end up in different places.
End result! It engraves, then cuts, in one print, and the cut step will be off-center compared to the engrave step. With material being held in place during the print.
Then something is bumping, material moved or something is loose. Going to have to take pictures so Support can see it the next time it happens.
Not going to have anything to do with focus or even material height. Those just determine the up and down movement of the head lens and the distortion correction for the preview image. Nothing to do with position of where the laser beam points.
I’m not sure I understand what you are trying to do…why would you have a different height for the cut in a file versus the engrave?
If you are changing the focal point - the machine will pause and reset itself for the different FPs. (I’ve done it many a time in early testing. It doesn’t affect the relative positioning between the engrave and the cut. That’s assuming you’re changing the focal point inside the Manual Settings panel, and not shifting it in the Unknown Materials thickness slot.)
If this just happened once, your machine might have gotten a bit of debris or something on the tracks - I’d check to make sure everything is rolling smoothly. If it’s happening regularly, try to post a few screen shots of what you are seeing so we can get a better idea of what is going on.
Even if you ran separate jobs using different material heights the job coordinates shouldn’t change.
If nothing is moved, the overlay is basically just trying to display where it thinks the coordinates relayed by the file are going to fall. I’m not sure exactly how they compute it once you start moving things - I’m guessing just an offset (I.e. you moved it by this, so offset the coordinates by this amount) - but still, all of the coordinates are based off of the X Y from the file itself.
Yeah, I was thinking further out… a new user might shift the on-screen image to match where they thought it was supposed to go - the view would change radically with a thickness reset, and if you didn’t know to leave things alone, it could cause a variance.
I know this is casting for clues… probably deeper than we need to go.
This is one print, with an engrave step, then a cut step. Material is being held in place during print. I’m making my usual game pieces and boards. I have tons of hours of making these under my belt.
The instance of engrave height different from cut was when I simply didn’t change the height of the cut step as well as the engrave. I was experimenting with what changing it does to the engrave end result, things like that. I plan to adjust the cut focus by the same amount so it’s also focused inside the material a bit. (And all this is me setting up my own set of settings because the Proofgrade default material height is a bit off - putting in your own measured height gives better alignment in UI, etc. but remember that’s beside the point - my questions here are not UI alignment problems).
As to your question of why someone would do something like this - this also happened on a print that’s a defocused score and a cut (a print covering an entire thick plywood - one part of a game board). I assumed that when you and others recommended defocused score that you would not be changing the cut focus height. So the print that’s a score+cut is definitely my bigger concern. (Because like I said I just forgot to change the cut focus when the issue happened with the engrave+cut print.)
But I am thinking that this is a coincidence and not due to the focus changes. I’ve had this with default proofgrade focus heights plenty. I was simply originally asking if other people have seen this happen with steps of different focus heights, and the answer to that seems to be a resounding no.
It’s off by very little when it happens, but it’s still very noticeable to me at least. I hope we all can keep expecting perfect to be normal.
I think I should start with the rails/tracks. How do you best go about cleaning those?
Keep reading only if you care to hear about how the general “things are cut out off-center” issue has changed my workflow…
I make circular game pieces, about an inch in diameter. So it’s an engrave+cut print to make them. Prints consisting of multiple rows of pieces were consistently seeing at least some of the pieces to be cut out off-center. So instead of printing all the rows of pieces at once, I print one row at a time. This is so that the head doesn’t move at as much of an angle when it moves into position to start the cut step. This has worked well, but sometimes (quite uncommon) all the pieces end up being cut off-center.
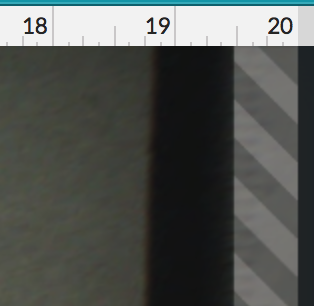
My guess is that the first off center issue arises when your right most piece is in a similar position. Note, that this won’t happen twice in the same session because if you’re losing steps subsequent prints will be too far left but consistently so the engrave and cut will match (that’s why a row at a time will tend to just destroy one row).
In your shoes, I’d try to figure out which Y (front to back) it is unable to reach all the way to the right edge by printing a gift of good measure in the likely Y position. If you’ve found the spot, it’ll appear that some of the numbers on the bottom are shifted right (it’s an optical illusion, the actual fact is that the rest of the engrave and all of the cut are shifted left). After you get that result, you have to turn off the machine and turn it back on to reproduce (it has to recenter the finial under the head to regain the steps it lost).
At the reproducible spot, you’ll want to do it on draftboard, take screen shots and pictures, particularly showing the print position and result. If you have this problem, though, you’ll likely need a warranty replacement. At least, that’s how they’ve solved it in the past. Another option might be that they change the printable area for your particular machine, but so far that hasn’t been the route they’ve chosen (as far as I know).