Started a print and it was off focus, cancelled the print and cleaned the cameras. Then the orange light came on. I checked the ribbon connection and it is secure, I cleaned the cameras again, unplugged the machine and turned the machine back on and the orange light is still on. It’s about 75 degrees outside and 72 inside. I’ve gone through all the posts to try and correct the issue and nothing is working to resolve the issue.
Hi, check if anything is up against the right side of your machine, or if a piece of paper has been sucked up against the air INTAKE holes on the right underside of your unit–i know from experience–we do need to keep the area clear around the intake to ensure there can be the proper intake of fresh air so the exhaust of hot air functions properly to avoid the orange overheating light.
1 Like
Also check the connect on the cable connecting to the print head, I have had that issue with a loose connection.
1 Like
I’m sorry that you’ve run into trouble with your Glowforge. I extracted the logs from your unit to investigate, and it looks like the orange button is appearing because the Glowforge is having trouble communicating with the printer head. There are two key connections I’d like you to check for me.
Could you please do the following?
- Turn off your Glowforge.
- Holding only the finished black surfaces, grasp the printer head as shown. Pull gently up and back to disengage the magnets and remove the head.

- There is a small tab in the center of the wire ribbon. Push down fully on the tab to release it, and gently pull the wire ribbon plug from the printer head.
- Take a clear photo of the gold pins inside the printer head where you just unplugged the wire ribbon. It should look like this.
- Pick up the printer head and wire ribbon. Make sure the tab on the wire ribbon is facing up. Slide the ribbon back into the head until it clicks.
- As shown, lower the printer head over the metal plate so that it rests next to the two round posts. Then push it gently away from you – you’ll feel a “click” as magnets pull the printer head until it sits snugly atop the metal plate.
- Pull the laser arm all the way forward.
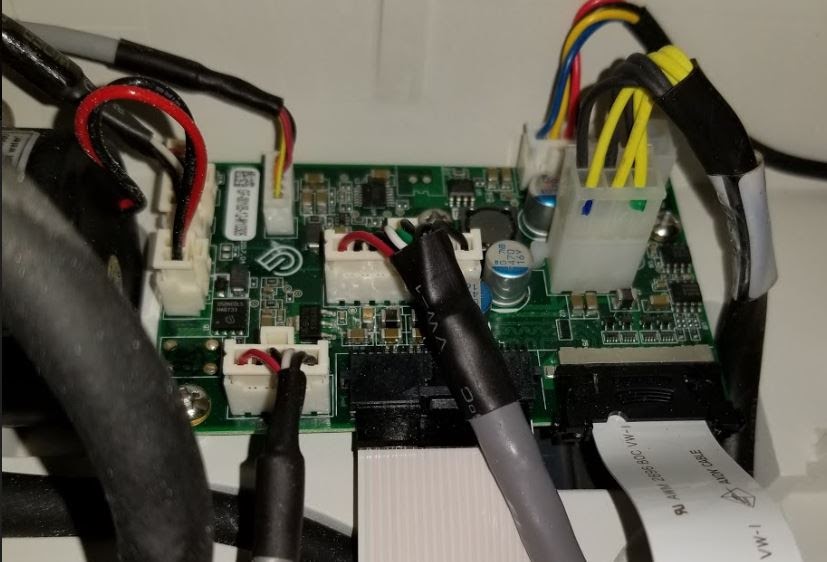
- Reach over the laser arm, and to the left of the inside of the unit and you’ll see this circuit board:
- Take a photo of this board.
- Turn your Glowforge back on.
- Send us the photos you took in step 4 and step 9.


Thanks for the advice, everything is clear around the machine. And the printer ribbon was secure, not sure why it isn’t connecting to the printer head
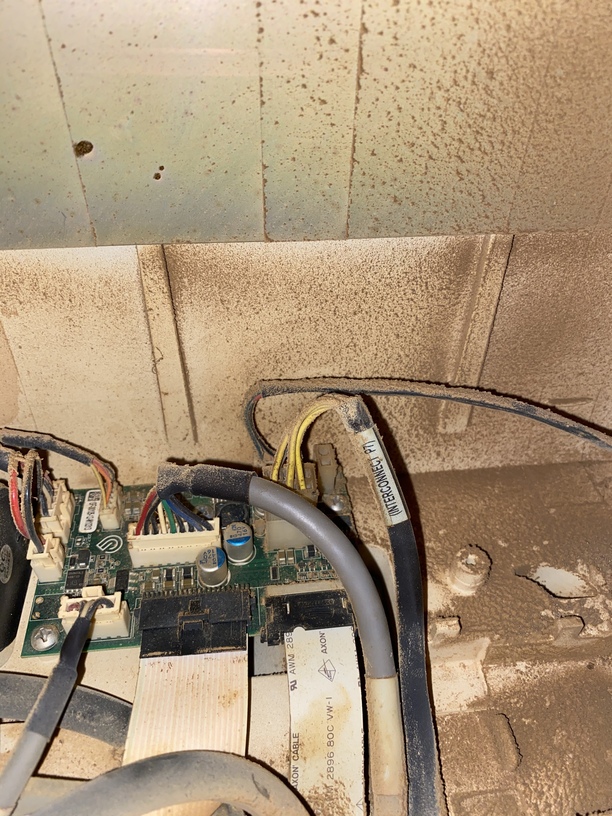
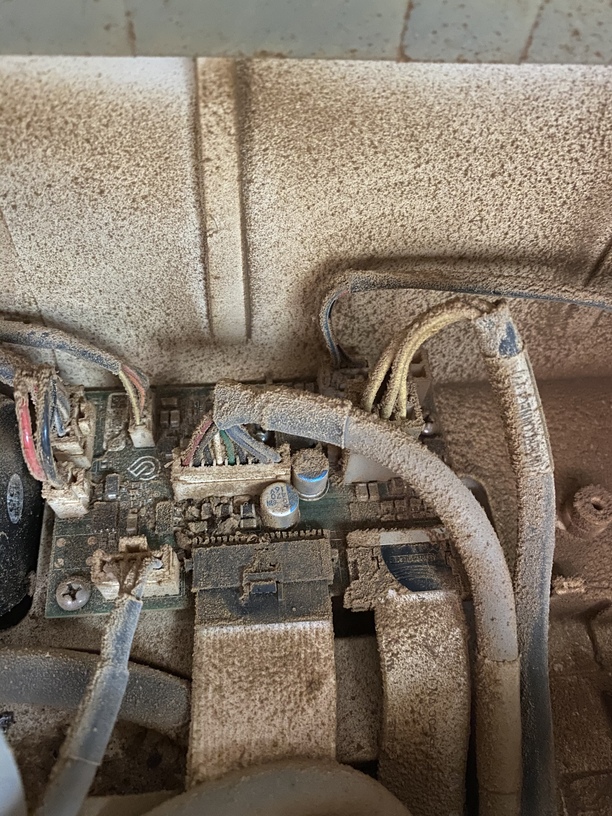
Thank you for taking the time to work through those instructions, cleaning the inside of your Glowforge in this area, and for sending over this photo.
Based on the photos, I noticed that one of the cables on the Circuit Board you reviewed appears to be slightly disconnected on the left side. Could you please Power off your Glowforge, and re-connect hte cable outlined in yellow below?:
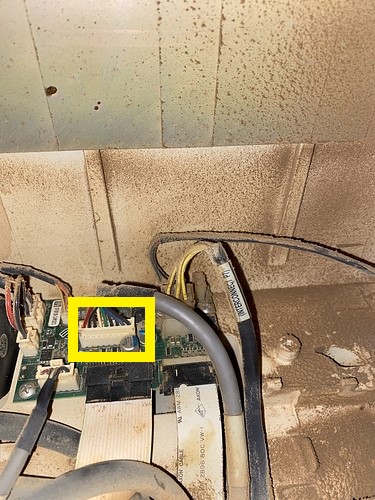
Once it has been reconnected, please attempt to perform a test print and let us know if the same behavior occurs. We’ll review the log files, and send over the next best steps.
I’ve pushed the cable in as far as it will go and the orange/yellow light is still on.
Thank you for working through these steps, and for reattaching the cable.
Unfortunately, it looks like your unit is experiencing an issue that we can’t resolve remotely. I’ll be in touch via email to sort out the details. I’m so sorry about the bad news.