Hello, total nube here. I was able to make my first couple of cuts out of the Med Draftboard (1 cut) and Med Basswood Plywood (4 cuts). So I decided to try the Med Clear Acrylic… It will not cut all the way through! I’ve searched the forum for the same issue and only came up with a few posts so I followed them. The sheet it flat. Ive removed the crumb tray and put it back in. I slowed the speed down. last thing I tried, cleaning the printer head. Still a no go. I tried to cut some of the Draftboard with the same little circle and it cuts! Tried the Acrylic again, still nothing. What am I doing wrong? TYIA
Is it cutting at all, or just marking the paper? Hard to tell from your picture.
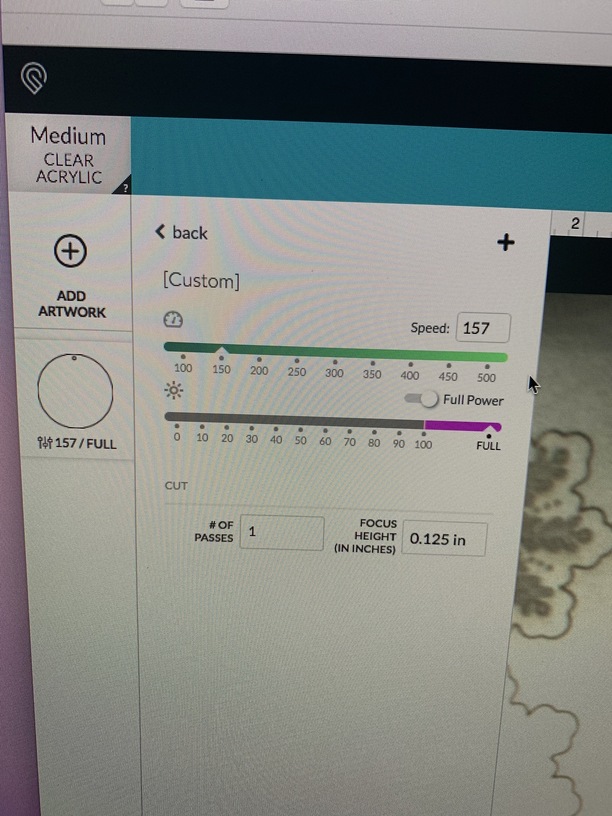
I’d double check your settings and make sure they didn’t accidentally reset. Feel free to post them here, as well, to help with troubleshooting.
1 Like
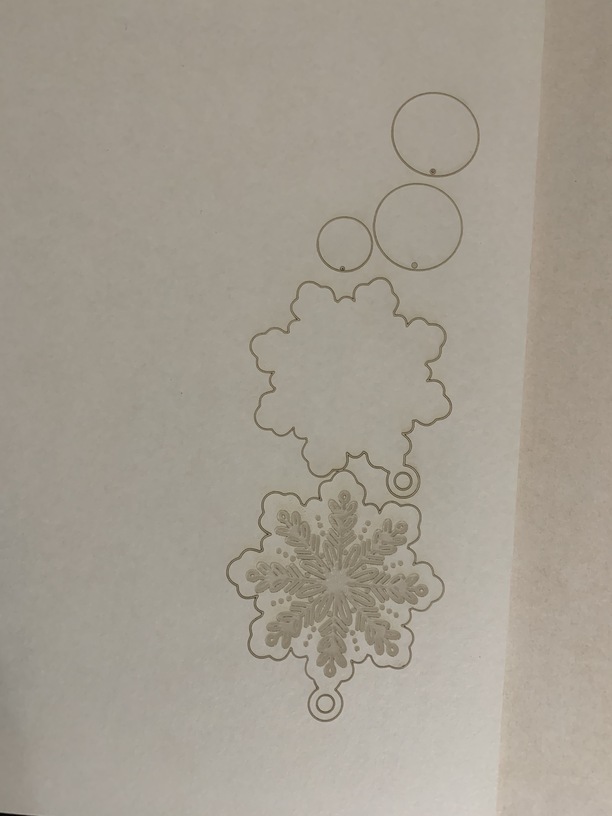
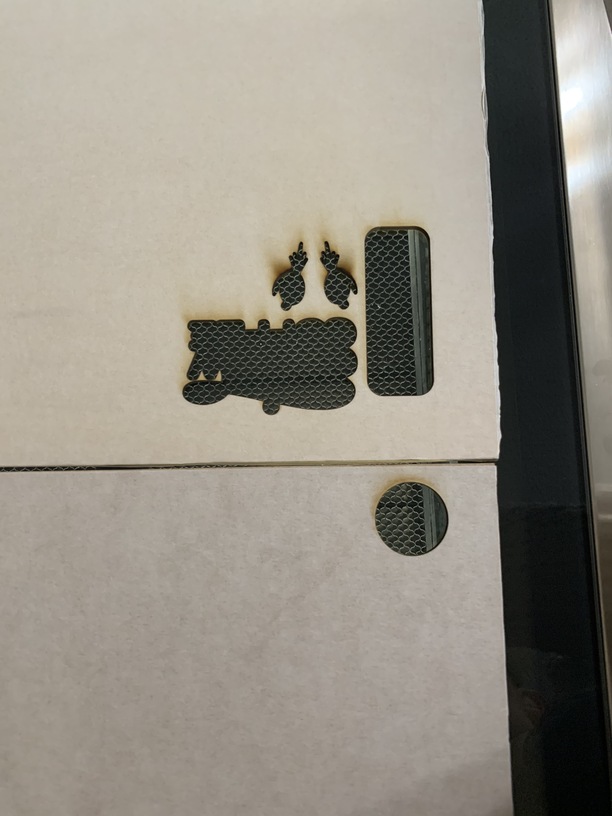
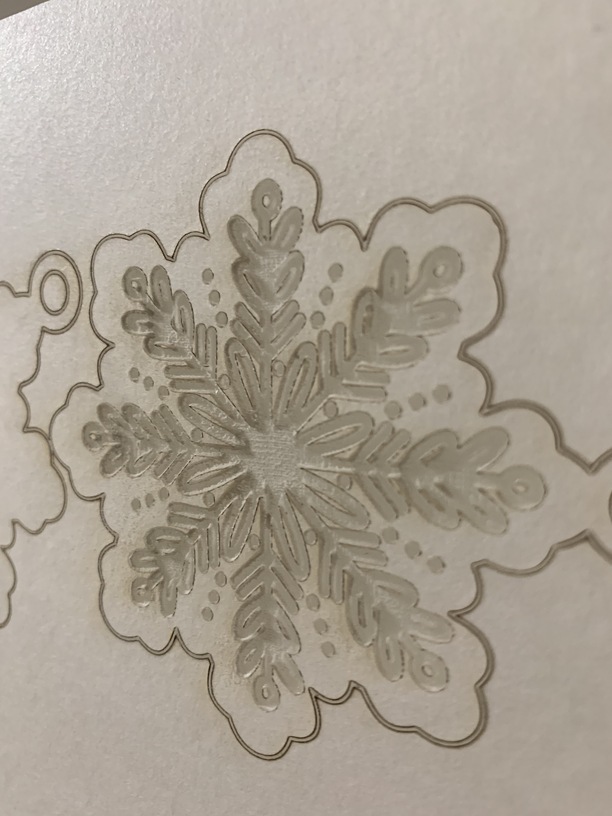
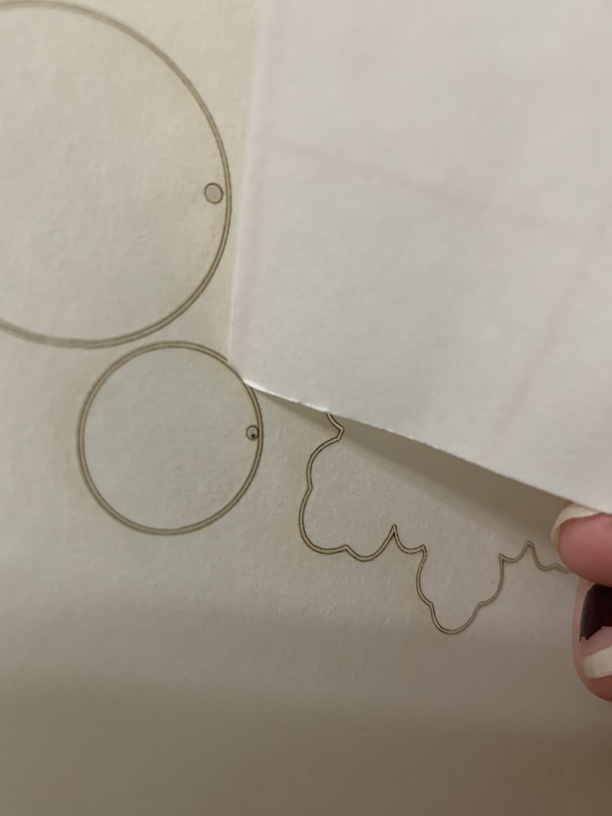
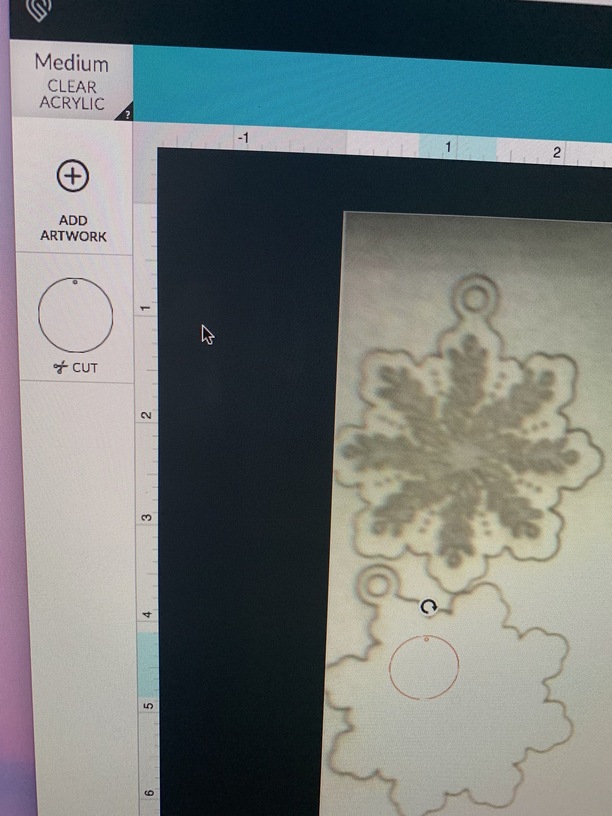
I’m pretty sure its cutting some. I tried to take some more photos… I used the corner of paper to push through the line and it slide in. And it looks like the engrave works!
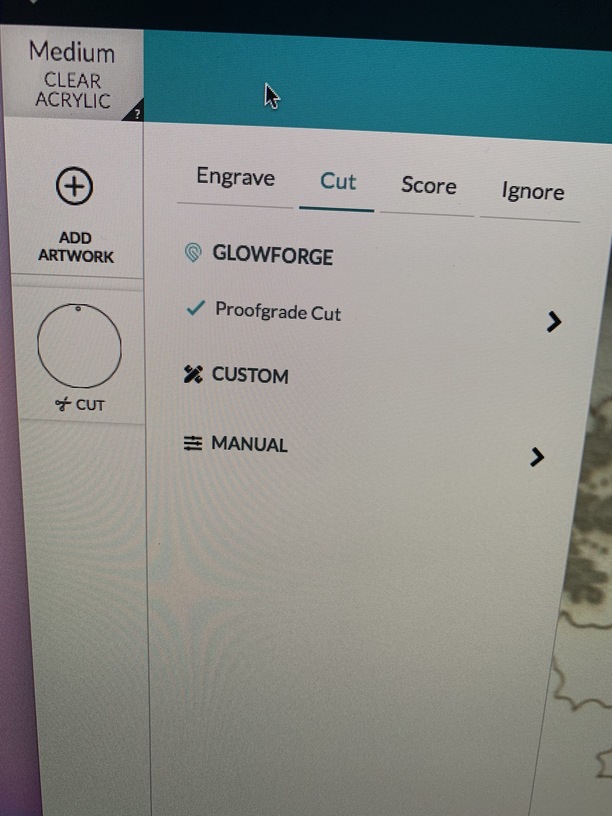
You do want to be sure that settings in the upper left are reading Medium Acrylic instead of the Draftboard you used earlier.
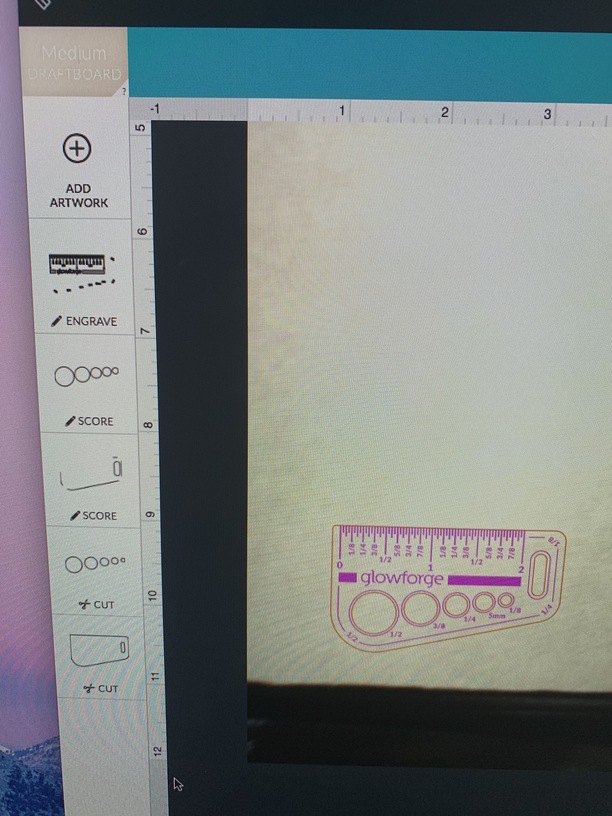
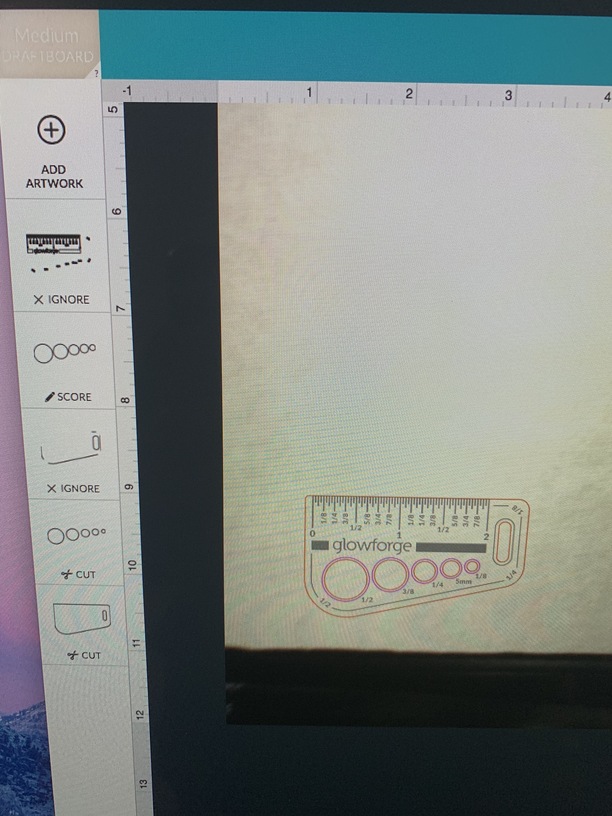
And to me it looks like there are issues with your cut file (double lines). If you would upload the design here (as a .zip file), we can check it out.
1 Like
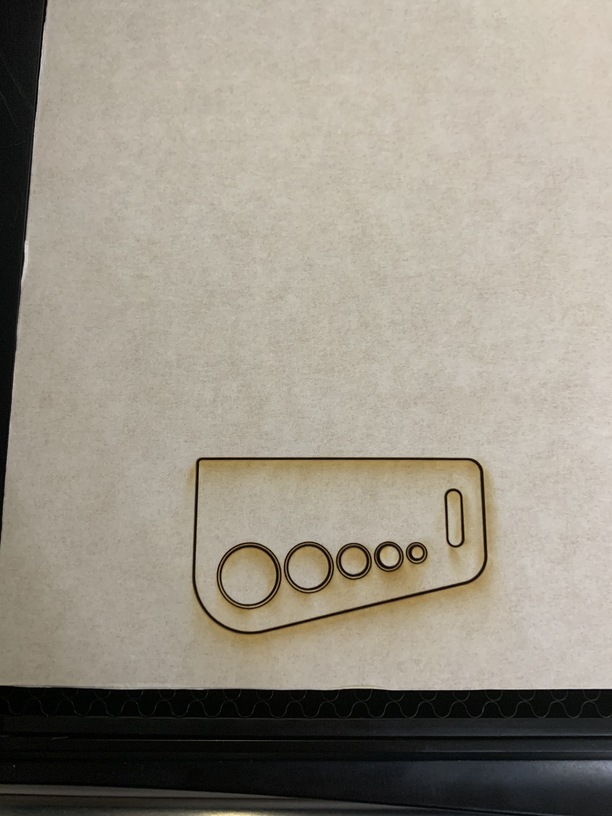
It appears that the string holes dropped out. If this is true, the acrylic may be slightly thicker than anticipated and you just need to bump up the power slightly, or your focus is a little out.
1 Like
Clear acrylics seems to be more problematic than other colors, and definitely more than wood–as noted, instead of just using the PG medium settings, use “set focus” (and pick and area you’ll be cutting/etching). My cuts on first attempt have increased dramatically using set focus!
And pin it down–helps keep it flat to the bed an doesn’t shift.
Also a really good trick for any material, is before you remove it from the bed, you try to feel if the cut out can move (this is hard to do if the material is not pinned down, though). If it’s fully cut, you can feel the shift, or often with acrylic, the stress changes caused by cutting, you may even see the pieces change in height, too while it’s being cut.
So if it’s not fully cut thru, you can ignore the etch and run a second cutting pass.
Don’t slow it down too much with acrylic–acrylic can melt and as it cools again, it may actually cause the kerf to fill with resolidified material (enough that doesn’t leave a clean cut).
1 Like
I used medium acrylic for the acrylic and draft board for the draft board so I don’t know what you mean by that. I can upload the file when I get home but I’m almost positive it only has the single line. That’s how I designed it at least but I’ll double check!
The string hole did not. Just the masking came off as I was inspecting it. I’ll have to try to bump up the power. Thank you!
Awesome feedback, thank you! I’ll have to try these. I didn’t think to pin it down since it was a full sheet but I’ll try that out. I haven’t used the set focus feature yet either so again, going to try that as well! I’ve etched acrylic before (my other baby is a silhouette machine) but never cut it so I was a little hesitant to change setting until I could get some feedback first lol.
I really appreciate everyone’s support and input!!!
1 Like
I’m so sorry that your acrylic prints did not turn out!
To cut successfully, there are three important things to check:
- First, your material must lie flat. This requires a clean, properly installed crumb tray and flat materials.
- Second, there must be no obstructions, dirt, or damage preventing the laser light from reaching your material.
- Third, your design must be set up properly - for example, with lines that are fully on the material and that are set to cut.
It’s hard to know which issue might be affecting your print, so please thoroughly inspect your unit and design according to the suggestions in our Troubleshooter, which you can read here: Cut Didn’t Go Through Material.
After checking these things out, please follow the steps below to run a test print:
- Turn off your Glowforge, then turn it back on.
- We included an extra piece of Proofgrade Draftboard with your materials shipment for troubleshooting. Place Proofgrade Draftboard in the bed and load the Gift of Good Measure design.
- Set the score and engrave steps to ‘ignore.’ Print the Gift of Good measure using the default settings. Allow the print to finish.
- When the print finishes, leave the lid closed and wait until the fans stop and the picture of the bed updates.
- Check the completed print:
- If the Gift of Good Measure fails to cut, take a photo of the front and back of the print and attach these photos to your reply.
- If the Gift of Good Measure cuts successfully, please try another print of the design you saw the issue with, and let us know the results.
Thank you for running this test for us. Please let us know the results and we will follow up with your next steps.
Hello, I followed these steps again did The Gift of Good Measure cut. That did cut. But i’ve been able to cut draft board just fine. So I ried to cut the same circle again and it still did not cut through the acrylic. I know the file works because I received it from another GF user. And it cuts out of the plywood and draft board just fine. I left the setting like it said.

I just tried again but this time using 2 passes and it cut!! But is this normal? I should be able to use the proof grade setting on the proof grade material, correct? I just don’t want to mess up my machine!!
1 Like
It’s not going to destroy your machine to edit the setting and turn the power up a little bit.
That said, the proofgrade setting ought to work. In my experience, acrylic cuts like butter.
1 Like
Do you possibly have another piece of Acrylic you could try your print on? If not could you please measure your material with a pair of precision calipers (or another precise measuring tool) if you have them, and post the values you record? Be sure to remove the protective layer on both sides before measuring. - Thanks in advance.
It’s been a while since I’ve seen any replies on this thread, so I’m going to close it. If you are still running into this issue please feel free to start a new thread or send in an email to support@glowforge.com with a measurement of your material with the protective layer removed.