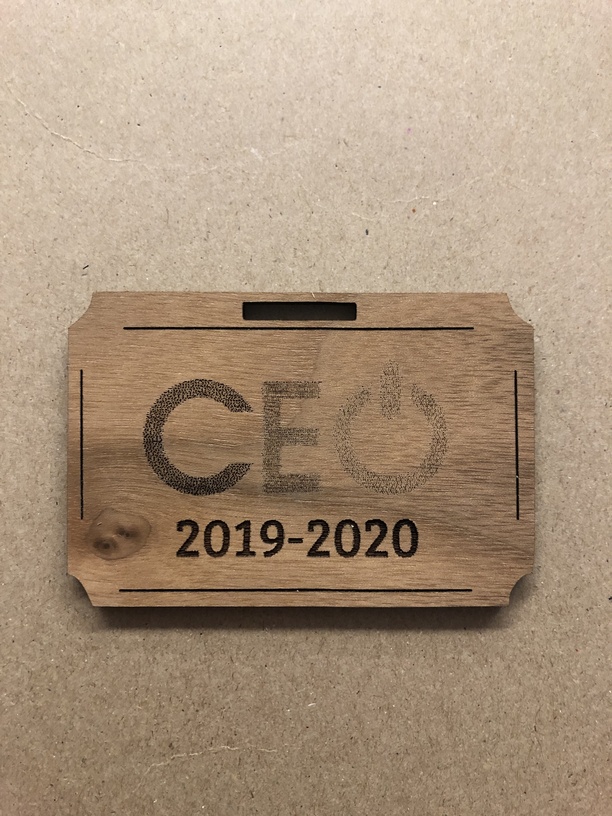
Any ideas on how to make the CEO (mainly the E & O) darker? Originally I had the settings changed and then I got nervous when I got the error message just prior to starting (I would rather not be responsible for setting the fire alarms off for an entire high school building). I deleted it and add it back with original PG settings and this is the result.
The original image is colored like so… C (blue), E (orange) and ) (green). I do not have access to a black and white image and only have access to a Chromebook here at school (therefore I haven’t found an image editing app that works - different day, different topic).
Is there a way to modify the engraving intensity (that may not even be proper GF lingo…LOL) to be similar to the 2019-2020? In the meantime I am going to try to print it out in black and white, darken it on the cope machine and then see what happens when I just trace the bed image…
Just go into your engrave settings and adjust “minimum power” to 100. That will make everything the same (for a basic machine) or almost the same for a plus or pro.
It would appear that the dates are vector format and the CEO is an image, since you do not wish color variation and a fairly deep cut I would have them all vector and fairly deep. Of the flammability of all the woods walnut is one to worry about the least unless there is wax or oil on it.
Hi, just to add a bit to the other responses–the engraving/etching responds to the colors and assigns different powers to the different colors in your image pending type of engraving type chosen (types vary power or vary dot intensity). So that is why you either need to change the settings in the GFUI, or convert the image to 2 color (black&white) so the settings (e.g. power/speed/LPI ) are the same for all of the image…
I am going to try to just convert to a B&W image, but in the meantime I went and made the settings for the date and the CEO logo the same and the logo still shows up as fading out the E and O. Is this normal that my image doesn’t change on the GYUI screen???
Probably, since I don’t think that changing the settings for a action type alters how an image appears in the GFUI–but I usually only work with black & white images so I’m only guessing. But I’ve never noticed my image in the GFUI changing when I modify settings, but type of action (at least when you select it–e.g. cut to score).
Except at the very edge where pixels mix and the edge is rounded depending on how fine the pixels. It works both ways but the GFUI does best with vectors where they are possible in my experience.
This question is outside our team’s scope due to manual settings and Non-Proofgrade materials. I’ve moved it to the Beyond the Manual so the discussion can continue there.